A manual wood router is a truly universal machine. In capable hands, it can replace most of the machine park with a well-equipped carpentry workshop. Considering that the price of a hand router is quite affordable for every home craftsman, and replacement cutters are sold both in sets and individually, the need to have such a universal tool in your arsenal is obvious.
Specific working techniques are also available that are characteristic only of a manual milling machine and are impossible on “large” machines. The question is interesting and capacious, so it should be considered in detail.
What is a router and what is it for?
A hand router is a power tool, which is an electric motor with a collet for installing a cutting tool on a shaft.
Integrated with it is a platform or base, a kind of desktop, which is capable of moving along guides and being fixed in a given position.
Using the platform, the cutting depth is set. There are two handles on the sides, by which the machine is held in the desired position or applied to the workpiece.
The milling cutter is designed for cutting parts made of different materials:
- Solid wood;
- Chipboard, including laminated chipboard;
- MDF;
- Fiberboard;
- Aluminium, duralumin;
- Soft plastic.
Using a hand router, different types of material processing can be performed. These include the following operations:
- Milling of recesses of various shapes - grooves, sockets, grooves and other elements;
- Profiling edges - creating shaped (curly) surfaces, milling quarters;
- Milling of special structural elements - recesses for hinges, locks, handles, tenons and sockets for them;
- Trimming curved and complex edges of furniture parts or special elements.
To ensure the accuracy and cleanliness of the cut, the design of the router has a lot of adjustment and adjustment elements. With their help they produce the following
- Changing the shaft rotation speed;
- Setting the immersion depth of the cutting element;
- Pre-set depth for quick cutting mode changes.
Important! For mass production of large volumes of products, a manual milling machine is not suitable. It is most rational to use it only for domestic purposes or in small workshops engaged in small-scale production of custom-made products.
Milling cutters for hand milling tools
A milling cutter is a cutting tool that can have an intricately shaped cutting edge. As a rule, all cutters are designed for rotational movements and therefore have a cylindrical shape. The shank of the cutter, which is clamped in the collet, has the same shape. Some cutters are equipped with a thrust roller, so that the distance between the cutting surface and the material being processed remains constant.
Milling cutters are made only from high-quality metals and their alloys. If you need to process soft wood, then HSS cutters will do, and if you need to process hard wood, then it is better to use cutters made of harder HM alloys.
Each cutter has its own technical characteristics, which provide it with high-quality and long-lasting performance. The main indicator is the maximum speed of its rotation, which should never be overestimated, otherwise its breakdown is inevitable. If the cutter is dull, you should not try to sharpen it yourself. Sharpening of cutters is carried out using special, expensive equipment. After all, you need not only to sharpen the cutter, but also to maintain its shape, which is no less important. Therefore, if for some reason the cutter becomes dull, it will be cheaper to buy a new one.
The most popular cutters
There are cutters that are used in work more often than others. For example:
- Edge cutters. With their help, the end surfaces of wooden blanks are cultivated. In addition to the curved edge, they can be used to form spikes or grooves to connect parts. Such cutters may have a bearing at the end that rests on the part, setting the processing distance.
Some types of edge cutters. - Groove cutters. These are cutters for forming grooves of various shapes. They, in turn, are:
- Spiral (a) - used to form technical grooves, such as tongue/groove.
- Fillet (b, d) - used for finishing surfaces in the form of grooves of various shapes and depths. They can be rounded, V-shaped or curly.
- Dovetail (c, d) - used to create a specially shaped groove intended for hidden or open connection of wooden parts.
- Shaped (d) - intended for decorating wooden surfaces. As a rule, they help create free-form grooves.
Groove molds are designed to create recesses in any location on the workpiece.
There are cutters that are simple, monolithic, made from a single piece of metal, and there are typesetters. Set cutters consist of a shank, which serves as the basis for a set of cutting elements. By selecting cutting planes and installing them on the shank, using washers of various thicknesses, you can form an arbitrary relief on the surface of the workpiece.
A set cutter is a set of cutting surfaces and washers that allows you to assemble a cutter of the desired shape.
In fact, there are a lot of cutters and this is only a small fraction of what is produced. All cutters differ in the diameter of the shank, the diameter of the cutting surfaces, their height, the location of the knives, etc. As for manual milling equipment, it is enough to have a set of five of the most common cutters. If necessary, you can purchase them at any time.
Main types of nozzles
Main types
For milling work, end mills with a shank diameter of 6.8 or 12 mm are used.
They are sold individually or in sets that include the most popular types of cutters.
There are sets with 7 mm shanks, but it is difficult to find a collet for them. Depending on the purpose and shape of the cut, there are edge and groove cutters. Edges include:
- Profile;
- Conical;
- Moulded (moulded, quarter-rolled);
- Disk;
- Fillet.
A common feature of edge cutters is the presence of a bearing that acts as a stop. Groove cutters include:
- Rectangular (straight);
- Filling;
- "Dovetail";
- V-shaped.
Groove cutters do not have thrust bearings and allow you to cut both on edges and on faces. There are straight cutters with a bearing at the top, just above the cutting edges. Usually its diameter corresponds to the size of the cutting part, which allows you to cut curved shapes according to a template. Such cutters are called turning cutters. They are not included in standard kits; if necessary, they must be purchased separately. Almost all cutters are available in several standard sizes. To make a recess of the required size, you need to select a cutter of the appropriate diameter or profile.
Preparation
To install the cutter in the chuck, the router is laid on its side. Some types allow you to disconnect the engine with the cartridge from the platform without changing its settings. Others do not provide this option, so most often you have to lower the base as far as possible. The cartridge is unscrewed using a wrench, which is included in the package.
The cartridge is fixed in immobility using a special button located above the point where the shaft exits the housing. It is not present on all types of milling cutters; sometimes you have to fix the shaft with a wrench and unscrew the chuck with another.
It is not necessary to remove the union nut completely, but sometimes this has to be done if the cutter is clamped too tightly in the collet. By gently tapping on the side surfaces and turning the shaft, the collet is loosened and the jammed cutter is removed.
The nut is screwed on, the new cutter is inserted into the collet approximately 20 mm. Some cutters on the shanks have special marks indicating the minimum and maximum immersion depth, but most of them are installed by eye. If the installation depth is too small, sharp feed may cause deformation of the cutter and damage to the workpiece. This is dangerous, since the maximum rotation speed of the router shaft is 30,000 rpm or more. A cutter flying out of a collet while moving has great destructive power; if it hits a person, the consequences can be very undesirable.
Attention! It is prohibited to screw the union nut without a cutter installed, as this will break the collet.
Setting the milling depth is as follows:
- The router with the base lowered is installed on a flat platform;
- The cutter is lowered all the way and fixed;
- The depth indicator slider is set to zero;
- The depth stop is raised to the required amount and locked with a screw;
- The cutter is unlocked and lowered until the depth stop stops against the adjusting screw, after which it is fixed again.
It is recommended to check the set depth on a test piece so that adjustments can be made if necessary. You should not immediately make the depth too large; this will cause the router to overheat and create an excessive load on the electric motor. The recommended depth per pass is 4-6 mm.
Speed setting
The first stage is setting the rotation speed of the cutting attachment. The recommended cutter diameter and corresponding speed levels in millimeters for different materials are shown in the table:
| Material | Diameter of cutting attachment, mm | Speed level, mm |
| Softwood: Coniferous | 4-10 | 5-7 |
| 12-20 | 3-6 | |
| 22-40 | 1-3 | |
| Hardwood: beech, oak, acacia | 4-10 | 5-7 |
| 12-20 | 3-4 | |
| 22-40 | 1-2 | |
| Drywall | 4-10 | 3-7 |
| 12-20 | 2-4 | |
| 22-40 | 1-3 | |
| Lining, plastic | 4-15 | 2-3 |
| 16-40 | 1-2 |
Basic rules of use
In this chapter we will try to answer the question: “How to work with a hand router correctly?”
A high-quality result is possible only if certain rules and working conditions are observed. These include the following wood carving requirements:
- It is necessary to work only with a sharp tool. If the treated surface is burnt, fleecy or has many small chips, the cutter should be replaced;
- The workpiece must be securely secured using clamps or other devices. You cannot hold the workpiece in your hands;
- The feed of the router should be smooth and leisurely, without jerking. Do not try to immediately remove a thick layer of material. In some cases, the excess mass is pre-drilled in order to remove a small remainder with a milling cutter;
- The cutting tool is changed only when completely disconnected from the network.
Example of table top milling:
Compliance with these requirements should become a prerequisite for work for a home master.
The cleanliness of the cut is ensured not only by the degree of sharpness, but also by the cutting speed. The higher the number of revolutions, the cleaner the processed surface. For hard materials - aluminum, dense wood, etc. — the shaft rotation speed should be reduced slightly so as not to overheat the cutting edges of the cutter.
When milling edges, the feed is made so that when moving away from you, the part remains to the left, and vice versa. If you need to make a groove, the direction of movement does not matter.
Let's look at common techniques for working with a hand router.
How to cut a circle
In order to cut a circle with your own hands using a router, you need to use special templates or devices.
First of all, it is necessary to clarify what exactly is meant - you need a part in the form of a circle, or a hole.
The delivery set includes a parallel stop.
If you drill a hole in it, you can make a simple circular jig. You need to turn the stop upside down, screw it in the center of the future circle onto a screw, use clamps to set the desired diameter of the hole and cut it in a circle. Sometimes the kit comes with a compass rod, which makes it even easier to make round holes.
When a circle is needed, a template should be used. It is a sheet with a hole of the required diameter. It can be made from plywood or fiberboard, which is recommended to be glued in half. This will result in a stiffer and thicker sheet, from which a high-quality template will come out.
The diameter of the template depends on how the emphasis will be made. If you rely on the base itself, then the diameter of the template should be increased by the amount of the platform radius plus the radius of the cutter. In cases where the emphasis is on the copy ring included in the delivery set, the diameter of the template is equal to the sum of the radii of the cutter and the outer convex part of the ring.
As a template, you can also use a ready-made circle into which the copy cutter bearing rests. The easiest way to fix it is with double-sided tape, after cutting off the excess material with an allowance of 2-3 mm.
The quality of work depends on the accuracy of the template. Usually it is cut out with a jigsaw, trying to maintain the shape as accurately as possible. In some cases, a round hole is cut using a jig with a clamped cutter.
Sampling quarter
Selecting quarters with a manual router can be done in several ways:
- Using a rip fence;
- Using an edge cutter with a smaller diameter bearing;
- With the machine platform resting on a flat bar, fixed at the required distance from the edge.
The first option is used when there is a smooth edge and a large quarter size that requires several passes. The second method is used to obtain the same quarter width, since only the immersion depth of the cutting part of the cutter can be adjusted. The third option allows you to make a large-sized quarter when the outer edge of the workpiece is uneven or unprocessed. Wide quarters have to be done in several passes, each time moving the stop a few millimeters until the desired width of the step is achieved.
How to choose a groove
To make a groove with a router, use:
- Parallel stop;
- A strip fixed at the required distance parallel to the groove line;
- A pair of planks between which the router platform moves.
The first two methods require accuracy and attention, since the milling machine can only be focused in one direction. If the master is distracted, the cutting line may go to the side. The third option allows you not only to avoid such situations, but also to increase the width of the groove. The distance between the slats can be increased slightly so that the width of the groove is equal to the diameter of the cutter plus the size of the gap. In this way, fairly wide recesses are made for various furniture parts, locks, and structural elements.
Edge processing, working with a template
For cutting edges, appropriate cutters equipped with a thrust roller (bearing) are used. It is necessary to pre-align the edge, otherwise the cutter will copy all the irregularities and the edge will look sloppy. In addition to edge cutters, templates are used to form a curved shape or produce a batch of identical parts. For work, a copy cutter with a bearing is used. The cutter is pulled out so that the thrust roller rolls along the template, and the cutting part processes the edge of the part.
Let's take a closer look at these working methods.
The width of the part is less than the length of the cutting part
In such cases it is necessary to use a template. The simplest option is to combine two identical parts into a pack. A bearing rolls along one of them, the other is processed by a cutting edge. If there is only one part, you will have to make a template from sheet material - plywood, MDF, chipboard or the like. It is important to accurately repeat the configuration of the part, to avoid the appearance of potholes or irregularities.
Many craftsmen do not like to resort to this method, since the template is often used only once and then thrown away. However, the quality of work is more important than labor costs. You should not spare time and effort, since it will be difficult or even impossible to eliminate defects after processing the edge.
Why do you need a milling machine?
The milling device is designed for processing both wood and metal. With its help, it is possible to form recesses or holes of any configuration. This greatly simplifies tasks such as inserting hinges and inserting locks. Doing this with a chisel and an electric drill is not so easy, and it takes a lot of time.
There are stationary milling devices and portable (manual). Hand-held electric milling machines are considered universal devices, with the help of which, in the presence of attachments, it is possible to perform operations for various purposes; you just need to change the position of the part in relation to the device or vice versa.
Stationary devices are used in factories or factories where mass production of wood or metal products is established. Under such conditions, the cutting attachment is stationary, and the workpiece moves along the desired path. When using a hand tool, on the contrary, the part is fixed motionless and only then it is processed, although there are parts that require fixing a hand tool. This is provided for in the design, therefore, it is considered more universal. This is especially true when a large number of parts need to be processed, and it is not possible to use a stationary machine.
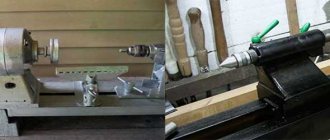
A homemade milling machine is a horizontal platform with a hole in the center, to which a hand-held device is attached from below.
There are many types of milling machines, but for use at home or for starting your own business, universal models are more suitable. As a rule, they are equipped with a set of cutters and various devices for performing various types of operations. The only thing is that if you have a manual milling cutter, simple operations can take much longer than when using a stationary machine.
Using a manual milling device it is possible to:
- Make grooves or recesses of any shape (curly, rectangular, combined).
- Drill through and non-through holes.
- Process ends and edges of any configuration.
- Cut out complex shaped parts.
- Apply drawings or patterns to the surface of parts.
- Copy parts if necessary.
Copying parts is one of the functions of any electric milling machine.
The presence of such functions makes it possible to simplify the production of the same type of furniture or the production of identical parts not related to furniture production. This is one of the main advantages of this tool. As a rule, to produce parts of the same type, it is necessary to install copying machines, which are designed to perform only one operation, which is not always profitable, especially in small enterprises.
Useful devices
There are a lot of devices that make working with a router easier and allow you to perform complex operations.
Most of them are designed to perform specialized types of woodworking, but there are also simpler ones that are useful for the home craftsman.
One such device is a table. The router is attached from below, the cutting organ passes through the hole and looks out. Working with such a table is reminiscent of processing parts on a stationary machine. You can install a stop, a clamp, or use a template. The advantage of this method is safety and the possibility of reliable control of the workpiece.
For copying on a scale, a pantograph or copying conductor is used. It can have a rather complex design in the form of a coordinate machine, or consist of several strips. A probe is attached to one end and is guided along a template. A milling cutter is attached to the other end, repeating all the movements of the probe and copying the reference part on its own workpiece.
There are also simpler types of devices, for example, a guide rail. It is a straight, even bar with a groove into which the ridge of the parallel stop is inserted. The tire itself is attached using clamps or double-sided tape. Useful when working with large-area parts, many grooves or other elements.
Devices for working with a manual wood router can be made independently or purchased ready-made. Factory templates are usually made of metal, durable and accurate. However, the prices for such products are quite high, which forces home craftsmen to make the necessary devices with their own hands.
Important! You should start making any additional devices after you have acquired some skill in working with a hand router and have an understanding of the meaning and necessity of having auxiliary devices.
In the video tutorial, the master teaches and shows what interesting things can be done with a hand router:
Setting the milling depth
In order not to overload the milling machine, it is advised not to immediately set the required depth, but to increase the value in several stages, in steps.
Changing the depth level is carried out using limiters made in the form of a disk with fixed stop legs of different lengths, which is installed under the bar. The number of such stops is usually 3-7, and a flag-shaped latch is used for fastening.
Adjustment of the milling depth is carried out according to the following algorithm:
- Place the router on a flat surface.
- Loosen the clamps and press the cutter until it rests on the surface.
- Unscrew the lock.
Unscrewing the lock
- Release the turret stop.
- On a disk with thrust legs, the one that corresponds to the required milling depth is selected. The disk is installed in the desired position.
- The bar is held with a finger without fixing the screw. The moving pointer moves so that its value converges with the zero mark.
- Raise the rod to the mark that corresponds to the required depth, then lower the turret stop lock.
Interesting! Some foreign milling cutters are additionally equipped with a special wheel for precise adjustment of the processing depth, which allows you to set a new value without disturbing the previous settings.
Safety precautions
Woodworking machines are the most dangerous type of equipment. A hand router is no exception. Working with it requires caution, accuracy and knowledge of safety regulations:
- Clothing should be sufficiently tight, without hanging ends, ties or other interfering elements;
- Wood dust is dangerous for the respiratory system and is a strong allergen. It is recommended to use a respirator, at least a regular “petal” one;
- Flying chips may get into your eyes. Most routers have a protective shield, but it would be a good idea to use glasses;
- It is necessary to hold the machine firmly in your hands. During operation, it vibrates and tends to turn in the direction opposite to the rotation of the shaft. You should not be distracted and let go of the running router;
- Recess the cutter shank into the collet by at least 20 mm and securely tighten the nut with a wrench;
- Before work, check the condition of the bearings on the edge cutters. They should not creak, wobble, or jam. If flaws are noticed, the roller must be replaced;
- First you need to start the milling cutter and wait until the working rotation speed is reached, and only after that insert the cutter into the material. If it is necessary to stop work, first remove the cutter from the material, then stop the machine;
- Always ensure that there are no nails or screws in the wood, and that there are no foreign objects or tools in the rotation zone of the cutter.
More detailed safety rules can be found in the user manual. Milling cutters from different manufacturers may have their own specific safety rules that you need to be aware of and follow during operation.
Rules for working with hand milling tools
Working with power tools requires special rules, especially when there are rapidly rotating elements. In addition, as a result of work, chips are formed that fly in all directions. Despite the fact that most models are equipped with a protective shield, this does not fully protect against the flow of chips. Therefore, it is better to work with such a tool wearing safety glasses.
The photo shows a model where a vacuum cleaner is connected to remove chips.
General requirements
If you follow the basic requirements for safe work with an electric hand router, the end result will please you with the quality of work and a safe outcome. These are the conditions:
- You should always use only sharp tools. How sharp a cutter is can be judged by the quality of the surface treatment. In addition, in such conditions the engine begins to get very hot.
- The material that needs to be processed must be securely fastened, otherwise normal operation will not occur.
The use of clamps for fastening the workpiece. - It is not recommended to remove the entire surface in one pass, as this increases the load on the cutter and the tool (motor). This entails a decrease in processing speed, and therefore a decrease in quality. Therefore, if the depth is decent, then it is better to remove the excess several times.
- The cutter is replaced only when the unit is de-energized, and turning it off with a switch alone is not enough. It is necessary to remove the plug from the socket.
The requirements are not very complex and quite feasible, but ignoring them means exposing yourself to danger. And one more thing, no less important, is the ability to hold a milling tool in your hands and feel how it works. If serious vibrations are felt, then you need to stop and analyze the reasons. It is possible that the cutter is dull or there is a knot. Sometimes it is necessary to correctly set the rotation speed of the cutter. Here you can experiment: either add speed or reduce it.
Care
A hand router is an unpretentious device that does not require too complex or specialized maintenance. The main care for it consists of cleaning it from dust and chips, timely replacing the brushes on the motor and checking the bearings on the motor shaft and cutters. It is necessary to ensure the cleanliness of the guide rods and the ease of movement of the router along them.
Some experts advise covering the rods with a layer of lubricant, but this is a rather controversial advice, since dust and small wood particles will begin to stick to it. It is more correct to clean the rods with a brush moistened with turpentine, which dissolves tree resin and removes fine dust.
In conclusion, it is necessary to recall that a manual milling machine is a universal multifunctional machine that has a lot of capabilities and is capable of performing complex operations. With its help, complex parts, artistic panels and other crafts and products that require high qualifications and experience are made.
Gradually, skills and experience are developed, leading to the complication of work operations and obtaining more effective results. If at first the router is used to a minimum, this does not mean anything - one day it will perform complex professional tasks.