An ax is a universal tool that is used by every master due to his own experience, skills and dexterity. At the same time, the main advantage is the ability to hold an edge and remain in working condition.
Taking into account the specifics of using an ax, which consists mainly of chopping blows, only high-quality and hard metal that has undergone competent hardening is capable of maintaining the working part of the blade in a given state. Unfortunately, many manufacturers save time and resources by shortening the production cycle and not completing all the necessary production steps in full, which deteriorates the quality of the finished tool. This problem is solvable, but only for people who have the necessary knowledge in the field of metal processing. Let's consider the technology of hardening an ax at home.
Hardening an ax at home
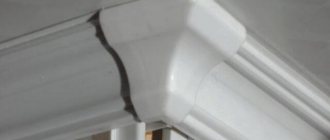
If the ax quickly becomes dull during use and dents appear on the tip, then the steel is soft. And this means that the ax is not hardened. And if the tip chips or cracks, that is, the steel is very hard and brittle, then this is possible if tempering has not been carried out after hardening.” A clean file with a fine notch will help us evaluate the hardness of steel, and therefore the quality of hardening.
If the hardness of the steel is high, then the file glides over it almost without catching. If the hardness of the steel is medium, then the file will take it a little. And if the hardness of the steel is low and the file takes it easily, it means that the steel is not hardened, or the heat treatment technology was violated. In the case of this axe, the file takes it easily. In this case, as well as in the case of increased fragility, the ax is subjected to a full heat treatment cycle. First, annealing, and then quenching and tempering. Correct hardening of an ax is considered to be hardening in which different parts of the ax are hardened differently. In the area of the blade, at a distance of about three centimeters from the tip, the hardness of the steel should be high. The hardness of the rest of the ax should be much less. This hardening ensures the wear resistance of the blade and the ductility of the rest. And it is a guarantee that during operation the butt will not burst or the blade will not break off.
Annealing
So, let's start heat treatment. The first operation is called annealing. Before hardening an ax or any other tool, it is necessary to anneal it. Annealing is a kind of zeroing of the structural memory of the metal. It consists of heating the entire instrument to a temperature of 740-760 degrees and gradually cooling it to 550 degrees. At a speed of approximately 30-50 degrees per hour. Annealing is best done in a brick kiln. The most important question is how to determine the temperature of the metal. A professional can easily determine the temperature by color. Well, a regular magnet will come to the aid of a beginner.
The fact is that steel, like iron, stops being magnetic at a temperature of 768 degrees . As the magnet heats up, we check whether the steel is magnetic. When the magnet stops sticking to the steel, this means that the temperature of our ax has exceeded 768 degrees and there is no need to heat it any more. We remember the color of the glow for a temperature of 768 degrees. It's called red-burgundy. We will need this knowledge when hardening, which is carried out at a temperature of 800-830 degrees, which corresponds to the transition from dark red to red. On the screen you see a table of heat and tarnish colors for carbon steel.
I would like to draw your attention to the fact that the camera distorts the real color, making it lighter. So, the temperature required for annealing has been reached. We move the coals away from the axe, close the stove, close the main valve and leave for 10 hours. Let the ax cool down along with the stove. During the annealing process, the microstructure of the metal is improved, internal stress is relieved and hardness is reduced. After cooling, the annealed steel becomes soft and can be easily taken with a file.
GOST 18578 – 89 Construction axes
The next point that we need to know to carry out effective heat treatment is the grade of steel from which the ax is made. All construction axes that were manufactured in the Soviet Union and are now manufactured in the post-Soviet space must comply with GOST 18578 - 89 Construction axes. This GOST specifies steel grades for the manufacture of axes. Each of these steels has its own heat treatment temperature regimes. And your own quenching media.
You can find out about this in steel grade books or in thermist’s reference books, which are freely available in the library. However, I want to emphasize the fact that the main materials for making axes are U7 and U7A steels. The ax I chose for experiments has a mark.
Above, the year of manufacture is 1963. On the left is the size according to GOST A2. On the right is steel. From which the ax is made. This is tool, carbon steel U7. Heat treatment modes for U7 steel are as follows:
Before heat treatment, the cutting edge of the ax must be dulled so that its thickness becomes approximately one millimeter.
What metals can be hardened
It should be borne in mind that not all metals are suitable for such heat treatment. Very often, the physical and mechanical qualities of structural steels are improved, for example, steel 45, as well as some alloyed alloys (65G, U7Kh).
Aluminum and many other non-ferrous alloys undergo heat treatment, during which the crystal lattice remains unchanged. This can be achieved by heating to low temperatures followed by rapid cooling in a different environment.
Main stages
The procedure consists of three main stages, which are performed sequentially without interruption:
- Annealing.
- Hardening.
- Vacation.
Let's look at them in order.
Annealing
The annealing process is necessary to change the structure of the metal, cleanse the structural memory of the steel and relieve stress incurred during casting or previous processing.
Figure 2 – Heat treatment modes for steel U7, U7A
The procedure consists of performing two steps:
- Heating to a temperature of 740-760°.
- Smooth cooling up to 550° at a speed of 30-50° per hour.
Considering the temperature difference, we can conclude that the cooling process will take from 4 to 7 hours.
The main difficulty is temperature control.
Steel heated to 768° has a red-burgundy color with a dim glow.
Without experience, it is difficult to understand whether the metal has reached the desired temperature or not. An ordinary magnet will come to the rescue. At a temperature of 768°, it ceases to be attracted to the surface of the steel, which makes it possible to determine the temperature with sufficient accuracy. After reaching the desired degree of heating, the furnace is turned off, and the ax is left in it for gradual cooling. Usually the process lasts slightly longer than the calculated value - about 10 hours.
Hardening
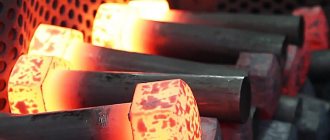
To harden, the metal must be heated again to a temperature of 800-830°. First, the surface is cleaned of scale, for which you need to use a hard wire circle. Heating is carried out until the metal acquires a bright red tint.
Important! When heating to 800°, you will have to use your own understanding of the situation, since there are no more correct ways to determine the temperature at home. It is a good idea to look at a sample of the metal that has been heated for hardening beforehand to get an idea of what it should look like.
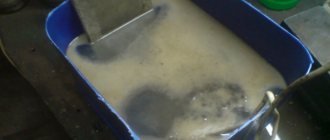
After heating, the metal must be cooled. Use water at a temperature of 30° and oil. The working part of the ax is immersed in water (3-4 cm), actively moving to prevent the formation of a vapor layer. The duration of immersion in water is 3-4 seconds, after which the entire ax is immersed in oil. At the same time, you need to make sure that it does not catch fire.
Vacation
Tempering is the final part of the entire process, designed to relieve metal stress and reduce its brittleness. Before starting the tempering, it is necessary to clean the surface of the ax again with a wire wheel, since it will be necessary to carry out visual inspection of the surface. It should acquire a blue tarnish color corresponding to the correct degree of heating.
The procedure is carried out in a conventional oven heated to 300°. The ax is placed in the oven and kept for 1 hour, after which it is removed and cooled naturally in the open air. Test processing with a file can be a criterion for the quality of hardening.
Attention! The higher the tempering temperature, the softer the metal will become.
Hardening methods
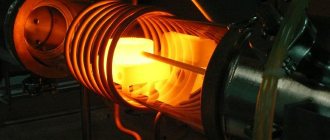
There are essentially 2 types of hardening methods. On an open fire and in the oven. But, unfortunately, in an ordinary fire it will not be possible to raise the temperature above 900 degrees. Then the oven comes to the rescue.
You can make it yourself. This is a rather difficult process, but once you make it once, it will serve you for a long time. Moreover, if you are a beginner master, you simply need it.
In the cell
Next we will talk about how to make your own muffle furnace for proper heat treatment of workpieces, and now we will simply and briefly describe the hardening process in it; the blade steel will be used 50Х14МФ:
- We heat the oven to the desired temperature, in this case 1070 degrees, and immerse the blades in the oven.
- Having loaded the blade into the oven, we heat the oven again to 1070 degrees, and at this temperature the countdown begins. The principle is simple: 1 minute 40 seconds for every millimeter of blade thickness.
- After the required time has passed, the blade is pulled out and cooled in air for 15 minutes under light pressure.
- Then the metal is tempered in the oven at 200 degrees.
Hardening a knife in a chamber made at home.
With this process, the steel gains a hardness of 56 HRC. But keep in mind that in this case, hardening took place without immersion in liquid. Each steel has its own hardening conditions. And the result you want to achieve will depend entirely on the process itself.
On an open fire
The method, one might say, was tested by our ancestors and has been around for many years. To properly harden steel, without any precise measuring instruments, so to speak “by eye”, you need to be attentive and patient. The only way to check is with a magnet. When a metal reaches a certain incandescent point, the so-called Curie point, it stops interacting with the magnet.
And one more sign is the color of the workpiece itself, it should turn dark red. But you also need to make sure that no blue or black spots appear during the process, this indicates overheating. The workpiece should be placed in the coals when the color of the flame from them is crimson.
What you will need:
- mineral oil in a container (can be worked off);
- bucket with water;
- well prepared coals;
- long metallurgical pliers.
Hardening a knife over an open fire. After the part has acquired the desired shade and is not magnetic, you need to carefully take it with pliers and lower it into the oil for 3 seconds, and this must be done several times. Keep the workpiece in the oil a little longer each time. And at the final stage we immerse it in water.
Features of the technology
At home, if you approach the matter correctly, you can qualitatively harden any knife. This could be a hunting or folding knife, a bayonet-knife or a product in the form of a hook, a blade made of a file or a bearing, a butterfly knife, etc. It is somewhat more difficult to harden products made from stainless steel at home, but this problem can be solved, if you carefully study the process technology and select the appropriate heating equipment. Various materials are used as a cooling medium when performing hardening, both in production and at home. Thus, the most common cooling media - water and oil - provide the following cooling rates of a heated steel product:
- oil at room temperature – 150°/s;
- oil heated to a temperature of 200° – 300°/s;
- water, the temperature of which is slightly above 20°, – 450°/s;
- ice water – 600°/s.
Annealing a knife over an open fire requires close attention.
The most important problem that you may encounter when trying to harden a knife at home is overheating the metal, which leads to a significant increase in its fragility. It is also necessary to very carefully monitor the uniform heating of the knife being hardened, so as not to encounter the formation of transverse cracks on its blade.
There is a simple rule that should be followed in order not to encounter such a problem: the part of the blade that will not be sharpened is heated three times to a purple color, which corresponds to a temperature of 285 °, and the cutting part is heated only once to a yellow color, after which the degree Its heating is checked using a magnet. You can learn more about this technique by watching the corresponding video.
Colors of heat and tarnish of carbon and low-alloy steels
On stainless steels, tarnish colors appear in the same sequence, but at higher temperatures
Different cooling media also provide different depths of the hardened layer (hardenability). Thus, when cooled with water, steel is calcined at a rate of 1 mm per second, and when oil is used as a cooling medium, this rate is almost halved. To harden a double-edged knife, obtaining hard cutting edges and an elastic core, you need to do the following: the blade, heated to the required temperature, is first dipped in water for two seconds and then placed in oil.
Another technology that allows you to qualitatively harden the cutting edge of a blade with significant thickness is hardening the knife in graphite. Using this technology, the details of which can also be easily studied in the video, you can qualitatively harden knives of various models and configurations (hunting knife, bayonet knife, butterfly knife, etc.). At the same time, such hardening can be performed efficiently at home.
How to carry out the procedure yourself
To do this, you do not need to have any experience - just follow the instructions exactly, which will tell you how to harden knives at home on your own. The procedure can be used for any type of blade - an ax, scissors, and other cutting tools.
Heating source
In the open air, part of the heat emanating from the fire evaporates - the resulting temperature, especially when heat treating high-carbon steel, may not be enough. In these cases, it is better to use a muffle furnace, cutter, blowtorch, forge, even a regular electric or gas stove. When making a batch of knives, it is better to determine the hardening time experimentally using a test. To do this, several metal plates are heated: one to the maximum, the other a little less.
The fuel is coals, which are heated to a maximum white color. The shade of the flame is yellow-orange or crimson. The fire should be distributed evenly over the entire area of the fire. After heat treatment, the hot object is dipped into the oil three times for a few seconds. The last stage is immersion in a container of water. The liquid should be thoroughly mixed (shaken) beforehand.
BlowtorchOvenForgeGas stove
Temperature
There are several methods for hardening steel with different heating temperatures, holding times and cooling rates. Each grade of metal requires a certain temperature regime:
- for knives made of low-carbon steel, the temperature range should be 757-950 ° C;
- blades made from high-carbon grades are hardened at 680-850 °C;
- alloying alloys will require heating to 850-1150 °C.
In production conditions, to determine the degree of heating, a non-contact measuring device is used - a pyrometer; in everyday life, an ordinary magnet is used. With a significant increase in temperature, the magnetic properties of the metal decrease: if the steel workpiece is not attracted to it, the temperature is optimal.
Experienced craftsmen are able to determine the quality of hardening by the color of the steel: the lighter it is, the stronger the heating. The metal should not be overheated, otherwise it will turn black and it will be impossible to clean it. The sharpened part of the blade is heated 3 times to an almost purple color, that is, to a temperature of 285 ° C. The cutting part is processed on fire only once, but heated more strongly, until a yellow-orange tint appears, that is, up to 950-1000 ° C.
Red color indicates heating to 720-950 °C. Raspberry or light cherry shades of steel mean that the heating temperature corresponds to 800-850 °C. The appearance of a burgundy color in the flame indicates that the blade is not heated enough, only to 650-720 °C, brown - the temperature is not higher than 530-580 °C.
Cooling and holiday
Depending on the heat treatment method and the type of blades, different cooling methods are used, for example, in mineral oil (waste oil) or ordinary water with added salt. Options:
- if the blades to be hardened are heated red-hot, they are cooled in oil, dipping into it three times, so that each subsequent cooling is longer than the previous one; the last stage is immersion in pre-mixed water;
- for knives with double-sided blades, to give them greater sharpness and elasticity, the blades, on the contrary, are first dipped in water for a couple of seconds and then used for sharpening;
- To make the middle of the blade as elastic as possible, you can first warm it up with a metal rod, then immerse the knife in boiling water for a couple of hours, then in ice water.
It should be taken into account that metal cools 2 times faster in oil (working oil). To determine the cooling rate of a material in different solutions, you can refer to the summary table.
| Environment used | Cooling rate, °C |
| Water heated to 27 °C | 450 |
| Room temperature oil | 150 |
| Ice water | 600 |
| Machine oil heated to 20 °C | 150 |
Steel that has been quenched and cooled is still too brittle. To further increase the characteristics of plasticity and viscosity, it should be heated again for an hour, but only to 150-200 ° C (this procedure is called tempering). For alloyed metal, the temperature should be in the range of 270-320 °C, for high-speed metal – even higher. To prevent the blade from bending during rapid cooling, it must be lowered into the liquid strictly vertically, the cutting edge must be at the bottom, and the blade must remain motionless.
Cooling in oil Vacation
Hardening with self-tempering
Another method of hardening a tool is self-tempering. First, the tool is heated in a furnace to the hardening temperature. Then, the cutting part is cooled to a temperature of 150-170 degrees. After this, the cutting part is cleaned of scale in order to see the tarnish colors. Let's see how the purple color goes. The tool is kept in air until the heat from the hot part heats the cooled part to a temperature of 250-300 degrees. We judge this by the color of the tarnish. Everything is purple. Cool. Water is used as a quenching medium. Only to cool the cutting part it is heated to 30 degrees. And for the final cooling of the ax it is heated to 50 degrees.
Test four: bending at the stop
Test for the elasticity of the blade and the strength of the knife structure as a whole.
We rest the tip of the blade against a hard surface (but we press it, not stick it in, that is, it should still lie a little on the surface) and slightly bend the blade - up to 10 degrees from the line of the handle. For kitchen knives with a thin blade, this figure will be higher - some of them can be bent at an angle of up to 30 degrees, although this is undesirable. When the load is removed, the blade should straighten again without deformation. We repeat on the opposite side. Pay attention to the state of fastening of the blade in the handle: the blade and the handle must be one piece, without play or cracks
Self-vacation
Self-tempering is a process that combines the hardening and tempering operations into a single procedure.
Its essence lies in the sharp cooling of the working part of the tool without additional cooling of the entire ax.
Figure 3 – How the color of steel changes when the ax is heated
A situation arises when the cooled part is heated to the required temperature due to thermal energy from the remaining part that has not been cooled.
The process is controlled by the color of the tarnish.
When the instrument acquires the desired color, it is finally cooled in water or oil.
Self-release is a rather complex procedure, the result of which depends on the experience and skills of the master. It saves time significantly, but it is better for an untrained person to complete the entire process so that they do not have to perform the entire hardening operation again.
The length of time the ax is kept in the oven, the time required for reheating and other nuances of the process depend on a lot of factors, including the size and shape of the ax, so it is unlikely that you will be able to get the expected result the first time. For the first time, it is recommended to involve an experienced thermist in the work and get a lot of useful information from him.
Features of the work taking into account the chosen method
Before starting work, the device is cleaned of rust and dirt. In addition, if necessary, remove the wedge from the ax handle and secure it to the stand. Before choosing a method, determine the shape and degree of sharpness of the ax.
Electric sharpener
The easiest and fastest way, but it requires skills, attention and special equipment. For sharpening you will need: an abrasive wheel with an electric drive, hand sharpeners, protractors and templates for different angles, a marker, polishing paste
Important condition - you need to wear safety glasses and gloves
Procedure for sharpening a carpenter's ax:
- Use a marker to paint over the entire chamfer to make it easier to control the sharpening process and untreated areas;
- set the sharpening angle on the device or try it on manually;
- If installed correctly, the blackening on the chamfer will be removed evenly with the stone; if necessary, the angle must be adjusted;
- turn on the emery and remove excess metal with smooth movements until the nicks are completely eliminated;
- turn the ax over and repeat the operation, control the overall angle with a template or block;
- finally bring the blade sharpness to the desired value using fine-grained sandpaper and sand it on felt with a special paste;
- clean off any abrasive residue and apply a coating to the chamfer.
The cutting edge will heat up when processed on a sharpening machine. This should not be allowed, for which it must be periodically immersed in water or oil. Heating the metal and then tempering it reduces hardness and impairs working properties.
Manually
This method has its advantages: firstly, the blade does not overheat, so the quality of the edge is the best, and secondly, you can sharpen an ax at home with an ordinary whetstone, when there are no electrical tools at hand. For work you will need: a file, sandpaper and stone of different grain sizes, felt, sanding paste, gloves, safety glasses. You can sharpen an ax in this way:
- use a file to remove large irregularities and bring the chamfer to the desired size (movements from the ax to the blade);
- spread the sandpaper on a flat surface, use the blade to make semicircular movements alternately on each side;
- Give final sharpness with an emery block, polish the cutting edge and treat it with anticorrosive.
The difficulty of the manual method lies in the need to constantly monitor the position of the ax relative to the abrasive. Even a slight tilt to the side can ruin the sharpening. In addition, this method is very tedious.
How to understand whether hardening is needed
First, you should check whether such a procedure is required. Not all manufacturers produce high quality products. It happens that the purchased ax was either not hardened at all, or it was carried out in violation of the process:
- in the first case, the material of the tool will be too soft, and this leads to the appearance of dents and nicks, as well as to rapid dulling during use;
- a violation of technology, as a rule, consists in excluding the tempering stage after heating from the process - the metal is brittle and quickly becomes covered with cracks.
Compliance with quality requirements is checked using a flat file. You need to take it with a fine notch. If it glides freely over the surface without catching it or leaving marks, this indicates the high hardness of the alloy.
If, by all indications, the tool needs to be hardened, it is necessary to determine what kind of steel was used to make it. This is necessary for proper processing.
The best steel used for a quality ax is carbon. It is marked U7, U8, U8A.
What is a taiga ax
First, of course, we’ll talk about the forged taiga axes we made, and compare them with purchased carpenter’s axes. Then considerations on the recipes for making your own from ready-made axes, which are common on the Internet.
Purpose
A taiga ax is an ax that is convenient to use for hunting, long hikes and work in forest areas. It is intended for collecting firewood, setting up a camp, and, quite often, for cutting up the carcasses of large animals. Therefore, optimal blade hardness, a reliable ax handle, and a convenient case are required.
Buy a taiga ax or make it yourself?
Carpenter's axes are usually on mass sale, but they are not very convenient for working in the forest. A long time ago, skilled people lightened and modified purchased axes for camping use; now a whole industry has emerged for regrinding axes and turning them into “author’s” ones. If everything is done correctly: the shape, the attachment on the ax handle, heat treatment and sharpening, you can get a good tool. But we prefer axes that are completely hand forged and designed specifically for working in the forest. The advantages of such an ax: optimal shape, light weight, more durable blade due to free forging rather than stamping. Therefore, we will first show off our axes, and only at the end of the article will we tell you how to make a taiga ax with your own hands.
How to properly harden an ax
Blacksmith Valery Samovich: “Using an ax as an example, I want to talk about the heat treatment of steel at home, which includes three stages: annealing, hardening and tempering. The need for hardening arises if the manufacturer violates the heat treatment technology.
If the ax quickly becomes dull during use and dents appear on the tip, then the steel is soft. And this means that the ax is not hardened. And if the tip chips or cracks, that is, the steel is very hard and brittle, then this is possible if tempering has not been carried out after hardening.” A clean file with a fine notch will help us evaluate the hardness of steel, and therefore the quality of hardening.
If the hardness of the steel is high, then the file glides over it almost without catching. If the hardness of the steel is average, then the file will take it a little. And if the hardness of the steel is low and the file takes it easily, it means that the steel is not hardened, or the heat treatment technology was violated.
In the case of this axe, the file takes it easily. In this case, as well as in the case of increased fragility, the ax is subjected to a full heat treatment cycle. First, annealing, and then quenching and tempering. Correct hardening of an ax is considered to be hardening in which different parts of the ax are hardened differently.
In the area of the blade, at a distance of about three centimeters from the tip, the hardness of the steel should be high. The hardness of the rest of the ax should be much less. This hardening ensures the wear resistance of the blade and the ductility of the rest.
And it is a guarantee that during operation the butt will not burst or the blade will not break off.
GOST 18578 – 89 construction axes
The next point that we need to know to carry out effective heat treatment is the grade of steel from which the ax is made.
All construction axes that were manufactured in the Soviet Union and are now manufactured in the post-Soviet space must comply with GOST 18578 - 89 Construction axes.
This GOST specifies steel grades for the manufacture of axes. Each of these steels has its own heat treatment temperature regimes. And your own quenching media.
You can find out about this in steel grade books or in thermist’s reference books, which are freely available in the library. However, I want to emphasize the fact that the main materials for making axes are U7 and U7A steels. The ax I chose for experiments has a mark.
Above, the year of manufacture is 1963. On the left is the size according to GOST A2. On the right is steel. From which the ax is made. This is tool, carbon steel U7. Heat treatment modes for U7 steel are as follows:
Before heat treatment, the cutting edge of the ax must be dulled so that its thickness becomes approximately one millimeter.
Vacation
The last heat treatment operation is called tempering. Tempering is necessary to reduce the brittleness of hardened steel and relieve internal stresses in the metal that appeared during the hardening process. I bake in a regular oven. The ax is kept for one hour at a temperature of 300 degrees, and then cools in air. This is the handsome guy we got after our vacation.
The color of the tarnish is blue, indicating that the tempering temperature was approximately 300 degrees. You can see this color if you turn the metal surface towards the light in a certain way. We check the hardness of the metal after tempering and make sure that the blade has become a little softer. As we already know, the hardening temperature of U7 steel is 800-830 degrees. And it cannot be reduced.
At lower temperatures, hardening may not occur at all. But what should we do if, after hardening, we need to obtain ductile steel with a relatively low hardness? In this situation, we harden the steel as expected, but increase the tempering temperature. The higher the tempering temperature, the more ductile and softer the steel will be after tempering.
Data on the hardness of steels after tempering, depending on the tempering temperature, is available for each grade in steel grade books.
Hardening with self-tempering
Another method of hardening a tool is self-tempering. First, the tool is heated in a furnace to the hardening temperature. Then, the cutting part is cooled to a temperature of 150-170 degrees. After this, the cutting part is cleaned of scale in order to see the tarnish colors. Let's see how the purple color goes.
The tool is kept in air until the heat from the hot part heats the cooled part to a temperature of 250-300 degrees. We judge this by the color of the tarnish. Everything is purple. Cool. Water is used as a quenching medium. Only to cool the cutting part it is heated to 30 degrees.
And for the final cooling of the ax it is heated to 50 degrees.
How to harden metal yourself at home
Heat treatment of metals is one of the main ways to improve their mechanical and physical-chemical characteristics: hardness, strength and others.
One type of heat treatment is hardening. It has been successfully used by man in a handicraft way since ancient times. In the Middle Ages, this method of heat treatment was used to improve the strength and hardness of metal household items: axes, sickles, saws, knives, as well as military weapons in the form of spears, sabers and others.
How is alloy steel hardened?
How to harden metal? At home, alloy steel is subjected to a mineral oil bath process. Thin carbon steel objects are hardened using the same method. The advantage of oil baths is that the cooling rate does not depend on the oil temperature. It will proceed equally quickly for any indicator.
How to harden metal in oil correctly? Water should not get into such a bath, as this can cause cracks to appear on the surface of the metal object. It has been noticed that if the oil is heated to a temperature of 100 °C, then the ingress of water will not cause cracking of the product.
Methods for heating a blade to hardening temperature
Many amateur workshops have a muffle furnace, electric or gas. The temperature in its chamber is sufficient for firing ceramics, melting glass and heating metal to the required temperatures.
In the cell
The oven has a temperature regulator, so heat treatment is not difficult. For annealing and hardening of one tool, you can make an electric muffle furnace with your own hands.
How to make a camera yourself
To heat the ax blade, you need a small chamber. Required:
- Body – any metal container with a wall thickness of 2 mm or more.
- The heat insulator is a mixture of fireclay clay and refractory brick chips.
- The heating coil is a wire made of fechral alloy.
- Thermostat.
- Network voltage stabilizer.
Before turning on the stove, you need to check that the wiring is working properly. To achieve the desired temperature, about 4 kW is required.
- A chamber is made from the refractory mixture, and grooves for the heating coil are laid in it. Allow it to dry, lay the spiral, cover it with a layer of clay, and bring out the ends of the wire to connect to the network.
- The dried heating chamber is inserted into the housing. The ends of the spiral are connected to the thermostat terminals.
Before making a muffle furnace yourself, study detailed instructions and watch videos of experienced craftsmen.
On an open fire
To reach 800 degrees, you need coals. It’s better to build something like a blacksmith’s forge from a bucket or barrel. In camping conditions, a large fire is lit. There must be a constant supply of oxygen to the coals.
A kind of bellows for blowing is made from a plastic bag. Use a boat pump and other available means. The coals should burn as brightly as possible. The ax blade is ready for hardening when it turns scarlet.
The essence of hardening metal products
In order to properly harden iron and other metals, you should consider the essence of this process.
The features of this type of heat treatment include the following:
- Quenching means heating a material to a temperature that can change its structure. In metals, the structure is represented by a crystal lattice.
- The process also involves cooling the material, for which oil or water can be used.
The purpose of such heat treatment is to increase the hardness of the structure of steel or other alloy.
Hardening is also associated with a process called tempering. It is carried out in order to reduce the fragility of the structure after heat treatment. Vacation is carried out at a lower temperature, and cooling takes much longer. The importance of this process is great, otherwise serious defects may form in the structure.
GOST 18578 – 89 Construction axes
The next point that we need to know to carry out effective heat treatment is the grade of steel from which the ax is made. All construction axes that were manufactured in the Soviet Union and are now manufactured in the post-Soviet space must comply with GOST 18578 - 89 Construction axes. This GOST specifies steel grades for the manufacture of axes. Each of these steels has its own heat treatment temperature regimes. And your own quenching media.
You can find out about this in steel grade books or in thermist’s reference books, which are freely available in the library. However, I want to emphasize the fact that the main materials for making axes are U7 and U7A steels. The ax I chose for experiments has a mark.
Above, the year of manufacture is 1963. On the left is the size according to GOST A2. On the right is steel. From which the ax is made. This is tool, carbon steel U7. Heat treatment modes for U7 steel are as follows:
Before heat treatment, the cutting edge of the ax must be dulled so that its thickness becomes approximately one millimeter.
Instructions: How to harden an ax at home?
An ax is a universal tool that is used by every master due to his own experience, skills and dexterity. At the same time, the main advantage is the ability to hold an edge and remain in working condition.
Taking into account the specifics of using an ax, which consists mainly of chopping blows, only high-quality and hard metal that has undergone competent hardening is capable of maintaining the working part of the blade in a given state. Unfortunately, many manufacturers save time and resources by shortening the production cycle and not completing all the necessary production steps in full, which deteriorates the quality of the finished tool. This problem is solvable, but only for people who have the necessary knowledge in the field of metal processing. Let's consider the technology of hardening an ax at home.
- What steel are axes made from?
- How to properly harden a blade at home?
- Main stages
- Annealing
- Hardening
- Vacation
- Self-vacation
- Conclusion
The use of spring steel for making a knife
Spring material 65G is used by amateur knife makers to make knives. Thanks to its unique characteristics, the metal finds its application in various fields.
Spring steel.
Blades for the kitchen, hunting, tourism - all show excellent cutting qualities. If there is a special need, you can actually forge a sword or an ax. After hardening, the steel acquires good rigidity, which allows the product to be cut. Examples of using spring steel:
- Kitchen knife. In difficult times for the country, after the collapse of the USSR, not all people could afford a good set of kitchen knives. I had to get out. Springs and plates made of 65G steel were easily accessible. In the kitchens of the post-Soviet space, homemade products were often found. The handle was made from improvised material: wood, simple epoxy, and electrical tape - which did not prevent the knives from remaining at their height.
- Tourist knife. The disadvantage of spring metal is that it is susceptible to corrosion and requires constant care after use. The knife is suitable for use in hiking conditions. An important point is hardening. If it is weak, the blade will quickly become dull on the tin can. You should know the hardness of the knife.
- Army. Tactical or, nowadays, military knives do their job well. Serrated sharpening will increase the scope of use of the blade. Withstands piercing blows without problems. In everyday conditions it will become a valuable assistant for a fighter or a “survivalist”.
- Axe, machete or sword. Alloy 65G and analogs allow you to make truly formidable weapons. The thickness of the product certainly plays a significant role. When producing such a masterpiece, you need to stock up on springs from a truck, or get a long plate.
With proper processing of the metal, we are guaranteed to get an excellent blade. Little experience with the manufacture of steel products, nonsense. Further, in the article we will provide a detailed description of the manufacture of knives from springs using various methods.
What steel are axes made from?
For a knowledgeable person, the question of what steel an ax is made of is far from idle. The fact is that the quality of hardening directly depends on the brand, composition and other characteristics of the metal. Some types of steel simply cannot be hardened because they do not have the necessary components and cannot acquire the necessary properties during the preparation process.
Figure 1 – Types of steel
For the manufacture of construction axes, according to GOST 18578-89, the following grades of steel are used:
- 8ХФ, 9ХФ, 9ХС, ХВГ (according to GOST 4543);
- 60G (according to GOST 14959);
- U7A, U8, U8A, U8GA, U9, U9A (according to GOST 1435).
It is necessary to take into account that a construction ax is a universal tool designed for constant and active use.
Unlike other types, this variety is used in a continuous mode, and therefore requires high-quality hardening of the blade, which prevents damage or rapid dulling of the cutting edge. It is necessary to check what metal the ax is made of when purchasing it, however, it is impossible to determine whether hardening was carried out and how well this procedure was carried out. Quality tools are sometimes marked with the grade of steel, but this information is of little use, especially for those who have never studied metallurgy.
The easiest way to determine the quality of steel is to take the tool by the handle, without touching the metal part, and sharply click on it with your finger or some hard object. If the sound is ringing and lingering, bell-type, the metal is good. A dull sound that immediately fades away indicates poor hardening or the use of unsuitable steel.
Another way to determine is to check for spark. If, when sharpening, long yellow stripes with luminous stars at the ends form on the emery, carbon steel was used, which can be properly hardened. If there are no stars, the steel is frankly weak and will not allow you to get the expected effect from hardening.
Important! The steel grade can be determined with high accuracy only in a special laboratory using a whole range of studies. At home, they only find out the metal’s ability to harden, which is usually quite enough.
The process of sharpening an ax
Check your ax before sharpening
Please note that the metal head must be firmly and securely attached to its wooden handle. Otherwise, it may slip or fall and seriously injure you during the sharpening process.
- If the head is indeed loose and even damaged, the tool may be too old and therefore unsafe to use. Additionally, if the blade is chipped or dented, your best bet is to buy a new axe.
- Clean the blade, especially if you notice signs of rust. Sand the surface with fine-grained sandpaper.
- Place the blade in a bench vise to secure it during the sharpening process.
- Be sure to close both jaws of the vise so that the tool head is firm and stable in position.
Ax sharpening options.
Sharpening with a grinder
Before turning on the grinder and starting the actual sharpening, put on safety glasses and a mask, as well as ear pads and protective work gloves.
Turn on the instrument. Hold it firmly with both hands. If the angle grinder is plugged into an electrical outlet, make sure the cord is long enough so you can get around the ax in the vise. Stand firmly and keep your legs slightly apart for the most stable position. Sharpening an ax with a grinder. Sand the surface of the blade. Be careful not to chip the edge
Please note that the original bevel of the blade must be maintained. Do not shorten or dull the blade. Sharpen the blade with slow and continuous movements across its metal surface, being careful not to overheat the edge in the process. Continue the same process for the other side.
Please note that the rotating disc must cover the entire surface of the edge evenly to obtain the best result. After you have sharpened your axe, allow the blade to cool for at least 10 minutes.
Sharpening with a whetstone
Having done the work of shaping, you need to make the tip even thinner using a block.
- The bar needs to be watered with a small amount of water, this will help process the tip faster and more evenly.
- Now simply use a pushing motion towards the bevel.
- Fixing your elbow and moving your entire torso will help you.
Sharpening on a grinding machine
Turn on the sharpener. Further:
- Align the bevel angle with the grinding wheel.
- Use light pressure and sand so that the wheel moves away from the blade, not towards it.
- Dip the ax head in water frequently to cool it down.
- Clean the edge with a wire brush to give the ax a sharp edge.
- After a few minutes of sanding, you can remove a lot of damage that would otherwise require filing by hand.
- After this, quickly trim the tip with a file, and the ax will be as sharp as new.
Sharpening an ax is quick and easy.
Sharpening with a file
Secure the tool either in a vice or firmly on your knees.
- Use a marker and color the entire bevel to use as a guide.
- Take a 25 cm file and bring it to the blade.
- Match the angle of the bevel and the angle of the file.
- Strike 5-10 times along the blade.
- Perform the same number of strokes on the other side of the blade.
How to properly harden a blade at home?
Hardening is a complex process, the result of which depends on the experience and knowledge of the master doing it. When hardening an ax, only the blade is subjected to the most severe treatment, and the butt and eye (hole for the ax) are left in their original state. This is important, since hardening increases not only the hardness, but also the fragility of the metal, and continuous processing can make the tool unsuitable for work - any blow can split it. Therefore, the hardening mode must be chosen so that the result is a hard strip of metal near the working edge and a softer, more viscous rest of the tool.
The essence of the process is the restructuring of the crystalline and atomic lattice of the metal, which occurs under the influence of high temperatures and a sharp change in the degree of heating. You will need a standard muffle furnace, which should be purchased or rented.
How to remove excess metal hardness yourself using tempering
Tempering removes the excessive hardness and brittleness of the material acquired during hardening. Tempering is essentially the same heating to a critical point and slow cooling in air, when the structural lattice changes again.
- Tempering at low temperatures requires gentle heating to 250ºС. It removes structural stress and maintains high strength. Suitable for cutting and piercing tools made of carbon material, as well as low-alloy steel.
- Tempering at average temperatures already requires intense heating in the range from 350ºС to 500ºС. It makes it possible to achieve such transformations of atoms when the structure becomes uniformly fine-grained, and therefore elastic and wear-resistant. Parts under dynamic load - springs, spirals - are subjected to this tempering.
- Tempering at high temperatures requires high heat in the range from 500ºС to 700ºС. Then a structural shift occurs, returning the over-hardened part to viscosity and ductility while maintaining the highest strength. Such tempering is required for parts subject to shock loads.
To summarize, it is necessary to clarify the picture of the process during vacation. In the first case, a slight decomposition will be observed in the metal, in the second, decomposition will occur, but the restructuring of the structure will not begin, in the third, a restructuring of the structure or crystalline structure of the grains will occur.
Hardening an ax at home - video, photos, nuances
How to qualitatively harden an ax at home? The relevance of this issue is explained by the wide demand for this tool. In addition, using the example of such a simple household tool as an ax, one can examine in detail the nuances of several types of heat treatment - annealing, hardening and tempering.
A good forged ax can cut a nail
It is quite easy to find out that a new ax purchased from hand or at a hardware store needs to be hardened: if the blade of the tool is very soft (which can be determined by its wrinkles even when cutting knots of small thickness), then it needs high-quality hardening. If cracks appear on the working part of the ax during operation or the blade becomes chipped, it should be fully tempered.
Hardening steel over an open fire
It is possible to harden metal at home. For an easy and useful hardening process, you need to light a fire and prepare two large containers. There should be a lot of hot coals in the fire.
Diesel or motor oil is poured into one container, clean water, preferably from a well, is poured into the other. You should first prepare a tool with which you will need to hold the hot product.
It is advisable to find blacksmith pliers, but if they are not among the tools, you can arm yourself with something else similar to pliers.
When the preliminary work is done, metal drills or other objects are placed in the very center of the flame, that is, on hot coals.
Rich white coals are hotter than others
It is important to watch the hardening process - the flame should be crimson, not white. If the fire is painted in the last color, then there is a threat of overheating and even burning of the metal
It is necessary that the color is distributed evenly across the entire area of the fire. Black spots should not appear on the edge of the product that is being hardened.
And if the metal turns blue in places, this indicates that the material has softened too much and become too plastic. This should not be allowed under any circumstances.
IMPORTANT TO KNOW: Tapping a pipe
Therefore, the process requires increased care, because you can overdo it and heat the ax blade white-hot.
When the metal equipment is heated in the fire, it is time to remove it from the high heat.
A hot object must be lowered into a container of oil many times with a frequency of 3 seconds, gradually increasing this period of time.
You cannot hesitate with these actions; you need to carry out operations to harden the metal edge quickly and sharply.
Next, the object is immersed in a bucket filled with water, which will have to be shaken a little.
At this stage, do not forget to be careful, as oil droplets on a knife or ax may burst into flames if they end up in water. The table shows how to correctly and incorrectly immerse various parts, including drills and disc cutters, in water:
The table shows how to correctly and incorrectly immerse various parts, including drills and disc cutters, in water:
Very often there is a need to harden drills. It is not recommended to immerse thin long elements flat into water, otherwise the lower layer of metal, cooled first, will shrink.
Video:
Drills should be lowered into the liquid with the thicker end.
If you follow all the rules and precautions, then hardening yourself will not seem like a complicated and dangerous procedure. It will bring the desired guaranteed effect
But sometimes at home you have to harden steel equipment or melt non-ferrous metal. Such operations require extremely high temperatures, 700-900 degrees.
And only a muffle furnace or an electric furnace can heat metal objects to this level. You can make a muffle furnace yourself. It is unlikely that you can make an electric oven at home.
Secrets of hardening a heat source
There are several options for devices that can bring the heating of a steel part to the desired temperature threshold. The ideal option is an industrial or home-made muffle furnace.
In the absence of such a tool, you can use another home assistant - a blowtorch.
A fairly powerful jet of flame makes it easy to heat parts of small thickness to the required temperature. Remember to move the torch along the plate being hardened to achieve even heating.
In addition, it is possible to use ordinary charcoal together with a blowtorch. To do this, dig a small hole in the soil, pour coal into it, and place the hardened blades of the knives on the edge. Heat the coal together with the plates with a lamp until the latter reaches the required heating. This method prevents the rapid cooling of the unheated part of the workpiece and its overheating.
The third option is to make a small forge. It can be either coal or gas. The main structural elements of the device are the housing and the source of forced air. The base of the coal hearth can be made of a steel sheet 10 mm thick with a piece of pipe with a diameter of about 20 cm welded at the bottom and an outlet from it for connecting a hose from the outlet of a household vacuum cleaner.
Do not forget to drill several holes in the sheet of sufficient diameter to supply air. Wood (barbecue) or coal is used as fuel.
Sources
- https://SevenTools.ru/metally/kak-pravilno-zakalit-topor.html
- https://setafi.com/instrumenty/topor/kak-zakalit-topor-v-domashnih-usloviyah/
- https://smm-star.com/kak-pravilno-zakalit-topor/
- https://VashNozh.ru/topory/zakalka-topora
- https://kovkapro.com/kovka-tehnologiya/zakalka-topora/
- https://printeka.ru/prochee/kak-zakalit-topor-v-domashnih-usloviyah.html
- https://2lzz.ru/stolyarnyj-instrument/kak-zakalit-topor
- https://teplobloknn.ru/metally/zakalka-topora.html
What is metal hardening and its types
Hardening is understood as a type of heat treatment of a metal, consisting of heating it to a temperature, upon reaching which a change in the structure of the crystal lattice occurs (polymorphic transformation) and further accelerated cooling in water or an oil medium. The purpose of this heat treatment is to increase the hardness of the metal.
Hardening is also used, in which the heating temperature of the metal prevents a polymorphic transformation from taking place. In this case, its state is recorded, which is characteristic of the metal at the heating temperature. This state is called a supersaturated solid solution.
Polymorphic transformation hardening technology is used mainly for products made of steel alloys. Non-ferrous metals are subjected to hardening without achieving a polymorphic change.
After such treatment, steel alloys become harder, but at the same time they become more brittle, losing their ductility.
To reduce unwanted brittleness after heating with polymorphic change, a heat treatment called tempering is used. It is carried out at a lower temperature with gradual further cooling of the metal. In this way, the stress of the metal is relieved after the hardening process, and its fragility is reduced.
When hardening without polymorphic transformation, there is no problem with excessive brittleness, but the hardness of the alloy does not reach the required value, therefore, during repeated heat treatment, called aging, it is, on the contrary, increased due to the decomposition of the supersaturated solid solution.
Features of steel hardening
Mainly stainless steel products and alloys intended for their manufacture are hardened. They have a martensitic structure and are characterized by increased hardness, leading to brittleness of products.
If you heat treat such products by heating to a certain temperature followed by rapid tempering, you can achieve an increase in viscosity. This will allow the use of such products in various fields.
Types of steel hardening
Depending on the purpose of stainless steel products, it is possible to harden the entire item or only that part of it that must be functional and have increased strength characteristics.
Therefore, hardening of stainless steel products is divided into two methods: global and local.
Cooling medium
Achieving the required properties of stainless materials largely depends on the choice of cooling method.
Different grades of stainless steel undergo cooling differently. If low-alloy steels are cooled in water or its solutions, then for stainless alloys oil solutions are used for these purposes.
Important: When choosing a medium in which to cool the metal after heating, it should be taken into account that cooling occurs faster in water than in oil! For example, water at a temperature of 18°C can cool an alloy by 600°C in a second, but oil by only 150°C.
In order to obtain high metal hardness, cooling is carried out in running cold water. Also, to increase the hardening effect, a brine solution is prepared for cooling by adding about 10% table salt to the water, or an acidic medium containing at least 10% acid (usually sulfuric) is used.
In addition to the choice of cooling medium, the cooling mode and speed are also important. The temperature decrease rate must be at least 150°C per second. Thus, in 3 seconds the temperature of the alloy should drop to 300°C. A further decrease in temperature can be carried out at any speed, since the structure fixed as a result of rapid cooling will no longer be destroyed at low temperatures.
Important: Cooling the metal too quickly leads to its excessive fragility! This should be taken into account when hardening yourself.
The following cooling methods are distinguished:
- Using one medium, when the product is placed in a liquid and kept there until completely cooled.
- Cooling in two liquid media: oil and water (or saline solution) for stainless steels. Products made of carbon steel are first cooled in water, since it is a fast cooling medium, and then in oil.
- Using the jet method, when the part is cooled with a stream of water. This is very convenient when you need to harden a specific area of the product.
- Using the method of step cooling in compliance with temperature conditions.
Temperature
The correct temperature regime for hardening stainless steel products is an important condition for their quality. To achieve good characteristics, they are uniformly heated to 750-850°C, and then quickly cooled to a temperature of 400-450°C.
Important: Heating the metal above the recrystallization point leads to a coarse-grained structure, which worsens its properties: excessive brittleness, leading to cracking!
To relieve stress after heating the metal to the desired hardening temperature, step-by-step cooling of products is sometimes used, gradually lowering the temperature at each heating stage. This technology allows you to completely remove internal stress and obtain a durable product with the required hardness.