It is no coincidence that the question of how to harden a knife yourself at home is so relevant, because it is this technological operation that allows you to give the blade of a cutting tool the required strength and hardness. If you neglect this procedure or perform it incorrectly, the cutting part of your knife will quickly become dull, which will make its use ineffective.
The durability and cutting ability of a knife are determined by the hardness of the blade.
Even if a homemade knife is made of a solid metal product (file, spring, valve, etc.), it still requires hardening, since during the manufacturing process the blade was subjected to intense mechanical processing and, accordingly, heating. It is quite simple to check how correctly the hardening of a homemade knife has been carried out at home. To do this, you need to hold its blade in a vice and begin to bend it vertically. If the knife breaks at a bend angle greater than 45°, it means the hardening was done correctly.
For those who do not like to go into the subtleties and details of the process, you can immediately watch a video with a detailed description and demonstration of one of the methods of hardening a knife at home. If you want to get acquainted with the technology in more detail, we recommend reading the entire article.
A little more history
Some blacksmiths used sheep urine collected for three days for this purpose. And others used the boy’s urine for such a process, and he had to be red-haired. These are the tricks the masters of the past used.
By the way, the use of urine can be partially justified, since the presence of salts in it accompanied the rapid absorption of heat from the hot metal.
There were even quite barbaric methods of hardening, a red-hot blade was stuck between the ribs of a slave, and it was believed that his strength was transferred into a metal blank. It's good that those days are over. But people gradually noticed that if, after heating the metal, it was placed in a salty environment, its quality and characteristics improved.
Time passed, and thousands of methods were tried before achieving a positive result. The young scientist metallurgist D.K. Chernov, who worked on this problem in 1866, achieved considerable success in determining certain values for each metal.
The plant where Mr. Dmitry Konstantinovich Chernov conducted the tests completely got rid of defects and this man can be called the progenitor of modern metallurgy. Today, any student, having a wealth of knowledge accumulated over centuries, can cope with the hardening of steel.
Choosing steel for knife hardening
As you know, steel is nothing more than an alloy of carbon and iron. Additives are added to them in small doses. They do not play a big role on the quality of the future blade. The most important element is carbon. Additives can be such as zinc, chromium, molybdenum, calcium, etc.
But the less carbon in steel, it acquires high strength, but wears out faster and corrosion develops faster. For proper hardening, you must know the composition of the future blade. It is best to carbon analyze the steel.
Ideal hardening of a knife blade.
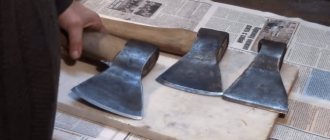
If the future product is, for example, made from a file or a car spring. Hardening in this case is simply necessary, especially since forging such a metal implies its mandatory heating. You can check the quality of hardening at home, but it is quite “cruel”.
You need to tighten the finished blade in a vice and begin to gradually bend it, and if the blade breaks at around 45 degrees. We can safely say that the hardening was carried out correctly. But this should be done after your first independent hardening of the blade, you need to remember the whole process well and repeat it again.
Hardening methods
There are essentially 2 types of hardening methods. On an open fire and in the oven. But, unfortunately, in an ordinary fire it will not be possible to raise the temperature above 900 degrees. Then the oven comes to the rescue.
You can make it yourself. This is a rather difficult process, but once you make it once, it will serve you for a long time. Moreover, if you are a beginner master, you simply need it.
In the cell
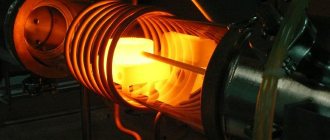
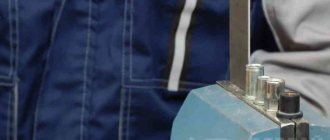
Next we will talk about how to make your own muffle furnace for proper heat treatment of workpieces, and now we will simply and briefly describe the hardening process in it; the blade steel will be used 50Х14МФ:
- We heat the oven to the desired temperature, in this case 1070 degrees, and immerse the blades in the oven.
- Having loaded the blade into the oven, we heat the oven again to 1070 degrees, and at this temperature the countdown begins. The principle is simple: 1 minute 40 seconds for every millimeter of blade thickness.
- After the required time has passed, the blade is pulled out and cooled in air for 15 minutes under light pressure.
- Then the metal is tempered in the oven at 200 degrees.
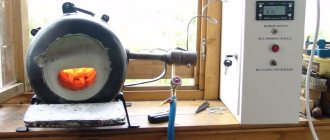
Hardening a knife in a chamber made at home.
With this process, the steel gains a hardness of 56 HRC.
But keep in mind that in this case, hardening took place without immersion in liquid. Each steel has its own hardening conditions. And the result you want to achieve will depend entirely on the process itself.
On an open fire
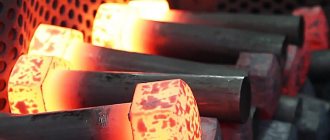
The method, one might say, was tested by our ancestors and has been around for many years. To properly harden steel, without any precise measuring instruments, so to speak “by eye”, you need to be attentive and patient. The only way to check is with a magnet. When a metal reaches a certain incandescent point, the so-called Curie point, it stops interacting with the magnet.
And one more sign is the color of the workpiece itself, it should turn dark red. But you also need to make sure that no blue or black spots appear during the process, this indicates overheating. The workpiece should be placed in the coals when the color of the flame from them is crimson.
What you will need:
- mineral oil in a container (can be worked off);
- bucket with water;
- well prepared coals;
- long metallurgical pliers.
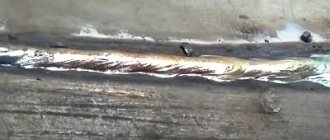
Hardening a knife over an open fire.
After the part has acquired the desired shade and is not magnetic, you need to carefully take it with pliers and lower it into the oil for 3 seconds, and this must be done several times. Keep the workpiece in the oil a little longer each time. And at the final stage we immerse it in water.
Increased hardness over open fire
In everyday life, hardening is often carried out over an open fire. This method is only suitable for a one-time process of increasing surface hardness.
All work can be divided into several stages:
- First you need to make a fire;
- at the time of lighting the fire, two large containers are prepared that will correspond to the size of the part;
- In order for the fire to produce more heat, you need to provide a large amount of coals. they give a lot of heat for a long time;
- one container should contain water, the other should contain motor oil;
- special tools should be used to hold the hot part being processed. In the video you can often see blacksmith pliers, which are the most effective;
- After preparing the necessary tools, you should place the object in the very center of the flame. in this case, the part can be buried in the very depths of the coals, which will ensure heating of the metal to a fusible state;
- coals that are bright white are hotter than others. The metal smelting process must be closely monitored. the flame should be crimson, but not white. if the fire is white, then there is a possibility of overheating of the metal. in this case, performance deteriorates significantly and service life is reduced;
- the correct color, uniform over the entire surface, determines the uniform heating of the metal;
- if darkening to a blue color occurs, this indicates a strong softening of the metal, that is, it becomes excessively plastic. this should not be allowed, since the structure is significantly disrupted;
- when the metal is completely heated, it should be removed from the source of high temperature;
- after this, the hot metal should be placed in a container with oil with a frequency of 3 seconds;
- The final stage can be called immersing the part in water. In this case, the water is periodically shaken. This is due to the fact that the water quickly heats up around the product.
When performing work, care should be taken as hot oil can cause damage to the skin. In the video you can pay attention to what color the surface should be when the desired degree of plasticity is achieved. But to harden non-ferrous metals, it is often necessary to be exposed to temperatures in the range of 700 to 900 degrees Celsius
It is practically impossible to heat non-ferrous alloys over an open fire, since it is impossible to achieve such a temperature without special equipment. An example is the use of an electric furnace, which can heat the surface up to 800 degrees Celsius
But to harden non-ferrous metals, it is often necessary to be exposed to temperatures in the range of 700 to 900 degrees Celsius. It is practically impossible to heat non-ferrous alloys over an open fire, since it is impossible to achieve such a temperature without special equipment. An example is the use of an electric furnace, which is capable of heating the surface up to 800 degrees Celsius.
How to make a chamber for hardening metal
It is clear that when making such a camera, it is better to take the process seriously, since you will not be making it for one day or once. Let's try to briefly describe the manufacturing process of such a chamber; it is also called a muffle furnace.
- The main thing is to correctly manufacture the “body” of such a camera; here they resort to a simple process. The future neck is made from any hard paper material (such as cardboard) and coated with a thick layer of fireproof clay. Don't forget to make a thin layer of paraffin between the form-building paper material and the clay.
- In the second stage, the future chamber is dried for at least a day, and then placed in the oven and calcined at a low temperature of about 90-110 degrees Celsius. After this stage, the paper component can already be removed.
- The final firing of the structure occurs over an open fire at a temperature of about 900 degrees, then it is cooled under natural conditions. You need to wait until the camera cools down completely.
- After the workpiece has cooled, it acquires the properties of stone and becomes very hard, like a brick. Doors that open horizontally are attached to it.
- The final stage can be called wrapping the future furnace with nichrome wire, with a cross-sectional diameter of about 0.75 mm. The entire structure will require about 18 meters. To prevent short circuits during winding, it is better to immediately coat it with raw clay. We make two holes in the housing, one for a thermocouple (to measure temperature), and the second for visual control.
A self-made chamber for hardening a knife.
At this point, we can say that the furnace for heating metal is ready. As you can see, there is nothing difficult in making a muffle furnace for your home.
Release of blanks
High temperature treatment creates internal stress in the metal. This negatively affects the flexibility and strength of the metal. The workpiece becomes fragile - if the pressure is incorrect or skewed, it begins to crumble or burst.
In order for the metal to become more ductile, a tempering procedure is carried out - bringing the temperature of the workpiece to the point of maximum ductility of the metal and its gradual, natural cooling. To do this, the metal is heated in a muffle furnace to the required temperature, and then, with the door closed, it is gradually cooled for 2-3 days.
It is quite simple to check whether the blade has been properly hardened - just run a file over the blade - if the blade slides, the hardening was successful, but if it touches the metal, then the procedure will have to be repeated.
Hardening a knife at home
It is very good if there is a furnace for hardening steel. You can even purchase it in a specialized store, but the pleasure is not cheap. So how to harden a knife at home without a special muffle furnace? There is a way out, and to be honest, there is more than one.
But first, you need to conduct small experiments and remember in detail all your actions. If the result is positive, then the same manipulations can be performed with a real part.
This tricky technique will help you get better at working on small workpieces and acquiring the skills to heat and cool a blade. We must not forget that different alloys require different temperatures and cooling methods, otherwise cracks and brittleness of the workpiece cannot be avoided.
Heating source
Basically, several sources of heating the workpiece can be distinguished. It is better to exclude the muffle furnace, since according to all expert estimates, it is the best in this matter. But we will try to evaluate other fairly common heating devices.
The forge copes quite well with heating workpieces. A blowtorch or propane torch may be suitable for this purpose; by trial and error, you can achieve the desired result. By the way, for these two options, you can build a small oven from refractory bricks, and the process will be simpler and the result will be positive.
Fireproof brick furnace for hardening a knife.
Well, the last, one might say, completely unacceptable source of heating is a gas stove. If you want to spoil something, use this option.
Temperature
As has been said many times, every steel requires a certain temperature. In production, special thermometers are used for control, but in everyday life you can use a magnet (also mentioned above).
Dark spots should not be allowed; this is overheating, which will subsequently ruin the entire workpiece. If the master has enough experience, then he can determine by eye by the color of the hot metal whether the workpiece is heated enough or not. There is also such a hardening method: the part of the blade that is sharpened three times is heated to a temperature of 285 degrees, and the cutting part is heated only once, and to the maximum 950-1000 degrees.
The heating modes for each brand of steel are different:
- low-carbon steel requires heating in the range of 757-950 °C;
- steel with a high carbon content is sufficient at 680-850 °C;
- but alloying grades require from 850 to 1150 °C.
There is a whole table of colors, colors of incandescence. For example: brown-red 580-650 °C, dark red 780-830 °C or orange 950-1000 °C. So be careful and do not overheat the workpiece.
Cooling and holiday
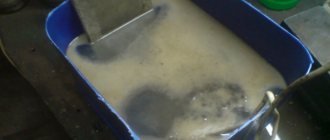
For proper hardening, you need to maintain the correct temperature during cooling. It is preferable to cool stainless alloys in mineral oil with additives. And low-alloy steels, in aqueous solutions with salt and other additions.
Cooling the knife with mineral oil with additives.
There are many cooling options:
- blades with double-sided blades are dipped first into oil and then into an aqueous solution;
- Red-hot workpieces are dipped into the oil three times, each immersion taking a little longer than the previous one. And only then they lower it into the water;
- To give elasticity to the middle of the blade, this part is heated, then dipped in boiling water for 2 hours, and then in ice water.
With all these manipulations, it is worth considering that metal cools twice as fast in oil. A workpiece that has undergone hardening is subjected to a special process called tempering to restore the crystal lattice of the metal structure. There is nothing complicated in this procedure: the blade needs to be warmed up for a couple of hours. For alloy steel 270-320 degrees, for plain steel 150-200 degrees.
Determining the quality of work
Having gone through all the stages described above, I would like to know what will come of it. How to check the quality of the work done is quite simple:
- sharpening should last for a long time;
- the blade should not wrinkle or crumble when in contact with dense materials;
- the blade must have plasticity, bending and restoring its previous shape;
- a normal tool, with regular sharpening and constant use, should last at least 10 years.
Don't forget that true mastery comes with experience. And experience, as we know, is the son of difficult mistakes.
If you didn’t succeed the first time, or the second, then be persistent - the tenth time it will turn out no worse than others. Study the material, practice and sculpt true beauty.
Previous
Making knivesHow to make bevels on a knife at home
Next
KnivesHow to choose a knife for your purposes
Etching the blade and creating the handle
Main stages of glass production: overview + video
The knife, which has passed all stages of heat treatment, is polished with a wire brush, sandpaper and a felt wheel to make the blade smooth. Iron oxidation can be prevented by etching - immersion in ferric chloride. As a result, the material is covered with a matte protective film. In the absence of ferric chloride, you can wipe the blade with vinegar or use gruel from grated raw potatoes for etching. The film covering the etched steel protects the surface of the knife from rust, so you should avoid damaging its integrity.
When installing a dial handle, the individual parts are assembled and then tightly compressed on the thread. A bolster is placed on the shank, which can be machined from aluminum, brass or duralumin. To fasten the side plates, wooden or made of bone, rivets are used; they can be reinforced with epoxy resin. When using leather, special glue is applied to the material and tightly wound around the handle. Before attaching the deer antler to the tang, the hole drilled in the bone substance is filled with epoxy resin. To give the handle a finished look, its material can be sharpened, sanded and waxed.