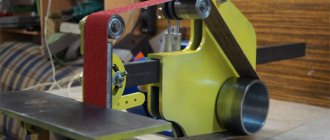
A grinder is a grinding machine used for processing and sharpening metal, wood and plastic products. It all depends on the rigidity of the tape. The stiffer the tape, the more durable the material can be processed. In addition to final sanding of products, the grinder can also remove rust from the surface. A necessary tool for the household. The price of finished products varies from 20 to 170 thousand rubles. But the product can be made at home. It is only important to understand the details and power of the device.
Principle of operation
The design consists of three main elements.
- Motor.
- Sanding belt.
- Rollers. There are main and secondary ones.
The main element of the mechanism is the motor and drive; they supply torque to the rollers that spin the tape. You can make components from metal, plywood and plastic.
Grinders are divided into stationary and manual. The design of the stationary grinder includes a table with clamps that can be installed anywhere. The table can also change the angle of inclination and rotate 180 degrees. An engine from a washing machine, drill, or grinder is suitable as a motor. The main thing is the number of revolutions.
The productivity of the machine depends on the design of the belt mechanism and the number of workpieces. If you plan to use a long belt, then you need a powerful motor.
The products also provide clamps in case the tape tension weakens. The clamps are ordinary bolts or a spring mechanism. The rollers in the finished product should be installed vertically to each other. If you change the location of the rollers there is a risk of tearing the tape.
It is very important to choose the right tape. Since the speed of sharpening the product will depend on this element. Tapes are distinguished by length, width and grain size.
The grinder belt must meet the following conditions:
- The material from which the tapes are made must be elastic.
- It is better to use a fabric base.
- You need high-quality abrasive material.
- Must withstand speeds of more than 1500 rpm.
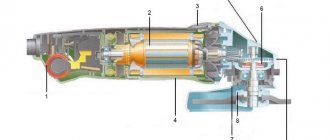
When working, it is necessary to keep in mind the physical properties of the parts being processed. Since the speed of the product depends on this. When manufacturing a grinding machine, motors from electrical appliances are used as the “heart” of the device, for example, a motor from a washing machine or an angle grinder.
We make the mechanism
The most important element, in addition to the motor from the washing machine, is a homemade movable unit, with the help of which the belt is tensioned and its position is adjusted. You can buy a ready-made moving mechanism for such a machine or order its production from craftsmen, but then the cost of the finished product will be close to the price of a factory grinder, which, of course, is unacceptable. So we will try to make this important part with our own hands. What materials will be needed:
- several pieces of corner 30 mm, one long - 40 cm and two short ones 15 and 25 cm;
- two long bolts and a dozen nuts;
- hairpin;
- bolt spring;
- metal strip 30x100 mm;
- short bolts, washers, nuts.
The roller parts had to be turned on a lathe. You can see them in the picture below. Two bearings, a nut, the roller itself and a kind of shaft.
Accordingly, the tools we will need are: a lathe, an angle grinder, a drill, electric welding, wrenches, pliers and “angelic patience.” Let's do the following. We weld the corners and plates to each other as shown in the figure below. We insert a bolt with a spring into the end of the structure. We will need this bolt to adjust the tape tension.
Next, drill a hole in the upper part of the main corner, insert a short bolt into it and screw on a short piece of the corner. This piece should move slightly from side to side and a roller with a bearing mechanism will in turn be attached to it. The movement of this piece of corner will subsequently allow you to adjust the position of the tape.
We assemble the roller mechanism and screw it to the corner. You don’t need to tighten it too much so that the roller rotates freely, but the roller and bearings shouldn’t come off either, so we weld the bearings to the roller and tighten the locknuts onto the ends of the shaft. Under the roller in the corner you will need to drill another hole and fasten a pin in it, at one end of which you need to tighten two nuts, and the other end will rest against the main corner
It is very important that the stud twists and unscrews along the thread
A short corner welded perpendicular to the main corner with a piece of chipboard screwed to it serves as a guide, and most importantly protects the master’s hands while adjusting the movement of the belt
This is important for safety, since the homemade grinder is adjusted by a pin, which is located dangerously close to the actively moving belt. Well, that’s all, the mechanism is ready, now you can connect the engine, put a bushing on its shaft, connect it all to the moving mechanism and start testing
Motor and shaft
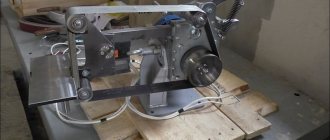
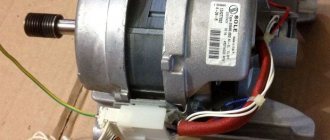
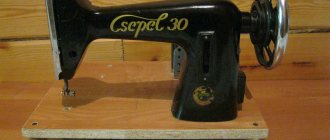
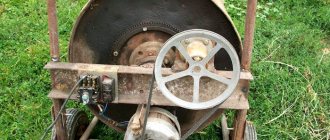
We have already talked quite a lot about how to connect the motor from a washing machine and will not repeat it. Let's move straight to the next and final stage of assembling the grinder. Let's connect the motor from an old semi-automatic washing machine. We protect the motor housing with a sheet of thin sheet metal and secure it to a suitable frame. In our case, we welded the frame from angles, but you can mount the engine directly on the workbench.
As you can see, we took the motor with a long shaft, but if you have a regular motor from a washing machine with a short shaft, you will have to come up with something and increase its length. In the picture above you see that the motor shaft is fitted with a special wooden bushing, which we turned on a machine. We will put the grinder tape on this sleeve. We will attach the moving mechanism that we made earlier just above the engine. The result is a machine that you can see in the picture below.
In conclusion, we note that it is not easy to make a grinder from a washing machine engine, but if you have the desire and your hands are itching, then you can spend a couple of days and make something similar to what was presented to your consideration in this publication. The main thing is not to rush and remember about safety precautions, good luck!
Share your opinion - leave a comment
Grinder with washing machine motor
We will need the following materials and tools:
- Motor from a washing machine.
- Abrasive tape.
- Two steel plates.
- Ears, bolt, washer.
- Video clip.
- Welding machine.
We install two plates on the motor. We attach washers to the plates. These mounts will ensure reliable installation of the engine on the frame.
We use 610x45 mm tape. The bolt, roller and ears are needed for the mechanism that controls the position of the rollers. We cut a hole in the metal plate for the motor. We weld a metal plate to the frame. We also attach a corner for the engine so that it is firmly fixed to it. We mount the pulley on the motor shaft. We sharpen the rollers; bearings will be installed in them.
We select a place to mount the main roller holding mechanism. We straighten the overall structure so that the abrasive belt is as tight as possible.
We drill a hole for the bolt, which subsequently controls the entire installation. This will allow you to adjust the tension level of the tape. It will also allow you to control the angle of the rollers.
A homemade product with a washing machine motor allows you to sharpen small parts.
Materials used
It didn't take much to make:
- motor from a typewriter;
- its original starting capacitor;
- part of the sheet metal covering of the machine;
- 4 rubber feet from the washing machine;
- plywood sheet;
- a 5 cm piece of thick-walled tube with an internal diameter of 14 mm;
- 2 identical bearings;
- glass sealant;
- sheet metal with a cross section of 8 mm;
- corner 63x63 mm;
- profile pipe 40x40 mm;
- profile pipe 30x30 mm;
- extended nut;
- steel strip with a cross section of 10 mm;
- furniture gas shock absorber;
- power button;
- plastic plugs 30x30 and 40x40 mm;
- bolts and nuts M12, M10, M6 and M5.
The main detail of the entire structure:
Grinder designed for drill
This installation is a special attachment.
We will need the following tools and materials:
- Metal sheet.
- Bearings.
- Shaft with gears.
- Abrasive tape.
We cut out two plates measuring 110×250 millimeters from a metal sheet. We drill several holes in the plates. On the studs we cut a thread of 120 millimeters. We attach the rollers to the studs and secure them with bolts.
We stretch the abrasive tape between the metal plates. We install the homemade product on the frame, and secure the drill with clamps.
Using this grinder you can sharpen knives or other flat products.
Definition and purpose
The unit, which is based on a drive device that drives the abrasive belt, is called a grinder. They are classified according to the following criteria:
- purpose;
- areas of application (industrial or for individual use);
- nature of execution (stationary, manual);
- production method (industrial devices or self-made ones).
The main tasks that can be solved using the machine include:
- removal of roughing residues (burrs, remaining sharp edges, various protrusions);
- surface grinding;
- removal of the effects of corrosion and old paints and varnishes;
- sharpening knives and cutting tools.
All of the above tasks are solved by a professional grinder. This machine has advanced capabilities. They are usually performed in combination with several abrasive devices (for example, a belt and a disk).
Grinder from a grinding machine
In this case we will need a grinding machine.
We assemble the base for mounting the machine.
It is necessary to make a hole in the design for wiring. And now the grinding machine is ready.
We glue the tape for the grinder with our own hands
We will need the following materials:
- PVA glue, regular super glue will also work.
- Clamps.
- Sandpaper.
Determine the required width of the tape. Cut off the required amount of paper. We remove the abrasive layer from the edges of the tape. We glue a piece of fabric onto the empty spaces and use clamps. We wait for it to harden, then tear off a piece of fabric. This is what you should get:
Then use finer grit sandpaper. And glue it flush to the abrasive part.
We made a reliable and durable grinder belt ourselves.
To choose the right belt for the machine, you need to correctly calculate the size of the pulley, focusing on the engine speed and the rotation speed of the belt. If the belt moves slowly, it may damage the surface being processed during processing. And if the tape is fast, the abrasive part will be erased without treating anything.
Console left
The console is easy to assemble. The parts are welded according to the drawing. First, one pipe must be bent using a manual pipe bender or simply clamped securely in a vice.
After welding, clean the seams and blacken them to prevent corrosion. Or you can paint it with enamel.
This is what you should end up with.
Homemade grinder assembled without tape
If you need to change the maximum grinding speeds, then, as an option, you can change the diameters of the rollers.
The diameter of the drive pulley is calculated using this formula: D=V x 1000 x 60 / π x N
Or use a frequency regulator to change the speed. There are many options for implementation, the main thing is the desire to do everything with your own hands and not be afraid of difficulties.
Rollers for grinder
This is probably the most difficult part of the job. As a rule, four rollers are made for a conventional draw frame. With sizes from 60 to 160 millimeters. The rollers are made of metal, steel or titanium are best. The size of the rollers depends on the size of the abrasive belt. The structure itself is made of metal or wood. The main thing is to ensure good fastening of the rollers to the working base. The rollers themselves should have a “barrel” shape, so they hold the tape better. In this case, it is advisable to create a drawing. It is possible that you will turn to turners for help. To achieve reliable and high-quality operation of the grinder, do not skimp on the production of rollers.
We looked at how to make a grinder yourself using different types of drives. Many drawings are designed for a specific task, but it is not a fact that they will suit you. You can purchase components at hardware stores or make them yourself. When working with a grinder, follow safety precautions. When manufacturing some parts, such as rollers, you should not skimp on them. Sometimes it is better to order them from professionals.
Homemade mechanisms for angle grinders
In order not to look for ready-made attachments, you can try to make them yourself. There are different options for making such devices, which will be discussed below.
From plywood
First of all, let's consider the option of how you can make a simple grinder from an angle grinder with your own hands. The simplest version of a grinder is made from an angle grinder, two rollers, a tension mechanism and a plywood base.
The most difficult part of this design is making the rollers. It’s good if your home workshop has a milling machine or a hand router. To do this, a suitable blank is turned from plywood with a milling machine, processed on a grinding machine, and bearings are pressed into place.
A base is cut out of the same plywood, in which a hole is cut for the grinder. Places for the rollers are marked, after which the angle grinder is secured and the wheels are mounted. You must first treat the sanded wheels with varnish. After this, the entire system is assembled, and the grinder is ready for use. The design of the device is clear from the presented photograph.
Sheet metal
If the workshop has a welding machine, and a turner you know can grind out the necessary rollers, then you can make a polishing machine from leftover metal.
Such a device will be no worse than the factory one. It will take a lot of time to make, but it's worth it. Before you start work, you need to develop working drawings or download them from the Internet. By assembling a mechanism not according to the drawings, you may not achieve the desired result, or the resulting device may turn out to be a source of increased danger.
First of all, it is necessary to accurately mark the bed. As an example, we use the following device drawing:
Using a milling and drilling machine, drill holes according to the markings. Then you need to prepare the tension bar, as shown in the photo.
Grind the rollers, and only then begin assembling the mechanism. The result is a universal attachment, as the power unit of which you can use not only an angle grinder, but also another suitable electric motor. The finished look is shown in the photo below.
From the remains of a professional pipe
Having the skills of a welder, you can easily convert the grinder you have in your home workshop into a grinding machine. Enough for this
Homemade grinder
- weld scraps of a corner or square pipe in the shape of the letter y;
- Attach suitable rollers to the ends;
- Screw the drive shaft to the shaft of the angle grinder;
- mount the sanding paper, and the device is ready for use.
This grinder can perform various operations:
- clean up metal irregularities after welding;
- perform complete grinding of the part;
- process wooden products;
- carry out final, finishing processing before coating the part with varnish;
- handle uneven concrete walls.
