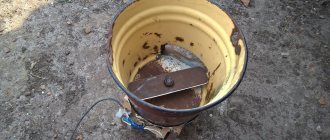
Often a situation arises when it is necessary to sharpen a tool or sharpen knives. To perform these works, a sharpening machine is best suited - it is also called a sharpener or an emery machine. This is the simplest power tool, which consists of an electric motor and an abrasive wheel. There are many options sold in the retail chain, which differ from each other in price and manufacturer, but are designed to perform one function - sharpening a cutting tool. Do not rush to purchase a factory-made electric sharpener: any home craftsman can make it with his own hands if he has the necessary spare parts.
Where to start making?
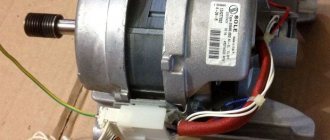
Homemade emery can be made at home, since there are quite a lot of recyclable washing machines. At any scrap metal collection center there will always be a dozen used household appliances. Engines rarely fail; more often, leaks occur or electronics break down.
The electronic boards used are comparable in cost to the machine itself. Therefore, after replacing the boards two or three times, users get rid of the device. They believe that it is better to buy a new one for regular use, and the old one is sent to a landfill.
For a nominal fee, it is not difficult to become the owner of several washing machine motors. If necessary, you can check them on site. You will need:
- a small piece of wire with a plug;
- some insulating tape;
- pliers;
- knife for stripping ends;
- switch.
Attention! The design provides for the use of an asynchronous motor. It is turned on using capacitors. Therefore, when removing the electric motor, you also need to remove the capacitors. Their connection diagram is indicated on the engines.
Homemade concrete mixer
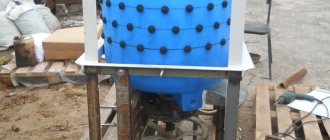
If you have started a small renovation that requires, for example, plastering the walls, a concrete mixer will come in handy. Once again, washing machine parts will come in handy.
As a result, you will receive a compact device with low power, which you won’t mind throwing away after the repair work is completed.
As a container for concrete, you can use the same drum with pre-sealed holes for draining water. It is best to use parts from a front-loading machine; there will be almost nothing to redo. To strengthen the body, use a metal corner, and for convenient movement of the concrete mixer, equip it with wheels. The main difficulty in the design is the manufacture of a “swing” for the correct tilt and subsequent pouring of concrete. How to do it correctly in the video:
Free video on washer dryer repair
Welcome to my free washer and dryer repair website
The purpose of this website with washer dryer repair videos is to help you fix your washer or dryer yourself. Most repairs can be accomplished by replacing the part or parts that are preventing your washer or dryer from working properly or at all.
The most important part when attempting repairs is knowing how to diagnose which part is causing the problem.
My free washer dryer repair videos will show you what parts you need to check depending on the problem your washer or dryer may be having.
These videos will show you what parts you need to check depending on the problem you may be having with your washer or dryer.
They will show you how to inspect parts, how to remove parts, and how to install new replacement parts.
Most repairs are so simple that you'll be surprised at how much you'll have to pay a repair company to simply replace parts.
My washer dryer repair videos will save you hundreds of dollars by showing you how the repair is done. It doesn't matter if they are mechanically tilted or not, if you follow my instructions in the video you can make the repair.
This site will help you save money and time by showing you how renovations are done. I suggest you watch the videos several times that correspond to the problem you may be having with your washer or dryer and then decide whether you want to make the repair or not.
Click the link for your washer or dryer brand and you will be taken to a page with the information you need.
Top loading washing machines
Whirlpool Direct Drive Washing Machines
Also can be used for Kenmore - Estate - Roper Kitchen Aid - Inglis Kirkland - Crosley - Maytag - and many other washing machines
© Copyright 2022 2020 Angel Acevedo. All rights reserved
DIY emery assembly steps
Step-by-step assembly of electric emery with your own hands. Attaching the motor to the base of the machine:
- The base of the machine is a 50x50 cm chipboard board. The engine is placed in its middle part and the dimensions of the engine are outlined with a pencil in order to know approximately where it will be installed.
- The engine typically has four studs or long screws that hold the engine housing together. Two adjacent studs will be the points where the support brackets will be screwed.
- Emery support brackets in the shape of the letter “P” are made from two pieces of galvanized steel 5 cm wide and such a length that the distance between the legs is equal to the distance between the head and the screw nut, and the height of the legs is approximately 6 cm. Holes are drilled in the legs of each bracket for a screw, in the long part of the bracket there are two holes for self-tapping screws.
- Unscrew the two adjacent screws, put the brackets on the petals of the body covers and put the screws back in place.
- The staples are turned so that their long sides lie with each other in the same plane, and the screws are tightened.
- The engine is installed in the previously outlined location on the brackets and screwed with self-tapping screws to the emery plate.
Attaching the trigger circuit and toggle switch to the base:
- Take a liter plastic container with an acrylic paint lid (or similar) and screw the lid next to the engine so that the container can be inserted into it, turning the latter upside down.
- A cut is made on the side of the bucket for the wires, and a toggle switch is installed at the bottom of the bucket with the switch lever facing outward.
- All capacitors are glued to the lid with hot glue and connected by soldering to the toggle switch and power cord.
- The bucket is put on and snapped onto the lid, after inserting the wires into a pre-made slot.
Making a flange for attaching a sharpening stone:
- Two circles with a diameter of 60 mm and one circle with a diameter of 32 mm are cut out of plywood with a jigsaw.
- In the middle of each circle, a hole is drilled with a diameter equal to the diameter of the engine working shaft.
- Two circles of different diameters are combined with holes and connected to each other using glue and two self-tapping screws.
- In the resulting part, at the end of the larger circle, a through hole with a diameter of 3 mm is drilled to the center and a self-tapping screw (locking screw) is screwed into this hole so that it is visible in the central hole.
- 2 mm of steel is removed along the motor shaft on one side so that the locking screw resting in this place does not allow the flange to rotate.
- The flange is placed on the motor shaft and secured with a self-tapping screw.
- A stone is placed on the flange and tightened with self-tapping screws through a wooden circle.
Making a protective casing:
- The protective casing consists of two parts, both of which are truncated cones. The distance between them should be 2.5 cm wider than the thickness of the grinding wheel.
- The side parts and the end of the casing are made of galvanized steel and connected to each other by soldering with a powerful soldering iron.
- In one place of the end, a grinder is used to cut out a window for the working area; on the side, a vertical slot is made with a width equal to the diameter of the engine shaft so that the casing can be put on top.
- The casing is attached to the chipboard using emery using self-tapping screws.
Mini sharpening machine
An electric sharpener is sometimes necessary if the master is engaged in modeling: during work it is often necessary to sharpen small parts. A large sharpener is not suitable for doing small work, so they often make mini-emery with their own hands. The assembly algorithm is as follows:
- take the motor from a computer hard drive or a children's toy;
- the tension sleeve of the spoke from the moped is soldered to the engine axis;
- a small grinding wheel is screwed to the shaft with a screw and washer;
- connect the power supply;
- fix the device on the bed, and the emery is ready.
Often, electric motors from a faulty sewing machine are used for these purposes. The advantage of this machine is that the motor has a speed controller, and this expands the capabilities of the device. It can also be successfully used as a polishing machine.
Connecting (checking) the motor
Naturally, before you start assembling something, the electric motor must first be connected and tested. In old washing machines, there are two versions of motors: an older and high-quality one, it has a closed housing with an impeller, with two supply terminals, and a newer one - four terminals, no impeller, cooling occurs through holes in the front and back, through which the windings are visible.
The old version does not require any capacitors for starting - the starting winding is cleverly connected and disconnected inside the engine using a special mechanism. Thanks to this, no connection difficulties should arise: both outputs are connected to a 220 volt network. The disadvantage of such a motor is that the direction of rotation of the shaft is preset by an internal connection and cannot be changed. Typically the direction is clockwise and therefore it will be necessary to use a left hand thread to attach the stone.
The newer version has four terminals of two windings: working and starting. You can distinguish them using a multimeter: the resistance of the working winding is about 10 Ohms, the starting winding is about 40 Ohms. Perhaps the resistances will differ from those indicated, but only slightly. The starting winding must be connected through a 4-5 µF capacitor for a voltage of at least 400 V. I have come across composite capacitors for similar motors: two connected in series, 10 µF each at 300 V. That is, in this way the maximum permissible operating voltage of the finished capacitor was raised. Using a composite capacitor of two with low voltages (at least 300 V) is possible, but not advisable. Capacitors should be non-polar!
You can check the engine without capacitors and starting winding at all: voltage 220 V. supplied directly to the working winding. With this connection, the motor will start without load in any direction. To set the direction of shaft rotation, you need to connect the starting winding and capacitor. For emery, you need to set the direction counterclockwise. The connection diagram is shown below, if the shaft rotates clockwise, you need to change the connection of the starting winding.
In many publications on the network I have seen a statement that the starting windings do not need to be connected at all, and the direction of rotation must be set manually when starting. Allegedly, if the starting circuit is used, the engine will burn out. I can only explain these speculations in one way - one wrote something stupid, and the rest were copied from the first. I can say with confidence: the starting winding can and should be connected through a 4-5 uF capacitor, the starting circuit should always be connected, without any additional buttons. And if the motor is working properly, such a connection is safe and completely harmless for it.
Result of work
The sharpener is ready.
The result is a sharpener like this, there are a lot of uses; if desired, you can make polishing wheels, emery wheels, etc.
How to make a flange with your own hands?
The most difficult task of the entire project was attaching the sharpening attachment to the motor shaft of the washing machine. The shaft does not have the required threads, and its diameter does not fit the hole in the stone. To eliminate the discrepancy, it is necessary to make an attachment for the electric motor.
Dictionary of kitchen appliances
This kitchen appliances dictionary will be very useful in your daily life.
Listen to the video to hear the correct pronunciation—in American English—and practice saying the words out loud during the pauses after each word.
Listen to kitchen appliance vocabulary
Get your free vocabulary ebook
Solving puzzles is a great way to improve your vocabulary. This book contains over 25 crosswords, word searches and puzzles covering twenty (20) different topics.
Along with your FREE eBook, you'll receive my weekly newsletter with tips, tutorials, and special offers just for my subscribers.
Enter your name and email address below to receive your free copy.
Kitchen Appliances Picture Dictionary
Blender: Used to grind food into smaller pieces and turn soft food into liquids.
- Many people make " smoothies " by blending ice and fruits/vegetables into smooth, ice-cold drinks.
juicer: a machine for squeezing liquid from fruits and vegetables.
bread maker/bread maker: a machine for baking and baking bread (including kneading bread).
coffee grinder : a machine for grinding coffee beans into small particles for use in a coffee machine.
coffee maker/drip coffee maker: a machine that brews coffee by passing hot water through ground coffee in a filter.
deep fryer: a machine that heats large quantities of oil and is used to cook food and vegetables (such as French fries).
Electric Bread Slicer: An electric tool for slicing bread easily.
Food scales: a device for measuring the weight of food products.
hand mixer: an electric tool that you hold in your hand to mix foods.
Stand Mixer: A self-contained mixer with many different settings for mixing, kneading and blending foods.
microwave oven: which quickly heats and cooks food using electromagnetic radiation.
slow cooker: an appliance that cooks food on very low heat for a very long period of time (hours).
gas stove and oven (left) / electric stove (right): appliances that use electricity or gas to cook food at high temperatures. Food is heated either inside an oven or on the stove in pots or pans.
electric burner: connects to the stove or hob. It reaches different temperatures during the cooking process.
Gas Burner: Releases varying levels of gas to heat food placed in pots and pans.
Hood: An appliance on top of a stove that uses a fan to draw in steam, smoke, and grease from the air from cooking.
Refrigerator and Freezer (Upper Compartment): Store food in a cool place (refrigerator) and very cold place (freezer) to prevent food from going bad (spoilage).
sandwich maker: prepares hot sandwiches by pressing them between two heated plates.
toaster: an electrical device for making toast by browning and toasting bread.
pasta making machine: A device for shaping pasta dough for various types of pasta (e.g. spaghetti, linguine, lasagne)
steamer: a machine that steams food from boiling water.
waffle iron: a machine for making hot waffles.
Dishwasher/Dishwasher: Cleans and dries dishes, glasses, cups, utensils, plates, bowls, pots and pans, etc.
washing machine: A washing machine that washes clothes and other fabrics and has different cycles for different types of fabrics. The machine also spins clothes after washing to remove excess water and allow them to dry faster.
Adapter
This is the only detail that cannot be made by hand. You will need a lathe and, accordingly, a person who knows how to work on it. What is the adapter for? The fact is that the size of the motor shaft is about 14 mm, while the mounting hole of the emery circle, as a rule, has a diameter of 32 mm. This means that their “direct” connection is absolutely excluded. The adapter seems to increase the washing machine motor shaft to the required size.
To make it, you will need a piece of round steel, approximately 65 mm long. and diameter 60 mm. The last figure is due to the need for the so-called flange - a fixed washer on the body of the part, into which a circle of emery rests on one side. Its thickness must be at least 4 mm. A seat with a diameter of 32 mm is machined in front of the flange. Next comes the “M20” thread, onto which the nut that secures the circle will be screwed.
For mounting on the engine, a hole is made in the adapter body with a diameter equal to the shaft. Then everything depends on how the pulley was fixed on the washing machine. There were two main options:
- Using a thread on the motor shaft and a large nut.
- Bolt 4, screwed into the adapter body, perpendicular to the longitudinal axis of the motor.
The part being manufactured must have one of the following mounting methods, depending on the type of engine.
Sometimes, home craftsmen try to minimize costs and make an adapter with a flange themselves. Most often, a pipe with suitable internal and external diameters is used as a base. You shouldn't do this without proper experience. The fact is that it is very difficult to select a suitable workpiece, so “beats” and distortions are inevitable. It will be unsafe to work with such emery. You should not save on your health, especially since the cost of a master’s work will not exceed 500 rubles, and if the part is made from its own material, it will cost even less.
Another adapter diagram for making emery from a washing machine engine
How to make homemade emery for your own workshop
Often a situation arises when it is necessary to sharpen a tool or sharpen knives. To perform these works, a sharpening machine is best suited - it is also called a sharpener or an emery machine. This is the simplest power tool, which consists of an electric motor and an abrasive wheel. There are many options sold in the retail chain, which differ from each other in price and manufacturer, but are designed to perform one function - sharpening a cutting tool. Do not rush to purchase a factory-made electric sharpener: any home craftsman can make it with his own hands if he has the necessary spare parts.
Simple DIY machine
The step-by-step process for making a small sharpener that can be placed on the wall is shown below.
| The sides of the future sharpener are cut out of a sheet 3...4 mm thick. |
| The remaining elements that will be placed in front of the machine are cut out from the same sheet. The auxiliary stop is cut out. |
| Holes are drilled in the sidewalls according to the attached diagram of their location. Auxiliary grooves are made. |
| Holes are also drilled in the front wall. The entire structure is welded according to the attached installation diagram. |
| Approximately you should get a similar device. |
| To install the abrasive stone, you need to machine the adapter sleeve according to the proposed drawing. It will be put on the shaft of the electric motor from the washing machine. |
| After assembly and painting are completed, the small-sized machine is attached to the wall. |
| To make it more convenient to work on the machine, a light source is placed nearby. |
Instead of an abrasive stone, you can install:
- mechanical brush from an angle grinder. It is used to remove paint and rust from the surface of workpieces;
- felt circle. Using GOI paste, craftsmen polish small items.
What to do after making the necessary parts?
Once all the necessary components are ready, begin assembling the emery. An adapter, a grinding wheel, a flange are put on the shaft, a nut is screwed on and the whole thing is secured with a bolt. The appearance of such a homemade emery is shown in Fig. 1. To connect to the network, you may need a long two-core wire and an electrical plug.
If the direction of rotation of the motor shaft needs to be changed, this is done by switching the corresponding windings of the asynchronous motor from the washing machine. If necessary, you can contact a familiar electrician to do this.
If the motor has 4 ends, then this will be quite simple: just identify the windings with a tester and change the ends on one of them.
When working with this device, you must follow safety precautions and wear safety glasses, etc.
Materials and tools for making emery with your own hands:
- Grinding and polishing wheels.
- Electric motor from an old washing machine.
- Cylindrical rod made of tool steel.
- Sheet round timber for flange and nut (metal).
- Bolt.
- Lathe.
- Electrical cable and plug.
- Vise.
- Tap.
- Calipers.
- Paper and pencil.
Making an emery tool for home projects is quite simple. The main thing is to take into account all the above recommendations. The homemade machine is so simple that it starts working right away. You can sharpen drills, knives and scissors at any time.
Circular
First, you will need to build a frame from a square pipe in the form of a small rectangular table. In the center of it it is necessary to weld ears for the shaft with fastening for the circular. A tabletop or cut-out sheet steel plate should be screwed onto the top of the frame. Under the upper parts of the frame, you will need to weld a base for the engine from an old washing machine with installation later .
The running gear is represented by a belt drive . Both pulleys have grooves on the motor and circular shaft, and the belt has grooves. This prevents the belt from flying off the pulleys during operation. For ease of use and transportation of this circular saw, two wheels from an old cart are attached to the legs of the frame on one side, and on the other side there is a convenient handle of the required length. Operating tips include safety rules when working with a circular saw, as well as the fact that you should always check the belt tension. This will keep your fingers and the rest of your body intact.
Direction of movement of the emery
First you need to determine which winding is intended for starting the engine, and which for the main work. To do this, you will need a tester that will help measure the resistance. In the first case, the value should reach 30 Ohms. The resistance in the working winding is much lower and is 12 ohms.
The winding responsible for the working process is connected to the electrical network. The starting winding is connected on one side to the coil. On the second side it is connected for a short period to the winding terminal. A relay is used for this. The engine starts.
In this simple way, by changing the ends of the winding necessary to start the motor, the direction of movement of the rotor changes. You can even do without a relay. In this case, you need to manually turn the sanding wheel in the desired direction.
How to set up an emery machine and make a protection
How to secure the sanding machine and put protection on it? You can screw it to a workbench.
To do this, use the bracket that is in the washing machine. To reduce vibration during operation, rubber gaskets are placed on the corner, which can be made from a piece of hose.
If the device is installed on a wooden workbench, cover it with a sheet of metal on top to prevent fire.
For your own protection while using the machine, install a metal arc over the disk. You can also enhance the protection by attaching 5 mm thick plexiglass to the pendants. The glass can be raised and lowered using hangers.
Safety precautions when working with a homemade device
When making power tools yourself, you should strictly follow safety precautions. If industrial units are equipped with protective equipment, then in home-made devices you will have to make them yourself. You should be aware that operating a sharpener from a washing machine engine without a protective casing is prohibited. It can be made from sheet metal 2.5 mm thick.
The working wheel experiences strong vibration during sharpening. To prevent the sandpaper from being destroyed during work, when installing the stone, cardboard spacers are placed under the metal washers. You should also make sure that the disc has no cracks.
While working, you should stand to the side of the circle so that if it breaks, the fragments do not fly towards the operator.
Which engine is suitable for making emery?
Wondering what engine you can use? You can use any motor from a washing machine, even the brands “Vyatka”, “Riga” or “Volga”. The main thing is that it has sufficient power.
For normal operation of the sharpening machine, a power of 100-200 W, with 1000-1500 rpm, is enough. For particularly large parts, a 400 W motor is suitable. But if the engine speed reaches 3000 rpm, it needs to be adjusted or a very durable disc installed.
What you need to create emery from a washing machine motor
To make a simple sharpening machine you will need:
- washing machine motor;
- flange;
- sleeve;
- attachment to the electric motor (emery wheel);
- casing for protection;
- support;
- starting device.
When purchasing, it is better to choose a product with two circles: a finishing and a rough version.
You also need to make an adapter with a flange. Since the size of the shaft does not match the hole of the grindstone, an adapter must be made. It can be done on a lathe, having previously determined the dimensions and completed the drawing. On the diagram you need to mark the diameter of the shaft and the emery hole.
You can make a flange for the shaft yourself. A piece of pipe with a diameter of 32 mm, no more than 200 mm in length, will do. It should fit perfectly on the motor shaft. On one side of the flange there is a thread, the direction of which depends on the direction of movement of the shaft. When sent to the engine, the other end of the flange is heated and pressed.
After installation, be sure to secure the flange. This can be done by welding or bolting, drilling the flange with the shaft.
The shaft adapter is ready. It remains to install the element for sharpening the cutters.
How to choose a motor for a sharpener
It is advisable to assemble some tools with your own hands. Most home DIYers know that an electric sharpener is too expensive. Therefore, craftsmen independently assemble this product from a frame with an electric motor, but choosing the right power plant is too difficult. This is worth doing for the following reasons:
- Models offered on the market disproportionately increase their cost as power increases. Usually, almost the most powerful modification is required, but it simply costs unrealistic money.
- The product has too many unnecessary accessories that increase the price significantly. These are various curtains for the button, protection that interferes with operation and a beautiful casing for the engine, which, to be honest, is completely unnecessary.
- There are often gaps in product lines. You need some power with the ability to hook a variety of circles, but the manufacturer does not offer what you need.
All these troubles can be removed if you select the engine yourself. This is not difficult to do if you have certain skills. Now you can quickly create a high-quality product, but for this you will need to apply a little intelligence and your own working hands.
What qualities should a sharpening engine have?
We do not take into account the possibility of modifying certain elements, because all this can be too dangerous. Try to choose a model that has the following characteristics:
- It is advisable to have an independent shutdown when jammed. This will avoid burnt brushes and self-starting after the work is completed. All this is fraught with unpleasant consequences.
- The engine must be protected from dust or be insensitive to it. Moreover, in most cases this dust is an excellent conductor of electric current. You can simply get burnt windings literally out of the blue. This fate often awaits craftsmen who try to adapt a household power plant from a washing machine or vacuum cleaner to their small industrial needs.
- There is no need to take a model with too many revolutions. Torque is important to you. Nowadays, defective sharpening stones are not uncommon. Centrifugal force can tear them apart, and the pieces fly with enormous force in different directions. Usually 1500–2000 per minute is enough; you can also set it to smooth adjustment to provide solutions to various types of problems.
- The motor shaft must be suitable for clamping the wheels. It will have to cut a thread for a bolt and a pressure washer. The direction of twisting must coincide with the direction of the circular movement, otherwise the circles will fall off all the time. The shaft must also allow holes to be drilled. Some models already provide this by default.
- If we talk about power, then 2 kW will be enough for almost any task. Don't forget that a circle has the ability to maintain momentum. You can compare it to a kind of flywheel that constantly helps maintain the moment of inertia. Moreover, the heavier the circle, the greater the impact it will have on the part being turned. The most important thing is that the engine has power reserves. The proposed option is optimal for turning blanks of knives and garden tools.
- Try to choose a model with a good support heel. This will allow you to correctly attach the product to the workbench tabletop or intermediate spacer made of PCB. When fastening, it is advisable to use spring washers to prevent unwinding. Some experts recommend pre-coating the threads with a special varnish. You can even install welding points, because the grinding machine is usually installed in one place for life.
Sharpening device from a washing machine: selecting a motor for emery
In terms of its power and configuration, the electric motor from old-style washing machines is ideal for portable homemade emery. As a rule, motors from units such as Siberia, Volga or Vyatka are used for this purpose. Approximate characteristics should be:
- mains voltage - 220 V;
- power - up to 370 W;
- rotation speed - no more than 3 thousand rpm.
Attention! If you construct an emery from a more powerful engine, a significant number of revolutions can simply break the whetstone during operation.
The parameters of the engine are necessarily indicated on its body. To make emery, a device with a power of 100-150 W and 1-1.5 thousand rpm is sufficient. It will cope well with household sharpening of repair equipment and kitchen utensils.
Old engine
A faster grinder (for example, an emery machine based on common engines with 2.8 thousand rpm) is appropriate to use for grinding or polishing parts. In this case, the emery stone should be stronger, and the main fastening element, the flange, should be of better quality and stronger.
Advice. To assemble emery from a motor with your own hands, you can use both a 1-phase and a 3-phase motor.
Selection of electric motor
To make emery yourself, you first need to select a suitable electric motor. Most often this is a motor from an old-style washing machine, for example, Malyutka - it is perfectly suitable for this purpose . Such a motor meets certain requirements: its power is in the range of 100-200 W, and the speed does not exceed 1500 rpm. If the rotation speed is higher, there is a risk of destruction of the abrasive wheel.
High engine speeds are needed for polishing parts, but they are not suitable for sharpening.
To make homemade emery, you can use any other electric motor. It must meet certain parameters.
- Shaft rotation should be minimal. Motors with no more than 1,000 rpm are best suited.
- The motor power should be between 100 W and 1 kW. The most commonly used motors are 400 W motors.
- It is desirable that it has legs for fastening.
- A single-phase or asynchronous motor, designed to be connected to a 220-volt network, is best suited.
Base
The frame on which the engine will be mounted does not require any special material costs, but this does not make it any less significant. The base must be well thought out, since making emery is not an end in itself; you still have to work on it. At the same time, all attention should be focused on sharpening the tool, and not on holding the motor jumping all over the workbench with your hand. Working like this is, at the very least, inconvenient, and in this case there is no talk of compliance with safety regulations at all.
Therefore, the base of the emery should be heavy enough, and most importantly, allow the motor to be fixed in the same way as it was fixed to the washing machine. It is best, of course, to make the frame metal. True, you will have to use welding for this. If this is not possible, then you should take a suitable piece of chipboard and bolt metal corners onto it to mount the engine. Even better, remove the motor from the washing machine along with the standard bracket and screw it to the base. The main thing is to use bolts and nuts for this; self-tapping screws can become loose and unscrew due to vibration.
There is one more key point. The height of the motor mounting should not only allow the emery wheel to rotate freely, but also provide a gap of 4 - 5 cm between it and the base. After the motor is securely mounted on the frame, you need to think about the support table. It must be metal; welding can be replaced with a bolted connection. If the starting capacitor on the washing machine was moved outside the motor housing, you need to provide a place for it on the base of the sandpaper.
Once the motor is securely fastened to the frame and all auxiliary elements are installed, you can proceed to the electrical connections. But first you need to make sure that the grinding wheel is securely fastened to the motor shaft, as well as that there are no various beats.
Disc grinder from a washing machine engine
In old washing machines you can find asynchronous motors, they come in different capacities and they make useful homemade products.
As a rule, the speed of such engines is low, but they have good torque.
Auto decided to make a good disc grinder out of one such motor. The homemade product is easy to assemble; almost everything is made of wood. The machine works perfectly, it is convenient to grind when you need to make a plane. Of course, the sandpaper is glued on the machine, so it won’t be possible to quickly replace it; it would be nice to install Velcro on the disc. If the project interests you, I suggest you study it in more detail! Materials and tools used by the author: List of materials:
— motor from an old washing machine;
- boards; — cable; - switch; - self-tapping screws; - bolts and nuts; - corner; - wood glue; - sandpaper. List of tools:
- drill; - screwdriver; - jigsaw; - iron; - Bulgarian; - ruler, level, marker.
Homemade manufacturing process:
Step one. Bed assembly
First of all, the author assembled the frame, using boards, blocks and screws.
The end result was a little table for the little motor. Step two.
Manufacturing and installation of the disk The author also cut the disk from a wide board using a jigsaw.
To attach the disk to the motor shaft, we drill holes in the pulley for the bolts, and now the disk can be securely screwed to the pulley with bolts and nuts. Of course, you will need to make recesses in the disk for the heads of the bolts or nuts, otherwise the protruding parts will interfere with the installation of sandpaper. Step three.
Installing the engine and modifying the disk We install the engine on the table through the strips, and also use a steel corner to screw the engine. After installing the motor, we connect it through the switch and start it. Next, we will need a grinder with a petal disc, use it to grind the disc so that it becomes perfectly round, you can also work with a chisel.
As a result, the author got a perfectly round disk; we center the motor so that the disk is clearly vertical.
Step four.
Installation of sandpaper and testing Cut out a circle of sandpaper in the shape of a disk and glue it to the disk with wood glue. To speed up gluing, the author used an iron. Finally, we screw on the wooden stop and the machine can be tested. The author made two speeds for the machine, fast and slow. The homemade product works perfectly, such a machine will definitely not sit idle in the workshop. This completes the project, I hope you liked the homemade product and found useful thoughts for yourself. Good luck and creative inspiration if you decide to do this again, don’t forget to share your ideas and crafts with us! Source Become the author of the site, publish your own articles, descriptions of homemade products with payment for the text. Read more here.
Bushing (flange)
The bushing for seating the whetstone is the most complex component of our device. This sleeve is also called a flange. What is a flange? This is a piece of metal pipe, the inner diameter of which ideally fits the electric motor shaft and is securely fixed to it. The outer diameter of the flange must coincide (with small errors) with the mounting diameter of the grinding disc. A thread is cut along the outer diameter to secure the disk; the thread must be opposite to the direction of rotation of the shaft. In other words, if the motor shaft rotates clockwise, then the threads must be left-handed. And vice versa, if the shaft rotates counterclockwise, then the thread on the sleeve should be right-handed, normal. That is why, just above, I advised connecting the motor with counterclockwise rotation.
If the electric motor has a fixed direction of rotation (old style) in the clockwise direction, then you will have to look for a lever for a left-hand thread. The fact is that if the directions of the thread and the rotation of the shaft coincide, then the probability of unwinding while moving is very high - the sharpening stone can easily fly off during work and injure others.
The best option would be to contact a turner you know and order the production of this bushing. Usually, a turner just needs to bring a pulley from the engine and tell him the mounting diameter of the grindstone. Most modern stones have an internal diameter of 32 mm. But it’s not for nothing that our web resource is replete with the motto “do it yourself” and it is quite possible to make a flange yourself. Of course, the quality will be worse than from a professional turner, but this does not require special skills or special tools.
You can also buy a suitable bushing from the Chinese.
So, the base will be a metal pipe “1/2” - a half-inch water pipe. According to GOST 3262-75, the internal diameter of this pipe is 15 mm, the external diameter is 21.3 mm. The outer one fits well with the mounting diameter of the grinder disc (22 mm), it may well come in handy. But the most important thing is that this diameter is well suited for a 32 mm nozzle, but more on that below... The internal diameter is 15 mm. does not fit any motor shaft and this discrepancy will have to be eliminated.
If the shaft rotates counterclockwise, you can use a plumbing pipe with a “1/2” thread as a pipe. If it is not possible to control the direction of the shaft and it rotates clockwise, then the thread will have to be cut independently using a left-hand thread tool. In any case, it is advisable to select a piece of pipe without a seam - the seam on the outside will not create any special problems, but the thickening from the inside of the pipe will contribute to beating during rotation.
A piece of threaded pipe must be cut to the required length so that the thread is on one side. The inner edges need to be processed with a round file. When choosing the length of the future flange, you need to try to make it as short as possible, but so that all the components fit on it. It is important to take into account the fixation bolt - there may be a recess or a cut edge on the shaft; the bolt on the sleeve in this place should not interfere with other parts.
As mentioned, the thread is only needed on one side of the sleeve, but the sharpening stone needs to hold something on the opposite side. A short piece of 32 mm polypropylene pipe is well suited for this purpose. must be marked SDR 6.0 (internal diameter 21.2 mm). A section of 1.5-2 cm must be cut as evenly as possible - this determines whether the stone will make figure eights during rotation.
Adapter for electric motor shaft from a bolt
It is advisable to wrap the threads of the bolt attachments with electrical tape so as not to damage them when clamped in the socket. Try to choose a drill as close as possible to the diameter of the shaft so that the bolt fits tightly and the runout is minimal. To fix the adapter so that it does not rotate, we drill a side hole and cut a thread of a suitable diameter.
The master took an old Soviet bolt, which has seen many nuts in its lifetime, but in terms of steel strength, not a single modern plasticine shiny twin can compare with it. I didn’t clean it of rust, but only renewed the carvings for the veteran. Modern metal is very soft and a nozzle made from it will not last long, so a real master in his workshop has a jar or basin with similar wealth of different sizes.
