The overall efficiency of the entire mechanism depends on each of its individual parts. In the case of a modern electric jigsaw, with a relatively complex design, this is exactly the case. Each element of this device is designed to perform a specific function for the sake of the overall result - performing a controlled cut. If problems occur on one of the mechanism components, the performance of the tool may decrease, down to zero. To return your device to service, it is enough to find and eliminate the “weak link”. We will tell you further how to repair a jigsaw with your own hands and reduce further wear of its parts.
We understand the design of an electric jigsaw and the principle of its operation
It will be easier to repair a jigsaw if you know what this tool consists of and how it works. Knowing the design and principle of operation, there will be no difficulties with repair work. First, let’s find out the main components of the power tool in question:
- Housing - it is usually made of impact-resistant plastic. This is the base of the device, inside which the component parts are located
- An electric motor is a commutator-type AC motor.
- Gear unit - a transmission mechanism through which rotational energy is converted into reciprocating movements
- A rod or pin with a spindle for securing working attachments. The rod is a cylindrical shaft that is connected to a plate. The shaft is located inside a fixed frame in which it moves
All these parts are power tools that can be used to cut sheet materials made of wood, metal, plastic and even concrete. For this purpose, appropriate types of saw blades are used, which are mounted in the chuck (spindle) of the power tool. A jigsaw is used not only for direct cutting, but also for cutting shaped holes in sheet material.
The operating principle of an electric jigsaw is to transform electrical energy into mechanical force. The operating diagram of the power tool in question is that alternating current is supplied to the electric motor, through which the armature begins to rotate. A gear is attached to the armature shaft, through which rotational movements are transmitted to the gearbox. A pendulum type gearbox is connected to a rod that moves up and down. When the blade is secured in the tool spindle, it will perform similar reciprocating movements, ensuring sawing of the material.
To simplify the work and expand the functionality of the tool, a start button, speed control and other additional functions are installed in the jigsaw design. When using the tool, breakdowns occur, which can be eliminated in two ways:
- Repair by cleaning, lubricating or reworking
- Replacement is the most common repair method, since when a gearbox, rod or motor breaks, they need to use new parts
The material describes all types of jigsaw breakdowns, as well as methods for self-repair. To repair a jigsaw, it is not at all necessary to take the tool to workshops and service centers. However, remember that if the warranty period has not yet expired, then it is better not to rush into self-repair, since this is the responsibility of the manufacturer or selling company.
This is interesting!
Any repair of a power tool begins with disassembling it, but the material describes ways to repair a jigsaw without disassembling it.
Step-by-step production of the machine
The master class on creating a jigsaw machine consists of several stages, each of which we will go into detail.
First of all, you need to prepare everything you need for work.
Materials:
- plywood 10-14 mm;
- spring;
- 2 bearings.
Tools:
- circular;
- grinding machine;
- drill with a set of drills;
- jigsaw with files;
- vacuum cleaner.
Preparation
This stage consists of the following steps:
- We make templates. For these purposes, you only need a pencil, ruler and paper.
- Cut out the template using a knife.
- Glue the template to the workpiece.
When gluing the template, too much glue is not required, since removing the paper will be difficult.
Manufacturing of blanks
Stationary jigsaw machine blanks are made as follows:
- We cut out the blanks using a circular saw or other suitable tool.
- We process parts on a grinding machine to remove chips and burrs.
- We drill a technological hole.
- To cut the grooves we use a file.
- To make holes for the bearings, we use a pin drill of the appropriate diameter.
- We make the slots for installing the jigsaw and the quick-release cover using a router.
Assembly
The assembly process of the machine is as follows:
- We fix the parts with glue, using clamps for temporary fastening.
- For further fixation, we use self-tapping screws, which we tighten with a screwdriver.
- When the parts are assembled, we perform grinding to remove irregularities.
- We coat the parts with varnish. It is best to use nitro varnish.
- We assemble the main part of the tabletop machine with screws.
- We fix the base of the device.
- Fix the top part.
- Use a hammer to drive the bearings into the prepared holes.
- We mount the bracket. For fastening, you can use a stud or bolt according to the inner diameter of the bearing. When tightening the nut, do not use excessive force as there should be some free play.
- Install the spring according to the photo below.
- To fix the file, we make a clamp, which is a plate with two holes. We install the plate on the bracket and secure it with a nut.
- When assembling the machine, the top part should look like in the photo.
- For ease of control of the jigsaw, we make technological holes on the body of the device being manufactured. You will also need holes for an outlet and a switch.
- After the necessary cuts are made, we gain access to the jigsaw controls.
- We make clamps for saw blades. To do this, we make a slot in the bolt head, but not all the way. During operation of the machine, a file will be placed in the slot.
- We mount and assemble the upper part at the place where the file is attached.
- In terms of design, the lower unit practically repeats the design on top. The only difference is that instead of a plate, an old file is used, in which the saw part is cut off almost completely with a grinder. In the remaining part we make a hole with a bolt and a slot similar to the upper unit.
- We install the jigsaw. To fix it, use countersunk screws.
- We fix the file in the upper and lower parts of the machine.
- To adjust the perpendicularity of the file, you will need a square or a block with an angle of 90°. The essence of the adjustment is to move the plate in the upper part to the left or right.
- The saw blade is adjusted forward/backward by moving the saw blade attachment unit.
- We make a plate from durable plastic that is installed at the bottom of the file. We cut a hole in the plate, and in the machine itself, using a router, we make a seat for the plate so that it is flush with the surface of the tabletop.
Types of jigsaw breakdowns and how to fix them
You can avoid jigsaw damage if you operate the tool in accordance with the manufacturer's recommendations. To begin with, let us remember that tools are classified into two types - household and professional. They differ in quality, so household jigsaws cannot be used for long and often, unlike professional ones. How to find out what type of jigsaw - household or professional? To do this, you need to take the instructions or technical description and read the manufacturer’s recommendations. If the manufacturer recommends using the tool for 15-20 minutes, alternating with 10-minute breaks, then this device is of a household type. You can work with professional tools for up to 2-3 hours continuously without worrying about overheating and breakage.
Domestic and professional type jigsaws break equally often, and their repair depends on the type of breakdown. Failures are conventionally divided into mechanical and electrical. Mechanical failures include malfunctions of the gearbox, rod, bearings and cartridge, and electrical failures include the motor, button, regulator, power cable, brushes. Next, we will find out in detail the types of malfunctions, as well as ways to quickly and correctly eliminate them.
Choosing a professional or household appliance
The main difference between professional jigsaws and household jigsaws is their high wear resistance and more intensive work. They can be used for 10 hours, changing attachments and processing different materials. At the same time, the quality of the result does not decrease. Unless the master gets tired and starts making mistakes. When using household tools, you must take a break of at least 10 minutes every third of an hour. And work no more than 3-4 hours a day. As a rule, this is enough for household use with a jigsaw.
When choosing a more powerful tool, keep in mind that as this characteristic increases, the weight also increases. The most suitable option for everyday use is jigsaws with a power of 500 to 650 W. They allow you to achieve cutting thickness in wood up to 70 mm and in metal up to 5 mm. If you need 160 mm for wood and 35 mm for metal, then take a more powerful jigsaw.
If the jigsaw does not turn on when you press the start button - where to look for a breakdown
When a power tool connected to an outlet does not show signs of life, the following parts may be damaged:
- No voltage in the network. Using a probe or multimeter, you need to make sure there is voltage in the outlet
- Damage to the network wire - usually the defect can be identified visually in the form of an insulation failure, but there are also breakdowns of damage to the current-carrying conductor. To avoid having to guess, you should use a multimeter, and in the dialing mode, check the serviceability of each core. If one of the wires is damaged, but the location of the defect cannot be identified, then the power cord should be replaced
- The start button is faulty - voltage is supplied to the engine after pressing the “Start” button. This button consists of a normally open contact on which carbon deposits may form. This deposit is an obstacle to the path and passage of current, so the tool does not show signs of life. This type of damage can be eliminated by disassembling the button and cleaning the contact. If the button is not removable, or the cause of its malfunction is the built-in speed controller chip, then it must be replaced
- Overheat protection - when the engine on the tool overheats, a protection is triggered that prevents combustion of the power unit. Such protection devices are not available on all power tools, but if the element is present, it is possible that the lack of operability of the device is associated with this particular part
- Engine malfunction - this will require a thorough check of the power unit
When the motor of a power tool does not start, the most important thing is to correctly identify the part that has failed. In addition to the absence of signs of the instrument’s operability, electrical breakdowns also include other types of malfunctions.
If the jigsaw engine is unstable - it sparks and there is a burning smell - how to repair it
A common situation is when the jigsaw is unstable. The reasons for the unstable operation of the jigsaw electric motor are the following factors:
- Graphite or carbon brushes are worn out or worn out - through these parts, electric current is supplied to the armature winding, which causes it to rotate. The brushes are in contact with the collector unit, which is a set of copper lamellas or plates. When the brushes wear out, the contact decreases, so the tool begins to spark during operation, a burning smell appears, and the body may even melt. The damage can be eliminated by replacing the brushes with new ones.
- Collector malfunction - if the copper plates show signs of blackening, as well as defects in the form of scuffing, chips and uneven wear, then this is also the cause of unstable engine operation. Signs of carbon deposits on the plates can be removed with alcohol, and to eliminate chips, scuffs and distortions, you will need to use fine-grained sandpaper
- Motor malfunction - if the resistance in one of the stator or rotor windings is different, this will lead to unstable operation of the tool. To eliminate the breakdown, you will need to diagnose the electric motor and identify the defect. To eliminate the malfunction, you will need to rewind the electric motor or replace the faulty part - stator or rotor.
- Button malfunction - if the tool’s motor malfunctions, it is possible that the cause is the switch. To make sure that the problem is not the button, you should directly connect the motor and check the functionality of the tool. If the symptoms of malfunctions are repeated, it means that the cause of the breakdown is not in the switch
Finding a fault in the electrical part may take a long time, which is due to the difficulty of carrying out diagnostic work. In addition, one of the most expensive parts of the tool in question is the engine. If the engine fails and there is significant wear on the gearbox, then it makes sense to purchase a new power tool.
Other types of electrical breakdowns of jigsaws and their elimination
In addition to the above defects, when operating a power tool, other types of breakdowns associated with the electrical part may occur:
- Doesn't cut under load. Failure occurs when, when attempting to saw a material, the performance of the tool decreases. To eliminate such a defect, you will need to diagnose the motor. Another reason could be poor contact in the button or significant wear on the brushes. Graphite brushes must be replaced when worn more than 40%-60%
- The speed fluctuates during operation - the cause may be weak contact. If a burning smell is heard during the operation of the tool, then due to weak contact the insulation of the wires or the button body melts. To identify a breakdown, you will need to disassemble the tool and inspect it.
- If the brushes spark during operation, they need to be replaced. It is unacceptable when significant sparking of the brushes is observed, since this not only reduces the power of the tool, but also the following negative consequences arise - the load increases, which means the current in the stator and rotor windings increases, and sparking also contributes to the deformation of the copper lamellas of the commutator. You cannot use a tool with faulty brushes for a long time, and they should be replaced as quickly as possible. Sparking can be detected through ventilation holes or cracks in the tool body.
To replace the brushes on a jigsaw, you will need to disassemble it. Some professional tool models have special channels for quick replacement. The brushes are mounted in brush holders. Fastening can be of two types - in the form of a latch or a screw. After unscrewing or snapping off the brush, it must be removed, disconnect the wire and install a new graphite element in the same order.
This is interesting!
For low-power electric motors, graphite brushes with a low copper content are used.
Cutting technology
They begin sawing after securing the workpiece and applying markings. To do this, you need to turn on the jigsaw, set the maximum speed level and adjust the pendulum stroke by setting it to number 1.
You need to bring the file to the marking line, press the side of the platform against the guide and start working. When moving the jigsaw forward, you need to monitor the location of the platform. Do not deviate from the guide. When there are a few centimeters left to the end of the canvas, you need to carefully hold the free edge, avoiding breaking. At this point the process can be considered complete. To prevent the cut from turning out crooked, it is worth remembering a number of nuances:
- During operation, do not press too hard on the electric jigsaw, otherwise the file will break;
- when cutting a steel sheet, you need to choose a tool with maximum power and work at high speed - when heated, the steel softens and becomes more pliable;
- When processing plastic, laminate, organic glass or stainless steel, it is necessary to provide additional cooling for the file and periodically take breaks so that the tool has time to cool down;
- to prevent the plastic from melting during processing, it is necessary to set the minimum speed with a frequency of 1000 rpm;
- the figured cut will be smooth if you choose a narrow file with small teeth;
- After finishing the work, the electrical device should be cleaned of sawdust and placed in a special case.
Professional builders advise adhering to certain rules to help avoid mistakes that will not be easy to correct.
When choosing a file, you need to start from the material you are working with: plastic, thin or thick metal, plywood, solid wood. You should prepare in advance all additional items that may be needed during the cutting, marking and fastening process
Particular attention should be paid to fixing the material to the surface.
It is best to try the sawing technique in advance and practice cutting with a jigsaw on unnecessary workpieces, because a crooked line will be difficult to correct. Safety precautions should not be neglected; you should use safety glasses and wear gloves when sawing.
If these recommendations are followed, the process of cutting parts should not be accompanied by unforeseen difficulties.
Diagnostics of an electric motor or how to identify a malfunction of the stator and rotor
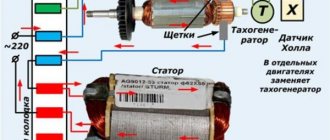
If there is a suspicion of malfunctioning of the electric motor, then the exact breakdown can be identified using diagnostic measures. To do this, you will need a multimeter, as well as a diagnosable rotor and stator. First, let's find out how to check the suitability of the rotor (aka anchor):
- Carry out a visual inspection. If there are signs of soot and deformation, then there is a high probability that the part has burned out. It is also necessary to inspect the collector unit, on which the presence of soot, chips and distortions is unacceptable. Misalignment occurs when the brushes wear unevenly.
- Use a multimeter to measure the resistance of the armature winding. Set the device to 200 Ohm resistance measurement mode or continuity testing
- One probe should alternately touch the collector plates, and the second should touch the steel core. The presence of resistance indicates a violation of the insulation. To eliminate the problem, you will need to replace the rotor winding
- If a breakdown between the winding and the housing is excluded, then the rotor must be checked for signs of insulation failure. To do this, use a multimeter in resistance measurement mode to check the quality of the insulation between the plates. A mark is placed with a marker from the beginning, and after that the resistance between the plates is checked one by one
- The resistance value should be approximately the same. A difference in resistance value of more than 10% from the standard value indicates an insulation failure. You will need to rewind the rotor winding or replace the part completely
- Interturn short circuit - another cause of failure may be the presence of an interturn short circuit. However, it is impossible to check the presence of such a defect with a multimeter. To do this, a special device is used, which must be guided through the collector. If there is an interturn short circuit, the device will make a corresponding sound. The defect can be eliminated by replacing the winding
If it is determined that the defect is with the armature, then it must be rewound or replaced. If the rotor is working properly, then we move on to checking the serviceability of the stator - a stationary mechanism, which also consists of a winding and a steel core from a set of thin plates.
The algorithm for checking the health of the stator is as follows:
- The absence of breakdown of the winding to the housing is checked. To do this, touch the winding terminal with one probe, and the steel core with the second. The device should not show the resistance value, otherwise a breakdown may occur and the stator must be rewinded
- The resistance in the windings is checked by touching its terminals one by one. The resistance value in all windings should be approximately the same value, which indicates its serviceability
- Check the integrity of the metal plates of the steel core. It is unacceptable for them to delaminate, so you will need to replace a separate unit
It doesn’t matter what brand the jigsaw is - Interskol, Makita, Bosch, Skill, Metabo and others. When purchasing a new motor, you need to take into account its parameters and dimensions. There are markings on the motors that you need to use when purchasing a new electric motor for a jigsaw.
This is interesting!
It is almost impossible to repair the electric jigsaw motor yourself, since this will require rewinding the winding. This can be done at a service center, but the cost of such a service is almost identical to the price of a new part.
Repair of the speed controller on a jigsaw instructions
Almost all models of electric jigsaws are equipped with a device such as a speed controller. What it is and what it is needed for, every owner knows independently. Structurally, the part is a board on which a wheel or switch is placed.
By moving the wheel (switch), the speed of the reciprocating movements changes. By acting on the wheel, the resistance changes, therefore the speed decreases.
To repair the speed controller on a jigsaw, it is not at all necessary to have an understanding of electronics. To do this, use a multimeter to check the serviceability of all resistors and the capacitor. Usually, a breakdown can be determined externally, since when it fails, the board will show signs of blackening and soot. In the photo above, the fault is a damaged power cord. A failed element on the board or a wire tip should be replaced, and this completes the entire repair of the jigsaw speed controller.
This is interesting!
If the regulator burns out, it should be replaced with a similar one in design and parameters.
Mechanical breakdowns on jigsaws and how to fix them
Mechanical failures include types of failures such as wear of bearings, gearbox, rod and cartridge or head. Mechanical type breakdowns are much easier to identify than electrical ones, and repair also comes down to replacing a failed unit, mechanism or part. Next, we will consider all types of mechanical faults on jigsaws, as well as ways to quickly eliminate them.
Worn bearings on a jigsaw, how to replace them
Bearings are consumables, so when they wear out, they need to be replaced. They cannot be repaired, and in order to extend their service life, you should regularly not only apply lubricant, but also perform preliminary cleaning.
If the bearings are worn out, then to replace them you will need to disassemble the tool and replace it with ones with similar markings. The bearings are pressed out and pressed onto the rotor shaft manually or with a special tool. Before installing new bearings, it is recommended to apply additional lubricant.
This is interesting!
To determine bearing wear, you should check for play in the outer race relative to the inner race.
Repairing a jigsaw gearbox and how best to lubricate it
If, while working with a jigsaw, a sound in the form of a crack is detected, then there is a high probability that the transmission mechanism is jammed. A gearbox failure can be identified visually, which requires disassembling the housing and inspecting it. If the gears are missing teeth, they will need to be replaced for repair. If the cause of the malfunction is metal shavings getting into the mechanism, then to eliminate the malfunction you will need to perform the following steps:
- Remove the gearbox from the tool, and thoroughly clean it and rinse it in solvent or gasoline. This will clean the part from metal dust and grains.
- Place the part in place, having previously assessed the wear of the teeth on the gears. If the wear is severe, which entails the gears slipping relative to each other, then the mechanism needs to be replaced
- When installing old or new gears, it is necessary to apply lubricant in excess
What is the best way to lubricate the gearbox on a jigsaw and other types of power tools? For this you can use Litol-24, if there is nothing else, but if you want to extend the life of the mechanism, then it is recommended to use a special lubricant from Bosch. This is an expensive lubricant that not only reduces friction between parts, but also protects them from dust and grains.
This is interesting!
For each model of power tool, manufacturers indicate in the instructions the recommended types of lubricants for the gearbox. If there is no such recommendation, or it is impossible to find such a lubricant, then a universal substance from Bosch is used.
This lubricant is sold not only in large tubes, but also in compact packages, which allows you to save money. In addition to Bosch lubricant for the jigsaw gearbox, you can use other options that are somewhat cheaper in price, but no less effective:
- Optimol Longtime 2 from Castrol. This lubricant is slightly cheaper than Bosch
- Huskey Coolube is not only the most affordable, but also the most effective. If Bosch lubricant is expensive, then it is recommended to choose Huskey Coolube
There are many other brands available in specialty stores, so you should rely on your budget. And remember that Litol-24 is used as a last resort if nothing else is available. It is unacceptable to contain not only metal dust in the lubricant, but also shavings and sawdust that enter through the ventilation holes. All blockages must be removed, and then lubricant must be applied and the tool reassembled.
This is interesting!
If there is a malfunction of the bracket (mount) in the gearbox design, it should be replaced, as shown in the video below.
Jigsaw Fiolent: main reasons for failure
Replacing the rod
In the first case, to avoid this damage, it is enough to handle the tool carefully and carefully. But if this happens, you will have to replace the damaged rod. To do this you need:
- Remove the housing cover by unscrewing the 4 screws.
- Remove the rectangular washers and retaining guides from the rod.
- Unscrew the 4 bolts and remove the mechanism cover. Below it is the flywheel and the rod itself.
- Unscrew 2 screws each, remove the lower and upper rod holders. The latter has a spring, so you need to remove it carefully.
- Remove the damaged rod with guide washers.
- Lubricate the flywheel and eccentric with special gearbox lubricant.
- Place the guide washers on the new rod and install it in place.
- Attach the saw blade holder to the lower part of the rod.
- Install the upper and lower holders, screw on the mechanism cover and install washers and retaining guides.
- Insert the cutting tool and test the jigsaw at idle and under load. If the check does not reveal any deviations, install the housing cover.
Tool lubrication
In the second case, everything is much more serious. It would seem that what is so difficult about lubrication? But due to the fact that the tool constantly operates in extreme conditions, wood dust cannot be avoided getting inside the device; service work has to be carried out according to the intensity of use, but at least once a year.
All mating parts and assemblies need to be lubricated. To do this, you need to disassemble the jigsaw. But if in the first case you, for example, limited yourself to only dismantling the rod, now we disassemble the tool completely and smear all the rubbing surfaces of the parts.
For lubrication, the manufacturer offers Litol 24, but it will not work in a jigsaw gearbox due to its thick consistency, so it is usually lubricated with oils. You can combine Litol 24 with graphite-containing lubricant Feol 2U in a ratio of 3:1.
Finalization of the design
However, it should be taken into account that now the fluidity of the lubricant mixture is higher, and after some operating time it will begin to enter the engine rotor. The reason for this is the left-hand transmission. As the rotor rotates, the lubricant mixture is captured by the teeth and fed to the rotor as if through a screw. The oil separator installed inside the electric motor housing does not perform its functions. In theory, it should reject the incoming mixture, but in practice this does not happen. This is evidence of the imperfection of the design proposed by the manufacturer.
To avoid this problem, some modification needs to be done. Or rather, place the oil sump not inside, but outside the electric motor housing. At the same time, in order for the oil separator snail to work and reject oil, it is turned over.
One more nuance. The diameter of the mounting hole is Ø 9 mm, and the diameter of the outer part of the oil separator is Ø 9.2 mm - it will ideally block the passage for the lubricant mixture. But when installing it, you need to apply a certain force and an attachment in the form of a pipe of a suitable size.
In addition, it is advisable to install a dust shield on the rear armature bearing. It will protect it from wood dust and extend its service life.
After this, you need to assemble the lubricated jigsaw and test it for functionality. After operating for 10 hours, you need to check the tool for grease getting into the motor housing. If everything is done correctly, then this option is excluded.
Replacing the rod on a jigsaw step by step description
Failure of the rod on jigsaws occurs in rare cases, but if this happens, then it needs to be replaced. The replacement principle is simple and straightforward, for which you need to disassemble the tool, remove the rod and install a similar one in its place. The most important thing here is to find a rod of a similar design for the corresponding brand of tool.
Rods or pins serve as guides through which reciprocating movements are created. After replacing a failed rod, it is also necessary to thoroughly lubricate this part. A saw holder is attached to the rod, which can be installed together with the new part.
This is interesting!
The rods on different models of jigsaws differ in design, so the replacement principle is slightly different. Difficulties do not arise if you install a new part in the reverse order of dismantling the standard one. To avoid mistakes when assembling the tool, it is recommended to take photos before removing parts.
Device
A jigsaw is a tool that is suitable for working with a wide variety of materials:
- solid wood;
- chipboard;
- plywood;
- hardboard;
- soft metal;
- PVC materials.
The jigsaw mechanism also experiences heavy loads. If such a unit is used regularly, then you should know its layout and how it works.
The design principle of this unit is simple; its main blocks are:
Air cooler, speed control, pendulum movement unit - these are all auxiliary holding elements that ensure the duration and productivity of work.
From the point of view of transformation of electrical energy, the following process occurs:
- an electrical impulse entering the tool goes to the brushes (they are made of graphite), which ensures the appearance of torque on the rotor;
- the rotational impulse is transmitted to the gearbox - a unit that transforms torque into translational motion, which is directed to the rod.
In this scheme, a special role is given to the fastening unit, which ensures a reliable connection of the rod with the moving blade.
As you can see, the design principle of a jigsaw is the same for all models. The difference is only in the quality of assembly, fitting of components, and materials.
Saw holders on jigsaws - the weak link and its repair
To replace the saw blade holder on jigsaws, you don’t even need to disassemble the tool. After all, they are attached to the tool rod using one or more screws. However, there are saw holders that cannot be replaced without removing the rod from the jigsaw.
General information about the design of saw blade holders on jigsaws is as follows:
- Devices are classified into two types - quick-release and conventional. Quick-clamping ones are more popular, but due to their complex design, it is difficult to replace
- Quick-clamping heads of saw holders are classified into three main types - radial, lateral and frontal. While radial heads are the most popular, side and front heads are rare. However, if the tool has a quick-clamping side or front head, then it will be impossible to find spare parts for it. To do this, you will need to order the part from the manufacturer.
- Quick-clamping radial heads of saw holders - consist of a base, which, when displaced, opens a hole for securing blades by recessing the balls, as well as a spring and locking rings for fixation. To disassemble the head and remove it from the rod, you will need pliers to remove the retaining rings. The design is simple and primitive, and for repair or replacement you do not need to disassemble the entire instrument
- Quick-release saw holders on jigsaws have a similar operating mechanism as hammer drill chucks. The mechanism is based on two balls, which fix the blades by their protrusions.
A faulty jigsaw head is detected by the following sign: the blades do not hold on, and when exposed to the material, they fall out of the fastening. Below is an example of a worn saw blade holder that needs to be replaced.
A detailed video description of how to replace the saw blade holder on a jigsaw is presented in the material.
Blade holder faults
Many modern jigsaws are equipped with bells and whistles, which are their weak points. For example, some models often require repair of the saw blade mount due to the presence of such functions as:
- A quick clamp that does everything for the tool owner: just move the lever, place the blade and work. Over time, the structure becomes loose and fastening parts become unusable. Unfortunately, most of these clamps cannot be repaired; they must be completely replaced.
- Lightweight screw fastening is a real problem for owners of cheap and mid-price tools. The rod attachment, made of weak alloys, has low strength, breaks, and the bolts break the seats. Repair consists only in the handicraft production of the appropriate product from durable steel, since each line of cheap tools often has its own saw blade holder configuration.
https://youtube.com/watch?v=gjTvIKJsoAY
If the jigsaw has a classic screw fastening of the file, then repairing it will not be difficult. This is a durable and time-tested design; you can use bolts for a Phillips screwdriver or a wrench. The clamping blocks are standard; finding a replacement for an extremely worn part is not difficult. There is a problem with thread wear, but in this case a new one can be cut.
How to extend tool life
In order for the type of tool in question to serve for a long time and not break, it is necessary to regularly carry out preventive measures. They consist in the fact that it is necessary to disassemble the tool, check the integrity and serviceability of all parts, clean the mechanisms of old lubricant and replace it. Do not overload the tool with work for which it is not intended.
Repair work on a jigsaw should begin with troubleshooting. In 99% of cases, successful identification of a malfunction allows you to eliminate a breakdown quickly and efficiently. To eliminate breakdowns, you will need spare parts, which can be purchased at any tool store. By devoting a couple of hours of time, you can prepare a power tool for the new season, and not worry that it will break at the wrong time.
Preventive measures for jigsaw care
Knowing how a jigsaw works, the principle of its operation and how to do it yourself, it remains to figure out one more detail - prevention or how to extend the life of the equipment. If you regularly check the availability of lubrication, the serviceability of consumables, and also eliminate minor breakdowns, the tool will last several times longer without major repairs.
Instrument maintenance can be performed in winter when the instrument is not in use. To do this, you should disassemble the jigsaw, perform a visual inspection, clean the gearbox and lubricate it, replace it if the brush is worn, clean the rod and spindle, and clean the button contacts. This process does not take much time, and the main thing is that in this way you can eliminate by 90% the probability of a jigsaw breaking at the wrong moment. The material presents a video clip on how to repair a jigsaw from A to Z with your own hands. Based on the instructions in the publication, the tool will always be ready for use.
https://youtube.com/watch?v=r1Xww-7yY7Y


