We tie a loop with a bowline knot
Before you start tying more complex knots, it is recommended to study the bow knot, as it serves as a basis for understanding other options. In addition, such a knot is universal and can be used to tie two ropes or secure it to a support. In order to quickly tie it in hiking conditions, you need to be well versed in the rope, not only sitting comfortably in a chair at home, but also on damp, damp ground in the rain. While hiking on Elbrus, there is no time to remember how to tie a bowline. At low temperatures, even if you know the process, it will be much more difficult to do with frozen fingers.
In order to understand how to knit a bowline, it is best to associate it with a loop on a rope. There are many styles of tying a knot, depending on speed and convenience. To find a way out of any situation, you need to learn to imagine the end result. Understanding the structure will allow you to tie both a single and double bowline knot without instructions, developing your own style.
In order to understand how to knit a bowline knot, you need to follow the following sequence:
- place the rope on a table or other surface (during training), so that one end is under your right hand and the other under your left hand;
- form a loop closer to your left hand, with the right end at the top, and pass it through the back;
- loop the free end around the back of the rope and thread it through the top of the loop;
- tighten the knot.
To tie a double bowline knot, also follow the step-by-step instructions:
- lay the rope on the surface so that the double end is under your right hand;
- fold the rope in half;
- form the same loop as for a single knot;
- pass the double end through the back of the loop;
- pass the newly formed loop on the right hand between the ropes of the double end.
Basics and features of the device
Before you start making the fire, you need to secure the ends of the product with a stamp, after which the remaining part of the end is dissolved into strands.
The next step is to lay out the unbraided part of the cable with a loop of the required size and punch the running part of the strands. There are many methods to weave a wire rope. It is important to do the first punching correctly if the bent side of the fire is turned towards the working part, and the running parts of the cable strands are located on the right. In this case, you need to take the first running strand, pass it into the cable against the descent in the direction from right to left under the 3 main strands. The second and third strands are broken under two and into one, respectively.
When the punching of the first three strands is completed, the fire must be turned over so that it is possible to punch the fourth and fifth running parts of the strands. And so on until the end of the cable. The remaining ends of the running strands need to be cut off, and the product itself must be calcined with wire.
We tie the ropes with a clew knot
The clew knot is used to fasten the two ends. Before tying a clew knot, it is worth remembering that its use on synthetic ropes is unsafe. Since synthetic fibers are slippery, the knot can come undone easily. The clew is used only for natural ropes that are under load.
In order to tie this knot, you need:
- fold the end of one of the ropes (on the left in the image) into a loop;
- pass the end of the second rope through the back side of the rope (in the image on the right);
- circle the left rope folded into a loop with the right rope;
- pass the end of the right rope into the loop formed by it.
Wedge couplings
Designed to create connecting points when there is a need to connect a cable to a mating structural element through a pin and loop.
Rope couplings are designed for medium and large diameter ropes. As an option, consider wedge couplings for ropes of the Green Pin brand.
The assortment includes:
Rope Wedge Coupler G 6413 - This coupling is designed for ropes from 7 mm to 86 mm diameter, therefore the permissible working loads range from 1.25 tons to 100 tons. The principle of operation of a wedge rope coupling is wedging and fixing the rope by increasing the load under the weight of the lifted load.
We tie the ropes with a weaver's knot
You can also use a weaving knot to tie two ropes together. It is also called textile, as it was originally used for fastening threads.
In order to tie such a knot as a weaving one, you will need:
- tie a simple knot at the end of one of the ropes, passing the end of the second through the loop formed from below, leaving a reserve length for safety knots;
- repeat the action with the second rope, but forming a loop on top;
- tighten the knot;
- form safety knots from the remaining ends in the same order.
Methods of fastening jute and steel ropes and cables
Depending on their purpose, cables can be secured using various methods. If we talk about ropes that are woven from flexible threads, there are a large number of fixation options. The methods for fastening the ends of steel ropes are not so varied. This is due to the fact that such products are distinguished by their specificity and difficult operating conditions for the clamps.
Let's look at a few basic methods that are suitable for jute and steel products.
With clamps
The first method involves fixation using special clamps that secure the loop. To do this, you must strictly follow the exact procedure. First, the end of the rope needs to be folded into a small loop. Experts recommend measuring the bent end so that the length is at least 18 times the diameter of the rope itself. A special thimble must be inserted into the loop, which is selected based on the diameter of the rope.
The clamp itself includes a threaded bracket and a block. The last element can be either forged or cast. The shackle should be located at the non-working end of the rope and connect the two branches. Quite often, double-sided clamps are also used, which are equipped with two identical brackets. The number of fasteners is determined based on project calculations, but there must be at least three.
Braiding method
The second method is practically no different from the previous method. The only difference is that the folded edge unravels into strands. After this, small fibers should be passed between the strands of the main rope. Double or triple lay options are possible. In order to determine the optimal number of punctures, you need to study the Rules of Gosgortekhnadzor, which clearly define the standards for performing such manipulations. For example, you need to use 4 ropes with a diameter of 15 mm.
Using bushings with wedges
The hinges can be secured using reliable cone-shaped bushings. The detail happens:
- cast;
- stamped;
- forged.
The narrow end of the rope must be passed through the sleeve, after which a loop is made. A wedge is placed in it, and the free end must again be inserted into the wedge cone bushing. The principle of reliable fixation is to adjust the wedge. The element should be tightened to capacity. Only then will the rope not slip out. To ensure that both ends are tightened evenly, the free edge should be connected to the main part with a small clamp.
Press-fitting
This method cannot be called the most common, since the previously described methods are considered more effective. This approach is more often used for finishing log houses by fastening them to logs. At the same time, jute ropes can perform both decorative and insulating functions.
Pressing occurs gradually using adhesives. The most important thing is to distribute the product evenly along the log house.
Tying the ropes with a snake knot
The snake knot is another option used to connect two ends. It is used for nylon threads and has high reliability. The second name is bloody. It is justified by the fact that in the past the knot was used to tie a noose on the gallows.
To tie a knot you need:
- arrange the ropes parallel;
- loop the end of one rope around the other through the top three times;
- do the same for the other rope, except that here you need to circle through the bottom;
- thread the ends into the ring formed between the ropes;
- Pull the base of the ropes, after which the knot will be easily tightened.
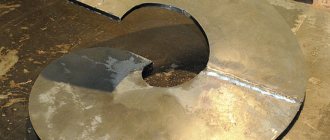
Weaving technology
We prepare the cable - we make a mark at the end from a couple of turns of masking tape and cut off the protruding parts of the strands. We measure three or four hoses from the end of the cable (full turns of any strand) and make another mark in this place. Up to this point the cable will unravel into strands. After this, we try on the thimble to the cable, roll it along the cable and find the place of the top mark in the middle of the thimble.
We securely fasten the middle of the thimble to the cable with nylon. To do this, it is convenient to use strands of scrap nylon ends, which are always available on the boat.
Securely (!) fasten the cable to the thimble. The appearance of the product will depend on this. I use a nylon heel folded in half, drawn in a figure of eight, tightening the cable loop around the thimble. Once again, this must be a really tight and reliable fastening that does not allow the cable to move relative to the thimble.
We fix the thimble in a vice so that the “tail” is on the left. This is the “front” side of the future fire. We are looking for the first strand, it is shown by the arrow. We weave this strand up to the thimble and punch it under two strands of the cable on the other side of the fire “along the descent” - from left to right. In the same place, but under one strand, we break through the strand adjacent to the first on the left (the second). The braided strands are numbered clockwise.
It will look something like this.
The ends of the braided strands must be secured with marks made from a couple of turns of masking tape.
We turn the fire to the other side, or approach it from the other side :).
In the depths of the fire there is strand number six, adjacent to the first, unravel it and punch it under two strands so that it comes out adjacent to the first. On this side, the punches go “against the descent,” that is, from right to left. This is easier to do if you punch the cable with piles and insert a strand into the punching hole at a higher level, then push it into place.
The next strand, number five, goes in the same place, but under one strand.
Again we return to the “front” side of our fire.
Strand number three is inserted in the same place where the first and second ones made their way, but “against the descent.” The photo shows how this is done using a pile. Under the same strand where the third was pierced, a fourth is drawn, but on the other side - “along the descent”, and UNDER the third. The core (it can be distinguished in the photo and in life by the different direction of the lay) breaks through in the same way as the fourth strand, and comes out side by side. Options and personal creativity are possible here; the core can come out beautifully to the first strand :).
This completes the first fire punching. We check the correct location of the strands, tighten the slack, cut the core, and push the strands into place with a hammer.
We suggest you familiarize yourself with the porosity of bread.
Second punch
In order for the “crane” fire to gain the necessary strength, three or four punches are enough. The second and subsequent punches are made against the descent - from right to left, through one strand under two. It is necessary to monitor and eliminate an unpleasant feature by tightening the strands - the strands collected in the first punching slide quite easily relative to each other, and come out of their places with further punchings, the fire “swells” and becomes loose.
We consistently punch the strands counterclockwise and complete the punching with a “lock”.
We tie the ropes with a flat knot
An option for tying two ropes together is also offered by a flat knot. Its scheme is as simple as possible. To tie a flat knot you need:
- cross two ropes;
- tie one of the ropes around the other;
- repeat the previous step with the remaining ends of the rope (so that the ends of the first come out of the loop formed by the second rope).
- tighten the knot by pulling the ends of the ropes and then the warps.
There are many options for tying loops and fastening two ropes together. Each of them offers a similar result, but using its own features. High complexity of a node indicates greater reliability. Simple ones have their advantage in terms of speed, but cannot provide reliable fastening on all materials. You can read about other types of tourist hubs here.
Tools
For work you need: a pair of worn flat screwdrivers with “clogged” edges, one of which is sharpened “to a cone”, pliers, or better yet, tongs, a hammer, a roll of masking tape and gloves. It is very advisable to have in addition a small angle grinder with a cutting disc and a solid vice.
An example of sharpening screwdrivers, hereinafter referred to as “piles”.
For example, they work like this. Preparing to punch the first strand.
Types of cables according to lay direction
1. Cross - strands are twisted into a cable in the direction opposite to the direction of laying of the wire. 2. Unilateral - the direction is the same. 3. Triple - type 1 lay is used, but the wires and strands are twisted in different directions. 4. Combined - in such products, left- and right-hand directions of lay are simultaneously used.
In addition, cables are divided into rotating and low-twisting. The material from which the core is made also divides them into organic, single strand or steel wire.
Now you can consider in detail how to braid the cable yourself. Tools needed to complete the job:
What is it made of?
Here, too, everything is simple: the cables are metallic and non-metallic. Steel certainly deserves respect, but not everyone can use such a cable. Yes, it is strong, but it hardly softens the jerks that are inevitable when towing.
At the same time, you are almost certainly guaranteed splinters and abrasions due to the thin steel wires that make up the body of such a cable. Such a cable will not stand on ceremony with the body either: it was ideal for the ZIL-130, but not so much for soft-bodied modern passenger cars.
Compactly placing such a product in the trunk is very problematic: a large rusting bay is not a gift. Finally, due to the same rust, the cable may simply burst under load.
With non-metallic cables everything is simpler: compact, lightweight, aesthetically pleasing, and do not rust. These are the cables that are mainly sold today. However, here you cannot miss the load: it must be selected based on the weight of the towed vehicle, and with at least a double margin. Let's say, if your car weighs about two tons, then the cable should be designed for about 5 tons.