Among the known metals, lead stands out brightly - this material has been used by mankind since ancient times and is considered the first metal to be melted down. Products made from this alloy were widespread in the past, but today, after learning about the toxicity of this metal, it is much less common. The value of this material has not fallen due to its properties and features, so its value at collection points is higher than that of other scrap metal. Let's figure out where lead is used today, how it affects health, and where lead scrap is bought in Moscow and the Moscow region.
Why is lead mined?
What is lead made from and how is lead mined in nature? Non-ferrous metals are an important resource in high-tech types of production, necessary for the manufacture of electronics, equipment, as well as in light industry.
Interesting materials:
How to send a parcel at the client's expense? How to send Sdek at the expense of the recipient? How is the Adjustment Invoice reflected in the VAT return? How is the balance of an active liability account reflected? How to reflect the receipt of cash to the current account? How to reflect an adjustment invoice in the sales book? How to pay off MTS debt on a personal account? How to understand a passive or active account? How to top up another subscriber's Beeline account? How to top up a Yandex wallet account via an ATM?
Making lead fishing weights with your own hands
Hi all!
Today I want to share my ideas, best practices and experience in making lead weights for spinning fishing. I’ll say right away: this method is only suitable for small batches and simple shapes of sinkers. For example, I would recommend making collapsible Cheburashkas using aluminum molds, which I use myself)
Before the start of the season, I decided to add weights to my collection - “bullets”, for the increasingly popular jig-rig.
Materials
So where do we start? First, we need to prepare a set of materials for making molds for our future sinkers. I make the forms from ordinary building plaster.
I use stainless steel wire with a cross section of 0.8 mm. Also, we will need ordinary disposable containers, any fatty cream, such as “baby”, water and an old spoon.
Samples
These are ready-made sinkers, purchased or previously manufactured. Any thing can serve as a model. I made one sample from a real bullet)
The shape can be slightly adjusted with plasticine, but only a little, because... When the gypsum sets, it releases heat and a large volume of plasticine will simply melt. In this case, I took the bullets I had previously made and equipped them with wire loops, fixing it all with green plasticine.
Mold making
You need to prepare the gypsum mixture according to the “powder to water” rule, in a ratio of approximately 1:1, you need to focus on the consistency, it should be creamy.
Pre-lubricate our mold and samples with the prepared fatty cream.
Pour the mixed plaster into the container to fill exactly ½ of the container and tap it on the surface, expelling air bubbles. As soon as the gypsum begins to set, it is necessary to immerse our samples halfway in the hardening plaster.
The setting time of the gypsum depends on the brand of the powder itself, the minimum time is 2 minutes, i.e. after 2 minutes we begin to carefully look at the surface of the plaster.
As soon as it becomes matte, it’s time!
We insert guides along the edges of our form. It can be anything, I use pieces of wire, toothpicks, lollipop tubes.
Now we wait for complete hardening, 20-30 minutes is enough.
Then we lubricate the surface of the mold and the samples recessed in it with our rich cream.
We dilute the plaster again and fill the container to the top. We also remove air bubbles by tapping and leave to harden for the same 20-30 minutes.
After hardening, carefully remove the mold from the container and carefully separate it into two halves, removing the samples.
That's it, the form is ready! We leave it to dry for a couple of days near the battery - the water should completely evaporate.
So I made 3 molds with different weights. Before the molds become unusable, the weights cast in them will last me for 2 or 3 seasons). The main disadvantage of such forms is their fragility.
Gypsum is a fairly fragile material, so molds quickly crack, caverns and chips appear in them, especially for split molds. Bullet molds last much longer.
For example, the uniform shown in the photo in the article is already in use for the second or even third season.
After the mold has completely dried, it is necessary to make sprues. To do this, mark the line of the sprue, connect the mold and drill out the sprue in the shape of a funnel using drills of different diameters. For the top point of the funnel I use a 10.1mm drill, for the bottom I use a 3.5mm drill.
Casting sinkers
Now we can start casting the lead weights! To do this we need wire for the ears, lead, a torch or crucible and a clamp.
We bend the ears from the wire using pliers and put them into the mold.
We connect the two halves of the form and fix them with a clamp.
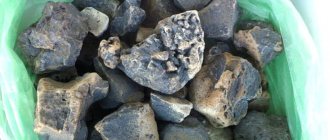
Melt the lead. I have old cheburakhs, tire weights and other lead scrap. I heat up the lead with a gas torch, it literally takes a few minutes, it’s very convenient! Next, pour the lead into the sprues and let it cool, that is, when you pour it into the last mold, the first one has already cooled down, everything is very fast!
Now we separate the mold and remove our weights.
Next we repeat in the same sequence.
Weights are cast very quickly, sometimes before fishing I remember that I have run out of a load of a certain weight, and then, in literally 20 minutes, I cast the dozen or one and a half weights I need. It takes less time than going to the store for the same goods)
In this way, you can experiment with the shapes and weights of sinkers, and invent some special shape of sinkers that are not available in stores.
For example, last season I experimented with stick weights, making several versions of non-snagging weights with different lengths and diameters.
The weight of such “stick” sinkers can be reduced directly while fishing, thanks to the small diameter of 6 and 8 mm (if you need to reduce the weight, you can simply bite off part of the sinker with pliers). Also, thanks to such diameters, the load passes 95% of hooks!
Another simplest form for casting weights is the “bullet” for Carolina. To make such a mold, you need to pour plaster into any sufficiently high mold, I took the cap from an aerosol can, and simply place the bullet samples coated with the same cream on top with the sharp side into the hardening plaster - that’s it, the mold is ready.
To cast such bullets, it is necessary to insert a “mortgage” made of steel wire, lubricated with ordinary toilet soap, into a mold, and pour lead on top. That's all.
The insert is removed from the bullet, leaving a hole for the fishing line.
Pros and cons of making your own sinkers
The most important advantage is the low cost of the resulting weights. It is also important that you can always cast the missing weights within 10-15 minutes if you have ready-made molds. I practice this quite often; before fishing, I quickly cast a dozen weights, if necessary.
Another plus for these homemade products is that you can choose a special shape and weight of the sinker for your fishing conditions, equip it with any accessories, “play” with the diameter and size of the loops, etc.
Also, this is a quite exciting and educational lesson in physics and chemistry for your children! Children are happy to get involved in the process, even for this alone it’s worth trying to make a mold and cast weights yourself!
Now about the disadvantages: the most important one, as I already mentioned, is the fragility of the form. You can add reinforcing additives to gypsum, such as lime and others, but this will not fundamentally change the situation.
Also, one of the disadvantages of this method is a certain amount of flash on the finished weights, this applies to collapsible forms. A mold for a “bullet” with a hole is the most successful option both in terms of durability and ease of making the mold, and in terms of casting the sinkers themselves.
I 105% recommend making a mold for bullets! I would also consider the difficulties of marking such cargo as a disadvantage. The grams have to be marked manually.
In general, making such sinkers does not require any special equipment or any special knowledge or skills, everything is extremely simple!
Blitz tips
- The porosity of a plaster mold and the tendency of lead to stick when curing can be greatly reduced by using chalk or talc on the inside of the mold to fill voids and create a layer between the lead and the plaster.
- To increase the service life of a plaster mold, you can impregnate and treat it from the inside with a sealant to reduce water evaporation when pouring metal. It won't be durable, but it will probably last a few more uses.
- When making small sinkers, regular matches or nails can be used to create outlet channels by simply sticking them into the mold material before it hardens.
- Instead of soap solution and vegetable oil, you can use silicone grease.
Electronic wobbler with recharging before fishing: 3 in 1. Glow, vibration and sound effect. What wobblers can this bait be compared to and what is its effectiveness? Read in the article.
Source: lakeking.ru
Where can I get raw materials?
As for lead, I would advise you to “make friends” with some plumber (or an employee of a car repair shop where batteries are often changed). Personally, I was very lucky - I became friends with a neighborhood plumber who “supplies” me a bunch of lead/water pipe scraps completely free of charge.
If you don’t have such friends around you, then it doesn’t matter. Just find out where metal is accepted (or recycled) in your city and go there for the weekend. Even if you have to buy “pieces” of lead raw materials, don’t worry! You will still be a serious winner, considering the rather “inflated” cost of store-bought / branded weights.
Forms for regular use
A plaster mold, even a very well made and dried one, will sooner or later collapse and you will have to make a new one or use a product suitable for frequent use.
Of course, for repeated use, molds made of heat-resistant steel or cast iron are best suited, but making these yourself is almost impossible. But cement is good for creating a melting mold, although this will require a little work.
Materials and tools for reusable uniforms:
- formwork material (wooden boards);
- liquid soap;
- cement;
- round file;
- fine sandpaper;
- clamp;
- cylinders for inserting into the filler hole;
- wire for making loops for the sinker.
For repeated use, molds made of heat-resistant steel or cast iron are best suited, but making these yourself is almost impossible
How to increase your fish catch?
Over 7 years of active fishing, I have found dozens of ways to improve the bite. Here are the most effective ones:
- Bite activator . This pheromone additive attracts fish most strongly in cold and warm water. Discussion of the bite activator “Hungry Fish”.
- Increased gear sensitivity. Read the appropriate manuals for your specific type of gear.
- Pheromone -based lures .
Lead sinker - how to properly make a casting of the desired shape using available materials?
Every self-respecting fisherman usually has in his arsenal, in addition to hooks, floats and baits, several options for sinkers - lead castings that ensure accurate casting and immersion of the bait in the water.
And no matter how sad it is, if the cast is unsuccessful or the fish leaves the hook, in addition to the bait and hook, the sinker is also lost, a thing that is not very expensive, but very necessary.
So we have to open a foundry for lead weights in the kitchen several times a season.
Characteristics of the material and use in the manufacture of sinkers
For those who are just starting their career, experienced fishermen advise not to hesitate to stock up on a whole set of sinkers at once. Both very tiny and quite substantial ones are suitable here.
But, this is for the first time, and then, when the fisherman gains experience and thoroughly studies all the nearby bodies of water, it becomes necessary not only to replenish the supply of weights, but also to make them as convenient as possible for fishing.
This is where a soft, fusible and fairly heavy metal that does not react with water or air comes to the rescue - lead.
One of the reasons why lead and its alloys have become so popular for casting weights is the availability of the metal.
First as the main metal for casting shot, and later as a metal widely used in the automotive industry, in railway transport, and in communication lines, lead, in fact, has never been a big problem.
On the other hand, it was possible to melt the metal with a melting point of only 327.5 degrees using kerosene gas or a fire, and it could also be melted in an ordinary large tablespoon or tin can.
Pros and cons of lead sinkers
Like any other tackle, a lead sinker has its pros and cons. Here, to understand, you need to take into account both the consumer qualities necessary for fishing, and those issues that relate to manufacturing issues, for example, the availability of materials or the complexity of the work.
According to experienced fishermen, the main parameters that a sinker must meet should include:
- Sinker weight – it must be heavy to ensure accuracy of casting the tackle;
- Have a streamlined shape - in the air, the irregular shape of the sinker, rectangular shape or roughness greatly influences the casting distance and accuracy, and in the aquatic environment this creates turbulence that scares away fish, prevents the bait from being guided correctly, and contributes to entanglement in aquatic vegetation;
- The casting should not only have smooth shapes, but also provide reliable fastening to the fishing line;
- Be inconspicuous, not stand out against the background of bottom vegetation, have, if possible, a matte color that is natural for the aquatic environment;
- Made from available materials;
- If possible, be manufactured in the simplest conditions using a minimum of auxiliary tools;
Among the advantages of lead sinkers is the availability of the material
As you can see, the basic requirements for sinkers are quite simple and quite applicable to a material such as lead. Therefore, the positive aspects of lead sinkers are:
- Availability of material;
- Ease of working with lead castings;
- The ability to independently smelt the required amount of sinkers;
- Cheap production, even if one or two are lost, it will not be a big tragedy;
- The ability to independently choose the weight and shape;
- The material has a natural color, ideal for the environment of most bodies of water.
However, it is worth mentioning the problems associated with the manufacture of lead weights:
- The work carries some risk of injury;
- It is not always possible to achieve results the first time;
- To work, you need a tool.
Technology for making lead weights at home
Casting lead sinkers, despite the ease of technology and availability of materials, is still a mini metallurgical production, so before starting work it is necessary to at least superficially study the basics of metal melting. And although there is nothing special here, it is very important to listen to advice and instructions - both the result of the work and the safety of the work depend on it.
Materials
For the work you will need several types of materials - plaster, cardboard, tape, twine, wax or paraffin, and of course, lead.
Plaster or alabaster is usually used to make molds. Gypsum is more reliable than alabaster, but alabaster is more affordable. These two materials are required to make casting molds.
The auxiliary material for the work will be wax or paraffin. From them, models of future sinkers are made.
Clamps are used to secure the halves of the forms, but it is cheaper and easier to use twine or a clothesline, or, in a very modern way, adhesive tape.
Lead for melting can be found at any scrap metal collection point. Not only rechargeable battery scrap is scrapped; often lead-sheathed communication cables, lead alloys such as babbitt or typographical lead font are scrapped.
Mold making
The classic method of making a mold consists of sculpting a sinker model from wax or paraffin and then casting a reusable mold from plaster or alabaster.
Several models of sinkers are made from wax or paraffin. In principle, you can use plasticine, but then, in order for the model to separate from the plaster mold, it will be necessary to lubricate it with Vaseline or fat-based hand cream.
After receiving the models, a gypsum solution is made and poured into a plastic or cardboard mold, so that the top surface is as smooth as possible. Until the plaster completely hardens, the model is pressed halfway into it at a distance of 1-1.5 cm from the top edge of the mold.
After final hardening, the entire surface, including the model, is smeared with Vaseline, grease or fat-based cream and filled with plaster on top. When pouring, make sure that the height of both forms is the same.
Lead weight mold
After drying, the molds are separated, the model is removed, and the place where the wax was is cleaned of any remaining grease. After the plaster molds have completely dried, grooves are made from the mold to the surface using a sharp knife or the tip of a thick needle. These channels are necessary to remove air from the filling cavity. A neck is made in the upper part for pouring metal.
In principle, the melting point of lead makes it possible to make sinkers without casting plaster molds. You can use wooden blocks, potatoes or beets as a mold; even ordinary office paper rolled into a cone in several layers can be cast into a good sinker.
Casting sinkers
It is recommended to grind the lead before casting. For melting, it is enough to achieve a metal size weighing 10-20 grams. This is necessary so that the metal melts completely and reaches the casting temperature of 400-450 degrees.
The form is connected and tightly tied with rope, tape or pressed with a screw clamp. They do this tightly, but not too rigidly, so that the form does not crack due to the temperature of the metal.
Melt lead in a melting bowl or spoon. Experienced fishermen use a regular ladle with a curved handle or a large stainless steel spoon for these purposes. After the lead has melted, the film is removed from the metal surface. The mold heats up for 5-7 minutes.
After the metal has acquired the necessary fluidity, it is carefully poured into the neck of the casting until molten metal begins to appear from the air channels. After all the necks are filled, the mold is left to cool at room temperature.
It is recommended to open the form 4-6 hours after filling.
Final processing
After the casting has cooled, they begin to separate the molds and remove the castings. First, remove one part, and then carefully remove the casting from the second part of the mold.
The resulting lumps of lead are bitten off with pliers or cut off with a knife. The next step is making holes in the weights. This is usually done with an awl or a thick needle. And giving the final shape is done using sandpaper and a file.
What finished lead weights look like
Just like that, with the help of basic tools and available materials, you can pour out the required amount of sinkers of various shapes.
Today, with the availability of technologies and materials, casting sinkers is becoming even easier, because on fishing forums you can order not only ready-made sinkers, but also entire sets with ready-made molds for casting and all the necessary tools.