Preparing the level for work
The quality and correctness of markings at a construction site depend on the device settings. Before setting up the laser level correctly, carry out the following preparatory steps:
- fully charge the level battery and place it in the device;
- adjustment begins if a laser beam appears when the meter is turned on.
To obtain accurate markings, the laser level is placed on a flat surface. When installing the marker, the following requirements are met:
- There must be no obstacles in the way of the device: objects, people and animals;
- the distance between the object and the level should not exceed the maximum mark, the value of which is indicated in the instructions for use by the manufacturer;
- a perfectly flat surface will allow you to take measurements with high accuracy; choose a table, tripod or homemade holder for the base;
- to prevent the meter from moving during marking, the device is fixed on a flat surface;
- Some models have a built-in self-leveling function; if the device is installed on an uneven surface, the device emits a signal.
Design features
The construction bubble level belongs to the category of simple, but most popular devices for repairs. Ampules with air pumped inside are installed on the bar protruding as a solid base. The ampoules have marks for measuring and determining the position of the air. When the bubble is placed in the middle, the surface is considered flat. If it moves away from the central part of the ampoule, then there is a tilt, the magnitude of which is estimated by the nature of the deflection of the air relative to the center.
The ampoule containing the air bubble contains liquid, usually industrial alcohol. The integrity of the ampoule must not be compromised.
Instruments vary in length - from several tens of centimeters to 2-3 meters or more. When working on limited surfaces, short structures are used, and in plastering work, longer ones are used. For example, for laying tiles, choose a level length of 400-1000 mm.
Long structures are susceptible to damage during transportation and operation. Therefore, shockproof structures are in demand.
Various materials are used to make the base. In the photo of the bubble level you can see products with a solid wooden or hollow aluminum and plastic base.
For metal, devices with built-in magnets are more suitable, and the presence of a ruler on one side of the bar makes marking work easier.
The accuracy of the work is ensured by several ampoules included in the design:
- the first is located on the surface of the wide part of the level and is used for horizontal alignment;
- the second is placed on a narrow and short surface for operations with a vertical orientation;
- the third is not available in all models, but its presence on the back side of a narrow plane at an angle of 45 degrees is useful for monitoring the correct operation.
The level should be applied to the wall, first leaning it against the nail. It is necessary to level the position so that the bubble shows alignment. A line is drawn on the plane of the wall. The device is turned over and the line is drawn again.
If the lines match, then you can be sure that everything is configured correctly. Otherwise, you need to make corrections:
- on the right, where the marks diverge, a mark is placed in the center between the lines;
- a level is applied to the screw, but this is done so that the other end coincides with the marking point;
- the position is fixed;
- The ampoule must be adjusted to the required position.
How to Adjust a Laser Level for Accuracy
Level calibration begins with adjusting the vertical beam. Then tighten the horizontal guide and set the angle to 900. The stages of work are as follows:
- The device is mounted on a tripod.
- Set the horizon by rotating the bubble level.
- Adjust the vertical and simultaneously check the ray indicator.
- Adjust the angle and speed of rotation of the beam.
- Install the laser pointer receiver.
Disabling unnecessary functions at the time of use allows you to extend the operation of the meter on batteries or a rechargeable battery. Attention! A self-leveling laser level may have a slight error. Therefore, the device is adjusted manually.
Bubble level
The bubble level is a profiled aluminum frame in which flasks with an alcohol solution are fixed. There are marks on the surface of each, and there is a small air bubble inside. The number of flasks can vary from 1 to 7. The simplest level is designed for measuring one horizon (vertical or horizontal), the average one has a container with a bubble rotated 45 degrees, and professional ones are designed for special work and are practically not used in everyday life.
Important! The problem is that all the bubble levels in the store lie. They cannot perfectly measure the correctness of the horizon. Responsible, expensive brands test each product for accuracy and put a mark on the body that shows the measurement deviation in the left and right directions.
How exactly to check the construction level of the bubble type depends on the design of the flask holder. Products produced today:
- with adjustable screw holder;
- with glued flasks.
In the latter case, it is easier to buy a new tool. It must be tested upon purchase to ensure the accuracy of the measurements. The simplest bubble type level check is as follows:
- a flat surface is found;
- a level is set to measure the horizontal surface;
- the position of the bubble in the flask is remembered;
- the level is flipped 180 degrees (the right and left edges are swapped).
If the position of the air bubble has not changed, the instrument has fairly high accuracy. But it happens that you simply cannot find an ideal horizontal surface in a store. In this case, they act differently.
- Setting up the Bosch PCL 20 laser level
A level is placed to measure the horizontal. Sheets of paper are placed under one of its edges. As soon as the instrument shows the ideal horizon, a metal ball is placed in the center of the body frame. If it does not start to roll to the side, the meter provides accurate data.
How to calibrate the horizontal line of a laser level
Before marking the room with a new device, it is necessary to make adjustments. Do-it-yourself laser level calibration is done in a large room.
The level is installed between walls located at a distance of 5 m. Turn on the device and mark the location of the pointer. Alternately turn the device 180 0 and mark the location of the pointer on the opposite side. The points are conventionally called a1 and b1.
Adjustment of a laser level with conical or cylindrical prisms is carried out through marks located at a distance of 5-10 m from each other
The level is transferred to the wall and installed at a distance of 60-70 cm. Perform similar actions and mark the points of the pointer. The points are called a2 and b2.
Measure the distance between a1 and a2 and between b1 and b2. Find the difference between the obtained values (a1 and a2 - b1 and b2). If the deviation does not exceed the value specified in the instructions, it means that the device is calibrated correctly and shows the correct level of the horizontal plane.
If the value differs greatly from the declared accuracy, manual adjustment is made. Using a hydraulic level, a straight horizon is found. Draw a line and begin to tighten the screw. As soon as the lines match, the setup is considered complete.
The prism level is adjusted in two planes at once, since it emits two beams simultaneously
Criteria for choosing laser levels
The classification of laser levels has already been discussed above. Let us add that today the market offers mainly two varieties that are most in demand. These are self-leveling and rotary devices.
The first are the tools with which laser planes are built. Within this category there are two groups:
- Operating on the basis of a pendulum magnetic damper compensator. The latter simply set the level without human intervention in the horizontal plane due to the influence of magnets on the pendulum.
- The design of which includes an electronic compensator. This is a more modern model with more accurate level setting, and therefore the ability to reduce errors.
Self-leveling model of a laser level Source www.artem-tools.ru
The second are rotating devices that can even be used for outdoor work, because their beam range reaches up to 100 m. There are four groups in this category:
- Those that are installed manually. It should be noted that representatives of this group are slowly fading into oblivion, like instruments that have worn out their time.
- Semi-automatic. Here the situation is like this - the horizontal line is set automatically, but the vertical line will have to be set manually.
- Automatic horizontal. These models do not have a beam that reflects vertical lines. In fact, this tool performs highly targeted tasks in terms of marking the horizon. A very accurate device with a fairly large range.
- Fully automatic. Everything is clear here - automatic alignment of rays both horizontally and vertically.
Rotary version of the laser tool Source www.hilti.ru
In principle, this is the entire classification. The question naturally arises of how to choose a laser level for your home from all that is offered. Let’s say right away that price actually plays a secondary role when choosing. The main thing is to decide what problems this device is being purchased for. But it’s optimal to choose a self-leveling model. It will save a lot of time. Moreover, such tools are easy to use.
If you purchase a laser level for your own needs, for example, to carry out minor work in the house: hanging a curtain rod or cornice, pouring a screed, and so on, then you should not buy an expensive model that is used by professional builders. But the latter should choose expensive tools with a full range of functions. And these are options with 3D, 5D or 6D functions with additional planes, plus a plumb line. A good addition to the functionality would be a rotary dial. With its help it is easier to mark the perimeter of the room along the horizon.
So, having considered the question of how to choose a laser level, let's move on to the section - rating of laser levels.
A huge variety of laser levels Source postroyka.org
Vertical adjustment
The device is attached to a holder and installed at a distance of 5 m from the wall. A plumb line 2.5 m long is attached to the wall. Turn on the level and draw the line with the plumb line. Check the deviation value. Values of 3-10 mm indicate that the meter is adjusted and the error is acceptable.
Devices with a conical and cylindrical prism to determine the correct vertical are adjusted using a plumb line
Where to begin
Using this device is easy. But first of all, everyone should understand that laser levels are represented in a huge variety on the construction tools market. And each of them has its own settings, its own rules of use. But all laser levels are divided into three main categories:
- Static, they are also crossliners, they are also multi-prism builders.
- Rotary, they are also levels, they are also multi-prism builders.
- Static for axes, they are also turned, they are also pointers.
It is clear that manufacturers include instructions for use with the device, which describe how the laser level works and how to use it correctly. It is not difficult to understand this document, because the application process itself is simple. But many people have questions about some things. The only thing you need to pay attention to right away is the way you eat. There are three options here:
- from the mains using a cable and plug;
- from batteries, the charging of which must be constantly monitored;
- from batteries, which are inserted into the compartment to power the device at the beginning of operation.
If the power supply is normal, a beam should appear when the laser level is turned on. This indicates that the device is ready for use.
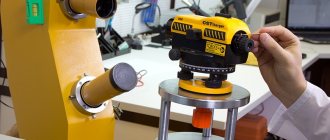
Laser level equipment Source www.geo-spektr.ru
Tilt adjustment
Do-it-yourself laser level adjustment to check the 900 angle is performed between two planes. There are two methods for determining the correct parameters:
- for adaptation with a barrel-shaped plane builder;
- with cone prism.
The first type of device has a tribrach or rotating base. The device is installed between the walls at a distance of 2 m and marks are applied on vertical surfaces.
Then the meter head is carefully turned clockwise by 900 so as not to move the device. The previously applied marks are combined with the readings of the laser pointer. This procedure is done four times for each side.
With perfect alignment of the marks and the beam, the correct angle value of 900 is obtained
The second technique is suitable for a cone prism device because the head is not centered when rotated. The device is placed on the floor and two marks are placed. The first is marked close to the level, and the second at a distance of 2 m. The body is turned 900 and the marks are aligned. This is done four more times for each surface.
Checking the device for correct installation
Much depends on the accuracy of the measurement results carried out by the device. If the plane for laying tiles is knocked off, then the evenness of the installation of the tool will affect the interior design. If the plane is checked during the construction of a house, then the installation of the level will affect the quality of construction and the reliability of this structure.
Each device (depending on the model and its cost) has corresponding error indicators
The permissible error values are indicated directly in the instructions for the equipment, which should be taken into account when purchasing a tool. Acceptable error values are indicated in the appropriate units of measurement, which are mm/m
Errors are not so important when using the device indoors, but they are extremely necessary when carrying out external work on beating a plane and leveling walls.
The error is one of the main technical parameters of the instrument, and some manufacturers indicate the magnitude of deviations not only in the technical documentation, but also on the body of the device. If the magnitude of the error is known, then the permissible deviation from the norm can be calculated. If the deviation value is higher than permissible, it is recommended to use a level with a smaller error value.
It doesn't matter if the laser level is being used to level a floor, wall or ceiling, but before taking the corresponding measurements, you will need to check the accuracy. The check is quite simple, for which the following steps are performed:
- First you need to put marks on two parallel walls in the room, according to which the check will be carried out
- One mark is placed on the wall that is closer to the device (at a distance of up to 1 meter)
- The second mark is placed on the opposite wall, located at a distance of more than 2 meters. The further the distance between the walls, the more accurately device deviations can be identified
- After marking with a marker or pencil on the wall, you need to move the level directly to the wall, which was further from the level
- Align the directional laser beam with the point that was marked. Then project the beam onto the opposite side and see if it matches the mark
- If it matches, then the instrument has an insignificant error (note that the greater the distance between the walls, the higher the error, and the smaller the gap between them, the correspondingly lower the error)
- If the laser beam does not coincide with the mark, then there is an error, and its magnitude is quite high. There are special adjustment screws in the device body, which also allow you to adjust the level, reducing deviations from the norm
Before using a laser level to level walls, you need to make sure that there are no large deviations, otherwise the indicators will not correspond to reality. Below is a video instruction and training on how to properly check the level for measurement accuracy.
https://youtube.com/watch?v=ffrWqniqrfs%3F
Adjusting the circular level of the level
A set of actions aimed at aligning the elements of the meter makes it possible to reduce the error rate to a minimum value. To adjust a round level, perform the following steps:
- a bubble is installed in the center of the level;
- the device is turned at a right angle;
- check that the installed bubble does not move;
- if the markings are shifted, then using lifting and adjusting screws the error is eliminated.
Calibration is carried out until the displacement of the bubble element when turning is completely eliminated
Rating of laser builders
The rating is usually based on product characteristics. There are no exceptions with laser levels. What you need to pay attention to when choosing this device:
- in what temperature range can it work correctly;
- radiation range;
- accuracy;
- how many directions can he hit;
- type of fastener;
- functionality: self-leveling, self-switching and so on.
So, let's move on to the rating of laser levels.
DEKO Laser Level
Chinese instrument, inexpensive, with two lines intersecting at right angles. Fastening is done using suction cups, you can hang it on a nail or self-tapping screw. Power supply: three AA batteries. Characteristics:
- range 10 m;
- accuracy, also known as error 0.3 mm;
- operating temperature range from +5C to +40C;
- 90° rotation;
- This is a non-self-aligning model.
The video shows a Chinese laser level brand Laser Level:
Ermak 659-022
Although this device has a Russian name, it is produced in China. Let's move straight to the characteristics:
- number of lines - 2;
- beam range - 10 m;
- error - 0.5 mm;
- temperature from +5C to +40C;
- scan angle: horizontally - 100°, vertically 120°;
- self-leveling within 4°.
The video shows a laser builder of the Ermak brand:
Bosch Quigo II
German quality has always been at its best. And this little device exceeded all expectations. It actually has small dimensions - it is a cube with a side length of 6.5 cm and a mass of only 250 g. That is what they call it - a pocket level.
A universal thread is used for mounting, which is suitable for all known tripods. Powered by two AAA batteries, which guarantees long-term operation. But this level also has disadvantages, which are based on its size. This is low accuracy and the impossibility of turning off one of the two intersecting lines, that is, when turned on, two beams will always shine.
And characteristics:
- glow range - 7 m;
- error - 0.8 mm;
- temperature range from +5C to +35C;
- the scanning angle is the same both horizontally and vertically - 60°;
- self-leveling - 4°.
The video shows how you can work with a Bosch Quigo II laser level:
The rating of the best inexpensive laser levels can be continued, because the market is filled with a huge assortment from a large number of manufacturers. Our task was to show the capabilities of inexpensive models that are popular among home craftsmen today. And also focus your attention on those indicators that shape the quality of the instrument.
How to set up a level for work after a fall
If the laser level is lost when the meter is dropped, you can adjust it using bubbles or a thread mesh. Inconsistency between indicators requires adjustment.
Attention! Experts recommend checking and adjusting the device daily to avoid distorted markings in the room.
The device is subject to metrological certification annually. If the level has been dropped or subjected to other mechanical impacts, the alignment is performed out of turn.
Specialized stores carry out mandatory pre-sale inspection and adjustment of the device. Adjustment is performed using various methods depending on the type of device. Self-calibration is done using:
- shifting the center of gravity and simultaneous rotation of the screws;
- installation of a flat plane of the front and side sides;
- Plumb adjustment of the meter.
Formation of the cross
Another type of level that you can create yourself is a laser cress.
This device is convenient to use when hanging cabinets in the kitchen or paintings indoors, as well as in many other cases. To create such a construction tool, you need to prepare a tripod from a video camera, a non-working player and several unnecessary disks. Creation scheme:
A cross made of laser pointers is installed on a tripod so that it begins to rotate around its axis
You can also use a drive from the player for this. It is also important to take into account that the level can freely move from one vertical to another to the desired height. The discs are glued together and attached to the old player. At the end of the work, a cross of laser pointers is attached to the disks. To install it, you need to use tape or other convenient means.
Due to the fact that the device will be in a stationary position on the tripod, it can be rotated in any direction without changing the height level. Having set all the necessary marking indicators, you can accurately set the level to any desired height in the room without regularly adjusting the device.
Checking the laser level for accuracy yourself
The simplest test of the meter's accuracy is done with your own hands. For this, method 1800 is used. Marking is carried out along the beams in the normal and deployed position of the device. If the position of the pointer and markings match, the device is calibrated correctly.
Adjustment screws help to correctly calibrate the device
Preparatory work
Preparing the device for operation does not take much time. However, if you skip one of the preparatory operations, the results may be far from desired. Here is the procedure for preparing the device:
- When using for the first time, carefully study the instructions. Even if you have already used a laser level, there are subtle differences in the settings of different models.
- Accurate determination of the scope of upcoming work. This will help you understand what operating mode to set the device. For example, when gluing wallpaper, you can set only the display of vertical lines, turning off all other markings.
- When you first start the device, charge the battery or install batteries. If the device has already been used, you should check the charge level before each use of the device, so as not to unexpectedly find yourself in a situation where, in the middle of work, all the markings suddenly disappear.
Before starting work, it is worth considering the level of protection of the device from dust, water droplets and other contaminants. For example, if the device meets the IP20 protection class, you should not take it outside in wet weather. Moreover, you should not leave such a device on the street unattended.
The last aspect that you need to pay attention to is the rules for installing the level before starting work. Different models are installed on the floor (on tripods or tripods), attached to walls or ceilings. To find out how to choose a laser level, read here
Do-it-yourself checks and adjustments of an optical level with a compensator
A beginner can set up a laser level using the video instructions. A level with a compensator is adjusted by loosening the screw fasteners and bringing the horizontal and vertical threads into the correct position.
Following the manufacturer's instructions, adjust the meter. If these actions do not bring a positive result, then the meter is checked by specialists. Metrological centers or licensed institutes quickly adjust the device.
The most reliable building levels
Construction level ADA TITAN 100 PLUS on Yandex Market
Laser level BOSCH UniversalLevel 2 Set (0603663801) on Yandex Market
Laser level BOSCH GLL 3 X Professional (0601063CJ0) on Yandex Market
Laser level ELITECH LN 5/4V on Yandex Market
Box level BISON “standard” 2 shockproof ampoules, 60cm on Yandex Market
Continuing the topic: Subscribe, and your VK feed will contain all the most interesting things about technology: Calculation of consumption
electricity equipmentCalculatex10/29/2019How to properly use a micrometerOther equipment for repair08/31/2019How to use a multimeter: instructions for beginnersOther equipment for repair08/29/2019Types of multimeters: which one is better to buyOther equipment for repairHomemade vibrating plate and vibrating screedDo-it-yourself manufacturingYour opinion Loading...Equipment reviews Electricity
calculation calculatorCalculate
As practice shows, there are 3 reasons why you have to adjust the laser level: poor-quality adjustment by the manufacturer; inaccurate transportation; shaking of the device resulting from a fall or strong impact. Very often the latter happens - I dropped it, it seems to work, but somehow it’s not right. An extremely small percentage of devices pass these tests with dignity and do not get confused in their readings after them. Therefore, to find out whether calibration is needed or not, the device is checked for accuracy. I will leave a link to the article on how to do this below the text. You can also watch the video:
Today I’ll tell you what mechanisms need to be used to set up the Condtrol 2D laser level. A rare copy, by the way. Based on the information published on the company’s official website, it has long been out of production. In general, this is the unit:
For those who prefer videos, a video about setting up this model was posted on our YouTube channel:
THERE WILL BE A VIDEO HERE SOON
The second photo clearly shows the hole. This is a handiwork by the owner of the device - an attempt to manipulate the counterweight screw without disassembling the device itself. In principle, if you don’t particularly care about appearance, this is a good adjustment option for Condtrol 2D. Below you will understand why.
First, let's disassemble the body. As is usually the case with such measuring instruments, it consists of two halves fastened together with screws. You can reach them through the recesses located on the right side. You will need a simple Phillips screwdriver; unscrew the fasteners counterclockwise.
After the screws are removed, there is no need to rush to stretch the parts of the body in different directions. First you need to remove the cover with the control buttons. Just pry it off with the flat blade of a screwdriver.
Now you can pull.
The right half is removed first. A plastic holder for the locking rod is screwed to the left, without removing which it will not be possible to pull the pendulum structure out of the grooves. Access to the settings mechanisms is on the left.
To keep it out of the way, remove the power button. Please note that when you put it back together, the activation toggle switch lever must be placed in the central compartment of the plastic key.
Then we unscrew the screws that secure the part to hold the locking shaft. The left one is easy to get to, but to unscrew the right one you need to disconnect the cable going from the control panel to the microcircuit.
When you pull out this entire structure, so as not to lose it, immediately remove the return spring.
Remove the pendulum and turn it to the left. Upon closer examination, two recesses with pins and a bolt are revealed. For ease of perception, let's denote them V and H.
As you can see, the Condtrol 2D laser level is adjusted using standard means: the emitter mounting screws and a counterweight. The principle is almost the same as for the so-called Chinese laser plane builders. "bucket". I will not go into details on this matter, but for those who are interested there is a corresponding video:
In essence, everything is the same in this model: it is better and more correct to manipulate H and V than with a bolt. By screwing/unscrewing H or V, the position of only the 1st emitter changes. By doing the same with the bolt, the position of the entire pendulum is deflected. If both diodes have the same error in the same direction, you can use a counterweight for adjustment. But this is extremely rare.
All options for using fastening screws and the results obtained are presented in the pictures below:
I believe that everything is completely clear with the principles of calibration - I twisted the indicated screw, the position of the LED changed, and the state of the line changed. It's quite simple. Therefore, let’s focus on the nuances, namely: setting up Condtrol 2D is a continuous process of disassembling/assembling the case. Previously, the site published an article “How to set up a Bosch PCL 20” and from it you can find out that Bosch has the same problems. But its design does not include a plastic holder for the blocker, which must be permanently attached to the body during assembly. If you wish, you can even make it so that there is no need to assemble the case: we fasten the batteries with tape in the order in which they are in the battery compartment, solder the wires to them, and fix them to the contacts. Such tricks will not work with Control.
Remember about safety
It would seem that there could be something dangerous in such a harmless thing. However, the power of the laser beam used in this device is quite high. Otherwise, we will not see him during the day, in the light of the sun. Therefore, remember that the beam should not hit the eyes of people or animals. And while working, always wear safety glasses - by the way, with them you can see the beam better.
In construction, measuring work is carried out with extreme precision. Today, the best tool is a laser level, which projects planes in a given direction. Before using the level, you must install and configure it correctly - the procedure depends on the type of device.
Compliance with safety regulations
[email protected] Do not use the device in temperatures below 20 and above 50 degrees. This may lead to the device not working correctly. Due to the complex optical design, which is easily damaged, the laser level must be stored in a case. In it, he will be protected from moisture, dust and unnecessary shocks. The bag in which the device is stored must be clean and dry.
Also, after carrying out work, all dirt must be removed from the tool. In this case, pay special attention to the lenses; it is better to treat them with a soft cloth so as not to scratch the surface.
Tools Checklist: 10 tools that everyone should have in their home
What do you need to know to check the level?
The level, like any other measuring device, has a certain error. For a laser level it is very small, no more than 0.2 millimeters per meter.
However, this only applies to high-quality, professional models. Models are also available for sale, the error of which reaches 0.5-0.8 millimeters per meter.
To check the accuracy of the laser level. You will need a level and a tripod with a height control lever. To determine the accuracy of measurements, the level will have to be installed close to the wall in order to be able to apply marks on it.
It is important to know that the level works in two planes, X and Y. These letters can be immediately indicated on the body of the device. If they are not there, you can designate the directions yourself.