The sinker is one of the consumable components of the tackle and often disappears along with the hook when biting large and strong prey. In stores, the cost of sinkers increases in direct proportion to their weight. Therefore, if catching large fish is carried out using several tackles, then purchasing sinkers becomes quite expensive.
At the same time, this element of equipment is quite simple to manufacture and practically does not require careful processing and complex preparation for use.
The material for the sinker is also quite common and accessible, so even complex sinkers can be made independently using appropriate blanks.
Materials for making sinkers
Experienced fishermen advise beginners to stock up on a large number of different sinkers. They can be very tiny and large, light and heavy, of different shapes. By gradually studying in detail the conditions of the reservoir where fishing is most often carried out, you can replenish your collection of cargo with the most convenient ones to use.
In specialized stores, the cost of shipping depends on weight. If a fisherman uses several gears at the same time, then it would be more rational to cast weights with his own hands at home. This is more profitable in many ways.
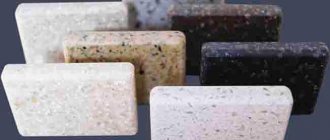
Gypsum
Gypsum powder for making molds
This material will be needed to produce molds for homemade weights. Only the combination of gypsum and lead has a number of specific features:
- when gypsum is heated to 200 degrees, moisture is released, which leads to splitting of the structure;
- after lead hardens, it is then difficult to remove it from the cell without harm to the entire form;
- Due to the microporosity of the metal, the finished product needs to be polished.
Therefore, gypsum is mainly used to make disposable molds.
Tin
Theoretically, small weights could be cast from tin. It is worth noting that tin weights are not capable of harming the fishing line. And solder can be made from a heavier metal. But the rationality of using such weighting agents is that they turn out to be too light. They are also visible to fish underwater.
It is permissible to add tin to lead.
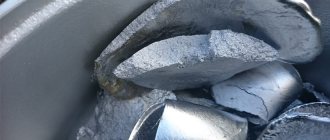
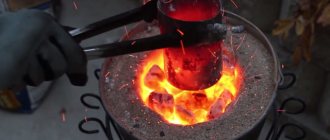
Lead
A universal low-melting metal that does not interact with water and air is lead. It is also popular as a source material for casting weights because it is affordable. This metal is widely used in the automotive industry, railways and communication lines. However, it is not difficult to melt lead yourself, using kerosene gas (it has a melting point of 327 degrees). The simplest option is to make a weight from a regular nut.
DIY catfish sinker
27 July 2022, 13:33
We are talking about sinkers for catching catfish using kwok. If you catch catfish with donks, you can pour out the sinkers even in a tablespoon. However, if you are serious about catching catfish, then special sinkers are needed for donks, which I will tell you about later. Now we have a short note about homemade weights for lines (“cuts”), which are used to catch catfish.
With simple tools and a little lead, you can easily make your own sinkers. This does not even require injection molds or special devices for casting weights.
The simplest do-it-yourself catfish sinkers
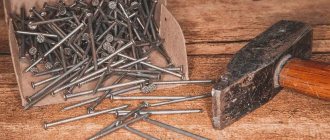
To make such sinkers, you need sheet lead, a small anvil, a nail and a hammer. More pliers. Fishermen usually use a cast iron iron as an anvil.
For as long as I can remember, such irons were used to make not only sinkers, but also summer and winter lures and all sorts of fishing little things. Sheet lead is easiest to cut from a suitable cable, but where to get it in our time is your task.
You can flatten any piece of lead with a hammer to the desired thickness.
You need to gradually wind a thin sheet of lead onto a nail or wire of a suitable diameter. Usually the diameter of this wire is 2.5 - 3 mm, so that the finished sinker slides along a cord with a diameter of 2-3 mm.
I don’t even know what to write about this operation: crimping and tapping, tapping and crimping. That's all.
After enough lead has been wound around the nail, the nearly finished sinker is filed.
Device for casting sinkers from shells
In the photo, my casting device was loaded onto a catfish, which was probably more than twenty-five years old. I use old sixteen-gauge brass shells as injection molds.
It is clear that any tube will do instead of sleeves, but sleeves have the advantage of having a hole exactly in the center.
There is not much to explain, since the process of making the sinkers is simple. The sleeve without a capsule is placed on a nail and filled with lead.
After the lead has cooled, the sleeve is torn off from the sinker with pliers, and the sinker is processed with a file. Look at the finished sinkers, cast in such a simple device: the file did not touch the top ones, but the bottom one was turned into an “olive”.
Varieties of sinkers for catfish
- The sinkers described above are sliding ones. These are the sinkers that are most common among catfish hunters with quok.
- There is another popular type of edge sinker: with wire rings. I don’t like such sinkers, since they contain “noisy” elements - wire sticking out of them. Semenych, like most “old school” fishermen, did not use such sinkers. On some of his cords (“edges”) the weights were made of very thin sheet lead, carefully wound directly onto the cord!
- I came up with my own sinkers a long time ago. They are much more complex than those described above, but increase the number of catfish approaches. Each of my sinkers has its own transparent leader. Such a sinker is much less alarming to catfish than one traditionally attached directly to the cord (“cut”). At the same time, the leash absorbs the jerks of the hooked catfish. I will dedicate a separate page of the site to my sinkers, because they deserve it.
- Buy sinkers for catching catfish using kwok
Source: https://chursin.info/blog/index_post_1532683989.htm
Samples of future cargo
Samples are understood as ready-made weights taken as an example. They can be purchased products or previously made ones. The sample can be any object. For example, made from a bullet.
You can use bullets for the sample
The plaster mold can be slightly adjusted using plasticine. But not in large quantities, because when the gypsum hardens, it releases a lot of heat and the plasticine begins to melt. If a bullet is taken as the source, then you will need to equip it with wire loops, which are fixed with the same plasticine.
Loops made of wire for scaffolding are attached to the bullet
Dovetail
Here we are talking about a dowel with a sliding installation. This gear is suitable for fishing in heavy currents. The weight should have a rough surface so that it does not dangle spontaneously along the bottom. The product should also have an internal hole for fishing line.
The most popular option in this segment is considered to be the “dovetail”. Its name comes from its shape - in the form of the letter V. To make such a weight, you can use metal or homemade molds.
Sequencing:
- A steel wire pre-treated with silicone (for the channel) is placed in the mold.
- Connect and fix the parts of the form.
- Lead is heated and poured through a special hole.
- Wait for it to harden and remove the product, then polish it.
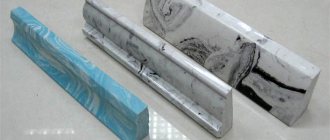
Ballerina
Another option for a sinker is “ballerina”. To melt it you will need metal, a container for melting it, and a mold. You also need to prepare stainless steel wire, heat-resistant cambric, a swivel and sandpaper.
Manufactured cargo "ballerina"
The manufacturing process itself includes the following steps:
- A mold is made from plaster, wood or other suitable material.
- A metal rod is placed in the central part.
- Lead is melted and poured.
- After hardening, the sinker is taken out.
- Sand it until smooth.
Now a swivel is installed at one end of the rod and secured with heat-shrinkable cambric.
Spoon
The easiest way to make a sinker for a donkey is to use a regular aluminum spoon. This is where its name comes from. To do this, place a container over the burner and melt lead in it. Then pour it into a spoon and wait for it to cool. Afterwards it comes off easily.
Spoon for casting weights will suit any size
The resulting shape of the weight is convenient in that the weighting material is not carried away by the current at the bottom. They lie flat and can remain in this position for a long time, holding the tackle. The disadvantage is that spoon-shaped sinkers are light in weight. After all, it is impossible to pour more than the dimensions of the cutlery dictate.
How to make a fishing sinker
This technology is suitable for the manufacture of various equipment elements and fixtures. You can cast sinkers for bottom fishing, sliding and stationary, eccentric sinkers for jig fishing, “bullets” for Texas equipment, cut-offs, depth gauges, etc.
All this can be done at home, and without special injection molds. When fishing in the current, “cone” sinkers are convenient. To begin with, a cone is made from whatman paper or thick paper.
Office equipment paper and PVA glue or thick paper on which some newspapers and magazines are printed are excellent for these purposes.
Next, you need to glue it together, and then wrap it with thin wire for reliability. Sinkers can have different sizes. The most successful is a sinker that has 1.5 centimeters on the upper cut and a height of 4 or 3 cm. From below, using scissors, you need to cut the tip of the cone so that the hole is about 1.5 mm in diameter.
Next, a ring is made from thin copper wire, and its ends need to be braided into a pigtail, which is then inserted into the hole at the end of the form. If necessary, I insert a wire loop, fastener, swivel, etc. into the top of the cone. If a through hole is necessary, then along the axis of the mold I install a thin metal knitting needle, pre-greased.
I place this paper cone in a yogurt cup filled with sand and fill it with molten lead. I try to use sand that has been washed and always dry! After 2-3 minutes, the castings can already be removed from the sand with pliers and cooled under running water.
Using wire cutters and a file, I bring the casting to the desired size and shape. Having flattened the conical sinker with a hammer, I get a flat one - for fishing in the current.
By changing the shape of the pound, you can expand the range of products produced: you can get sliding weights that are oval in cross-section, eccentric jig heads, etc.
Using your imagination, you can use cone castings to make many useful and very cheap products needed for fishing. But finally, I think it would be useful to remind you that work with lead must be done outdoors or indoors with good ventilation!
How to make a sinker for fishing - photo
Source: https://orybe.com/social/svoimi-rukami/kak-sdelat-gruzilo-dlya-rybalki/
Making a mold for casting
You can make molds for casting sinkers yourself or use store-bought ones. In home-grown production, gypsum, wood, silicone, steel, and aluminum alloy are used as sources.
The most commonly used material is gypsum. Sequencing:
1. Prepare a mixture of gypsum.
2. The container and samples are lubricated with something greasy.
3. Partially pour the mixture into one half of the container and let it cool a little.
4. A sample weight is half-immersed in plaster.
5. Pieces of wire are inserted along the sides so that the halves can be separated later.
6.When the product hardens, apply oil or silicone to the surface.
7.Install the second half of the mold, which should have a hole for filling.
8. The gypsum composition is completely poured.
9.After complete hardening, dismantle the mold.
10. The structure is processed to eliminate defects.
The simplest thing that can be done at home is casting in wet sand. The void is created using a cardboard cone or cylinder. If the weight has metal elements inside, then they are installed in advance (before pouring the metal).
You can make a wooden mold by cutting out the required voids. A simple option is when lead is poured into a hole made in wood. It is more difficult when the mold is made of two components, each of which has indentations. These halves are connected and wrapped with wire so that they do not fall apart. After the lead hardens, the cast is separated.
Video on how to make a mold:
Forms for regular use
A plaster mold, even a very well made and dried one, will sooner or later collapse and you will have to make a new one or use a product suitable for frequent use.
Of course, for repeated use, molds made of heat-resistant steel or cast iron are best suited, but making these yourself is almost impossible. But cement is good for creating a melting mold, although this will require a little work.
Materials and tools for reusable uniforms:
- formwork material (wooden boards);
- liquid soap;
- cement;
- round file;
- fine sandpaper;
- clamp;
- cylinders for inserting into the filler hole;
- wire for making loops for the sinker.
For repeated use, molds made of heat-resistant steel or cast iron are best suited, but making these yourself is almost impossible
Casting sinkers
Before casting a fishing sinker, the lead must be crushed. It takes 20 grams of metal to melt it. This is the only way it will completely melt and heat up to the required temperature of 450 degrees.
The mold is connected and fixed with wire or something else, but without tightening (otherwise it may burst after hot metal is poured into it). Then the lead is drowned in an appropriate container. Many fishermen use an aluminum spoon or ladle for this purpose.
Preparing for pouring
When the lead becomes liquid, the film is removed from the top. Heat the mold for 5 minutes. After this, the metal slurry is poured into a special hole in the mold until the metal begins to protrude through the air channels. After this, the workpieces are left to cool. Disclosure is carried out no earlier than after 5-6 hours.
Ready tackle
You can pour lead into paper cones (made of cardboard) placed in wet sand.
Cones can be made from aluminum foil
We pour out a sinker for a donkey with a rubber shock absorber
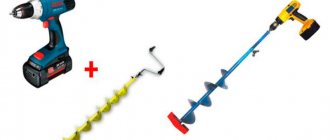
Let's first look at how to make fishing weights for elastic bands. We will perform this procedure outside. We will need a fire or a gas burner with a spray can. In the first case, it takes more time to melt lead, but there is no need for equipment or extra costs.
Melting lead with a gas torch takes just a few minutes, but requires a can of gas.
We also need a tablespoon, a lead tin and a little patience. We will dump the load in the ground. We find a damp piece of land and press a hole with a spoon to make a boat like this. Next, take a stick and insert it into one of the ends of the resulting form. Then we wait for the lead to melt.
After it becomes liquid, pour it into the resulting recess. We wait until it cools down a little, after which we take out the stick. The result will be a load weighing about 300-350 grams. It will lie well on the bottom and is easy to cast over long distances. We inserted a stick to create a hole in the weight.
You can pour several pieces at once if you can get a fire source with a high temperature.
Many fishermen ask the question: “How to make fishing sinkers for elastic bands of light weight, so that they stick well to the bottom and are not carried away by the current. Making such weights is quite simple. You need to take 3-4 pieces of wire 10 cm long and bend them into staples. Then place it in the recess. After pouring you will get a spider like this. After casting, the weight will lie in one place, and these pieces of wire will hold it. The weight of the cargo in this case may not exceed 150 grams.
Final processing
After the casting process is completed, the finished products will need to be processed. If the load is made in a spoon, then to fasten the scaffolding you need to drill a hole in the metal body. It is done in the narrowed part with a drill with a 2 mm drill bit. Just be sure to remove the chamfer with a drill so that the fishing line does not tear on a sharp metal edge in the future.
To ensure that the weights are not particularly noticeable in water, they should be treated with an aqueous solution of potassium permanganate. Immerse the parts in it for several hours. The sinkers also need to be sanded using emery or a velvety file.
This is what homemade weights look like after processing.
When working with lead, do not forget about safety precautions. It is unacceptable to cast sinkers in a closed room, so as not to inhale toxic fumes.
Also, it is unacceptable to use utensils for cooking.
Blitz tips
I offer my original and effective method of making molds for smelting products (sinkers, jig heads) from lead.
We take ordinary plastic bottle caps as a basis. Fortunately, there are now a lot of them and of different sizes. Then we take the original product for which we will make a mold (sinker, jig head, etc.).
We prepare the original: To do this, we make spacers in those places where you consider it necessary, so that during the filling nothing will wobble or spin (see photo). Then we put it on the cork and adjust everything. In order for the other half to fit tightly, we lower the hook (if it’s a jig head) or your spacers a little into the side of the lid. This can be done in different ways: cut out grooves or press a little with a hot iron.
When everything is adjusted, you can proceed to the main action: Take a beer can (we also have enough of them), cut off a third from the bottom. It turns out to be a very convenient jar to work with. In this jar, melt wax (paraffin or a regular candle) on the stove, and dip our original with spacers into the hot wax. When lowering it into the wax, you need to chat quietly so that the wax covers absolutely the entire surface.
We take it out. We try to do it carefully so that there are no drops or smudges, otherwise all this will be reflected in the form.
When the wax hardens, we place our original on the lid according to the grooves and fill it with ordinary epoxy (you can add fillers). When the epoxy hardens, you can consider half the job done. I'm sure many people will want to take the original out of the mold and see what happened. I answer: it is possible. But in this case, you will tear off the wax coating and have to re-coat it, then install it and adjust it into place. You can also remove it to make sure it’s not stuck. I assure you that if you covered the original with wax properly, the product will not stick.
Next, you should carefully scrape off the wax from the outside of our product. Because we will cover again, and the second layer is unnecessary. You don’t have to scrape it off, but then when dipping again, keep it in the hot wax longer, the first layer will melt). We take our half-mold and just as carefully dip it into the melted wax so that everything is covered. After this procedure, set the workpiece aside. We take the second plug and cut a hole in the bottom for filling. We place this plug on the first one from the top, with the hole facing up. It turns out to be a barrel. To keep the shape, I take this barrel and also dip both sides into wax. This is instead of glue. Holds up well. Pour epoxy into the hole. In principle - that's all! I think everyone understands.
After drying, cut off the plastic from the side and drill a hole for filling. I personally clamp it in a vise and work. The rest are quite capable.
Remember to take precautions. Tin sometimes shimmers, and this is not good. Be careful. Go for it. Hi all!
» /> » /> » /> » /> » /> » /> » />
Pros and cons of making sinkers at home
Tackle with homemade weights has its advantages and disadvantages. The first include:
- availability of source material;
- high consumer qualities of finished products;
- the process is not labor-intensive;
- the ability for one person to smelt the required number of products;
- not costly;
- ability to choose weight and configuration.
But there are also problems. When working with heavy metal, there is a high risk of injury. It’s not always possible to get what you need on the first try. The process will require a set of tools.
As a result, weights must meet basic requirements. They should be:
- heavy so that the accuracy of casting the equipment is maximum;
- streamlined (roughness on the surface leads to the appearance of turbulence in the water, which frightens the prey);
- with reliable fastening for scaffolding;
- invisible in the aquatic environment;
- made from simple materials and in artisanal conditions with minimal use of tools.
DIY fishing sinkers
To ensure that the gear is cast a considerable distance from the shore, as well as to ensure its reliable immersion and fixation at the bottom of the reservoir, almost every fishing gear is equipped with a sinker. Despite the fact that in exceptional cases any metal object of suitable weight can be used for this purpose, a properly made sinker will allow you to catch fish as efficiently as possible.
What should the sinker be like?
A high-quality sinker must meet the following parameters:
- be heavy - for the manufacture of parts, as a rule, lead is used, which has the highest possible density from the materials available to the fisherman;
- have a streamlined shape with a perfectly smooth surface - when casting the tackle, aerodynamic forces act on the sinker. The rougher the surface of the sinker, the more rectangular its shape, the shorter the flight of the tackle will be when casting, and when retrieving fish or removing the tackle from the water for checking, more effort will be required;
- have a reliable fastening for the fishing line;
- do not stand out against the background of the bottom, so as not to scare away cautious fish;
- made from inexpensive materials.
Where to get lead
You can make weights from any lead you have at hand. It could even be old sinkers. By visiting any tire shop, you can purchase unnecessary weights used for balancing. The only thing is to remember to remove metal inclusions from them. There is also lead in car batteries. True, you will have to make a lot of effort to get lead from there.
Power cables, or rather their coating, are also suitable. It is made of lead plates, 2 mm thick. Do not forget about the opportunity to purchase the desired metal in the form of sheets or ingots. The first option is better, but the layers can be too large and it is recommended to purchase them together with someone else.
The most basic methods of casting fishing weights are considered. They are easy to make even without a mold. If you have a metal blank, then you can pour weights to order in batches and make good money from it. The main thing is to find the lead.
Home and industrial methods
There is literally a homemade way to protect lead surfaces from corrosion. There is always sunflower oil on the farm. Pour it into a bowl and immerse the newly smelted figurine in it. Hold for about five minutes, remove, place on a layer of napkins and let dry.
In production, to protect lead parts from oxidation, it is usually used, in a word, where industrial oil is sold. You can order graphite lubricant through the online store. The lead product will retain its shine for a long time.
If the product is large, you can simply wipe it with a cotton swab dipped in vegetable oil.
Preparing the melt
Melting of a material involves the process of transition from a solid to a liquid under the influence of a temperature gradient. This indicator depends on the characteristics of the components that form the alloy.
For example, the melting point of lead is 327 °C, and tin is 232 °C. For solder made from these materials, the liquid transition temperature is 183 °C.
Melting of materials occurs when heated. The rate of transition to a liquid state is called the melting point.
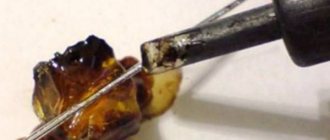
Lead is a plastic and viscous chemical element that is easy to process. It easily forms an oxide in air. A fresh cut of metal quickly becomes dull. The material is fragile and easily susceptible to mechanical stress. The density of lead is 11.3 g/cm³. The specific heat of fusion of lead is 25 kJ/kg. The material is highly viscous and difficult to break into pieces. At the same time, it is very soft; it leaves a dent when pressed with a fingernail. Metal can be easily cut with a knife.
Melting point is the temperature at which a metal turns into a liquid state.
The melting point of lead allows it to be heated in a ladle on a simple fireplace, followed by casting into molds.
The specific heat of lead at room temperature is 127.5 J/kg, and when the metal is heated to boiling, the figure increases.
Making lead balls
In view of the great amount of heresy on the Internet regarding even such a banal topic as making lead balloons, I decided to leave the experience for future generations.
1. The mold is best made from plexiglass. Align using squares as in a jig and glue at the ends with hot-melt adhesive. Then, for reinforcement, iron corners were placed on hot glue.
I tried to make a mold out of cardboard wrapped in tape and cardboard soaked in paraffin, but one of them got wet and fell apart.
2. Mix 60 ml water + 90 g gypsum = 120 ml dough.
3. Use Vaseline as a release agent. Soap solutions are complete garbage.
4. Riser Ø 3.5 for a ball Ø 12, Ø 4.2 for a ball Ø 20.
If you make it less than 3.5 mm, it will flow for a relatively long time; if it’s more than 5 mm, you won’t be able to bite it off with pliers (of course, with pliers of an adequate size).
5. Drying and calcination of the mold.
According to the first option, I dried it in a slow cooker at 80° until the water stopped evaporating. Mass of gypsum. forms after drying 182 g.
According to the second option, I heated it for several hours with a gradual increase to 180°C.
The weight of the mold after calcination is 162 g.
There is no difference during casting and after casting according to the 1st and 2nd options.
6. Melt from above and below.
There is more heating power on top, so you don’t have to wait half a lifetime.
7. It is most convenient to tighten the flasks with such a clamp. All kinds of rubber bands from panties, from bicycle inner tubes, silicone ones from sealant - complete garbage. (either they do not provide the required force, or they tear)
8. No problems with filling
9. The mold cracks after 2 kg of lead. So there is no point in making long multi-place forms.
For three days and three nights Aladdin rubbed the magic lamp until he saw a half-erased inscription on it: “Made in China”
There’s no point in bothering with balls, it’s easier to cast cylinders and there’s no need to make any molds, we pour them into pieces of tubes according to size (lead gives a decent shrinkage and the cylinder is easily knocked out) or we immediately pour a long sausage, even into the ground, making the required depression with the tube. Then cut into pieces and you're done. After a year of grinding, the cylinders will turn into balls.
You can use weights from a tire shop - three years of grinding:
For three days and three nights Aladdin rubbed the magic lamp until he saw a half-erased inscription on it: “Made in China”
Source