Working with an engraver: “easy and simple”
To ensure that the product, on which the craftsman has to work painstakingly, is not spoiled by an accidental mistake, it is necessary to know the intricacies of using an engraver, be able to accurately copy drawings and follow safety rules. Difficult? Not at all! We will tell you in more detail about all the secrets of working with the tool later in the article.
Stage No. 1. Workplace organization
First of all, you need to properly prepare everything you will need for engraving.
For working with tools, a table with a high-power lamp is best suited - this way all the smallest details will be clearly visible. To avoid damaging the furniture, it must be covered with paper or cloth.
Thanks to this, chips and dust generated during cutting and grinding will remain on the material and not on the surface of the table.
For rough drawing, you should stock up on a pencil or felt-tip pen and adhesive tape - it will come in handy if the pattern has already been drawn on paper.
In this case, the tape will help firmly secure the “draft” to the surface so that it does not move and the pattern is even.
If you intend to depict something directly on glass, plastic or wood, the surface should be “degreased”, that is, wiped with alcohol. This way the felt-tip pen will not wash off, and the drawing will be better visible.
Stage No. 2. Tool preparation
In order not to be distracted by searching for the necessary attachments during the engraving process, it is better to immediately lay them out in the order in which they will be needed during work. At the same time, it is worth understanding the purpose of each part.
For example, a cone-shaped bur bit is designed for cutting outlines and is not suitable for making fine strokes, while a cylindrical bur bit will do the job perfectly.
The engraver always comes with instructions, so you can quickly find out in what case to use the attachments.
Sometimes a special suspension is sold along with the instrument. It is needed not only to give the engraver the correct position during storage.
Thanks to it, it is possible to avoid vibrations that occur during operation, and, consequently, some errors when applying the pattern.
Before you start using the tool, you must install the suspension so that the flexible shaft cord does not get in the way and does not create interference.
Stage No. 3. Drawing
To ensure better hand glide over the surface, you should wear gloves. Thanks to them, the brush will not remain in the same place for a long time. In addition, this will help avoid the appearance of stains on degreased wood or plastic.
For those who are just starting to work with an engraver, experts advise choosing the minimum speed. This way you can simultaneously solve 3 problems: cut the pattern evenly, make strokes of the same depth and not damage the material.
You need to start by drawing the outline itself and only then move on to “drawing” the details - small lines, dots, etc. In order to give the image a finished look, you should use the roller with a soft felt surface included with the engraver. Using this part, you can remove all roughness and “burrs” left by the carver.
When working with an engraver, you should always remember that every 10-15 minutes you will have to stop and turn off the tool (if its design does not include a cooling system). This way you can avoid engine overheating and premature breakdown. More precise times for each model can be found separately in the attached instructions.
Stage No. 4. Equipment care
In order for the engraver to serve properly for many years, you need to constantly monitor the condition of the working elements.
If, upon inspection of diamond wheels, brushes or attachments, cracks, roughness or other damage are found on them, these parts must be replaced with others.
It is worth remembering that new consumables must be of the same brand as the tool itself. Only in this case the manufacturer guarantees the efficiency of the engraver and its long service life.
The second thing you need to do every time you finish painting is to clean the ventilation holes. They serve for additional cooling of the engine, but over time they become clogged with dust generated when cutting wood, plastic or glass. Contamination reduces the productivity of the engraver and often causes its failure.
To prevent this from happening, you need to carefully remove the abrasive using a piece of cloth soaked in warm water or soapy water. It is not recommended to use alcohol-containing products, solvents and gasoline, as they can damage the body of the instrument.
It is typically made from ABS plastic or polystyrene, which are susceptible to chemical attack.
Based on this information, you can organize your work with the engraver step by step so that it is effective, reliable and enjoyable. However, this only applies to those cases when the tool is used to apply patterns. Otherwise, when cutting various materials, grinding surfaces, or drilling holes, you should follow the safety rules:
- before turning on the engraver, you must make sure that the power cord is in good condition and check the operating parts for damage;
- To protect your eyes from dust and random sparks, you must use glasses;
- during heavy work (drilling, milling), the engraver must be held firmly with the fingers of the entire hand - this eliminates the risk of arbitrary movements that can lead to failure of the equipment;
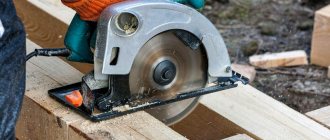
- If the cutting disc suddenly jams, do not try to immediately remove it from the hole. In such cases, you need to turn off the power supply, wait until the nozzle stops rotating, and carefully pull the engraver out of the cut;
- After completion of work, all used nozzles must be cleaned of accumulated dust. By servicing the engraver on time, you can not only extend its service life, but also improve the quality of work with it;
- consumables purchased separately (wire brushes, diamond discs, etc.) must exactly match the technical characteristics of the tool, have the appropriate shank dimensions, thickness and speed.
Apply these simple tips when completing orders and you will get excellent results. And if you don’t already have one, you can always choose a suitable engraver in the catalog on the website of our online store.
What can an inexpensive Laser Engraver do? (part 2)
Subscribe to the author
Follow the author if you like his publications. Then you will receive notifications about his new posts.
You can always unsubscribe from notifications in the author's profile.
The article applies to printers:
Hello guys!
This article is a direct continuation of the article Why do you need a Laser Engraver at home?!
My acquaintance with laser technologies continues and in this article I will tell you where else I was able to use a Laser engraver and what materials can be processed.
Before starting, I want to say that I really liked how easy and simple it is to do certain tasks with a laser. And believe me, there are at least hundreds of use cases. Of course, we can’t cover everything in two articles, but let’s go over the most interesting things.
By the way, there were a lot of questions about whether there was a big difference between a 7W and a 20W laser. Which prompted me to order a more powerful laser. Many of you already know that laser characteristics have two main parameters : power
consumption
and
optical power
.
So, the Chinese often write power consumption, since it is always greater. And the Chinese use this for marketing purposes. For example, in my laser it is 7W, but the optical power is only 2.5W. Its brother has 20W consumption and 5W optical power. Therefore, when choosing a laser, you should always look at the optical power.
After playing with this little guy for two months, I became inspired and wanted to try a more powerful laser.
Therefore, I ordered two more lasers. One full-fledged one with kinematics, manufactured by TWO TREES TOTEM S 40W - https://www.banggood.com/custlink/mGmEtgtyhA it has a power consumption of 40W. But don’t let this mislead you, since the optical power of the Negro is only 5.5W.
It's new and has extra goodies like a red laser for easy positioning of things. In general, when it comes to me, I will definitely do a review and most likely write my impressions about it in an article.
And I also ordered a laser head for 7.5 optical watts. It will turn out to be the most powerful of my entire arsenal. You can hang it on a 3D printer or upgrade an old laser. So I will also test it and tell you my impressions.
I also managed to get you promo codes with good discounts. NEJE MASTER 2 7W – BG7WRUV
, $149.99 — https://www.banggood.com/custlink/KG3hHtqGw9NEJE MASTER 2 20W —
BG20WR
, $169.99 — https://www.banggood.com/custlink/v3GdHPzRKYTWO TREES TOTEM S 40W —
BG2635K
, $219.99 - https://www.banggood.com/custlink/mGmEtgtyhAProfessional program
LightBurn
which I use - https://gistroy.ru/blogVideo Instructions for flashing firmware and connecting to LightBurn-
The first part of the video review -
The second part of the video review -
The introduction turned out to be a little long, but believe me, I tried to present only the most important things. Well, let's start our experiments.
While cleaning the workshop, I came up with the idea of labeling all the plywood boxes. I first sanded it with a belt to remove old labels and dirt from the front side. Well, at the end I got this picture.
But it was obvious, after all, the tree and the laser do not carry any intrigue. But what was intriguing was the engraving of the painted glass with orange paint.
I'm finishing assembling the ULTI STEEL
, and his signature color is black and orange. Therefore, the idea came to make glass in the color of the printer. I bought a can of water-based paint from Leroy Merlin so that it wouldn’t stink when heated. I cut glass from a large photo frame.
And he started spray painting. It was a very unusual paint. But it fit well on the glass.
After which it was the turn of Laser engraving. To be honest, I had doubts that everything would work out, since the paint is light, and the laser does not like light objects. But after a few centimeters of engraving, I realized that everything was fine!
I did not install a continuous engraving, but rather a sort of shading at 45 degrees. Looks very cool in real life. And I got this super designer glass for the printer.
Agree, it looks much nicer than just an aluminum table with transparent glass!
A few weeks passed, I had already printed a couple of parts, and after one large ABS part, the thin glass burst as it cooled. I was wondering if the laser only burns paint or glass too. I armed myself with acetone and napkins, and after removing the paint, I realized that quite deep marks remained on the glass; they could be felt very well with a finger. And it's just light paint. I think the black one will be even deeper. Overall it was quite an interesting experience.
Drill for wood carving: how to choose an engraver and cutters, carving technique, video
Wood carving drills differ in engine power, speed (number of revolutions made per minute) and torque. They can be powerful, withstanding heavy loads, or compact, but operating for a long time at high speeds:
- Large cutter making 10 thousand rpm;
- Small bur , with a speed of 20 thousand rpm.
You should not give preference to engravers that perform 30 thousand rpm - they are practically not in demand in work.
A drill that operates at high speeds and simultaneously withstands the powerful load of a large cutter has not yet been created. Therefore, experts recommend immediately purchasing at least two tools that differ in characteristics, for example:
- The micromotor is compact in size and operates at high speeds.
- A drill with good power, equipped with a reinforced tip.
Complex work is performed with a tool with an additional handle, and a compact device does an excellent job of applying small strokes.
When choosing a serial model of an engraver that will work in multitasking mode, one starts not only from expert reviews, but also from characteristics and functionality.
Advice from the experts
Beginning craftsmen who want to save on buying a tool can make a drill with their own hands. To do this, you will need an electric motor removed from an old washing machine or some other engine, which must be powerful. You cannot do without a belt drive, which must connect to the drill sleeve. The latter, like the tips, will have to be purchased separately.
Homemade drill
A homemade engraver can be replaced with a drill and screwdriver. In this case, you will have to purchase a flexible shaft that will be attached to the tool, as well as a special attachment that acts as a fastener.
The resulting drill will be able to make fine patterns, but its power will be low. Those working with a homemade device should take care of a tripod in order to hang the tool on it and manipulate the attachments through the flexible shaft.
With a homemade engraver you can create subtle inscriptions and patterns, and process metal, plastic and bone parts.
Some useful tips:
- It is convenient to use linden, beech, alder or pear wood. When choosing pine and ash blanks, you need to be prepared for the fact that you won’t get a high-quality design on it;
- The background, on large workpieces, is performed with a nozzle with a limiter;
- The depth of the slot is selected before starting work. A small piece of wood on which you can use a drill will help you not to make a mistake with it.
A stencil helps simplify and make the engraving process more accurate. To start working, you need to transfer the selected pattern from it to the workpiece and finish drawing it if necessary.
The drill allows you to make inscriptions on wood, as well as patterns of varying complexity
A wood carving drill allows you to apply artistic inscriptions and relief images to the surface of the material.
However, beginners in this business need to know the technology for doing the work. Advice from masters, as well as a sequential diagram of wood carving with a drill using sketches, will help in solving this issue.
How to choose a drill
The key to success in this activity largely depends on the chosen tool. First of all, you must decide on the workload of the drill. It is recommended to pay attention to two aspects:
- The power of the micromotor, which will determine the duration of operation of the equipment under mechanical loads.
- The number of revolutions of the working body into which the nozzles will be fixed.
Those wishing to engage in this activity professionally should be aware that they will need to purchase two tools. To date, drills with high power and high speed have not been invented. For this reason, beginning craftsmen should purchase:
- A powerful drill with a reinforced tip design;
- Smaller tool for fine work.
The next step is to select a workpiece. Experts recommend giving preference to wood species with a dense, uniform structure. The best choice would be: linden, pear, beech or alder. Oak, spruce, and pine blanks will not be the best choice. The disadvantage is the poor quality reflection of the texture of the drawing.
Drill carving technology
Having decided on the workpiece, you need to create a sketch using thick paper and prepare your work area.
The latter must be equipped with a powerful electrical device, the light of which allows you to examine in detail any engraving elements.
To fix the stencil on the surface to be processed, you will need masking tape, and if parts of the sketch will be applied directly to the workpiece, a felt-tip pen or pencil, as well as alcohol to degrease its surface.
The process of working with the workpiece looks something like this:
- Transferring the stencil to the surface of the workpiece using carbon paper. If a paper template is not used, the surface is degreased with alcohol before applying the inscription or image. The areas to be selected are shaded with a black pencil.
- Trace the outline of the design with a small bur with a cutter having a star-shaped or needle-shaped section. At this stage, small drills can be used.
- Stroke with a large tip and select the background part. The sampling depth is pre-selected on an unnecessary piece of wood.
- Sanding the background with a piece of fine sandpaper.
- Performing small items.
- Polishing the surface with a felt roller to remove any burrs left by tools. Stain coating.
- Cleaning the finished product with fine sandpaper - the stain should remain only in its background part.
- Applying the base by rubbing in a neutral shade of paint. The finishing decor can be bronze powder, the excess of which should be removed with a flannel cloth.
This is approximately how engraving of small and not very complex designs occurs. You should start creating more complex products only after completing woodcarving training in courses or from a master.
In this video, the master demonstrates carving with a drill.
Any master wants to make a high-quality drawing with clear contours. To do this, you need to follow simple tips that will make your work much easier:
- Create a stencil, preferably using thick paper, for which thin cardboard is suitable.
- Using carbon paper, transfer the contours to the workpiece.
- Using small cutters, go through the marked areas.
In this way, a stencil will be created that will make the engraving process much easier, this will be especially noticeable if the pattern is repeating.
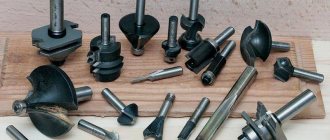
It is important to choose the right nozzle from many types:
- Abrasive. Designed for grinding;
- Wire brush. It is an indispensable thing in rough processing of workpieces;
- Steel cutters. These are the main attachments, thanks to which contours are cut and other preliminary operations are performed;
- Serrated blades. They are necessary for finishing workpieces with thin relief;
- Drill. The main purpose is to make holes;
- Sharoshki. Thanks to them you can do polishing;
- Felt circles. Necessary in the final stages of work.
Safety precautions
A drill, like other cutting power tools, requires compliance with safety precautions. Its requirements are as follows:
When working, it is important that the work surface is stable and clean.
- Work on a strong and stable table that remains in place while carving.
- Wear a robe or apron made of thick fabric, choose sleeveless clothing or roll them up as high as possible. Hair, if long, should be gathered in a ponytail and hidden under a headscarf or light headdress.
- Secure the workpieces with special devices so that the work process proceeds quickly and safely.
- The light should be bright. The lighting fixtures are positioned so that the craftsman does not cast a shadow on the work surface while carving.
- Wear safety glasses.
- Check the sharpness of sharpening points on a wooden block, not your fingers.
- Maintain order and cleanliness in the workplace so that you don’t stumble upon anything sharp among the sawdust that has accumulated on the table.
- Clean the work surface with brushes, not with your hands. From time to time, wipe the tables with a damp cloth to remove accumulated dust.
- After work, put tools and attachments in their places.
- Ensure that electrical tools and their cords are in good condition.
- Check how the tools are plugged into the outlet and untangle twisted cords.
- Turn off the tool, which does not have a ventilation system, every 10-15 minutes. for cooling.
- Remember about fire safety - dry shavings are flammable, so they should not come into contact with heating devices.
- Make sure there is a first aid kit in the work area.
Faulty parts are replaced only with similar ones, and the engraver’s ventilation holes are cleaned immediately after finishing work with it.
A drill used in a workshop or at home will last longer if you provide it with proper care.
Faulty parts are replaced only with similar ones, and the engraver’s ventilation holes are cleaned immediately after finishing work with it.
It is necessary to regularly check devices and tools used in parallel with carving equipment: the surface cannot have nicks, cracks or other defects.
It is necessary to start carving wood with a drill in a well-lit room, on a work table, where there are no unnecessary things. Lack of light and clutter are causes of injury while working. Make sure there are no explosive substances nearby.
When making adjustments, you should unplug the instrument from the outlet. Under no circumstances should you clean or change accessories while the equipment is powered on! The use of tools with defects is strictly prohibited.
Conclusion
Wood carving is a very difficult process, so before you begin, you need to pay attention to a number of nuances. The right tool, as well as suitable cutters for the job, will be the key to success. However, remember that safety comes first!
By keeping these aspects in mind, you will achieve success in wood carving. The drill requires regular, appropriate care with cleaning and replacement of worn parts, as well as compliance with safety precautions during operation. These actions will help maintain the functionality of the equipment for a long time and make it work as efficiently as possible.
Wood carving with an engraver for beginners
Very often, when making a relief image on a wooden surface, craftsmen, in order to make the task easier, use special drills with various attachments.
This equipment can be used as a dental bur or special hand engravers for a certain type of material (glass, wood, metal).
Wood carving using a conventional engraver, especially for beginners, requires certain skills and presents some difficulties.
The very first problem that you will have to face is choosing a drill from the huge variety of options presented on the modern market.
How to choose the right drill?
Despite the great variety of drills on the market, choosing the right one, knowing the necessary technical characteristics, is not so difficult. The main selection criteria are engine power, which determines the number of revolutions of the drill per minute, and torque.
When choosing a drill, you will always have to make a choice between the ability to withstand heavy loads and the ability to work for a long time at high speeds, because not a single machine, unfortunately, combines these two important qualities. It is for this reason that the best option is to purchase two drills with different technical characteristics.
The best option for wood carving would be:
- Powerful drill with reinforced tip.
- Compact micromotor capable of operating at high speeds.
If you really like to save money and also get along well with technical equipment, then you can assemble your first drill yourself: to do this, you need to take a motor from a washing machine or any other motor of sufficient power and, using a belt drive, connect it to the sleeve from the drill. All this action requires dexterity and some skills, besides, the sleeve and tip itself will still have to be purchased.
Technical drills.
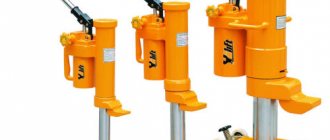
Russian production produces quite powerful sleeveless drills “Profile” with a pedal - This model is very reliable and allows you to perform an incredibly wide range of technical operations: drilling, grinding and much more, despite the low speed.
For years, the drill machine from Foredom SR from the USA has gained its authority in the market (you can see this device in the photo below). Very reliable in operation, even under high loads. All spare parts can be purchased at almost any store that sells tools for jewelers. The choice of attachments is very large and varied: from power collet attachments to convenient quick-release attachments.
Micromotors.
Micromotors These are unique mini drills - they are more compact and do without a flexible shaft. Their motor is mounted directly behind the tip. Such machines are very convenient to use for the most delicate work; it is for these purposes that they are very convenient.
Among the Russian ones, the DPM 25-2 drill with a specialized medical handpiece should be highlighted. It fits very comfortably in the hand, the burs can be changed easily and quickly, and the price for a machine with such characteristics is not at all high.
But it should still be noted that the medical handpiece is not designed for heavy loads, and therefore, if used too often, it can quickly fail. The micromotor cannot be repaired, since the carbon brushes, which wear out over time, cannot be replaced.
Thus, from time to time you will have to change the engine or purchase a new drill entirely. Otherwise, this is a very good, budget and convenient option. You can also look for good analogues from Korea.
The following drills are attractive for their functionality and reliability, but in Russia Marathon or Strong drills are quite expensive. They have very high speed and power ratings - up to 30,000 rpm and a power of 65W. For a micromotor, these figures are very respectable. The best masters work with just such drills.
It should be noted that the above micromotors are only suitable for small burs and small bur cutters. Using large cutters on them, you will significantly reduce the resource of the tool and its service life. It is for this reason that it is necessary to have at least two types of drills in your arsenal.
Usually the drill is equipped with a flexible shaft. It is convenient to use when performing small parts in the thread. However, when using a flexible shaft, the drill loses half its power.
Tips for carving.
So, carving is best done on wood species with a monolithic structure: linden, beech, alder, pear. Pine, ash and oak are less suitable for this purpose.
The first step is to transfer the sketch to the board and shade the background that you will remove.
The picture around the office should be outlined with a small drill with a round star-shaped section. After which the entire background is hammered with the same drill, albeit of a larger diameter, to complete the job faster.
In order to select a large amount of background, it is convenient to use the limiter attachment that comes with the drill.
The cutting depth must first be adjusted and practiced on an extra piece of wood.
After the background is completely cut through, it is sanded with sandpaper.
After this, the details are cut out in the drawing itself.
After completing the work, you should sand the entire picture and cover it with stain, then go over it with sandpaper so that the stain remains only in those places where the background is lower.
on the topic of the article
In the video lessons below you will see a couple of examples of how craftsmen work with wood engravers, as well as reviews of drills from some manufacturers.
A little about the main thing
Wood carving using this method takes place in several stages:
- First of all, you need to prepare a sketch for work. You can find it on the Internet and print it, or draw it yourself (if you have such skills).
- Transfer the finished sketch to the prepared surface. For convenience, it is best to use carbon paper.
- We process it in rough form.
- We trace along the contour.
- We paint the product.
- Apply varnish and wait until completely dry.
This is a standard technology for working with an engraver. Suitable for work of any complexity, and most importantly, it will be understandable even for a novice master.
Basically, the engraver is sold already in its complete set, but manufacturers have also created other additional devices that may be useful during work.
Read this: DIY wooden toys for children
Basic tools required in addition to a hand engraver:
- The handle is ergonomic, required for comfortable work. Since the tool itself does not have such a device, which means the work will be difficult and inconvenient;
- Collets;
- The milling attachment is a similar part of a river router, only in this case it is small in size;
- Tripod - required for working with a flexible shaft;
- Angular attachment - reduces the angle of rotation by 90 degrees; in addition, its design is very rigid.
Speaking about the costs of this tool, if you purchase an exclusively flexible shaft and a tripod, the price will not be that high. If you buy all the equipment, then in this case the price issue increases significantly.
If you are a beginner in this craft, then it would be best to purchase a minimum set, which will have an average set without any excesses. This is necessary in order to understand in more detail which attachments will be used in all types of work.
There is no point in buying expensive equipment; sometimes an ordinary cheap Chinese set works even better than an expensive branded one.
In any case, the decision is yours when choosing an engraver.
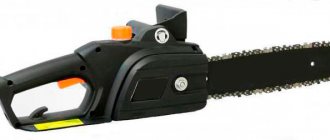
Read this: Chainsaw Wood Carving for Beginners and Experts
Getting ready for Easter
Woodworking is a very difficult task that produces works of art. This is only said about handmade wood carving, because no machine in the world can compare with handmade work.
Why? A person, working and creating his masterpiece with his hands, puts a lot of effort, time, and, of course, the most important thing - his soul into his work. Sometimes it’s enough to look at a craft and you understand in what mood the master created it, what was in his soul at that moment.
After all, the mood and emotions are completely transferred to the created product.
Today we invite you to consider step-by-step instructions for decorating wooden eggs. The main tool, of course, will be the engraver.
So, for work you will need the following tools and materials:
- Engraver;
- Grinding attachment;
- Prepared wooden products;
- A simple black pencil;
- Sandpaper;
- Stain;
- Varnish;
- Application brushes;
- An eraser.
Step-by-step instructions for work.
Wooden products need to be lightly sanded with sandpaper. The surface must be flat. Then we select the drawing and transfer it to the workpiece. This must be done carefully.
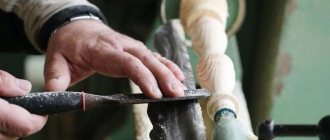
We install a grinding attachment in the engraver and begin to make notches, as shown in the photo.
At high speeds, the wooden product may burn a little. To prevent this from happening, it is necessary to move the engraver back and forth according to the intended pattern.
After working with the engraver, you need to remove all pencil lines with an eraser. It should look like in the picture:
All that remains is a small matter. Now we need to color our egg souvenirs. In this case, you can use stain, and in different shades. Apply it to the finished product with a brush and put it aside until it dries completely.
After which we go through a little sandpaper, thereby creating an unusual effect. Now you need to coat it with varnish, wait for it to dry completely. This is just an example. How much your imagination is enough depends only on you.
Try, experiment, then you will become a real master in wood carving as an engraver.
That's all, the master class has come to an end, our Easter souvenirs are completely ready. In addition to all of the above, we invite you to watch the video tutorials in order to fully understand this craft.
Video on the topic of the article
Source: https://knittochka.ru/rezba/rezba-po-derevu-graverom-dlya-nachinayushhih.html
Working as an engraver on wood and other materials: video, choosing an engraver and caring for it
Working as an engraver is a fascinating procedure with which you can create various patterns and inscriptions on the surface of the workpiece, grind and polish small parts, and also solve a whole list of other tasks. In order for the results of working as an engraver, which can be a standard drill, to be of high quality, it is necessary not only to understand why it is needed, but also to know all the nuances of using such equipment.
The engraver allows you to work not only with wood, but also with other materials
Equipment selection
When choosing an engraver or drill, you must decide for what work such a device will be used, as well as what materials will be processed with its help.
Knowing this, you can choose an engraving machine for working on metal and other materials or a drill for wood carving (even taking into account the huge variety of similar devices presented on the modern market) without any problems.
The most significant characteristics of engravers that you should pay attention to are:
- the power of the drive motor, which determines the ability of the equipment to operate for a long time under significant mechanical loads and process various materials;
- the number of revolutions developed by the working body in which the engraving tool is fixed.
Nowadays, there is plenty to choose from; each manufacturer produces several models of engravers that differ in both price and functionality.
Very often, those who are going to purchase an engraver for their professional activities or for work at home have to make a choice between the two characteristics mentioned above.
No matter how much one would like it, not a single modern engraving device from among serial models is capable of effectively combining high power and speed.
That is why specialists who often have to use an engraver immediately purchase both powerful and resourceful models. The best choice in such cases would be:
- powerful engraver, the working tip of which has a reinforced design;
- compact and lightweight micromotor capable of operating at high speeds.
For heavy work, a tool with an additional handle will be convenient, and fine engraving is best done with a compact device
For not too complicated engraving work at home, you can make such a device yourself, giving it exactly the functionality and characteristics that are necessary.
There is a wide variety of designs of homemade engravers and videos about their manufacture, so choosing an acceptable option is not difficult. For example, you can make an engraver that will be driven by an electric motor from old household appliances.
However, to make it convenient to work with, a homemade engraving machine must be equipped with a flexible drive and a special attachment in which the tool used will be fixed.
Using a homemade engraver at home, you can not only apply inscriptions and patterns to the product, but also perform various types of processing of parts made of metal, plastic and bone.
Wood carving with a handmade engraver is also possible.
Depending on the working tool installed in the attachment of such a device, it can be used as a mini-drill, a small router, a compact grinder and polisher.
Homemade engraver with flexible shaft
To choose a serial model of an engraver that will effectively cope with all assigned tasks, you should focus not only on the rating of such equipment among specialists, but also on its characteristics and functionality.
Serial models of engravers
Serial models of engravers, which are equally successfully used both at home and in the professional sphere, can be divided into the following categories.
Technical drills
These are powerful sleeveless devices with which you can successfully perform various technological operations, namely: drilling, grinding, milling, etc. Such units, operating at low speeds, are equipped with a convenient foot pedal and can be used in conjunction with both collet and quick-release chucks.
The power of technical drills allows them to be used for various operations with the help of additional attachments and accessories
Micromotors without flexible drive (sleeves)
The compact drive motor, which is equipped with engravers of this type, is mounted at the rear of the working attachment.
Such small and high-speed engravers, not intended for heavy loads, are used primarily for the most delicate work. At the same time, the micromotor with which these engravers are equipped cannot be repaired; it can only be replaced with a new one.
That is why it is advisable to use these devices for not too complex work, without subjecting it to significant loads.
Engravers or drills with flexible shaft
These drills are very convenient to use for engraving and fine carving. However, it should be borne in mind that the flexible shaft with which they are equipped reduces their power by almost half.
How to work as an engraver
To make the work performed by the engraver more comfortable and efficient, certain rules should be followed.
Preparation of the workplace
The working surface on which engraving is carried out with a drill must be well lit, so it must be equipped with a powerful lamp that allows you to easily examine in great detail all the elements being processed.
If you use a paper template for engraving, you will need masking tape, with which the template is fixed to the surface to be processed. Sometimes a sketch of a design or inscription that needs to be engraved is applied to the product being processed with a regular felt-tip pen or pencil.
The surface must be degreased with alcohol.
It is convenient to store all engraving tools in one case if there is no space for setting up a full-fledged workshop
Tool preparation
To perform engraving, various tools are used that are installed in the engraver. Each of them performs certain functions.
Thus, a tool with a cone-shaped working part is needed to apply the outline of a design, and a cylindrical bur is needed to create small strokes.
Before starting work, all tools should be laid out on the workbench in the exact order in which they will be used.
Carrying out engraving
The hand holding the engraver's working attachment should slide freely over the surface being processed; for this, it is recommended to wear a fabric glove.
Such a glove will also allow you not to leave hand marks on the grease-free surface of the workpiece. If you do not yet have experience in engraving, it is better to carry out the work at minimum speed.
This will allow you to cut an even pattern consisting of strokes of the same depth, without damaging the workpiece.
Engraving inscriptions using a stencil
All engraving methods assume that the outline of the design is first made, and only then its details are “drawn” with the appropriate tool. The made drawing should be processed with a felt roller, which will give it a more neat appearance and remove all burrs left by the tool from the treated surface.
If the design of the engraver or drill you are using does not provide a forced ventilation system, then after 10–15 minutes of operation you should turn off the equipment and allow it to cool naturally.
Caring for engraving equipment and tools
In order for an engraver or drill used at home or in a well-equipped workshop to last as long as possible, it is necessary to properly care for it.
First of all, you need to monitor the condition of the tools that are used in conjunction with such equipment: there should be no cracks or other defects on their working surface. Defective instruments may only be replaced with burs of the same design and type.
You should also make it a rule to clean the engraver's ventilation openings from dust accumulating in them after each working session.
Proper care of the engraver will not only keep such equipment in working condition for a long time, but also perform processing with its help as efficiently as possible.
Metal engraving tools – DIY metal engraving: tools
alexxlab | 10/04/2016 | 0 | Questions and answers
DIY metal engraving: tools
Applying a pattern to various objects by removing a substance from its surface has been known to mankind for many millennia.
With the advent of new materials, the need arose to develop working methods that allow engraving on objects that are much harder than wood and stone.
New technologies make it possible to fully automate the engraving process when applying a design to a metal surface, but for a home craftsman, the most suitable option is to master the manual method of applying a design.
Do-it-yourself metal engraving is possible at home, if you have the tools and a suitable room to perform this type of work.
What is needed for engraving
For manual engraving at home, you will need the following tools and materials:
- Stichel.
- Metal blank.
- A vice or similar device for holding a workpiece stationary.
The blank for applying the pattern can be used from any metal, but for beginning craftsmen it is better to use aluminum or copper.