Almost every person, sooner or later in his life, encounters repair and construction work to one degree or another. Some as a customer, and some as a performer. But everyone understands that the quality of work depends on strict adherence to horizontality.
In the yard, this is the level of the foundation, the level of brick laying not only for the construction of a residential building, but also for outbuildings, fences and other structures. If indoors, then all levels of floors and ceilings should be perfectly level.
Advantages of a water level
For this, building levels . They come in these types:
- laser;
- pipe;
- bubble ;
- water.
The easiest to operate and the most budget-friendly is the water level. It’s also a hydraulic level, it’s also a spirit level.
This tool is the most reliable and easiest to use, while giving the most accurate and consistent results. It even allows you to align objects that are located at great distances, in different rooms, or even around the corner. Such a device is inexpensive, and gives very accurate and stable readings. Plus, making it yourself is very easy.
Leveling the floor: how to correctly measure the curvature and eliminate it yourself
There are many methods and tools designed to determine the horizontal level of a surface. Various plumb lines, laces, homemade or industrial levels can be used. Each of these methods has its own advantages and differs in measurement accuracy.
Today on sale you can find high-quality construction and laser levels that ensure horizontalness with millimeter accuracy.
It should be remembered that the correct choice of the tool used will guarantee the quality of the work performed, and in the future there will be no need to again carry out the labor-intensive and expensive procedure of leveling the floor.
Construction and laser levels are produced today by various manufacturers. Products from the German companies DeWalt and Bosch, which are distinguished by their quality of workmanship and measurement accuracy, are very popular. You can also find a variety of building levels from other manufacturers on sale. Let's talk in more detail about which levels should be chosen for such work.
- Possibility of mounting the level on the wall. The presence of such an option will be in demand among professional specialists who measure not only horizontal, but also vertical walls. Therefore, if you are looking for an inexpensive tool, then you can refuse to have such an expensive option in the device.
- Price . The price of these levels can vary significantly. On sale you can find both simple models and professional laser levels, which have numerous additional functions. Before purchasing, you should determine whether such costs will be justified or whether you can purchase an inexpensive entry-level model, which will allow you to perform such repair work efficiently. If you just need to level the floor in your home, then purchasing an expensive professional laser level for such work will not be economically justified.
- Simplicity of design . Commercially available laser and construction water levels are simple in design, so they can be easily used by the average homeowner who does not have the appropriate skills and knowledge in the field of construction.
- Availability of self-leveling function . Laser levels have such functions, which allows you to ensure the highest possible accuracy of the measurements taken. The tool creates a small optical cross, which allows such a device to independently determine the desired points vertically and horizontally.
- Power supply. Some models of laser levels are powered by a battery or rechargeable battery. Professional models have the ability to connect them to the electrical network, which somewhat simplifies their use.
Laws of physics in construction
Pascal's law of communicating vessels, familiar to us from school, underlies the principle of operation of the water level. The spirit level is a transparent flexible tube with plastic flasks at the ends, on which markings are applied. These flasks are control vessels, and the position of the water determines the level relative to the horizon. If the liquid level at both ends is the same, then the objects are at the same height.
Where can I buy a water level? Yes, at any hardware store. But a self-respecting master will not refuse to do it himself. To do this, you only need to buy a transparent hose of the appropriate length. Flasks can be replaced with disposable syringes.
The length of the tube depends on the object of repair and varies from 2 meters to 30. If it is a small room, for example, a bathroom, then 6-8 meters will be enough. To work in private homes with large halls, a length of 20 meters or more may be needed. It is not recommended to take a very long hose, as during operation it can become twisted, bent, interfere, and the results can be distorted. Too short may sag. The optimal length is when the hose falls freely along the wall and lies freely on the floor. The diameter can also vary from 5 mm to 2 cm. But you shouldn’t take a very small one. You have to choose the appropriate option yourself.
Design and principle of operation
Can be used in various fields of construction. The most accurate device in this area is a laser level. But in terms of price and the ability to manufacture a simple device, the hydraulic level is the most popular among simple devices.
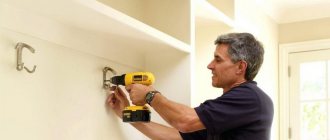
It will also help during concrete work when pouring the floor, leveling the finished floor covering, and gluing decorative wall finishes. Such a device will allow you to mount various interior parts in all rooms at the same height. When using it, marks are drawn on the walls, and the same distance is measured from them.
The marks are drawn by applying them along the upper edge of balanced columns of water in the hose. Therefore, it can serve exclusively for marking along the horizon, but in different rooms and large distances. The hose can be used in various lengths.
At its ends there are vessels with centimeter graduations marked on the walls. When determining, the columns of water in the flasks should be placed at the same level. But flasks with markings are often removed as unnecessary; you can simply mark 1 mark at the ends of the hose and work like that.
Important. A large diameter hose will allow water to pass through it faster - this will speed up the work. The diameter of the tube should not exceed 15 mm, and the optimal length would be a length of no more than 30 m.
To make it easier for beginners to operate the device, some models are equipped with rubber movable sliders on the flasks. This device allows you to note the amount of water rise. This is especially important for leveling different areas of the house.
Construction hydraulic levels, industrial production, are produced weighing no more than a kilogram. The operating principle of the hydraulic level is quite simple. The tube is filled with water. Now, to determine the mark, you need to level the columns of water and mark its position for repeated marks.
Preparation for use
Although the hydraulic level is very simple to operate, it still requires care and attention. Before starting work, you need to do some preparation, namely: pass a soap solution through the tube to get rid of the oily liquid inside, the presence of which can distort the readings. Then fill the system with water. The liquid can be colored with some food coloring or potassium permanganate for better measurement results. As an option, use boiled or distilled water. To work at subzero temperatures, use antifreeze liquid.
It is not recommended to pour water directly from the tap because there may be a lot of air bubbles. There are two ways to fill the hose:
- Fill a bucket with water and place it on a hill (optimally 2 meters). Place one end of the level at the bottom of the bucket, and pull water through the other so that it flows freely.
- Lower one end with the flask as low as possible to the ground, insert a funnel into the hole of the second and pour water evenly from the bucket into the system.
After this, you should check the tubes for the presence of air. To do this, fold the tube in half with the ends up, press them together, lightly tap the tubes - the air bubbles after such an impact will rise up and slowly go out on their own.
Manufacturing
The choice of source materials should be approached responsibly, so that later you do not have to redo or buy other components.
- You need to prepare two vessels, preferably cylindrical with divisions. It is convenient to use flasks from large-volume syringes.
- The hose must exactly fit the diameter of the vessel fitting. A hose for a construction hydraulic level is considered suitable if it has sufficient elasticity and does not deform or crack when bent. The most acceptable diameter is considered to be from 10 to 15 mm. It all depends on the amount of work being performed. Large sleeves are also quite suitable.
- The connection points between the hose and the flasks must be treated with sealant to prevent liquid leakage and air ingress.
- If there is no ready-made scale on the flasks, then the marks are applied independently with a marker. This is necessary for ease of use.
You can make a simple hydraulic level with your own hands, without using vessels, but with only a hose. You should cut a piece of the sleeve of the required size, fill it with water, leaving a little free space, and solder the ends.
What is better to fill in the hydraulic level?
The purpose of using this device is to achieve the same water level in both flasks. Then the required line will turn out smooth. First of all, you need to fill the device with liquid. Usually water at room temperature is used, which can be slightly tinted. This makes it more convenient to observe the condition of the liquid inside the device and the presence of air bubbles.
Filling the device with water should be done in such a way that the possibility of creating air pockets inside the hose is completely excluded. If this happens, then the air must be expelled, otherwise the markings will not be accurate. You can simply check that the filling is correct by raising both flasks side by side to the same height. If the liquid in them is at the same level, then everything is in order. Otherwise, air still got into the sleeve and must be removed.
How to use a hydraulic level
How to use a water level? All work with the hydraulic level is carried out together with a partner. First, the main reference line is drawn, which is a horizontal line along the perimeter of the room at a height of 0.9 - 1 m. For this you will also need dyeing thread, a pencil, and a tape measure.
The work is carried out in the following order . First, the first point is placed (it is called a reference point): make a mark with a pencil and record the hydraulic level indicator. Then the partner goes to the place where there should be another point and puts his end of the tube to it. When the water calms down, the first person tells the partner how to lower or raise its end so that the mark coincides with the water level in the spirit level. Put a point on the wall. It is advisable to make several points on each wall. All the following marks are made using this principle. And they are made from the first reference point.
All marks must be connected using a construction ruler or dyed thread. The end line must coincide with the very first point.
Using a tape measure and a ruler, draw perpendicular lines down and up to the required distance. These will be the floor and ceiling levels. In this case, first find the zero point of the floor, and then the ceiling. Marks are transferred to adjacent rooms from the first reference point.
Leveling the foundation horizontally
To check the evenness of an already poured foundation with your own hands, you need to use a water level in the following order:
A base is made to secure the device. To do this you will need to take two boards and two bars. I place the boards horizontally, and the bars are attached to them perpendicularly, placing them approximately in the middle
It is important to align the angle between the boards and bars: if it is not equal to 90 degrees, the measurements may be inaccurate. Leveling can be done with a construction square. One of the options for attaching a hydraulic level for breaking the foundation.
Next, the ends of the hydraulic level tube are secured to the workpiece.
It is best to use only the tube. Stores sell ready-made devices that, in addition to the tube, include a container with a measuring scale and mounting hardware. You can use these, but due to the difference in the thickness of the tube and the hole in the measuring container, the liquid will take a very long time to level out during the measurement process. To increase the speed of DIY work, it is recommended to use a simple level consisting only of a tube. After installing the device on one of the corners of the foundation, allow the liquid to level out and mark the water horizon on the device. You can mark with a regular pen. This will be the basic o. Then the ends of the tubes are clamped.
The next step is to check the deviations of one corner of the foundation relative to the other. To do this, one end of the tube with the board is transferred to the corner being tested. Unclench the ends of the device and allow the liquid to level off relative to the horizon. They take readings. To do this you need a ruler. It is used to measure deviations of the water level relative to zero (the first mark). Measuring the difference in height of foundation corners.
Calculations are performed using the difference method. To do this, the deviation at the tested point is subtracted from the deviation at the base point. It is important to take into account the signs of deviations. If the water column has dropped below the base mark, then the value is taken with a minus sign, and vice versa. For example, after transferring the level to the required point of the foundation, the deviation of water from the marked horizon at the base angle was minus 3 mm, and at the tested angle minus 7 mm. (-3 - (-7) = 4 mm). This means that the angle being tested is 4 mm higher than the base angle. If a negative value is obtained, then the angle is located below the horizon of the accepted zero. In the same way, all corners of the foundation are checked for which the length of the hydraulic level is sufficient. To ensure that all points are checked, two diagonally located sections can be taken as base ones.
After the measurements have been taken, it is necessary to check the design's compliance with the standards.
During construction, it is important to align the edge of the foundation horizontally. Maximum deviations are indicated in the manual for SNIP “Regulatory requirements for the quality of construction and installation work” and SP “Load-bearing and enclosing structures”
| Deviation | Permissible value |
| horizontal plane for the entire length of the foundation section being inspected | 20 mm |
| local surface irregularities, except for supporting areas | 5 mm |
| at the junction of two adjacent areas | 3 mm |
All deviations are indicated for height marks. If the measured values do not fit within the required framework, the quality of work is considered unsatisfactory and the surface must be leveled. For private housing construction, leveling can be done when laying a brick plinth.
Difficulty of use
With all its advantages, the hydraulic level also has its disadvantages and difficulties. The following can be distinguished:
- work only in the horizontal plane (not suitable for vertical alignment);
- working with a partner (you can do it on your own, but it will take more time and effort);
- filling the tube with liquid (a long tube is more difficult to fill with water).
But, despite everything, the hydraulic level is a very practical, accurate and necessary tool. Real masters have long appreciated it.
.
- Mark a reference point on the wall at the required height, install one of the ends of the hose so that the water level is at the desired point. An assistant holds the end of the hose at the reference point, or the hose is fixed to the wall with a fixed fastener.
- Move some distance away from the reference point and attach the hose to the wall. Wait until the water calms down and put a mark that shows the water level. Remember to close the hose opening while moving so that the amount of water does not decrease.
- Make 3-4 marks on each surface and measure the remaining walls. Remember that all measurements are taken from the first reference point.