If you ask anyone who is into DIY what their biggest dream is, chances are pretty high that they will say either a 3D printer or a laser cutter/engraver. A laser wood burner is a very cool thing, just like a 3D printer.
Two years ago I was browsing through videos and magazines when I came across an interesting article about a laser engraver. I've seriously wanted one of these cars ever since. I looked for it a couple of times on eBay and Amazon, but they were too expensive. However, now, prices have reached a level where they are affordable for DIY enthusiasts.
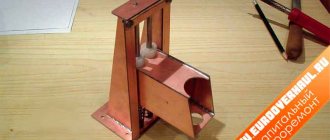
In the end I got the 5500mW Laser Engraver.
The CNC pyrograph has the following features:
- Can engrave on wood surface, plastic, bamboo, rubber and leather.
- Cuts paper, foam and thin leather.
- Engraving area: 15cm x 20cm
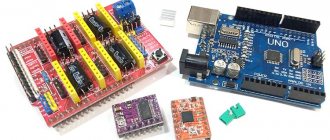
- Powered by Arduino Nano
- Compatible with Open Source Software
- Operating power: 5500 mW
Despite the fact that the assembly kit arrived quite a long time ago, I only now had some free time. In this instruction, I want to share with you my experience in assembling a CNC burner with my own hands, tell you about its use and what you can do with it. I hope this information will be useful to many.
Engraving on laser machines
Such drawings can be made by an engraver... Beautiful!!!
Using machines you can process not only various types of wood, but also plywood and veneer. When engraving, you should take into account the type of wood, since each material has its own unique characteristics.
The material processed using laser equipment is subject to heat treatment, after which it becomes resistant to environmental influences. To ensure that the edges of the product are less scorched, inert gases (CO2 and H2) are used during operation. The laser equipment kit includes a compressor through which air is supplied to the beam operating area. Through it you can adjust the supply of inert gases.
On the installation, you can adjust the speed and power of the beam, which allows you to apply a contrasting pattern. Also, using laser beams, you can remove a layer of varnish or paint, under which the original color of the material remains.
Laser engraved products not only look amazing, but are also friendly to the consumer and the environment. Long lasting image will not fade or fade. The highest quality engraving is obtained on hardwood materials. Patterns on mahogany, walnut, and alder look beautiful and attractive.
What can be produced using laser technology
Using laser processing, you can easily remove paint and varnish coatings, as well as apply high-precision images to the surface of wood.
Engraving differs in the type of application and is divided into vector and raster. With vector engraving, a laser beam draws uniform, thin lines across the entire surface. Raster graphics are characterized by the application of individual lines and dots using a laser.
Using laser burning, you can make various information and advertising signs, key rings, souvenirs, decorate things and even create portraits of incredible beauty.
A good idea for a gift is to engrave a photo on wood, as well as on various objects, for example, boxes.
Laser burning will provide jewelry precision processing, regardless of the shape of the object or workpiece. It can easily cope with applying a design to the surface of a souvenir barrel, or a fancy text on the body of your favorite guitar. Blanks can be cut in different shapes, but the engraving of even such products will be distinguished by clear lines and contours.
When producing symbols in mass quantities, identical designs will not differ from each other due to the accuracy of burning.
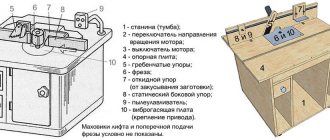
CNC burner
A CNC burner, or pyrograph (pyroprinter), is a machine with computer numerical control (CNC), on which images of varying complexity can be burned using a computer. With its help, at home, a master is able to create real paintings of varying contrasts on wood, plywood, leather and some other materials.
Why is such a device needed? Its main feature is control from a computer using a special program. In fact, it can be used by anyone who is familiar with computer technology, but does not have artistic talent. The burner will reproduce the image selected and entered into the program on wood or other material. This way you can make a souvenir, gift, painting, portrait, transfer any image to a case, casket, box, case, etc.
The device is used at home or in a workshop. It allows you to open your own business. The process of creating a complex pattern is much simpler and faster. The image can be adjusted. The burner provides high precision and quality.
Setting up and debugging a CNC burner
Setting up a CNC machine begins with installing the NC. It is loaded ready-made from external media (floppy disks, flash drives, magnetic tapes). The program is located on a memory card, computer hard drive, or solid-state drive. One of the best programs for CNC burning is Pyroprinter, adapted for Windows XP, 7, 8, 10.
To program the machine for a specific operation, you need to load an image (picture) that needs to be burned onto the workpiece. The graphic file is pre-translated into DXF, Exeilon, HPGL or Gerber format. The programming process is controlled on the monitor. The UP gives commands to move the tool in the form of G and M codes that are understandable to the device. In the Pyroprinter UE, the controller based on Arduino Nano V3 is responsible for micro-movement of up to 4 coordinates simultaneously and gives a stable movement speed of 10 m/min at 20 steps/mm.
Setting up and debugging of the machine is ensured strictly in accordance with the instructions. During the setup process, the necessary information is displayed on the screen indicating which keys to use. If necessary, you can adjust the transferred image.
CNC burners allow you to create original drawings and inscriptions on the surface of different materials and transfer entire paintings and portraits onto workpieces. The required image is entered into the computer, and then the device reproduces it on the surface of the product. The work does not require artistic skills, but aesthetic taste is required.
- 06 September 2020
- 4332
Choose and use a laser engraver
And this is a homemade engraver, but more on that later...
Currently, there are many well-known brands that supply laser engravers. The device is almost the same everywhere, but many of them differ in their factory configuration and functionality. First of all, when choosing a laser engraver, you need to clearly define the purpose of its use, as well as what points you need to pay attention to when drawing up an estimate and not miss anything.
Right choice
When purchasing, we take into account such parameters as reliability, power level and price.
Particular attention should be paid to power. The engraver's work can range from 20 to 130 W, but it can be higher. For engraving and cutting of medium-thick wood, only 40 W is enough. The emitter tube will have the same power as the equipment.
After purchase, the laser can be upgraded, in other words, the emitter can be replaced with a more powerful one. You should not change the emitter power to too low or too high, in contrast to the base one, as you can lose a lot of time and money, and the quality of the output material will significantly decrease.
When choosing, pay attention to the presence of an optical system and a cooling system.
By correctly focusing the laser beam, you can concentrate the radiation power at a certain point using an optical lens.
To adjust the beam, reflective mirrors with two modifications are provided, on which the performance of the laser engraver depends.
Pay attention to the cooling system
The cooling system is divided into two types:
- Air;
- Water.
The air system consists of several fans that turn on together with the engraver.
The water system is a closed type system. Pipes and a water jacket pass under the main components, and a continuously running pump with the help of a radiator drives ice-cold distilled water through the pipes. This type of cooling is often used in industrial machines.
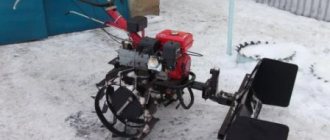
Financial moment
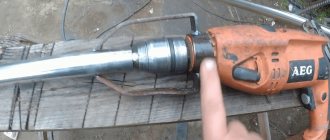
Wood burning with an engraver
You need to think about the approximate cost of servicing the device and consumables. Very often, the laser engraver kit does not include all the necessary equipment, so you will need to supplement it, depending on the material being produced.
Extraction of associated fumes during operation is provided by a standard exhaust system. A charcoal hood will remove excess odors in the work area.
To engrave cylindrical materials, special devices are needed to rotate them.
After purchasing, you need to install the equipment; it is better to seek help from professionals. But if you decide to install it yourself, then you should strictly adhere to the manufacturer’s recommendations.
When installing yourself, it is worth highlighting a number of such features:
- After you have connected the device to the power supply, to the voltage stabilizer and grounded, you need to do a test run of the installation;
- You can connect the engraver to your computer, install the necessary drivers and do a few test runs again.
- When working with equipment, you must strictly follow safety regulations!
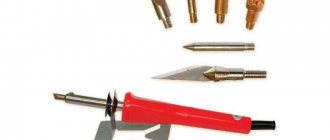
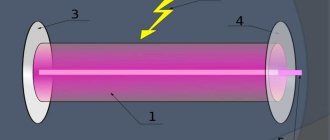
Laser burner
The CNC laser burner is one of the latest developments.
CNC Laser Burner
The main distinguishing feature of the device is the ability to accurately cut and draw boundaries; high results are achieved due to the fact that the machine draws dots on the wood. Advantages of the laser machine:
- Thanks to its high precision, the machine is convenient for burning small inscriptions and signs - the image will be clear with bright contours.
- The laser burner is suitable for processing wood, leather, paper and film.
- The machine works properly in a room with low or high temperature; drafts and changes do not affect operation.
There are major disadvantages.
Since the machine draws with dots, it will not be possible to remove halftones and shadows with a laser. Even an experienced artist with an optimally configured program will not be able to achieve a three-dimensional image.
The CNC laser machine is slow. Experts assure that to draw a portrait measuring 25x25 centimeters, the master will have to spend about 13 hours. It is necessary to take into account that the picture will be light, and additional drawing may be required.
When you enlarge a photo before transferring it to the canvas, the burner will draw it in pixels. Externally, the image will resemble a mosaic.
Masters claim that a laser wood burner emits too bright a glow; over time, such brightness will negatively affect vision.
PREPARATION FOR WORK
The engraver has 2 ports. One port with a USB connector is used to power the device (Unfortunately, the power supply is not included).
As a power supply, I took a charger from a mobile phone, the current strength of which is 2A. The device itself consumes 1A.
The second connector has a miniUsb port, which connects directly to the USB port of the PC and is used for data transfer.
The first thing you need to do after connecting the machine to your PC is to install the driver from the memory card.
Installing drivers
We connect the memory card, go to the Driver folder and run Driver.exe.
Run Driver.exe and click INSTALL
After installing the driver, you can start the program. After starting the program, select the port and click the “connect” button (You can view the port for connection in the Device Manager).
After successful connection, you can start working.
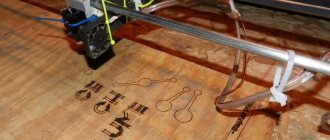
We select the image we need and simply drag it into the program window. Almost all elements in the program are intuitive. The maximum image resolution should not exceed 512*512px
Having decided on the image, you need to send the picture to the engraver (using the Sent image to machine button), and then place the object to be engraved on the machine platform.
We focus the laser beam with a lens (the smaller the focusing point, the more effective the work) and click on Start.
If necessary, we can always stop the burning process or pause it.
The yellow button on the machine allows you to start and stop engraving without using a PC (for this you need to first download the image)