The properties and characteristics of a high-quality knife directly depend on the level of its final grinding and polishing. They have a great influence not only on the ability to maintain the integrity of the cutting edge and sharpening for a long period of time, but also on the productivity of operation - minimum effort, maximum result. Also, of course, all this is imprinted on the appearance of the entire knife and guarantees additional resistance to corrosion. It is precisely the precise adherence to technical subtleties and the quality of these processes that allows us to answer a simple question, which is why some knives cut better than others and do not become dull an order of magnitude longer.
Handmade knife polishing.
Difference between grinding and polishing
To understand the difference between the process of grinding and polishing, you should refer to the very definitions of these actions. Let's look at them in more detail:
Grinding
Using abrasives of various sizes, it allows you to make the surface of hard material smooth.
Polishing
The final stage in blade grinding, with its help you can achieve extreme smoothing of the surface until a specific shine appears.
The concepts are actually the same in the workflow. And they follow sequentially depending on the need. Bringing the workpiece to the required size, as well as adjusting its shape or removing rust, will require grinding.
It is used if necessary and is the final stage of grinding. If the task is to bring the surface to a shiny state, then you should resort to polishing.
It can be done manually or using special wheels on an angle grinder or machine.
This is where the opinions of the masters differ greatly. With the help of special machine devices, the process will take much less time. But according to experts, the result will be weaker than polishing by hand.
Steel polishing and knife sharpening
Polishing metal surfaces
is perhaps the most intensive work process in knife production - only consistent execution of certain work can lead to a good result.
Abrasive sandpaper and sanding paper are available for sale.
ZM, VSM and Klingspor,
have proven themselves best These types of abrasive paper have a high-quality bond of abrasive grain, which means that the grain is firmly connected to the supporting material and stays on it for a long time, in addition, the grain is evenly distributed over the entire area of the material. Using low-quality materials will require more processing time and, moreover, will not bring the desired result - this is not the case when you need to save.
For coarser sanding work, sandpaper with grits of 60, 80, 120, 180 and 240 is suitable.
To obtain a smoother surface, it is better to use 600, 800, 1000, 1200 and 2000 grit wet sanding paper.
These numbers indicate how many abrasive grains are located per square inch of the carrier material - the higher the number, the thinner the sandpaper.
When grinding metal surfaces, experience plays a major role. Only the basics of this process can be outlined on paper, but even here the main rule remains: theory is theory, and experience is acquired with practice.
Not every grade of steel lends itself equally well to grinding.
For example, RWL34 steel presents fewer grinding problems than ATS34, although the former has a higher carbide content. In terms of wear of sanding paper, the absolute superiority belongs to steel CPM-S30-V and CPM-S90-M (formerly CPM440-V and CPM420-V), but subsequently they hold an edge better.
At the workplace, sheets of sanding paper must be distributed according to the grit size. It is very important to have good lighting in the workshop (halogen lamps are best) - only with such lighting can you determine whether the traces of previous processing have been completely removed and switch to paper with a finer grain.
As sanding aids, there are different shaped pads that not only spare your fingers, but also allow you to achieve truly smooth surfaces.
The choice of paper grit for the initial sanding phase depends on the quality of the surface obtained as a result of its preliminary processing.
If the surface was sharpened with a file, then it is better to start with 80 or 120 grit paper. After processing the blade on a sanding belt with 120 grit, you can switch to 240 grit for further sanding. Some craftsmen grind and polish the material to the very end on a machine. As you can see, the range of surface treatment options is quite wide.
But let's return to the blade, the surface of which was processed with a file. As a rule, the file moves across the blade, so in order to remove all the grooves left by the file, you should grind along the blade. To do this, you need to use a sanding block to which you can press the sanding paper firmly and evenly. Once the surface has been sanded with 120 grit paper, you can move on to a finer grit, preferably 240, and make movements perpendicular to the direction of movements during the previous sanding. When moving from one grain size to another, the difference between its values should not be too large, but not very small either.
In practice, this sequence has proven itself: 120, 240, 400, 600, 800, 1200 and 2000; or 180, 320, 600, 800, 1200 and 2000.
To obtain a gloss finish, you can finish the treatment with 600 grit. When changing the grit, it is very important to also change the direction of movement of the abrasive material, which allows you to determine whether the traces of the previous grinding have been removed.
During the grinding process, do not forget about the spine of the blade, the appearance of which should correspond to the entire product as a whole. Much attention should be paid to the edges and transition areas - they must be sanded clean and to sharp corners, which is not so easy. On the finished knife, these places can be used to judge the quality of the work performed.
Now the question arises: gloss or mirror shine?
To obtain both surfaces, painstaking pre-treatment is necessary.
A glossy surface is obtained if, at the end of processing, the sanding paper moves across the surface in a straight line and evenly, and the paper should completely cover the surface.
A hard rubber pad is a good aid here, but when sanding transition areas, be careful not to round off the corners. What grain size to finish processing with is a matter of taste.
A beautiful surface is achieved with 600 grit, but you can also combine, for example, start with 400 and immediately move to 1200 for final sanding. Some craftsmen use additional grinding paste or matting agent.
To polish the surface to a mirror shine,
it is necessary to pre-grind it with paper with a grain size of up to 2000. Only after this can you begin polishing on a polishing machine using a soft polishing wheel. Polishing paste, available for sale in specialized stores, is suitable as a polishing agent.
When polishing, do not apply much force to the edges so that sharp corners do not round off, which can easily happen if the master is overzealous. The main thing is a clean surface without any remaining abrasive grain: if the grain gets into the polishing wheel, the entire polishing can go down the drain. A blade polished to a mirror shine requires painstaking work, but often all the beauty of this shine quickly disappears. A highly polished surface on blades made from carbon steel is an effective protection against corrosion, but for chrome steel such protection is no longer necessary.
Finally, one more question: to what grit size should you grind before hardening the metal? It depends on the steel itself and the hardening method.
On stainless steels, which are hardened in vacuum furnaces, no scale layer is formed, so there are no restrictions on the degree of grain size during grinding; moreover, everything that can be done with the surface of unhardened steel can be easily done manually. If the blade should have a normal gloss, then the surface before hardening can, in principle, be completely polished, but after hardening, minor refinement is necessary. If we are talking about a mirror finish, then finish grinding before hardening with 1200 grit and continue grinding after hardening. As a rule, the method of hardening carbon steels is different from that of stainless steels, for example, in a forge, while they form a layer of scale. Therefore, there is no point in subjecting the surface to final processing before hardening. In such cases, sanding should be completed with 400 grit and continued after hardening.
Anyone who prefers to work with “their” steel can, over time, develop their own individual processing methods that are best suited for this particular type of steel.
Sharpening a knife
A new blade should be sharpened only after it has been hardened. This means that when making a blade it is necessary to leave 0.2-0.6 mm for the future blade. If the blade is finally sharpened before hardening, then as a result of exposure to high temperatures during the hardening process, undesirable structural changes in the metal may occur on a thin blade, and all the positive properties of the steel will be negated.
Some experts use diamond files for sharpening; you can often hear about craftsmen who bring the blade to the required sharpness on a sanding belt.
I strongly do not recommend using commercially available sanding belts for sharpening. The rotation speed of the belts is too high, which can lead to overheating of the metal due to friction and thereby reduce the degree of hardening. Sanding belts with adjustable rotation speed can only be used for rough sharpening, and then only at low speeds and provided that the master already has some experience. Using a sanding belt is not easy to achieve the same sharpening angle on both sides of the blade, and the blade can be ground down quite quickly.
For beginners who do not yet have sufficient experience in such types of work, it is recommended to use a sharpening set that allows you to adjust the sharpening angle,
which is the same on both sides of the blade and retains its shape, unlike the angles obtained by hand sharpening.
In addition, here you can choose a smaller or larger sharpening angle to suit your taste or depending on the application of the knife. For rougher work, a larger angle is better, but if the blade needs to be razor-sharp, then the sharpening angle should be small.
You can purchase such a device by clicking on the link and buy it at a discount.
Knife lovers can splurge on an expensive but high-quality Japanese whetstone, which can be used to sharpen blades by hand, but this work requires practice and a lot of time.
When sharpening a blade, quite strong burrs appear, especially on high-alloy steels. There are two ways to get rid of them: the blade can be processed on a grinding or polishing wheel using polishing agents. Or, according to the old grandfather’s method, use a leather belt attached to a wooden block.
How can you check that a knife is sharp?
There are several ways:
try shaving the hair on your arm or cutting off a few hairs on the back of your head, scratching your fingernail, cutting a rope, etc.
A test with a sheet of typewritten paper turned out to be very practical: take the sheet by the corner with two fingers and cut it diagonally with a knife. If this can be done in one smooth movement without jerking, then this indicates that the knife is sharp.
This post may contain affiliate links. This means I earn a small commission from links used at no additional cost to you. See my privacy policy for more information.
polishing, knife, weapon, article, photo, sharpening
Manual polishing
In the past, craftsmen from all over the world did not have special equipment, but somehow managed to get the job done efficiently. They polished knives without any special equipment. They used natural abrasive materials such as stone.
You can get the correct shape of the blade by grinding. It is possible to achieve a perfectly smooth surface using manual polishing. Using special mechanical devices, it is not always possible to obtain an ideal surface.
By all rules, hand polishing is the final treatment of a knife. To polish a knife at home yourself, you must first resort to grinding. It is produced on belts with a grain size of no more than 320. Or the surface should first be treated with sandpaper.
Blades polished to a shine.
Grinding
At the first production stage, after sawing, welding or casting, grinding of the still rough material is carried out. Its task is to remove irregularities and burrs from the surface, remove scale or old coating and bring the product to the required dimensions and shape. To perform this type of work, specialized mechanisms are used, which come in several varieties. They operate at the same high speed.
Grinding the bevel of the knife.
In some cases, you can use a primitive method, which consists of using granulated sand as an abrasive. The blade is rubbed against it until the protrusions on the plane are completely destroyed. You can polish something only with the help of rough mechanical action.
Features of sanding
Processing with sandpaper.
To polish a product with sandpaper, the first step is to sand at an angle of 90 degrees. But at the same time, irregularities may appear on the knife. This can happen if the paper becomes clogged with small particles.
In some cases, these bumps may go away. But you may have to switch to a larger grain again.
To carry out high-quality work, you will need good lighting, and the process must be performed under a magnifying glass.
When removing large irregularities, you can again switch to fine-grained paper. The polishing process can be carried out with different papers, the main thing is that the transition from one to another is smooth. This means that the grain of the paper should not change sharply.
You can start with paper with a grain size of 600, then increase it to 800. Next, polishing is done in an increasing manner. And so you should go up to 2000. And perhaps you should resort to 3000 sandpaper.
Bottom line
Basically, all polishing methods boil down to one thing: it is necessary to use a large amount of abrasives, gradually reducing their grain size. Various objects can act as abrasives: various stones, sandpaper, tapes with special compounds, etc.
As an encouraging parting word for those who will try their hand at this difficult task for the first time, here is an interesting fact: according to Japanese standards, only the one out of hundreds who has studied for at least five years with a master of his craft and has “God’s spark” for this can become a first-class polisher "
Previous
Knives Stationery knife: types, care, selection rules
Next
KnivesHow to choose a rotary knife for cutting fabric
Abrasive stones
Stones, like paper, come in different grain sizes. The most popular are 320,400 and 600 units. For proper grinding, experts recommend using Indian bench stones. This method has been used for a long time.
Stones are good for removing unevenness from metal. In the old days, sand and soil were used for these purposes. And for polishing, stones with a structure harder than the blade were used. The most popular stone for polishing is sandstone.
How to use stones correctly
Stones of different grain sizes are used for grinding and polishing. You can examine the structure of the stone under a magnifying glass. Coarser stones are necessary when removing large scratches that remain after filing a blade.
To prevent the surface of the stone from clogging, it must be periodically moistened with water.
Arkansas stones are not bad for such work. They come in grain sizes up to 1000 units. The material is perfect for finishing.
At the very beginning of polishing, a coarser abrasive is required, and these stones are not used. Japanese wet stones are also very good at working. In addition to natural ones, there are also artificial ones. They are a little cheaper in cost.
Abrasive stones of different grains.
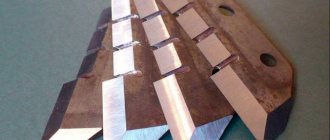
Knife grinding
Process the blade into a rectangular piece, the easiest way is to use grinding machines. It will take less time, but requires a process of precise eye and sense of proportion.
It is impossible to see the degree of grinding between the knife and the tape.
In this case, the master relies on his feelings. He literally has to feel the process taking place. The master must mentally imagine and feel each pass of the tape or circle. If you do the operation repeatedly, muscle memory will appear.
When sanding, you should follow a few tips, they are mandatory for a beginner:
- It’s better to start with simple shapes and a short blade length. Use a template to apply the outline to the workpiece.
- Carbon steel grades are easier to process. Make the workpiece strictly rectangular in shape.
- The basis for such work is considered to be muscle memory. Take several blanks at once and perform the procedure with them one by one. Making a blade from start to finish is not advisable.
- Equip your workplace with good lighting. Wear comfortable shoes to help you balance properly during the process.
Final grinding and finishing are carried out with longitudinal movements along the machine belt. At the initial stage, it is best to use a tape grain size of 60-80 units. Further work is carried out with a slightly smaller grain of 160-240.
The entire blade is processed with any grain. After completing the grinding process, the product is hardened. After this, the workpiece acquires the necessary rigidity. Next, processing is carried out with finer abrasives. But this will already be a polishing process.
Blades after polishing.
Feeling the steel of a knife blade
You need to have a keen sense of what's happening between the tape and the part to avoid small, flat, uneven or edged areas. Therefore, when bringing this part of the edge to zero thickness, work carefully. After completing the work, the primary bevel is uniform and goes directly to the edge of the knife.
I now spend a few minutes leveling both sides of the piece on the 120 grit tape. The accompanying photo shows me pressing down on the back of the blade with the middle finger of my left hand to prevent the moving belt from tearing it out of my hands.
RJ Martin's Manta Ray knife has a double recessed blade (recessed grinding on both sides).
If you're wondering how I got the blade into that position on the tape, I slid it off the end of the sandpaper while holding the point with my right index finger and thumb. With my left hand in place, I relax my left wrist, release the finger pressure, let the tape pull the blade out of my right hand, and then it lands on the flat rest. I then move my right hand back into position so that I can apply even, light pressure to the piece. To remove the part from the tape, the process is repeated in reverse order. This is much harder to explain than to do!
After tracing the outline of the knife onto the finely ground steel, the author uses the rounded side of the sanding belt, which extends beyond the edge of the wheel, to create recesses for the fingers and contoured areas of the handle.
Now I switch to a new 240-grit ZM 967 belt, repeat sanding both sides of the blade blank, and then sand the primary bevel again, making passes at a slightly different angle so that I can see the scratches left by the 120-grit belt. After three or four light passes, these scratches disappear, and the blade takes on a nice appearance. This concludes the work on 6x48 sandpaper.
Now on the 10″ wheel I create a relief or secondary sanding on the top or back of the knife by holding the back of the knife at a 45 degree angle to the wheel and trying to sand on the part of the wheel that is below the center of the knife. I carry out rough sanding on a 60-grit belt, and then finish it on a sharp 120-grit belt. This relief is aesthetic and practical. It removes enough unnecessary weight from the blade and improves its penetration ability.
Polishing the knife
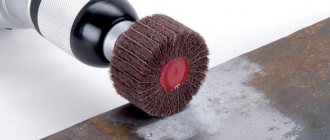
The steel acquires a uniform matte finish after the grinding process. The surface must be absolutely smooth, with no dents or potholes allowed. Otherwise, the result of polishing the workpiece will disappoint you. Polishing is carried out on a belt machine.
But such a tool costs a lot of money, and not everyone has it. You can resort to using an angle grinder; this method is most accessible to ordinary citizens. Let's look at the process step by step:
- It is necessary to prepare the blade for work. The handle can be wrapped with masking tape, or even better if it is possible to temporarily dismantle it.
- You will need not a simple grinder, but one with the ability to switch speeds. The speed should be as low as possible. The grain size of the wheel at the first stage is required to be 320 units, or you can use a special polishing mixture based on SF glue.
- Next comes changing the disc to a felt one. Here you will need polishing paste. The grain value of the mixture should be in the region of 600-800 units, the manufacturer does not play a role. You need to be careful when processing; just go over the blade a couple of times on each side.
- After the previous step, the abrasive paste is removed from the wheel and ointment with a grain size of 1200-1600 units comes in its place. Next, you should carefully, without strong pressure, walk along the blade several times. The procedure should be performed to a mirror shine.
The polishing process takes a lot of time. Be sure to complete all processes in strict order. You should act confidently and not be nervous when you fail. Choose the right abrasive paste with the right grit. Any little thing can affect the result.
Blade before and after polishing.
Polishing
Polishing the knife is the final stage. Its function is the final leveling and transformation of a matte surface into a glossy one. It is unrealistic to achieve a similar result using rough processing. The design of polishing machines is somewhat different from grinding machines. They operate at lower speeds, which can also be adjusted. Also, there is no way to do without polishing pastes.
Excellent polishing quality can be guaranteed not only by mechanical impact, but also by chemical impact, which exposes the metal to the influence of the active composition.
Quick polishing by hand
Many professionals say that the polishing process is best done by hand. Movements are made carefully along the blade. With this tactic you can quickly polish the blade. But there are specialists who use a grinding machine.
The rapid rotation of the circles polishes the blade faster. But this does not mean that the quality is better. This method has its drawbacks. The surface of the blade is not always perfectly smooth. It may show rough waves or scratches.
If the scratches are in one direction, this can be quickly corrected. After rough processing, it is necessary to prepare a small piece of leather and a special polishing compound with a grain size of 1600-2000 units. This paste should be used for finishing, but by hand.
Have you tried polishing the knife?
Of course! Not yet...
Application of dry and wet paper
Polishing work can be carried out with dry or wet paper. The material is lubricated with water so that it does not deteriorate or become greasy during the process. But for a certain type of work, only dry paper is required.
In order to polish a knife at home using paper, you will need to purchase a special kit.
It can consist of many sheets of different grain sizes. This will be the most economical. Waterproof material is more durable, this should be taken into account.
To polish a metal surface, it is best to use paper treated with silicon carbide chips. For a correct and convenient process, follow these tips:
- paper should be folded in half;
- the workpiece should be fixed using clamps to any surface;
- paper folded in half will not slip out of your hands when working.
Sandpaper of different grains.
Something about safety measures
I find it dangerous to place a polisher directly on a table or workbench. When the polishing wheel grips the blade, it flies at 75 miles per hour or more towards the surface of the workbench. Such a pointed rocket can bounce off the workbench and, hitting the wheel again, go directly to the master.
| Marking the shank for drilling or milling a recess for it in the handle. | The screw tip of the drill bit is designed to simply cut into the surface of the handle plate |
Mount the machine on a workbench extension no larger than the motor base. The idea is to ensure that there are no obstacles between the circle and the floor. Some kind of soft mat should be placed under the polishing wheel so that the blade, falling down from the wheel, does not get damaged or, even worse, fly off the wheel towards the operator.
A few years ago I was teaching a friend how to make knives. In a hurry, he set up his polishing machine directly on the workbench. The polishing wheel grabbed the dagger's guard and threw it straight onto the surface of the workbench. Bouncing off the workbench, the dagger again hit the circle, which sent it straight into my friend's hand. The friend did not receive any injuries, but he did not go to work for a long time and spent a lot of money on treating his hand. I know more terrible stories about accidents caused by the polishing wheel, but I won’t tell them here. I will just repeat that, from my point of view, a polishing machine is the most dangerous tool in a cutler's workshop.
Protection should be installed over the circles. The photo shows how I did it.
Even if you've never had anything bounce off the wheel in your face, it's good to have dust and bits of polish flying onto the floor and not at you.
My circle guards are made from 3/4″ plywood, glued and screwed together. I hope that the blade of the knife, wrapped around the wheel, will get stuck in the tree, and not in me. When the wheel works, the protrusion on the front of the protection can be moved lower. The upper part of the machine protection is convenient for storing polishing compounds and other small items.
Mirror processing
Any knife will look attractive with a blade polished to a shine. To polish a knife blade to this condition, you will need special secrets. Each master has his own polishing methods.
Whichever option is used, the result should speak for itself.
To achieve an ideal surface, the product can first be sanded by machine.
And only at the finishing stage should you start polishing by hand.
Preparation at the grinding stage also plays a significant role in the final result. Handle grinding wheels with care. High machine speed can damage the product. The grinding wheel must be used with a soft surface.
Using GOI paste
The method of working at the finishing stage with GOI paste has been known to masters for a very long time. To polish a knife with GOI paste, you need to select the appropriate type of polishing material. It will depend on the grade of steel of the workpiece being processed.
Using GOI paste, metal, plastic and glass surfaces are polished. Previously, it was made from chromium oxide and was green in color. Today it is made of aluminum oxide, and its color has become red and white.
Types of pasta
In the old days, there was only one type of paste available. Now masters have a choice. It is produced with various grains:
- number 4 is used for rough work, it is used at the initial stage of polishing;
- to obtain a matte surface use number 3;
- and for final polishing numbers 1 and 2 are used.
Green pasta, like in the past, can still sometimes be found on store shelves. Previously, such paste was produced in liquid form and in bars. They were absolutely identical in grain size. It has only one advantage - low cost.
Various GOI pastes.
How to use GOI paste
You should prepare a small piece of cloth. The process does not look complicated; you should rub the surface of the blade with progressive movements. It doesn't require much pressure. Otherwise you may get big scratches.
Movements should not be too sudden. The work should be completed when the blade begins to shine.
For proper treatment, you should first use paste number 4, it will remove all deep scratches. Then move on to number 3.
And at the finishing stage the surface is treated with numbers 1 or 2. These types of paste allow you to achieve a mirror shine. After work, you should rinse the blade in running water. But you can also rinse in kerosene. It is also recommended to cover the surface with tsaponvarnish.
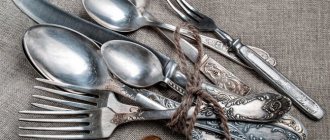
How and how to clean a knife, home recipes
There are several reliable folk recipes that will help you quickly revive a seemingly hopelessly damaged knife. These methods are harmless both to health and to the cutlery themselves.
Potato
Raw potatoes contain a lot of oxalic acid, which cleans metal well. You can enhance the effect of the acid by adding baking soda, laundry soap or table salt.
You should cut the potato in half, then rub the cut side with soap and wipe the blade. You can press the potatoes tightly to the knife and leave for an hour. After these manipulations, the rust will come off well.
When the potatoes are saturated with rust, you should make a new cut and apply it again.
Table vinegar + citric acid
If the knife is very old, then lemon acid and vinegar will help save it.
First, the knife is soaked in vinegar for several hours. You can even leave the blade in concentrated vinegar for a day. Some housewives soak a rag in vinegar and wrap a knife in it.
You can also use lemon. You just need to squeeze the juice out of it, soak a rag in it and wrap the blade in it. If corrosion appears on the surface of the metal, the blade should first be cleaned with a nail file.
Baking soda
Soda can not only remove stains from fabric, but also clean a knife blade until it shines. You just need to make a paste of baking soda in water and apply the mixture to the blade for several hours. All that remains is to clean the knife from dirt with the abrasive side of a kitchen sponge.
Coca Cola
Coca-Cola perfectly removes old dirt and rust. You just need to immerse the knife in the drink and leave it for several hours. All that remains is to wipe the blade dry with a rag.
Onion
Onions, just like potatoes, contain acids that perfectly dissolve rust and dirt. You just need to rub the blade with the cut of the onion and leave it for several hours, and then wash the blade.
Kerosene
An old proven remedy for cleaning rusty knives is kerosene.
You should soak a rag in kerosene and wrap the blade in it, leave it for a day, and then rinse under running water. After this procedure, the blade will shine like new.
Tomato paste
You just need to thickly coat the blade with tomato paste or ketchup and leave the knife for a quarter of an hour. If necessary, the treatment must be repeated. The paste also contains acids that dissolve rust well. After processing, the knife must be dried.