Peculiarities
Usually, when growing potatoes, they are hilled with hoes. But this method is not productive enough, and sometimes very tedious. Not everyone can cultivate a large plot of land or a large field by hand. Therefore, the potato hiller really helps the owners. You just need to choose the right specific type of mechanism.
The simplest manual hillers can not only hill up the soil (as follows from their name), but also loosen it. With proper skill, impeccable tillage is guaranteed. Ready-made tools are relatively inexpensive. The modified hiller is attached to the tractor.
Of course, this is a more productive device used in large farms.
The components of the product are:
- a pair of stamped wheels;
- mounted hitch;
- steel frame;
- dumps;
- iron paws.
Hillers can also be used in conjunction with walk-behind tractors. There is no need for any special device for this. You just need to attach a regular hilling machine. But, one way or another, people do not want to overpay for something they can do with their own hands. Let's try to figure this out.
How to assemble the device
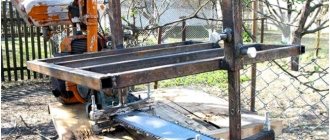
To assemble a metal lathe with your own hands, you need to follow these steps:
- Assembling a machine frame from beams and channel elements. If you intend to process large workpieces, use materials that can withstand significant loads. For example, if you want to process metal parts that are longer than 5 cm, the thickness of the frame materials should be at least 0.3 cm for the corners and 3 cm for the rods.
- Installation of longitudinal shafts with guides on channel elements. The shafts are connected using a welding machine or bolts.
- Making the headstock. For this, a hydraulic cylinder with a wall thickness of at least 0.6 cm is used. A pair of bearings must be pressed into it.
- Shaft routing. Bearings of large internal diameter are used.
- Filling the hydraulic cylinder with lubricant.
- Installation of the pulley and caliper with guides.
- Electric drive installation.
If you look at the drawings of a lathe, you will notice that to increase the stability of the cutter holder, a tool rest is used; a thin metal strip is fixed at the bottom of the unit. It is intended to protect the working part of the device from deformation when processing the workpiece.
Operating principle
A manual hiller works according to a seemingly primitive scheme. However, this has little effect on efficiency. One of the farmers presses on the traction handle located in front, and the other presses on the same handle at the back. As a result, the mechanism is set in motion, and the working disks are immersed in the ground. When moving, the soil layer is loosened, then, by installing or removing several special parts, they change the distance separating the disks.
Self-production of a hilling device is available to all farmers. All you need is basic mechanical knowledge and experience in day-to-day operation of agricultural machinery. Do-it-yourself equipment turns out to be much cheaper than factory-made analogues. There is no need to talk about satisfaction with one’s own skill.
However, we must remember that the safety and efficiency of work is only in your hands; everything must be thought out to the smallest detail.
Homemade cultivators - advantages of assembly
Many enthusiasts are starting to build their own motor cultivators not only because of the significant savings in money. Among other important advantages of making an agricultural implement yourself are:
- the ability to equip the motor cultivator with a set of functions that will be really important when using it on the site;
- no need for frequent maintenance and regular repairs - provided that reliable parts are used during the assembly of the motor cultivator, homemade equipment will be many times more durable and durable, especially when compared with some Chinese models;
- the ability to configure the working units of the agricultural unit as needed for operation under specific operating conditions.
At the same time, it is important to remember that a chainsaw cultivator will be truly reliable and effective only when the operator carefully prepares for assembly and acts strictly according to the algorithm. Otherwise, the manufacturer will receive an agricultural implement that will often break down and not show proper productivity in the garden
This is interesting: Robix motor cultivator (Robiks): models and characteristics, video
Manufacturing process
The hiller is made from the following components:
- steel sheet 0.2 cm thick - for the dump;
- lanyard – connection of the rack with the front link;
- stand - made from a water pipe with a cross-section of 1 inch and a length of 1 m;
- tubes with a cross section of 1/3 inch - used on rods.
The turnbuckle is sometimes replaced with a simple steel plate. But in this case, you will have to drill holes in it to help adjust the tilt of the hiller. To work you will need:
- devices capable of bending pipes;
- gas burner (or blowtorch);
- welding machine;
- Angle grinder.
Finding ready-made drawings is much easier than making them yourself. But you still have to carefully study these materials, since the slightest mistake can result in serious losses. Hillers placed on a walk-behind tractor are secured with brackets. To connect the mechanism lead to these brackets, a stopper, bolts and flat washers are used. The stopper is inserted into a square pipe and then carefully attached to its wall.
Regardless of size, the hiller must be multifunctional. This means that it needs to be regulated. A telescopic device helps you change the height. A smaller tube is inserted inside the pipe located in the middle of the hiller, which reaches the rear rod.
Such a solution will allow you to easily manage the parameters of the hiller.
The mechanism itself is equipped with a movable frame. Its mobility is ensured by the hinge and lanyard that attaches the front link to the main rack. If the last part is replaced by a steel plate, it must be secured in position using bolts. Important: even an ordinary hiller cannot be made without welding. The racks, blades and rear links are welded to each other, and then it’s the front link’s turn.
The rear link is made 0.5 m wide, and the width of the handle is 0.2 m. Pipes 0.3 m long are welded onto the center of the fork. The free end is inserted into the thrust cavity. To adjust the height of the stand, the holes on its upper edge, as well as the vertical fork, are drilled out. The width of the front and rear links must exactly match, the largest permissible deviation is 0.01 m.
When making a hiller, you also need a double-mouldboard plow. For it, take plates 0.2 cm thick. The plates will have to be bent in a semicircle. The completed halves are welded to the stand.
It is extremely important: the seam at the junction of the parts must be as level as possible, and the plates themselves must be sanded with a grinder.
Pruning knives are made of carbon steel. Externally, such knives resemble arrowheads. Careful sharpening is a prerequisite. It is carried out strictly at an angle of 45 degrees. This approach allows you to maintain the sharpness of the metal for as long as possible.
The sharpened knife is welded to the stand from below and additionally ground. The discs are made from 2 steel plates. Having cut out these plates, you need to make semicircles out of them. Of course, after welding the disks to the rack, you need to align the seam as much as possible. Any part that will be welded is ground in advance.
Assembling the hiller frame
Figure 1. Diagram of a beam without discs.
A potato hiller must perform several functions simultaneously. Therefore, it is recommended to make it adjustable. You should take the longest main tube and make a hole in its central part. Next, you need to retreat equal distances from this hole and make more holes. After this, you need to insert an adapter tube into this hole, and into it - a tube for the rear thrust. Such a fastening will provide more convenient work with the plow and will allow it to be adapted for a person of any height. This is especially convenient for elderly people. Indeed, in this case, when working with the hiller, you will not have to bend down much to adjust the desired height. It will only be necessary to move the adapter tube to another hole on the main tube.
Now you need to make the moving part for the hiller with your own hands. For this purpose, the front thrust tube should be connected to the main handle using a hinge or a welding machine. After this, you need to attach a lanyard, which will make it possible to independently adjust the angle of inclination.
When the required optimal angle of inclination of the front link has been selected, it is recommended to bolt the lanyard. This way the plow will be more reliable and will not break over time. If necessary, you can attach bolts in other places.
Next, you should bend the main handle correctly. Here you need to work slowly and very carefully so as not to damage the tube as a result. Remember that the optimal angle is 15° (it is recommended to use a protractor while working). You need to start bending the tube approximately 40 cm from the end.
How to do something yourself, with your own hands. home handyman website
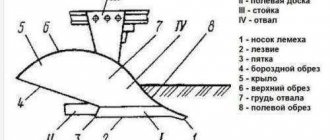
Do- it-yourself plow-hiller drawings
How to make a hiller plow
The most popular equipment for summer residents and gardeners is a hiller plow. This is especially true for those whose areas for growing potatoes, for example, are large, and whose strength is no longer what it was in their youth.
I think that readers will be able to make a plow- hiller with their own hands .
The basis of the tool is the support angle (Fig. 1, item 3).
It is made of an equilateral angle 40x40 mm, in which the cold shelves are brought together at an angle of approximately 60...70°. The size of the corner and other parts can be determined by the general appearance.
A toe is welded to it (Fig. 1, item 4 and Fig. 3, 4). But before purchasing a new lawn mower, you might want to think about the possibility of creating a lawn mower from a chainsaw with your own hands. To operate the hilling plow at a set depth, a heel is welded through the stop bar (Fig. 1, item 6) (Fig. 1, item 5).
How to learn to weave a mobile phone case from rubber bands
The technique of weaving a cover from rubber bands is not as complicated as it seems. However, you will need a little more time than weaving bracelets and keychains. Up to 1000 rubber bands are used to weave a mobile phone case. If you don’t know what color to weave a phone case, then photos of the finished work will help you decide on the pattern. To make a mobile phone case you will need a Rainbow Loom machine and elastic bands, as well as a hook.
Phone case made of rubber bands.
Phone case made of rubber bands.
Phone case made of rubber bands.
Phone case made of rubber bands.
Phone case made of rubber bands.
Phone case made of rubber bands. The author of the case is Ekaterina Stroikova
Phone case made of rubber bands. The author of the case is Lamia Tumanova
Phone case made of rubber bands. The author of the case is Lamia Tumanova
Phone case made of rubber bands. The author of the case is Sofia Goncharova
Phone case made of rubber bands. The author of the case is Polina Samolova
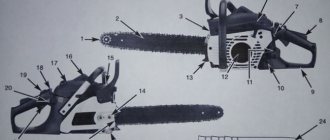
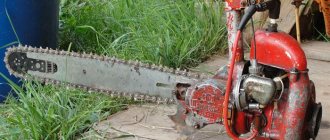
Chainsaw hiller FRIENDSHIP
Very simple and easy to manufacture design. After hilling, you can regularly remove weeds, without 1 - support corner; 2 - cheek; 3 — turning area; 4 — eye; 5 — lower rotating bar; 6 - rivet; 7—locating pin; 8 — upper rotating bar; 9 — hairpin; 10 - window hinge
how to make a hiller
Rice. 2b. A miter saw for wood is easily made with your own hands from a manual one. Cheek marking and bending according to marking. Ras. 3. Toe of the plow-hiller: 1 - toe stop; 2 - sock; 3 - heel. Rice. 4. Toe development
C. Repairing a chainsaw with your own hands is calm. P. Prokhorov, Dnepropetrovsk
Working on a homemade lathe: safety rules
Before starting operation, you must check the following points:
- the motor must be covered with a casing to prevent chips from getting on it;
- the spindle of the device must rotate freely;
- the part should be fastened along the axis;
- equipment requires protective shields;
- Eye safety will be ensured by glasses;
- The cutter is fastened parallel to the frame; misalignment can lead to an accident;
- At the end of work, be sure to clean the equipment from sawdust and other waste.
Reviews and: 4
And I came up with the hiller and made it myself about fifteen years ago. Do-it-yourself ATV (43 photos) I managed to assemble an excellent ATV from different things. Without any extension and more elegant. Potato beds from under the planter, and this is up to 70 cm, it covers up perfectly.
My grandfather, who was in Germany during the war, saw reversible horse plows among the Germans and told me about it. In our country, I first saw such a plow at a fruit nursery only in the early 90s. And even then, most likely, he was abroad.
I am for a double-turn plow! About 30 years ago I purchased a double-turn, single-horse plow for plowing and slightly restored it. DIY lathe from a circular saw. I would like to note several advantages of the device. When plowing with such a plow, the soil layer turns both to the right and to the left. The result is a flat, slightly ridged surface of the field without oval ridges and camber furrows. You can plow starting from any side of the plot and laying rows one after another (no need to wind circles). Unlike a traditional plow, this one has not one, but two shares and one moldboard, bolted to the bed. The unit rotates around its axis 180 degrees and is secured in working position with a lever. On both sides of the plow, field boards are bolted - units that ensure stable movement of the body, protect the stand from abrasion and relieve it from the bending moment (it occurs under the influence of lateral pressure of the soil layer). I regulate the plowing depth using a special device with cutouts located vertically on the horizontal stand of the plow (front). Note: It is good to work with a double-turn plow and electric traction. The only drawback of this plow is that it is somewhat heavier than a regular horse-drawn plow (which does not have a turning device) and requires somewhat more effort from the plowman. By the way, nowadays, plows of similar design are widely used on walk-behind tractors and walk-behind tractors. Sergey Barsukov
Previously, preparing a new plot for potatoes took me a lot of time. Having chosen a section of the meadow, I mowed the grass low and marked it by length and width. Do-it-yourself chainsaw crafts: how. Then he pulled the cord and made a cut with a shovel across the entire surface of the soil. He rolled out the walk-behind tractor and adjusted the plow so that the edge of the body was along the line left by the shovel. So (the layer of earth) fell away and lay down as a smooth ribbon. While without careful marking, the furrow turned out to be uneven and the load on the engine increased due to adjustments. To save time, I made this process more streamlined. Do-it-yourself wooden scaffolding from 6 vacancies construction company abis group. Instead of a cord and a shovel, I used a metal cutter, securing it to a rail of the appropriate length. Before plowing, I secure it to the plow stand and immerse the cutter 10-15 cm into the ground. Do-it-yourself machine for sharpening the chain of a household chainsaw: what does a chainsaw chain consist of, what machines can be used for sharpening. When finished, I dismantle it. The dumps are smooth, with the grass facing down. The engine runs without voltage
Basic elements and operating principle
One of the most important characteristics of a metal lathe is its ability to withstand the severe loads encountered when processing metals. At the same time, accuracy and speed are required.
A simple design for metal processing at home contains:
- base (bed);
- two racks (aka headstock);
- electric motor;
- motion transmission mechanism;
- device for securing the workpiece;
- stop for the cutter (support).
The main mechanisms are located in the headstock, but a homemade motor can be located outside. Using a transmission mechanism, the movement from the motor is transmitted to the spindle - a hollow shaft, to which the workpiece is attached using a chuck. The tailstock serves to support the free end of the part.
Precision processing is achieved not only by skilled hands:
- stability of the base;
- absence of spindle “beating”;
- reliable fastening of the workpiece in the chuck.
Made according to all the rules, the mini-machine is easy to operate and compact. It is suitable for processing small metal parts of various shapes, wood and plastic blanks.
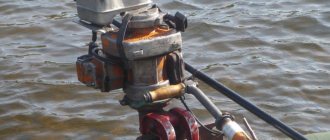
How to make a walk-behind tractor from a chainsaw with your own hands
Having available small plots to purchase a walk-behind tractor for a lot of money, in fact, this is unreasonable. In addition to the direct device, you also need to regularly purchase other necessary items:
Read:
2. Additional equipment;
3. Lubricants;
4. Flammable substances.
That's why, to ease the financial waste, it's worth trying to create a motorcycle from a chainsaw yourself.
The direct active process begins with the manufacture of the frame. It has the shape of a cube with angles of 3232 millimeters. The main engine is attached to the transverse upper corners of the frame. The fuel tank is mounted slightly lower on brackets. The vertical uprights of the front have intermediate shaft supports on them. To install the chassis bearings, it is necessary to connect special supports to the longitudinal corners.
Pros and cons of homemade design
Having analyzed the results of this homemade product, based on reviews from owners and videos of operation, the conclusion suggests itself that the design is effective. With a competent approach to business, a walk-behind tractor with an engine from Druzhba is not much inferior in its characteristics to its factory counterparts.
The main advantage of homemade products, of course, is saving money. You can find the necessary parts and materials by simply rummaging around in your garage or shed, or you can purchase them for a small amount of money.
Also among the advantages of a homemade unit are:
- sufficient power of the resulting device – up to 4 hp;
- compactness, small dimensions of the walk-behind tractor;
- light weight, maneuverability, mobility;
- economical fuel consumption;
- the Druzhba engine is not whimsical in terms of the choice of fuels and lubricants;
- The walk-behind tractor is capable of performing various operations.
The engine used in chainsaws, especially in the Soviet “Druzhby” chainsaws, is durable and capable of withstanding long-term loads.
The main disadvantage of a homemade walk-behind tractor from a Druzhba chainsaw is that with any design you won’t be able to get a real walk-behind tractor. The power of the walk-behind tractor is enough to cultivate areas with good soil. There are also restrictions on operations. It will most likely not be possible to use the entire arsenal of attachments on a factory walk-behind tractor.
Chainsaw hiller
home hiller
from
a chainsaw
The AUTO MOTO car channel will show you a comparison of cars, crash tests.
As a result of the entire process described above, a thin walk-behind tractor with a center of gravity located above the supporting surface of the wheel is obtained. It is quite possible to use a metal load on the front frame member. By using 30mm diameter pipe cross rods, you can achieve remarkable hand control. A roller of a rubberized nature can become a material for the direct manufacture of wheels.
The self-made walk-behind tractor uses two specialized sprockets. One of them plays a leading role, and the second influences the intermediate shaft.
Pros and cons of homemade design
Having analyzed the results of this homemade product, based on reviews from owners and videos of operation, the conclusion suggests itself that the design is effective. With a competent approach to business, a walk-behind tractor with an engine from Druzhba is not much inferior in its characteristics to its factory counterparts.
The main advantage of homemade products, of course, is saving money. You can find the necessary parts and materials by simply rummaging around in your garage or shed, or you can purchase them for a small amount of money.
Also among the advantages of a homemade unit are:
- sufficient power of the resulting device – up to 4 hp;
- compactness, small dimensions of the walk-behind tractor;
- light weight, maneuverability, mobility;
- economical fuel consumption;
- the Druzhba engine is not whimsical in terms of the choice of fuels and lubricants;
- The walk-behind tractor is capable of performing various operations.
The engine used in chainsaws, especially in the Soviet “Druzhby” chainsaws, is durable and capable of withstanding long-term loads.
The main disadvantage of a homemade walk-behind tractor from a Druzhba chainsaw is that with any design you won’t be able to get a real walk-behind tractor. The power of the walk-behind tractor is enough to cultivate areas with good soil. There are also restrictions on operations. It will most likely not be possible to use the entire arsenal of attachments on a factory walk-behind tractor.
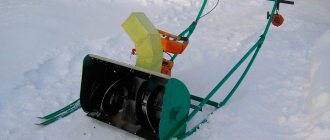
Features of designs with different motors
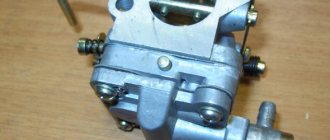
Chainsaws of various manufacturers and models are equipped with motors with different characteristics. For the most efficient operation, when assembling a homemade snow blower, these features must be taken into account. For example, the Druzhba and Ural chainsaws stand out among other models due to their high engine power, which causes vibration and noise during operation.
Vibration can be avoided by installing a thick piece of rubber gasket between the engine and the frame.
In addition to installing a gasket on the housing, you can equip the engine with a muffler. To do this, the cavity inside a solid metal pipe must be filled with a rubber gasket, and the entire resulting structure must be attached to the motor with bolts or by welding. This will reduce the noise level during constant operation of the device. In addition, high operating power comes with high structural loads. To prevent the early failure of a snow blower based on the Druzhba and Ural chainsaws, you will need to equip it with a high-strength chain.
The increased reserve of torque and thrust of the engines of devices of the Ural and Druzhba brands allows, if desired, to increase the volume of the bucket and the power of the auger, thereby increasing the overall productivity of the unit. The motor from a Stihl brand household chainsaw is not very powerful. Thanks to this, a snow blower based on it will have a relatively small size and increased maneuverability. The dimensions of the bucket for such a device should not exceed 50 cm in height and 60 cm in width. A device assembled in this way can remove snowdrifts up to half a meter high from both dry and sticky snow.
Required tools and materials
To make a walk-behind tractor from a Druzhba chainsaw, you need to prepare the following parts and materials:
- from the Druzhba chainsaw - engine, fuel tank, gearbox;
- steel pipes, angles or profiles for assembling the base of the structure;
- iron sheets to strengthen and protect the structure;
- steering, suitable for a motorcycle or moped;
- wheels from a motorcycle or any other small diameter;
- transmission, can be used from a car or moped;
- fasteners - bolts, nuts, washers.
As a tool for work you will need:
- electric welding;
- angle grinder (“grinder”);
- spanners;
- drill, drill bits;
- marking tools (tape measure, square, etc.).
The steering can be used ready-made or, if necessary, made independently from steel pipes. Welding can be used as fasteners; if it is not available, parts can be secured using a bolted connection.
Homemade mini lathe from professional pipe (almost like a factory one)
In today's review, the author will share with us his personal experience of making a homemade mini lathe.
The basis of the machine is a square profile pipe 60x60 mm (wall thickness - 3 mm).
The dimensions of the professional pipe were not chosen by chance - it ideally fits a clamping chuck with a diameter of 16 mm. The result is a fairly compact headstock.
If you use a drill chuck with a diameter of 13 mm to make the headstock, then in this case you will need to use a 50x50 mm profile.
We also advise you to read: how to make a simple and compact machine for making clamps for reinforcement cages.
The length of the lathe bed is 22 mm, but if necessary it can be made longer.
Case without machine
You can also weave our cute little case without a machine. Throw on, wrapping the elastic band twice around the hook. Put on another one, pulling it through the previous one. According to this chronology, we weave a certain chain of 16 irises. Do you have a wide phone? Then it’s worth trying on this piece; if it’s too small, then weave it to the length we need.
In our case, insert the hook into the eighth rubber band. Remove the remaining ones for now. Place our tool into the third elastic band and thread another iris through it. There are four loops on the hook. We stretch another elastic band, lower everything on the hook onto it, and place the second loop on the hook. Weave two more stitches using the third loop.
Article on the topic: Women's knitted cardigans with knitting patterns and descriptions: learning to make a knitted openwork cardigan for a girl with photos and videos
Knit one rubber band at a time. Weave three stitches through the loop. Continue working by turning our case. We insert the hook into the top layer and throw on one elastic band at a time, without missing a single loop. After we have knitted the base, weave an additional elastic band in the outer loop. Insert your hook into the next loop and pull the elastic through. Pull another iris through 4 loops. We weave the product to the required length.
Connect its ends, finishing the last layer. There are four loops left on the hook through which you need to weave an elastic band. Tighten the knot and the job is done. Watch the video where experienced craftswomen tell and show how to weave a cover on a hook.
Manufacturing of longitudinal and transverse feed
The main part of the longitudinal feed is made of a profile pipe 80x80 mm (with a wall thickness of 4 mm).
A part of the wall with sides 10 mm high is cut off from the profile pipe, to which a cheek is welded on one side. We drill a hole with a diameter of 8 mm in the cheek - for the passage of an M8 thread.
In a part made from a turning tool, the author drills a hole coaxial with the hole in the cheek.
After this, the drilled hole will need to be drilled to a diameter of 14 mm and an M16 thread cut.
The author used an M16 thread so that the feed pitch was larger (1 turn - 2 mm).
The author attaches a square rod (adjustable clamp) to the movable platform (from the inside).
The author made a cross-feed base from a piece of 40x20 mm profile pipe. The slot in it is made for an M6 screw. An extended M8 nut is inserted and welded inside.
The cross feed screw is a piece of M16 pin. At the end there is a groove with a diameter of M8 for the handle of an old sewing machine.
The longitudinal feed is pressed against the frame using a homemade clamp, which is located inside the frame.
We install the longitudinal feed on the base and secure it. Next, the transverse feed is made using the same principle, but from a piece of 50x50 mm profile (wall thickness - 2.5 mm).
A 6 mm thick metal plate is attached to the top of the cross feed (used to secure the tool holder).
The cross feed lead screw is made from an M8 stud. A groove was made on one side and an M6 thread was cut for a homemade flywheel.
Required tools and materials
To make a walk-behind tractor from a Druzhba chainsaw, you need to prepare the following parts and materials:
- from the Druzhba chainsaw - engine, fuel tank, gearbox;
- steel pipes, angles or profiles for assembling the base of the structure;
- iron sheets to strengthen and protect the structure;
- steering, suitable for a motorcycle or moped;
- wheels from a motorcycle or any other small diameter;
- transmission, can be used from a car or moped;
- fasteners - bolts, nuts, washers.
As a tool for work you will need:
- electric welding;
- angle grinder (“grinder”);
- spanners;
- drill, drill bits;
- marking tools (tape measure, square, etc.).
The steering can be used ready-made or, if necessary, made independently from steel pipes. Welding can be used as fasteners; if it is not available, parts can be secured using a bolted connection.