With the beginning of winter, especially snowy ones, problems associated with movement appear.
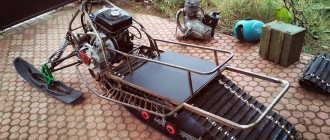
Few people know that a snowmobile can be constructed from available materials as an alternative means of transportation in winter conditions. At the same time, there is no need for serious expenses. Moreover, if there is a lot of snow, you won’t be able to get far by car, but a snowmobile will allow you to move in such conditions without any problems.
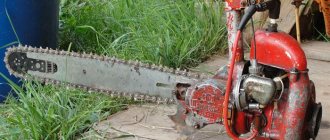
Choosing a chainsaw
In retail outlets you can find several models of chainsaws. The most popular of them are the Druzhba chainsaw, the Ural chainsaw and the Shtil chainsaw. Before choosing, you should think carefully by comparing their technical characteristics.
Chainsaw "Friendship"
This is the simplest chainsaw that can be used as an engine for a snowmobile. The result is a simple design without anything superfluous.
The only drawback is the heavy weight with relatively low power. In addition, the structure does not have parts for attaching safety covers. In addition, this design is outdated in all respects.
Specifications:
- Power – 1 kW;
- Weight – 12 kg;
- Engine (two-stroke);
- Tire length – 45 cm;
- Fuel (gasoline).
Chainsaw "Ural"
This is a specialized model that has greater reliability, power and less weight in relation to power. This is an environmentally friendly unit capable of operating in extreme conditions.
If you decide to use a Ural chainsaw, then this is a good choice. Its technical characteristics fully correspond to those stated.
Specifications.
- Power – 3.68 kW;
- Weight – 11.7 kg;
- Engine (gasoline two-stroke);
- Overall dimensions – 46x88x46 cm;
Chainsaw "Calm"
It is also suitable for creating a snowmobile with your own hands. This is an environmentally friendly device, absolutely harmless to humans. The main advantage of the chainsaw is its light weight and quiet operation, compared to the Ural chainsaw, and even more so when compared to the Druzhba chainsaw.
Rework principle
The principle of alteration is very simple and combines the entire range of home-made devices and assemblies. A chainsaw is used as a drive. The unique qualities of the chainsaw motor, capable of operating at very large tilt angles, perhaps not upside down, allows this universal drive to be used in many designs. In the case of using a chainsaw as a drive for a homemade hand-held power tool, most of the parts of the original chainsaw are retained, and only the working part is changed.
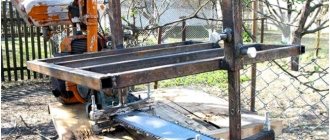
Walk-behind tractor from a chainsaw
If, on the basis of a chainsaw, you make a stationary machine or vehicle with your own hands, the alteration becomes deeper. A gearbox, variator or belt drive is added to the design, the fuel tank is replaced with a more capacious one to ensure long-term operation without refueling.
Scheme for making a snowmobile from a Ural chainsaw with your own hands
Schemes for assembling a snowmobile from a Ural chainsaw: 1 – steering wheel; 2 – fuel tank (from the Druzhba chainsaw; 3 – power unit (from the Ural chainsaw); 4 – steering ski stand bushing (pipe with a diameter of 30-2 pcs.); 5 – steering ski (2 pcs.); 6 – caterpillar drive gear (nylon, sheet s15, 2 pcs.); 7 – caterpillar (from the Buran snowmobile, shortened); 8 – frame; 9 – support roller (from potato sorting, 18 pcs.); 10 – strut backrest limiter (pipe ½); 11 – caterpillar tensioner (2 pcs.); 12 – caterpillar tension gear (nylon, sheet s15, 2 pcs.); 13 – bearing No. 80204 in the housing (4 pcs.); 14 – trunk box, bottom plywood s4, sides board s20); 15 – seat (cover-plywood s4, foam rubber, leatherette); 16 – 1st stage of chain transmission; 17 – 2nd stage of chain transmission; 18 – seat backrest limiter (½ inch pipe); 19 – driven sprocket of the 1st chain drive (large sprocket of the creeper, intermediate shaft); z=38; 20 – drive sprocket of the 2nd stage of the chain drive (small creeper sprocket), z10; 21 – driven sprocket of the 2nd degree of chain transmission (drive sprocket of the track drive shaft), z18; 22 – drive sprocket of the 1st stage of the chain drive (gearbox output shaft sprocket), z12; 23 – steering knuckle lever; 24 – steering rod (2 pcs.); 25 – steering shaft with bipod; 26 – front axle beam (pipe with a diameter of 30); 27 – caterpillar drive shaft; 28 – tension axis of the caterpillar.
Without creating a diagram and drawing, it is unlikely that it will be possible to connect together the main units of the structure, such as:
- Engine;
- Transmission;
- Skis and tracks.
To simplify the design process, you should take a caterpillar from the Buran all-terrain vehicle. If a children's version is being designed, then skis will be enough.
Racks
Steering ski : 1 – runner (nylon, sheet s20, from a children's snow scooter); 2 – spring (normally stretched, from the rear shock absorber of the moped); 3 – spring support; 4 – undercut (duralumin corner 20x20); 5 – spring cover (angle 35x35); 6 – fastening the spring to the cover (M8 bolt with washer); 7 – support lever (pipe 30x30); 8 – spring for fastening the rack-fork to the ski lever (steel, sheet s2); 9 – spring for attaching the support lever to the ski (steel, sheet s2); 10 – axles (M8 bolt, 2 pcs.); 11 – steering knuckle stand (bicycle steering stand with crown and part of the fork); 12 – steering bipod (steel, sheet s4); 13 – fastening of the steering bipod (type M16); 14 – fastening the spring bearing and the lever spring to the ski (M5 bolt with a countersunk head, 7 pcs.); 15 – lever bushing (steel pipe with a diameter of 30 mm); 16 – plain bearing (nylon bushing, 2 pcs.); 17 – stand bushing (steel pipe with a diameter of 30 mm). In the top view, parts 11, 12, 13 of the steering knuckle are not shown.
Snowmobile racks can be made from 3x3 cm corners. They are connected to each other by steel jumpers. As a result, there is a relatively small portal. To create a platform, you need to take a sheet 2 mm thick and connect it to the portal and the middle of the right side of the vehicle elements. This platform will serve as a mounting location for the chainsaw gearbox and the chain drive shaft.
On part of the rear portal and the middle of the snowmobile, a small space should be created for the seat structure.
The front part of the frame and the front axle crossmember are connected by means of a beam. The beam is an ordinary water pipe with a diameter of 1.5 cm. At the end of this pipe, steering ski bushings are attached by welding, and a stand is installed in the center. The stand will serve as a support for the engine subframe.
Particular attention should be paid to the mounting points of the racks. For greater reliability, the attachment points are reinforced with steel gussets, 2 mm thick. This approach will strengthen the vehicle and make it more reliable and durable.
Caterpillar
Snowmobile frame with tracked block : 1 – rear part of the spar (steel sheet s2, with flanges, 2 pcs.); 2 – tension device (4 pcs.); 3 – rear portal (corner 30x30); 4 – middle part of the spar (angle 50x63, 2 pcs.); 5 – bracket-fork for installing the axis of the road wheels (steel sheet s2, 10 pcs.); 6 – middle portal (corner 30x30); 7 – platform for mounting the power unit gearbox and the intermediate speed reducer shaft (steel sheet s2); 8 – scarves (steel sheet s2, 4 pcs.); 9 – front portal (corner 30x30); 10 – front component of the spar (steel sheet s2 with flanges); 11 – axis of tension gears; 12 – caterpillar tension gear (2 pcs.); 13 – axis of road wheels (steel, circle 10, 5 pcs.); 14 – axle fastening (M10 nut and spring washer, 20 pcs.); 15 – spacer bushing (duralumin pipe); 16 – roller (18 pcs.); 17 – bearing unit (4 pcs.); 18 – caterpillar drive gear (2 pcs.); 19 – caterpillar drive shaft; 20 – drive sprocket of the drive shaft (driven sprocket of the 2nd degree of chain transmission), z=18; 21 – steering knuckle bushing (pipe with a diameter of 30 mm, 2 pcs.); 22 – front axle beam (pipe with a diameter of 30 mm); 23 – scarves, 4 pcs.; 24 – engine stand (pipe with a diameter of 30 mm); 25 – roller tire (rubber ring, 18 pcs.).
To assemble a mini-version of the snowmobile, you can take the tracks from the old Buran and modify it, shortening it by almost a whole meter. Gears can be made from a sheet of nylon, 1.5 cm thick.
Drive shaft
Caterpillar drive shaft (tension shaft is the same, only position 4, replaced by position 1) : 1 – left (along the way) tip (steel, cylinder 22); 2 – shaft (steel pipe 0.28x20; 3 – flange for fastening the gear to the shaft (steel sheet s4, 2 pcs.); 4 – right (along the way) shaft tip (steel, cylinder 29); 5 – track drive gear (2 pcs.); 6 – frame spar, 2 pcs.); 7 – bearing housing cover (steel, 2 pcs.); 8 – bearing 80204 (2 pcs.); 9 – bearing housing (steel, 2 pcs.); 10 – drive shaft sprocket; 11 – fastening the sprocket to the shaft (M12 nut with wide and spring washers); 12 – key (steel 20); 13 – seal (felt, 2 pcs.); 14 – fastening the bearing housing to the spar (M6 bolt, with 4 sets of screwdriver); 15 – fastening the bearing housing to the spar (M6 bolt with spring washer, 4 sets).
The drive shaft is made of a steel pipe with a diameter of 1.4 cm. Special flanges are attached to the shaft, to which gears are attached. Trunnion tips are mounted at the end of the drive shaft by welding. The journals must have space for installing bearings.
Examples of drawings and diagrams of other working structures
It is possible to develop your own version as a diagram and drawing. But it is also not forbidden to use successful working designs offered on various sites as a basis. The first on the list will be the most popular, frequently encountered drawing of a snowmobile from the Friendship chainsaw.
For this model there are detailed drawings of the main parts:
- Rack.
- Caterpillar.
- Drive shaft.
Engine
This unit is considered the most critical mechanism of a snowmobile. Compared to other structural elements, such as a tire or chain, the engine must work properly and without it the snowmobile will not even move. Therefore, the long-term performance of the device will depend on the reliable and trouble-free operation of the engine. If you want to install an engine from an imported chainsaw, you can purchase a used Shtil.
Another important design element on which the trouble-free operation of a snowmobile depends is the gearbox.
Asterisks
Immediately noticeable is the fact that the right tip has a keyway for installing and securing the chain sprocket. This is the track shaft sprocket, which is securely fastened with a nut. To make fastening possible, a corresponding thread is cut on the tip.
The tip of the tension shaft has the same overall dimensions, and the fastening of the structural elements is carried out similarly to the fastening of the track shaft sprocket.
The first gear stage should have a sprocket with the highest gear ratio (number of teeth). The Ural chainsaw engine has 38 teeth.
Steering
On a homemade device, you can install a handlebar of any design, even a bicycle. In this case, it is very important to put manual control of engine speed on the steering wheel. In order not to bother too much, it is better to use a steering wheel from a moped, scooter, etc., which already has a mechanism for controlling engine power. This will make the design more reliable and easier to manage.
Assembly steps:
- First you need to do the frame. To do this, you will need steel angles (50 by 36) to make the middle part of the vehicle. And sheets, at least two millimeters thick, for making the back and front parts.
- In the place where the track shaft will be located, you need to drill two holes.
- The brackets must be welded to the bottom of the side members at the same distance and the support rollers must be installed.
- Place the rollers on 5 axes and attach them to the bottom side of the grooves.
- Make bushings from pipes and install them between the elements.
- The bracket axes must be secured using nuts.
- Then you need to make racks from metal corners. Using them the gearbox will be attached. Then you need to install the intermediate shaft for the chain drive.
- Now you need to prepare the seat. A car seat is suitable for him. Install it on the frame.
- Then you need to drill holes for the future steering wheel. It can be made from a tube and control knobs or taken from an old moped or motorcycle.
- Where the racks are located, metal gussets must be installed to strengthen the vehicle.
- Now you need to make a drive shaft from a pipe, then insert a flange into it to attach the gears.
Well, that's all, the vehicle is ready!
You can watch this video on how to make such a homemade snowmobile with your own hands:
Tips for use
It’s worth immediately noting that a homemade design, no matter what it is, is unlikely to be registered (legalized) with the relevant authorities. And therefore:
- According to the law, a homemade snowmobile does not belong to the category of vehicles. Therefore, its further use, as well as responsibility for the consequences, rests solely with the person who made it. It is better if it is operated somewhere in the outback and does not come to the attention of the relevant services.
- A snowmobile and an amphibious all-terrain vehicle are completely different vehicles, although they have certain similarities.
- Since the engine has low power, it is not advisable to transport cargo with this vehicle. It's better to travel alone.
- To travel at night, you can install lighting (headlights) on your snowmobile. This will increase the functionality of the device and comfort when moving.
Benefits of the product
The essence of the benefit of a homemade design is tangible savings in money. A good factory snowmobile will cost a considerable amount of money. In addition, the situation often occurs that having bought a snowmobile, ridden it for a short time, then it sits idle and is used extremely rarely. Lack of free time, banal dependence on the availability of sufficient snow.
A homemade snowmobile can be assembled from existing scrap metal and unnecessary spare parts, spending a little money. The engine of the Druzhba chainsaw is economical and is not picky about the oil and fuel used. In the future, if the snowmobile is no longer needed, it will not be such a shame to give it away, sell it, or even just throw it away.
Having free time and an interest in engineering work, a homemade snowmobile can be reconstructed, modified, or made changes. It's like a children's construction set, only for adults.
On caterpillar tracks
Track supports are used more often than others, simultaneously performing the function of propulsion. The reason is high efficiency and reliability. This design allows you to reach high speeds while maintaining stability and maneuverability. There are several options for how to make tracks for a snowmobile with your own hands:
- from a conveyor belt,
- from truck tires,
- from driving V-belts.
Plastic or PVC tubes no larger than an inch in diameter, sawn along the axis, must be bolted across the conveyor belt.
Even a child can handle such a lightweight device.
Old truck tires with winter tread can also be used as tracks if you cut off the sidewalls. They don’t need crossbars, but you will have to sweep the edges with fishing line in centimeter increments, otherwise the tire will quickly become frayed.
Drive belts, just like the conveyor belt, must be equipped with lugs. Several parallel belts, 2 or more, are connected to each other by transverse strong lugs, attaching them to the belts with rivets or with screws. The distance between adjacent hooks should be equal to the pitch of the drive sprocket.
Tracks made from conveyor belts or belts are often reinforced with a chain, which increases the reliability and durability of the propulsion unit.
These snowmobiles combine lightness with a reliable drive.
One of the varieties of tracked snowmobiles is a motorized dog, which was named after its resemblance to a sled dog. At the expense of maneuverability, the design was lightened, and the traction force also increased. But this is the most effective towing mechanism in the snow.
To change direction, you need to make significant efforts to shift the center of gravity of the motorized dog.
The basic dimensions for assembling a two-seater snowmobile, indicated in the drawing, will help make the ride comfortable. Other sizes will depend on the availability of spare parts and assembly diagram.
When driving, discomfort from headwinds is alleviated by installing motorcycle glass and mudguards for the feet. But it is impossible to completely protect yourself from the cold wind on such transport. For comfort, you need a completely enclosed cabin, which means the weight will increase and a more powerful engine will be required.
A snowmobile with a car engine is designed for long trips over long distances. With heat-insulating body material, the ride is comparable to the comfort of a passenger car.
And the easiest way to achieve comfort is to simply place a rear-wheel drive vehicle on wide supports such as skis, tracks or pneumatic wheel tubes, and also drive the standard wheels to the snowmobile propulsors and attach the front ski to the steering bipod.
During manufacturing, it would be useful to provide a replaceable scheme for replacing wheels with skis and back, if you use spare parts for the conversion.
Homemade snowmobile device
Since we will be making a vehicle from a static tool, before realizing our intended desire, we should develop a circuit diagram. A snowmobile must not only move optimally, but also be able to carry the owner’s weight + a small load.
Based on this, each node must have a specific purpose, and the device must be clearly thought out at the very beginning. The schematic diagram of the snowmobile looks like this, and you should focus on it when making a homemade snowmobile with a gasoline saw engine:
Making a snow blower - algorithm of actions
The manufacture of the unit should begin by creating or studying existing drawings. This will allow you to prevent possible errors in advance and complete the work as quickly as possible.
The correct procedure is as follows:
First of all, you need to prepare the frame. The reliability of the machine depends on its quality, so you should choose reliable materials for its manufacture. First you need to take several identical pipes and weld them to each other
In this case, pay special attention to two longitudinal pipes, which not only serve as part of the frame, but also act as skids of the unit; The front parts of the pipes must be cut at an angle, and then the resulting holes must be welded to prevent snow from getting into them. If this is not done, melted snow inside the pipes will lead to corrosion.
At the same time, you won’t even notice it; Weld two transverse pipes to two longitudinal pipes. In this case, the latter should be located in the rear part of the structure, since the unit’s motor will be supported on them. The distance between the transverse pipes should be about 20 cm; Next, you need to remove the engine from the chainsaw. Instead of the standard motor drive sprocket, which serves to tension the chain, you need to install an ordinary small sprocket. It can be taken from an old Voskhod or Minsk motorcycle. The sprocket must be fixed motionless by welding it. However, before this the part will need to be centered; After manufacturing the frame, you need to move on to creating a working element - the auger of the unit. To do this, take a small diameter pipe or shaft, 80–85 cm long. These dimensions are needed for mounting the drive in front of the main part of the structure. Particular care should be taken in selecting suitable bearings; Next, take a metal sheet 2 mm thick and cut out 4 identical circles with a diameter of 30 cm in it. You need to cut holes in each circle with a diameter of 22–23 cm. Then each of the circles will need to be trimmed to make turns out of them; Then you need to determine the central part of the shaft and weld 2 metal plates, 13 cm long and 15 cm wide, to it. Place the sheets strictly parallel to each other. They will serve to throw snow to the sides when operating the snow blower; Weld screw strips to one side of the blades. Next, install the spacers on the shaft and weld the other ends of the screw bands to them. In this case, all 4 screw plates should be directed towards the center of the auger. The entire manufactured structure must fit into a 70-centimeter section of the shaft, since the drive will be installed on the rest of it; The next step is to move on to manufacturing the body. To do this, you need to take 2 round sides, the size of which should be 7 cm larger than the auger. After this, you will need to weld a metal sheet no more than 1 mm thick to the circumference of the sidewalls. As a result, you should end up with a semicircle of metal plates. Make holes in the central parts of the sidewalls and install the auger in them; Before attaching the auger, you need to install bearings on the shaft and press them securely. Remember that the auger must be centered. Use cages to secure the bearings; Next you need to assemble a snow disposal. For this you will need an aluminum pipe with a diameter of 15 and a length of 10 cm. You will also need a metal sheet from which you need to form a box. To install the snow drain, you need to make a hole in the back of the auger blades. A pipe is inserted into it and secured with ordinary bolts. Place and secure the box on top of the pipe; Then put a sprocket from a domestic motorcycle on the drive section of the shaft; At the last stage of manufacturing, you need to assemble the entire existing structure. To do this, the housing and auger must be installed and welded to the longitudinal pipes of the frames. Install the chainsaw engine on the transverse pipes so that the drive and driven sprockets are located strictly in the same plane; Install a chain on the drive and make a handle from leftover metal pipes. Don't forget to move the throttle control lever to the handle.
Seat
The box under the seat is most often made with your own hands from boards? Suitable thickness 20 mm, plywood top. This is a box lid and a seat at the same time. It is attached on hinges, covered with foam rubber on top and covered with leatherette-type fabric. It is possible to use a ready-made seat from an old motorcycle.
Making a snowmobile from a chainsaw with your own hands is not so difficult if you have the technical skills, knowledge and necessary tools. And the more ready-made parts and spare parts from old equipment are available, the faster and easier it will be to create such a vehicle.
Why do you need a drawing?
How to make a homemade earth drill (pit drill, earth drill)
Assembling a snowmobile begins with a plan, that is, with a drawing. It is recommended to do it yourself, taking into account the non-standard and unique nature of the planned man-made mobile vehicle. Here it is necessary to remember that this working diagram is needed for internal use, therefore the level of drawing art does not matter, but the main thing is how clearly the plan will be embodied in the diagram
When drawing up a drawing, it is important to take into account the weight of the structure: the lighter the snowmobile, the higher its maneuverability will be.
Frame
According to an individual drawing, the frame is welded in the form required for this version of a homemade snowmobile. Wooden bars or metal pipes are used as the starting material. The easiest way is to make a wooden frame. Its main advantages are that it is easy to repair in the field (there is a lot of wood around), and it holds the car well on ice. The metal frame is welded from pipes of a certain square section, the size of which depends on the load. Its advantage is that it is a stronger and more durable structure than a wooden one. As always, there is a ready-made option - take a frame from a moped.
Track assembly
After making the frame, they begin to create tracks, consisting of tracks and rigid hooks installed along their entire length. Caterpillars can be made from conveyor belts or car tires. You can use ready-made industrial tracks. An advantage of purchasing ready-made tracks may be their special regional purpose, where climate, terrain and travel conditions are taken into account.
Wheels are installed inside the homemade tracks. With their help, the tracks on which the lugs (or simply hooks) are located rotate.
A common option for their manufacture is plastic pipes. They are cut into pieces
The lugs are attached to the tracks with bolts, and it is important to maintain the same distance between the lugs so that they do not disturb the movement of the caterpillar
The wider the tracks, the more difficult it is to control the vehicle, but the higher the maneuverability becomes. The thickness of the tracks must correspond to the engine power.
Chassis
After the frame and tracks are ready, they begin to assemble the structure with the chassis.
- Using front suspensions, the steering and skis are attached to the frame.
- The steering wheel is often taken from a motorcycle or scooter, but in case of non-standard solutions, it is assembled independently, based on personal preferences and convenience.
- Skis are often used ready-made. Typically, a ski consists of the following parts: base, shock absorber, link leg, fork, its rod and bipod. But there are options for making your own: from plywood, plastic, metal.
- The rear suspension connects the engine to the tracks.
- A motorcycle chain can be used as a drive.
- The fuel tank is chosen based on safety, economy and practicality. The capacity of the container (made of plastic or metal) is determined by considerations of the necessary distances to be overcome.
- The seat is made to order according to individual preferences, since the control of the snowmobile will depend on convenience and comfort. The best choice is a seat made from quality materials.
Drive shaft
It will be tubular type with a diameter of 28 mm. A round flange with holes for the gears should be put on it. Press and weld solid pin tips into the ends of the drive shaft. The latter must be machined for bearings.
It should be noted that the left tip should be slightly shorter than the right one. On the extension, make a keyway to fit the driven sprocket of the second stage of the chain drive. This part is also called the track drive shaft sprocket and is secured with a 14 mm nut. The appropriate thread must first be made on this part.
The dimensions of the tension shaft tips must be the same and fastened similarly to the drive devices.
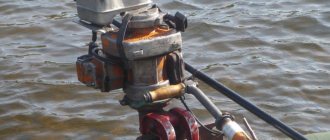
Snow scooter with motor
Argomak snow scooter with motor from a walk-behind tractor
DIY snow scooter with motor
Unfortunately, the production of motorized snow scooters is not currently established. This is probably due to the unprofitability of this type of “transport”. A snow scooter with a motor is a regular Energomash (“Argomak”) or “Snowball” snow scooter with an electric drive attached to it that sets the object in motion.
Homemade snow scooter with motor
Of course, such a model is interesting not only for children, but also for adults. But, since it is impossible to buy a snow scooter with a motor in a regular store, folk craftsmen figured out how to create such a machine with their own hands.
The resulting snow scooter with a motor is the result of combining a regular snow scooter with a motor board. Let us remind you that a motorboard is a board that is driven by an internal combustion engine installed on it. This is what is used as a motor.
This model of snow scooter can withstand a load of about 100 kg and reaches speeds of up to 20 km/h, provided there is a well-rolled path with compacted snow. The disadvantage is the difficulty of moving through loose snow and a weak battery, which lasts for 30-40 minutes of use.
An additional advantage of such a “toy” is the ability to disassemble it if necessary and use the snow scooter for its intended purpose. As for the motor, it can also be used in the summer by connecting it to a bicycle.
However, not everyone can make such a design. So, as an alternative, you can buy a snowmobile. You can buy this vehicle in our online store.
Snowmobile for adults
Snowmobile - a machine for moving on snow
A snowmobile is an excellent means of transportation in snowy areas. Snowmobiles are used by athletes, winter walkers, and fishermen. Models of snowmobiles are very diverse, and the less they weigh, the lower their carrying capacity and engine power.
In our online store you can find the Buran snowmobile, Patron Snowfox 80 snowmobile, ABM Wind 4T JS-150-G snowmobile.
How good should it be?
The most important element in this device is the engine. All other details, such as a chain or tire, do not play a significant role in the design of such a vehicle, so the main thing is to monitor and control the operation of the motor. If it is in good working order, the snowmobile will always be on the move. If you decide to take the engine from imported chainsaws, you don’t have to purchase a new device under warranty in the store. A used option is also quite suitable.
The only part in a chainsaw that must also be in working order along with the engine is the gearbox. It will also be useful to us in our work.
Read also: Photo of the gate from the profile
How good should it be?
The most important element in this device is the engine. All other parts, such as a chain or tire, do not play a significant role in the design of such a vehicle, so the main thing is to monitor and control the operation of the motor. If it is in good working order, the snowmobile will always be on the move. If you decide to take the engine from imported chainsaws, you don’t have to purchase a new device under warranty in the store. A used option is also quite suitable.
The only part in a chainsaw that must also be in working order along with the engine is the gearbox. It will also be useful to us in our work.
Racks
At the next stage, it is necessary to weld 3 racks made of steel angle to the spar. The best option would be corners measuring 30 x 30 mm. They also need to be connected with steel crossbars. This way the structure will form a small portal. Make a platform between its front part and the middle on the right side - weld a 2 mm steel sheet. After this, place the chainsaw gearbox and the intermediate chain drive shaft here.
A box can be installed in the space between the rear portal and its middle part. For what? It will serve as a support for the seat, which must be welded there at the final stage.
The front part of the frame must connect to the front axle crossmember. As a beam, you can use a regular water pipe with a diameter of at least 30 mm.
Weld steering ski bushings to the ends of this pipe. Attach a stand in the middle of the beam that will serve as a motor subframe. All these parts also need to be made from pipe, and at the joints on the posts and beams, gussets from a 2 mm steel sheet should be additionally welded. This way the structure will become strong and, accordingly, reliable.
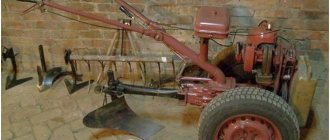
Homemade products from “Friendship-4”
The layout of the engine and gearbox of this saw is so successful, and the clutch is so compact that the device is an almost ready-made power unit for many interesting homemade products.
In 1973, based on these engines, the MAI X-3 ultra-light helicopter was created, followed by modifications 4 and 5. They were even shown at a number of exhibitions, but did not go into mass production. It was too difficult to coordinate the operation of as many as 8 engines for 2 propellers that ensured its movement.
But he flew! But driving the engine from Druzhba is much easier. On snow and on hard roads.
True, sufficiently high speeds at the output gearbox of the saw require the installation of a large driven gear on the traction wheel, an intermediate reduction shaft, or a reduction in the diameter of the wheel itself.
But snowplows and motor cultivators from it turn out to be quite productive, but also with a system that reduces the speed.
Finally, it is worth remembering that the saw is equipped with a system with a hydraulic wedge.
This device is a great help when felling trees. How it works will become clear after watching the video: