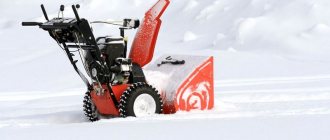
As the owner of a summer house or private house, there is a need to remove large amounts of snow in winter. It is difficult to cope with such a volume with an ordinary shovel, and not every person can physically cope with it. It takes a lot of effort and time.
A good option is to buy a snow blower. The only problem is that a factory snow blower is expensive, and people only use it a few times a season at most. The rest of the time the equipment sits idle.
Therefore, an alternative solution appeared. These are homemade snow blowers that can be assembled from scrap materials. For example, it could be an old unnecessary chainsaw. The efficiency is high, the motor is quite powerful and productive. And the assembly itself is not difficult if you understand some of the nuances and strictly follow safety precautions.
DIY chainsaw snow blower
A snowplow with a factory-made chainsaw engine is a budget option for assembling high-quality, passable and fairly maneuverable equipment. A chainsaw snow blower has much smaller dimensions than store-bought equipment, so it can cope with snow removal in the most difficult to reach places.
Before you begin, you will need to select drawings. The diagram used must accurately indicate the dimensions of all components, and must also be capable of installing them into a common device.
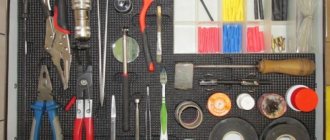
To assemble the homemade product, you will also need to prepare parts. Their list includes:
- pipes of different diameters made of steel and aluminum;
- forged metal shaft;
- several bearings;
- Sheet steel;
- welding machine;
- hand tools: wrenches, screwdrivers.
Assembling a homemade household snow blower from a chainsaw consists of several stages. Their list includes:
- Frame assembly and engine installation. A homemade snow blower must be equipped with a durable and impact-resistant frame. The stability of the snowplow when moving off-road, as well as the protection of its internal parts from mechanical damage, largely depends on its quality and balancing.
It is best to weld a durable frame from solid steel and aluminum pipes. The base of the frame should be assembled from pipes of the same diameter. Next, pipes of smaller thickness will be welded to them. During assembly, you need to pay attention to the 2 installed longitudinal pipes, which in the device will not only play the role of one of the parts of the frame, but also perform the function of snowplow skids. When connecting, all their holes will need to be welded so that snow does not clog in them, causing corrosion.
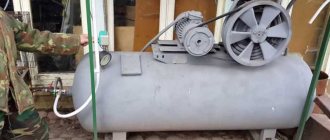
When assembling, it is necessary to weld transverse pipes to the rear of the longitudinal pipes - the engine for the snow blower must be installed on them. In this case, the first transverse part should be welded at the rearmost part of the longitudinal elements, and the next one - 20 cm from the previous one. The result should be a frame in the shape of the letter “P”. Next you need to install the engine. It must be secured by welding or strong bolts. Then the standard sprocket for the chainsaw chain needs to be replaced with a small sprocket, which can be taken from any old Soviet motorcycle.
2. Assembling the housing of the working auger and the drive mechanism of the snow blower. To create a working auger, a pipe of small diameter, 80–85 cm long, is best suited. On an auger of shorter length, it will be difficult to install a reliable drive located in front of the main part of the later-made bucket. One of the main roles when making an auger yourself is played by correctly selected bearings for the shaft.
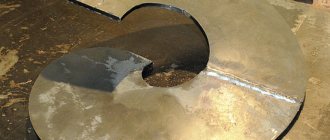
You will need to cut 4 absolutely identical circles from sheet steel, approximately 300 wide and 2 mm thick. Next, you need to make holes in the circles with a diameter of 22–23 cm and cut them for further production of turns for the auger. All this must be done with all 4 circles. After this, 2 plates will need to be welded to the central part of the shaft being used. It is best for the plates to be welded parallel to each other - in this position they will more effectively throw snow away when operating the snow blower from a chainsaw. Then screw plates are welded to the shaft so that they are parallel. All together the plates should fit on a section of shaft 70 cm long. The remaining part of the pipe will be needed to install the assembled chain drive;
3. Making a snow blower bucket. To assemble the bucket yourself, you will need 2 round metal sides, the initial size of which should initially exceed the immediate dimensions of the auger by about 7 cm.
Before you finally secure the auger for the snow blower, you will need to put bearings on the shaft;
4. Assembling the ejection chute. To make this part of a snow blower from a household chainsaw, you will need an aluminum pipe, at least 10 cm long and about 15 cm in diameter. To install the aluminum pipe, you will need to make several holes in a homemade auger. Next, a solid metal pipe is inserted into them and secured with bolts.
A metal box is installed on top of the pipe. The sprocket, which was taken from a Soviet motorcycle, must be put on that section of the shaft that remained free after installing the screw plates;
5. Final assembly of a snow blower with an internal combustion engine from a chainsaw. To assemble a homemade product, first of all, you need to weld a bucket and auger to the longitudinal parts of the manufactured frame. Next, you will need to install a chain on the manufactured drive. To make this easier, you need to use a tension sprocket, which will be attached to the auger with bolts.
Next you will need to make a handle using several metal pipes. You will need to display the controls on it: the throttle position adjustment lever, the ignition on and off button, as well as other switches.
A snow blower assembled in this way from a household chainsaw will be able to clear areas ranging from 5 to 25 acres. The homemade product will be quite easy to maintain and suitable for independent repair.
Procedure
Once a suitable drawing (component layout diagram) has been selected, the necessary tools have been found and the Druzhba saw has been dismantled, you can begin assembly. You should start with the frame, since all the elements of the motor unit will be attached to it. The process is completed by assembling the chassis, as well as additional blocks: if desired, headlights, gearbox and clutch, if the drawing is more complex and requires them. For the first time, it is best to choose a simpler drawing.
Frame assembly
The first stage involves the following actions:
- bend the pipe so that it takes the shape of 2 spars with edges pointing upward;
- the steering wheel is welded at the back (the easiest way is to weld two handles, but if available, you can use a ready-made steering wheel from a motorcycle);
- It is recommended to strengthen the structure with cross members from the same pipe;
- We cut out a “shelf” from a metal sheet for the battery, which we weld to the rear bends of the side members.
It turns out to be a vague resemblance to a sleigh. For heavier structures with more powerful power units, the frame can be made in the shape of a cube or similar to a tractor for 4-wheeled homemade products.
Assembly of the motor block
The most difficult stage is assembling the components. Before you begin, you need to mark on the frame the places to which the parts will be attached. The principle is as follows:
- a motor with a gearbox is mounted on top of the crossbars;
- a fuel tank is installed under the engine (a separate support should be welded under it), the battery is mounted on a special platform;
- To prevent exhaust gases from entering the control unit, you can make an exhaust pipe from a 7 cm metal tube with a diameter of up to 25 cm.
This is the basic version without a gearbox, which can be installed upon request. The drawings will help you understand the assembly in more detail. By and large, the details of “Friendship” are simply rearranged. The hitch is connected to the output shaft of the chainsaw.
Chassis assembly
There are at least two options: you can use a ready-made axle shaft from a car, or you can make a homemade walk-behind tractor driven by physical force (the “chassis” of an old cart or wheelbarrow will come in handy, which will significantly reduce the weight and dimensions, because a car axle shaft will require the use of tires). In the first case, you will have to organize the drive from the motor to the axle shaft, which is not easy, so welding the “running” wheelbarrow to the frame is a more understandable option.
It is not difficult to figure out how to make a walk-behind tractor from a chainsaw if you understand the general operating principle of both units. In addition to “Friendship”, “Ural” and “Taiga” saws are also suitable for the walk-behind tractor. When deciding to experiment, you should understand that the homemade product will have limited functionality and low power, allowing you to process a maximum of 20 acres.
If you find an error, please select a piece of text and press Ctrl+Enter.
The walk-behind tractor is an effective assistant in the processes of cultivating the land, as well as further caring for the garden and garden. The easiest way to obtain this device is, of course, to purchase it. However, there is an option for making it using a chainsaw engine, in particular from the Soviet “Druzhba”. Its powerful engine, simple design and overall unpretentiousness make it well suited for this role.
Options for making a snow blower from engines from different chainsaws
Different chainsaws are equipped with different motors. In this regard, when assembling a snow blower, the manufacturer will need to make certain changes to its design. Let's look at them using the example of those chainsaws, the engines from which are most often used to make homemade equipment.
Chainsaw snow blower Druzhba
In order for the assembled homemade product to be reliable and balanced, you will need to study the diagrams before assembling it. The drawings should tell the manufacturer the correct procedure and methods for installing components into the overall structure of the snow blower.
The engine from the Druzhba chainsaw is distinguished by its high power, therefore, unlike imported saws, it vibrates and makes quite a lot of noise during operation. To make the operation of the snow blower from the Druzhba chainsaw more convenient, when installing the motor, you will need to install a thick piece of rubber between the frame and the engine. It will significantly reduce vibration on the frame and operator handle.
Features of the walk-behind tractor
Structurally, a homemade walk-behind tractor is a two-wheeled unit on a frame, producing up to 4 liters. s at an average speed of 2.5-2.7 km/h. Features, as well as operational tasks, are largely determined by the choice of power plant. If we are talking about a conversion from “Friendship”, the following parameters will distinguish it from a purchased walk-behind tractor:
- small size, lightness;
- savings on fuel and lubricants;
- the ability to assemble a unit tailored for specific work (required frame size, mounting unit).
A homemade walk-behind tractor can plow, hill up crops, harrow, mow or remove tops, and apply fertilizer. Due to its small size, it can be used in hard-to-reach places (for rocky, poor soil, the power of a homemade product may not be enough). It will be especially useful for those in whose area the strength and power of a large purchased walk-behind tractor will be excessive.
A chainsaw can be used as the basis for a homemade walk-behind tractor
DIY chainsaw snow blower Ural
If you take a good look at the design of any snow blower, then there is nothing complicated, which means you can make it yourself, having only the necessary materials and tools on the farm. You will also need a power plant. Many craftsmen were able to adapt the engine from the Soviet Ural chainsaw as a propulsion device for a homemade cleaner.
Advantages and disadvantages
A couple of positive points about a homemade snow blower made from a Ural chainsaw:
- The cost of manufacturing such a unit will be several times cheaper than purchasing a factory model of a snow blower, even if you have to buy a used chainsaw;
- The performance of a snow blower with a Ural chainsaw engine will not be much inferior to this indicator of the factory model;
- Almost all other elements of the snow blower are made from scrap materials - sections of pipes, sheets and pieces of thin iron.
But in general, a homemade unit is worthy of attention, since it can significantly save money and make snow removal easier. Photo of a homemade snow blower from a chainsaw Ural
The easiest way to have a beautiful front lawn
You've certainly seen the perfect lawn in a movie, on an alley, or perhaps on your neighbor's lawn. Those who have ever tried to grow a green area on their site will no doubt say that it is a huge amount of work. The lawn requires careful planting, care, fertilization, and watering. However, only inexperienced gardeners think this way; professionals have long known about the innovative product - liquid lawn AquaGrazz .
Read more>>
One such mechanized innovation was snowblowers. But any technique costs a lot of money, so home craftsmen began to think about what they could use to create them with their own hands. We thought about it and created snow blowers made from chainsaws. A homemade snow blower made from chainsaws significantly reduces the time spent on snow removal, and also allows you to more thoroughly clean your territory from precipitation.
This article will describe options for creating snow removal equipment with your own hands. It turns out that you can make your own snow blower from a Druzhba chainsaw, which will significantly save your accumulated funds due to the fact that the scheme for creating a snow blower is very simple, and the parts can be found at a flea market or in your grandfather’s garage.
To solve our problem, there is no need to purchase the most powerful units; a low-power chainsaw, for example, with a power of five hp or more, will be sufficient. With.
This is interesting: Snow blower from a trimmer - drawing, manufacturing, operation
Frame, power plant
So, next we will describe the design of a self-made snow blower from a Ural chainsaw. The basis of the snow blower is the frame to which all the elements will be attached; it will also act as a cart.
It is better to weld the frame from small diameter pipes. The sections of pipes that will be located longitudinally relative to the unit itself will also act as skids, with the help of which the snow blower will move through the snow. Therefore, it is better to cut the edges of these sections that will be in front at an angle, and weld the holes so that snow does not pack into the pipes.
A frame is welded from two sections of pipes that will be located longitudinally and two sections that will be located transversely. In this case, cross members are needed to mount the engine on them, so one should be located at the rear edge of the longitudinal sections, and the second cross member approximately 200 mm from the first.
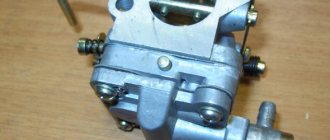
The power plant is used from a Soviet chainsaw because it does not have much torque, but it has good traction. You won't need the entire chainsaw, so you need to remove the motor from the frame. Next, it needs to be redone a little. In place of the chainsaw chain drive sprocket, you need to install a small drive sprocket from the Voskhod, Minsk motorcycle. You can simply weld it to the chainsaw sprocket, having previously centered it. Photo of the finished power plant
Suspension
When converting a vehicle into a snowmobile, special attention is paid to the rear suspension. It definitely needs improvement. To make it you need to prepare:
To make it you need to prepare:
- chassis;
- two levers;
- connecting rails;
- hinges
After preparation, you can begin making the pendant:
- The front arm is connected to the sliding rails on one side and to the chassis on the other using hinges.
- Do the same with the rear lever.
- Position the torsion springs between the sliding rails and the rear torque rod.
- Place the fastening of two power elements between the suspension arms.
To secure the suspension, use tie rods.
Auger, auger body, drive
Let's move on to the working parts of the Ural snow blower, namely the auger. It is made from a piece of pipe of small diameter. You can also use any shafts up to 80-850 mm long. An important condition is the selection of bearings for the shaft. This length of the shaft is needed to provide its drive, which will be located outside the housing.
Next, you need to cut 4 circles with an outer diameter of 300 mm from sheet metal 2-3 mm thick. Holes with a diameter of 220-230 mm are cut in these circles. Next, the existing disks are cut on one side and at the cut site the disk is stretched, forming something like a coil of a spring. This must be done with all 4 blanks.
The prepared screw bands are welded on one side to the blades, on the other side spacers are attached to the shaft, to which the other ends of the bands are welded. The ribbons need to be positioned so that their turns move toward the center. That is, on both sides of the blades there should be two tapes installed in parallel and with their turns directed towards the center. Moreover, this entire structure should not exceed 700 mm in length; the rest of the shaft will go under the drive.
Photo of the auger mechanism of a homemade snow blower
Let's move on to the body. It is made from round sidewalls, which in diameter should exceed the auger by about 50-70 mm. Next, a sheet of metal 1-1.5 mm thick is taken. It bends along the circumference of the sidewalls and is welded to them, forming a semicircle. Holes are made in the center of the sides into which the finished auger is inserted. From the outside of the sidewalls, bearings are put on the shaft, pressed against the sidewalls and secured, while the position of the shaft is centered. To secure the bearings to the sidewalls, you can make races, or simply weld them to the sidewalls with external races, but then the structure will not be dismountable.
Drive shaft
It will be tubular type with a diameter of 28 mm. A round flange with holes for the gears should be put on it. Press and weld solid pin tips into the ends of the drive shaft. The latter must be machined for bearings.
It should be noted that the left tip should be slightly shorter than the right one. On the extension, make a keyway to fit the driven sprocket of the second stage of the chain drive. This part is also called the track drive shaft sprocket and is secured with a 14 mm nut. The appropriate thread must first be made on this part.
The dimensions of the tension shaft tips must be the same and fastened similarly to the drive devices.
Chainsaw snow blower: tips and tricks for creating
A large amount of snow falls on the territory of the Russian Federation in winter. In some places the precipitation reaches a height of a meter or more. It is in such conditions that a snow blower is simply an irreplaceable thing. The market offers a large assortment of snow removal equipment of varying power, household and semi-professional types. However, not everyone will be able to allocate a sufficient amount of money to purchase expensive foreign cars. One option for getting a snowblower would be a homemade version made from a chainsaw.
How to assemble a snow blower with your own hands?
Having understood the design of snow blowers and familiarized yourself with the drawings from the Internet, you can build a snow blower with your own hands using a chainsaw. Even a beginner can easily master this homemade product. Having a number of necessary components, tools and spare parts on hand, you can construct a homemade snow blower.
The only difficulty you may encounter is finding a power unit. However, any motor of domestic or foreign chainsaws is suitable for these purposes. On forums and on many websites you can find various diagrams and drawings that show what components are needed and how to connect them together.
Theoretical aspect
Proceed to work only after preliminary development of the plan and complete readiness to make a snow blower. Planning is the main stage at which all the necessary parts and drawings are prepared according to which the assembly will be carried out. With the help of a correctly drawn up drawing, it is almost impossible to spoil the design or fail to make a working unit. It is the diagram that will allow you not to miss an important node and secure everything in the right place.
The design of the snow blower consists of:
- Gas tank;
- Engine;
- Wheelbase;
- Cardan shaft;
- Bearings;
- Leading star.
Choosing a chainsaw for a homemade snow blower
The power and performance of a snow blower directly depends on the engine you choose. This main element is removed from the chainsaw. The higher the power of the saw, the better. The engines in household models are two-stroke, power varies from 2 to 10 horsepower. For a homemade snow blower, 5 horsepower will be quite enough. Below we will look at the most popular brands of chainsaws that are often used for homemade snow blowers.
Chainsaw “Friendship”
This chainsaw was developed during the USSR, in 1950, after which it began to be produced en masse in the Soviet Union. Since then, the technical indicators and characteristics of the saw have become significantly outdated. The weight of the unit is 12 kg, in addition, the saw has large dimensions. Experienced owners say that the first saws, which were assembled in the first decade of the plant’s existence, still work properly.
However, chainsaws produced after 1990 are characterized by frequent defects, regular breakdowns, malfunctions and a short service life.
Gasoline saw “Ural”
Another representative of the domestic production of chainsaws. “Ural” tools can be called a kind of improvement on “Druzhba” saws. With the same weight, the Ural has more power from a two-stroke gasoline engine (5.5 horsepower) and smaller dimensions. In this regard, the performance of these devices is much higher.
German chainsaw “Stihl”
Imported sawing equipment is often much better in quality and performance. Foreign factories, such as the German concern Stihl, always try to produce technological innovations. Of course, this also affects the cost of the equipment. Shtil is one of the most popular companies among the Russian population because it has high power, excellent quality, long service life and a relatively low price.
Technical capabilities of "Friendship"
However, new devices with certain breakdowns simply cannot be used anymore. The same cannot be said about the good old “Friendship”. Many people know that after it becomes impossible to work with it for its main purpose, this chainsaw gets a second, no less vibrant life.
Today, homemade products from the Druzhba chainsaw are most often found in villages where real craftsmen still live. And savvy people, having this wonderful product of the domestic industry in their hands, were able to make quite decent functional devices from it.
It turns out that after working for a sufficient period of time felling forests, for some reason this chainsaw is not thrown away. It's all about the universal drive, which allows you to use such saws in other devices in the future. So, it became possible to use the Druzhba chainsaw as a basis for some other units due to:
Quite a powerful engine;
The ability of the device to withstand extreme conditions;
High autonomy of the saw;
Sufficiently compact and light weight.
The working parts of the chainsaw rarely fail, largely thanks to the clutch, which eliminates overload. This part is sealed and is less susceptible to blockages that cause breakdowns.
What devices are made based on the Druzhba saw?
If we take into account the above-described advantages of a chainsaw, it becomes clear how such a unit can be used in the future in almost any area of human activity. For this reason, many will probably be interested in what can be made from a Druzhba chainsaw and how to then use it in their personal household. Here is a list of fairly simple devices:
More complex devices that were implemented on the basis of the Druzhba chainsaw include:
What does it take to make a snow blower?
Next, using an example, we will look at assembling a snow blower with our own hands based on a Ural chainsaw. The fact is that in this particular chainsaw the inertial clutch in some cases acts as a kind of fuse, protecting the rotor from breakdowns and malfunctions. The equipment motor is equipped with a 1:2 reduction gearbox.
Our goal is to create reliable and productive snow removal equipment with our own hands on a budget.
To do this, we will try to use accessible and cheap materials:
- shaft;
- aluminum and metal pipes;
- metal sheets;
- bearings and fastenings;
- chainsaw motor;
- welding;
- improvised tools.
The assembly process itself is not particularly difficult, so every man could successfully make a snow blower with his own hands at home. You don't need any special skills to do this. If you don’t know how to properly operate some tools, you can watch a couple of video lessons on this topic.
Schemes, drawings and principles of assembling a homemade snow blower
On the Internet, on forums and discussions, you can find many drawings of a snow blower made from a chainsaw with your own hands. In our example, consider the following diagrams:
The engine itself must be placed on the longitudinal axis for reliability and quality of operation. In addition to the motor, use a fuel tank from a Ural chainsaw, securing it to the steering support with two bolts. The control handles can be taken from the motorcycle. To create a bucket, you will need pipes with a square cross-section of 20x20x1.7 mm, from which a frame is designed and covered with a sheet of tin, the thickness of which is at least 0.5 mm.
Below are drawings for assembling the most important part of the snow blower - the auger rotor.
You can make an auger with your own hands from the following parts:
- shaft in the form of a ½ pipe;
- a driven sprocket mounted on the shaft;
- two bearings mounted on the housing;
- rotor wing 30x4 mm;
- rotor blades, 2 pcs;
- auger blades, 8 pcs;
- wings for blades, 4 pcs;
- support corners, 2 pcs.
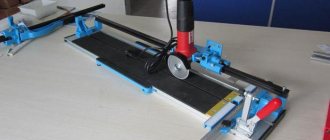
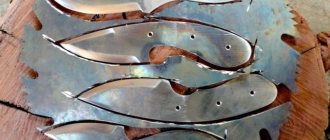
The blades can be made from duralumin sheet, the thickness of which is 4 mm. Using jigsaws you cut out a kind of horseshoe. You will make the fastening process much easier if you cut them individually rather than as a single piece. Below are drawings of the rotary auger blades.
How good should it be?
The most important element in this device is the engine. All other parts, such as a chain or tire, do not play a significant role in the design of such a vehicle, so the main thing is to monitor and control the operation of the motor. If it is in good working order, the snowmobile will always be on the move. If you decide to take the engine from imported chainsaws, you don’t have to purchase a new device under warranty in the store. A used option is also quite suitable.
The only part in a chainsaw that must also be in working order along with the engine is the gearbox. It will also be useful to us in our work.
Tips and tricks
As described above, when creating blades, it is better to cut them separately, in the form of horseshoes, and attach them to the shaft. However, some users cut out rings from a metal sheet using a grinder and a jigsaw, and then stretch them into a spiral with a vice. This method is more effective, but significantly more difficult in terms of physical activity.
Another user recommends using self-locking nuts as fastenings when assembling a snow blower with your own hands. Thus, all fastenings will be more reliable and the structure will not break during operation.
Video reviews and lessons on how to make a snow blower
Reviews from owners of homemade snow blowers Any man who has assembled a snow blower with his own hands will name many advantages of this design. The main advantage is accessibility, low cost, and the ability to work with common materials and tools that everyone has in their garage. For inexperienced craftsmen, this activity may seem complicated, but you can quickly figure it out, thanks to the many training videos, diagrams and drawings on how to assemble a snow blower from a chainsaw with your own hands.
Safety precautions
The following are a number of recommendations, following which will reduce the risk of injury during work.
- It is recommended to wear safety glasses and gloves while working to prevent injury.
- Using a welding machine without a protective mask is highly discouraged.
- Before installing the auger on the frame, the mechanism is turned by hand. The shaft should rotate without difficulty, and the blades of the knives should not touch the frame. Only in this case can the mechanism be secured to the frame.
For more information on how to make a snow blower from a chainsaw with your own hands, watch the video below.
What to make a snow blower from
Step139 lives on Lake Baikal, where the snow in the cold season is as endless as the famous lake itself. Previously, a forum member used to clear the area using an ordinary aluminum shovel, but one day, after a large snowfall, he began to think hard about purchasing special equipment. The electric option was no longer needed due to the need to carry a cable. The gasoline and non-self-propelled unit was inconvenient to move along the steep slopes of the site. The self-propelled model turned out to be quite heavy, and, moreover, it could not be carried down the steps.
The last factors that persuaded the man to make a snow blower from a chainsaw with his own hands were heavy soils - loam with crushed stone and the distance from the city: in the event of a breakdown, store equipment would have to be transported 70 kilometers for repairs. He decided to make the unit as simple as possible, completely made of iron, but at the same time light and repairable. In such conditions, a snow blower using a Friendship chainsaw or any other good old chainsaw would be ideal.
To make a homemade snow blower, a forum member needed:
- a chainsaw that had been lying idle in the garage since distant Soviet times;
- metal sheet 1400x400 mm and 2 mm thick (blades and paddles);
- stainless steel sheet 700x800 mm, 1 mm (bucket casing);
- shaft d20mm l =800 mm;
- a pair of bearings d48/20 mm, pressed into the pipe on both sides;
- two unnecessary arcs (square 20x20 mm) and two crossbars (also 20x20) from the greenhouse (frame);
- nuts, washers, pieces of 35 mm angle and metal, a strip 2 mm wide and 40 mm long were needed to attach the casing to the side walls;
- rear sprocket crown from a Minsk motorcycle (large driven sprocket);
- sprocket from the sunrise motorcycle (drive, small);
- chain from a motorcycle “Minsk”, “Voskhod”;
- brake cable from a snowmobile;
- gas trigger;
- rubber handles from a snowmobile.
The forumhouse.ru participant found almost half of the materials and consumables from this list in his garage, the rest had to be purchased in the store - Step139 spent 801 rubles on this.
How to make the Druzhba saw serve in another form?
If you are eager to give a second life to such a saw, then you will need some design skills and knowledge. After all, you will have to work with a gasoline unit, and sometimes you will have to independently turn out parts for a new device on a lathe. Although a familiar turner may be hired for these purposes. Or the part can be made on a CNC machine.
It is also important to understand that remanufacturing the saw will sometimes not produce the expected power. For example, a motor cultivator that “got” an engine from Druzhba is unlikely to be able to easily cope with a fairly large vegetable garden
But gradually it will be possible to treat a small area with its help. Many craftsmen will probably be able to build such a motor cultivator in which the engine energy will be transferred by a gear to the drive wheel.
Often in the village you can also see a working mower, for which the Druzhba chainsaw was also converted. This unit is operated non-stop for a long time during haymaking and operates for more than one season. To create such a mower, the tire is removed from the saw structure along with the drive sprocket and chain. In this case, the saw is quickly converted to its original state and can easily cut wood in winter.
If you, as they say, have steady hands and have a small garden plot, then it is not at all necessary to purchase a walk-behind tractor. After all, servicing, and even more so purchasing, is quite expensive. However, if you have an old Druzhba saw or the opportunity to buy it for a small amount, it is quite possible to make a walk-behind tractor with your own hands. The very principle of this modification is to use two sprockets as a force transmission system. Such a homemade walk-behind tractor can easily be used when working on a small garden plot.
Everyone knows the Russian deputy, who often presents real “surprises” in the form of heavy snowfalls. If you have serious complications with snow removal during such a period, then you should think about designing a small snow removal device, the basis for which can be an old Druzhba chainsaw. For such a snow blower, you will need to design a screw mechanism. In order for it to efficiently perform the duties assigned to it, the material for its manufacture must be elastic and durable. Rubber has these characteristics. A sled can be used as a basis for moving a homemade snowplow. It is possible to dump snow when re-equipping a water pipe with a certain bend.
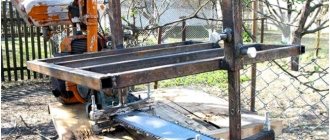
Sometimes a farm requires a device such as a sawmill. Of course, it is unlikely that anyone will install such a large device on their site. At the same time, a mobile device capable of quickly sawing a tree trunk to specific dimensions may be quite in demand. Therefore, the chainsaw sawmill “Druzhba” was also implemented by folk craftsmen. There are several types of such devices. They can differ mainly structurally.
For a sawmill from the Druzhba saw, some kind of stationary frame must be created, which allows you to fix the saw itself in a certain position and set the dimensions for the cut. But there are also designs that take up very little space and can even be taken with you into the forest right away. And already in place, dissolve the wood.