14591 1 3
Petr Pirogov May 16, 2018
I'm short on space in my garage, and when my workbench ran out of space, I decided to move most of my tools to the wall. Today I’m ready to tell you how I managed to properly organize their storage.
Step 10: Vise Holder
For portable vices, I cut out two hooks from wood. They fit into slots on the sides of the vice and hold it in place. This makes it easy to remove the tool if necessary.
Criterias of choice
For those who are not ready to start making shelves themselves, there is always the option of buying a ready-made device of the desired shape, size and functionality.
However, even if you have any organizer in mind, consider the following selection criteria, selected by experienced craftsmen:
- Material: Choose metal structures as they are guaranteed to last longer.
- Dimensions: choose a model that is not too bulky or too miniature.
- Load: Consider how much load the shelf can support and relate this to the tools you have at your disposal.
- Adjustment of dimensions and design parameters: if you need to modify your shelf, it is better to purchase a model that will consist of removable blocks.
Step 11: Hammer Holder
These hammers are held in place just like open-end wrenches—furniture dowels at a slight angle hold the tool to the wall.
Photo gallery of Workshops from open Internet sources:
In the photo we see a very neat storage system for hand tools. wheels, TITEBOND glue
There are also a lot of hand tools on this wall. In the center is a hand saw. View axle saws in our catalog
The Jet machine and Festlul Systainers are masterfully presented. Look in the catalog with prices All machines, Festool tools
The Craig table is well positioned in the photo.
On this wall is a fan of MILWAUKEE tools. And it’s not for nothing that this manufacturer of hand-held power tools belongs to the Heavy Duty class (works in harsh conditions) for professionals and beginners all over the world. Many new items now have a 5-year warranty!
The photo shows the amazing sophistication of the arrangement and selection of a carpenter's hand tools. Look at the review of Arsenal Masters RU Carpenter's tools for wooden house construction
We will help you choose tools for your workshop. We will take into account all your individual characteristics. Your online store Arsenal Masters RU. If you want to share your experience of upgrading your Workshop or garage, write to us at
Step 12: Marking Tool
A block was made for the core, in which I drilled a small hole the size of the diameter of the tool. Then I used a bandsaw to cut off the front of the holder and drilled a hole to mount it on the wall.
Technology for creating a wooden tool rack in the garage with your own hands
Before you create a storage rack with your own hands, you need to decide on the total number of tools that need to be placed.
The tool must be placed on a vertical stand in a safe position.
Creating a project - important points
To make the wall system convenient, draw up a plan-drawing of the future structure on paper, which takes into account all the requirements for the system:
- Calculate the height and width of the rack - it is better to use the entire wall from bottom to top.
- The recommended depth of niches for shelving is up to 65 cm, and the width between the vertical supports of the shelves is up to 1 m.
- Determine the required number of shelves, including how many holder shelves with cuts for tools.
- At the bottom there are spacious floor shelves and racks for tires, wheels and large carpentry tools.
- Mark places for magnetic tapes, hooks, and holders.
- They calculate how many organizers and containers are required, what sizes, and also determine their location.
- Sort tools and all small fasteners and parts for storage.
What you will need
To make a rack, prepare the following tools:
- measuring tape, square, level;
- saw, grinder;
- fasteners;
- hammer, drill.
It is recommended to drill holes in shelves and containers for natural ventilation. This is necessary to protect items from rust.
What materials need to be prepared
All the necessary material to create the rack is prepared according to the drawn up project:
- For the main panel of the holder, you can use a perforated panel.
- If the rack is made of wood, it is recommended to purchase oak or pine lumber without cracks or knots.
- Wooden boards up to 2.5 cm thick will be required for shelves.
- Shelves can be made from regular and laminated plywood.
- The vertical posts of the frame are made of 10x10 cm timber.
- It is recommended to pre-treat wooden boards with anti-mold and mildew agents and paint them.
- To assemble a metal frame, you need a rectangular profile and corners (up to 2 cm).
Manufacturing of components
The procedure for manufacturing the rack and components is as follows:
- Vertical racks made of timber and boards or plywood are cut into shelves according to the given dimensions, and a perforated panel is prepared. Mark out places for shelves.
- To make a metal frame, cut blanks of the required height with a grinder and mark the locations of the shelves. The frame is assembled using fasteners and corners. A primer is applied, then the parts are coated with anti-corrosion paint.
- The shelves are assembled from boards. They are pressed tightly together and nailed together with nails or screws.
- Shelves from boards are assembled by laying elements across the frame, so they can withstand a lot of weight. If the shelves are assembled by laying boards along the frame, then there is a chance that they will sag under the weight of the tools.
- The structure is assembled using self-tapping screws, nails and wood glue.
- The joints of all parts are additionally reinforced with metal corners.
- The entire structure is installed on the wall and secured with metal brackets.
- Shelves with grooves, holders, magnetic tapes, racks, containers and organizers are manufactured separately in the required quantity.
- You may need a small workbench with a vise made from wooden boards. It can be attached to the wall system as a fixed or folding surface on metal or wooden holders.
Step 15: Stencil and Protractor Holder
I have a large and a small protractor. Each of them has the same holes, which allowed us to create a simple holder.
Electric garage lighting
Improvement of the garage space includes high-quality lighting. This can be minimal lighting or major lamps. The location of lighting fixtures and their power depends on the frequency of use of the building, as well as the type of work carried out in it. Electrification of utility rooms is a whole complex of measures. The installation plan consists of the following steps:
- Installation of power cable inside the garage;
- Installation of distribution board;
- Choosing a location, placing sockets, switches, lighting fixtures;
- Grounding.
Any type of device can be used for electric lighting. Simple incandescent lamps, energy-saving, halogen, and fluorescent lamps are suitable. Any model must be installed taking into account certain rules. Light fluxes should evenly cover the entire area. It is better to manage them on a modular basis, creating a division of zones. You can place a small lamp of a suitable design on the table, and place LEDs on the ceiling.
Step 16: Small Item Holders
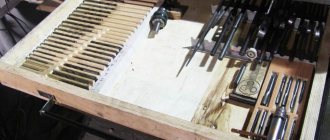
For the rest of the tools I made simple holders, simply adjusting them to the profile. For example, for drills I cut out the mount in the shape of a plastic box, for pencils and watches - in the shape of a box, etc.
Important! Some instruments are additionally reinforced with small nails.
Making a shelf rack
If you regularly use tools, it will be convenient to use an open hanging rack. When working, you don’t need to look for the right wrench or nuts; you just need to stretch out your hand to get to the right tool. You can find various models - both simple and complex.
If the tool rack (photo shown in the article) is used away from the workshop, then you can install doors on it. The result is an aesthetically pleasing design that will serve you for many years. But now let's look at how to make a shelf-rack.
Shelving cabinet
The shelving cabinet is perfect for a small room. The cabinet is placed along one of the walls, forming an area for tools. The shelving cabinet can be built in the form of one long shelf, or have several shorter ones.
The second advantage of a shelving cabinet is the stability of the structure, thanks to which larger and heavier tools can be stored on it.
Of course, the rack does not have the mobility of a suspended shelf, so its location needs to be thought out more carefully.
Hanging structures
Suitable for any room with walls: workshops, garages, loggias, balconies. Wall-mounted tool organizers include panels placed along walls to hold equipment, as well as individual tools that hang on hooks, magnets, or screws.
The attachment completely transfers the load to the wall. Therefore, before proceeding with installation, you should make sure that the wall material has sufficient load-bearing capacity. This primarily applies to ceramic bricks and low-density porous concrete.
The easiest way to make an organizer is from an ordinary wooden board, nailed with the wide side to the wall. Well-bending thin nails are driven into the front side of the board to serve as holders for tools. This design is suitable for placing small hand tools. The main thing is to choose the diameter of the dowels and the thickness of the board so that they can withstand the payload.
In ready-made versions, the role of clamps is performed by powerful magnets located along the entire length of the rail. Magnets can be installed on homemade canopies. They are useful in both primary and auxiliary fastenings. There is no need to drill slots for installation; the magnet can be attached using epoxy glue.
Wall panels are more versatile due to the large working surface area. They are made of metal, wood, plywood, textolite or plastic. The surface can be either perforated or solid. Perforated panels are widely available in construction stores, and they often come with special mounted containers. Versatility is achieved thanks to a fixed hole pitch and removable fasteners.
Solid panels are often assembled by hand. They are easy to use and install - there are no fundamental differences from installing a board organizer. However, large organizers, especially with thin material thickness, are recommended to be mounted on the wall through guides (boards, slats). This principle also applies to perforated panels.
To create a metal organizer, you will need a sheet at least 1 millimeter thick. In this case, it is not at all necessary to buy sheet steel. The basis can be made up of casing from broken household appliances: washing machine or dishwasher, gas oven, microwave oven. It is sufficiently thick and, as a rule, covered with high-quality enamel.
The cladding is straightened in places of kinks, forming a single plane. Along the edges there are mounting strips in the form of wooden boards, fixed at the ends with self-tapping screws. The panel will be hung on the wall using these guides. If necessary, you can add an additional board in the center, as well as vertical elements. This will prevent the steel sheet from “walking” freely while drilling holes and during operation.
Holes are marked on the front side. The larger the size of the equipment that is planned to be placed on the organizer, the larger the step. The holes can be arranged either in a cage or in a checkerboard pattern. The recommended grid pitch, at which a homemade organizer will be compatible with most ready-made hanging holders, is 25 millimeters. For drilling holes, a step drill is best suited: it is well suited for thin metal, does not leave burrs, but is afraid of distortions, so it is better to tilt the panel slightly before work.
The remaining free space is suitable for the role of an impromptu board for depicting diagrams and drawings. Small organizers can easily fit in the perforated areas; it is enough to provide them with a reliable fastening. Hanging holders can be made from bent wire using spot welding.
Features of the garage arrangement
A garage space is usually not very large, but it does have some features that need to be taken into account. Initially, it is advisable to create a project or at least a detailed plan, and then make “land markings” - mark on the floor, walls, where and what will be located. When designing, the height, length, width of the room, and a list of items that should fit here are indicated. You should “push off” from the place where it is most convenient to park the car - nothing should interfere with its entry or exit.
Gates are also an important element; they are installed as hermetically as possible; additional space will have to be allocated to open some types of structures. The width of the passages between all items in the garage is made sufficient for convenient movement.
What other elements can be placed in the garage space:
- basement, inspection hole;
- mobile overpass;
- cabinets, racks, shelves for storing various things, tools, materials;
- tables, workbenches;
- crane-lift with winch;
- lathe, drilling machine;
- miniature sawmill;
- stands for wheels, tires;
- lighting fixtures, heaters;
- water pipes;
- compressor;
- welding machine.
Table stand for drills
When working with a drill, you have to constantly change attachments. It often happens that you put a drill somewhere, and later it is difficult to find. Having made a small stand with just four parts with your own hands, you will place drills, cores, pencils, cutters and other similar attachments in it.
Photo of a table stand for drills.
For the top layer of the device, light plastic is optimal, on which the inscriptions are clearly visible, and it is easier to make neat holes in it. For the middle, select a piece of chipboard or MDF with a thickness of 16 mm or a little more. Fasten these two parts with screws and use an awl to mark the location of the holes. Mark on a square grid with a side of 15 mm for drills, and for other items, orient yourself in place depending on their dimensions.
Making a table stand for drills.
Drill holes, selecting drill bits 1 mm thicker than the shank of the nozzle being placed.
Clean the bottom surface of burrs and attach 3mm plywood to it. Screw a wooden strip for feather drills from the end and mark the plastic to quickly find the bits.
Gates
When arranging a garage, it is important to pay great attention to what will connect it with the outside world. It is necessary to take into account all possible obstacles to entry into the garage for further installation of the gate. The gate, first of all, serves to protect the room from penetration, and also retains heat inside
The gate, first of all, serves to protect the room from penetration, and also retains heat inside.
Types of garage doors.
There are the following types of gate designs:
- Swing. The cheapest and simplest option.
- Lifting. The gates are lifted into a special collection box, allowing you to save space inside the garage and not take up space on the street.
- Multi-sectional. The door leaf consists of several sections. When opened, they gather and rise towards the ceiling using a spring point. They save space and create a good seal.
- Recoil. They open to the sides like a wardrobe.
- Roller shutters. Similar to the sectional version, but the gate itself is divided into many parts, which are assembled together and rise upward. Most often, the mechanism is located inside the gate itself.
We must not forget that the gates are created so that the car can enter and exit the garage without difficulty. It is best to treat the gate with silicate paint, which protects the room from moisture penetration and also preserves the material from corrosion.
How to arrange a garage inside: layout, finishing, storage systems
We will send the material by email
A garage is required for storing vehicles. But if it is properly equipped, it can also become a storage room for tools and equipment, a storeroom, or a workshop. In this article we will talk about how to arrange a garage so that it becomes a comfortable multifunctional room with a stylish masculine design.
Well-equipped garage
The process of interior arrangement of a garage space should begin with the development of a garage layout. This is necessary in order to properly distribute the available space. The first step, of course, is to mark the location for the car. Then the location of the racks for storing all the necessary automotive equipment is determined. Any remaining space can be filled at your discretion.
At the same stage it is worth deciding on the color of the finish. It is better to make the walls light so that the garage does not seem too cramped. In addition, light shades of the interior will smooth out the shortcomings of the technical room. Against the background of light surfaces, shelves with tools and spare parts will look less cluttered.
Garage with light finish
