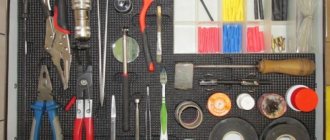
A tool shelf is an important thing in a household. With its help, you can easily correctly arrange tools and organize the space of a garage, balcony or storage room, turning the room into a universal workshop. This review will look at the main types of shelves, and also give ideas on how to make a tool shelf with your own hands.
Material selection
Before you start designing a shelf, it is advisable to approximately think about its size, taking into account the dimensions and the number of tools.
As an advertisement: High-quality and durable balcony repairs can be ordered on this website: https://viploggias.ru/remont-balkonov/
Then you should answer the question: what can you use to make a shelf for a tool? It is important to remember the advantages of each material: wood is easy to process, it is cheaper than metal, the service life of wooden structures is quite long, but when the temperature changes or the humidity in the room increases, wooden products quickly deteriorate.
Metal shelves can withstand heavy loads, you can comfortably place any equipment on them, and such a product can last for many years thanks to the reliability of the material.
As for the variety of types, we can roughly divide the shelves into hanging, wall-mounted or shelving cabinets. This review will look at all three types, as well as provide recommendations for assembling and using each of them.
Purchased products and handmade ones
Ready-made options are very easy to assemble
Assembling ready-made options is very simple - the kit always includes instructions for assembling metal shelving. You just need to understand the sequence of actions and repeat everything that is written in the text and shown in the diagrams.
Homemade rack fully meets your needs
Another thing is whether the store rack will meet your needs?
After all, it does not take into account the specifics of the work to which you devote your free time. The second important difference is that purchased options are standard sizes, while self-production will allow you to use free space more efficiently, plus it will take into account the dimensions of stored items.
You determine the dimensions of the racks yourself, based on your needs.
Hanging shelves
Hanging shelves are highly mobile: they can be easily moved from one place to another if the situation requires it.
The second advantage of this type is ease of assembly. Almost anyone can make such a shelf with their own hands. On the other hand, such shelves are quite unstable; they sway at the slightest touch.
Shelving options and assembly technology
In this section we will look at two types of structures: homemade from wood and ready-made from metal. Each option has its own assembly features, so read both sections carefully.
Your option may well combine both materials
Wooden rack
We will look at a mobile tool rack that can be moved to the required location. It is convenient to take everything you need from it, and the capacity allows you to store all the electrical and plumbing tools, as well as measuring devices.
Below are illustrated instructions - the assembly of racks of this type is carried out in this order:
| Illustration | Description |
| First of all, you need to make a rough drawing of the future rack. This is necessary so that you clearly understand the final result and can calculate the approximate length and width of all elements. Consider the height of the racks, the width of the lintels, the depth of the shelves and the distance between them. If there are additional details, they should also be included in the sketch. |
| First you need to mark the block. We need vertical posts and cross bars. It is better to cut elements of one type, then another, and so on. This way you definitely won’t get confused and spoil the material. |
| The block is cut into pieces of the required size. You should have vertical posts as well as spandrels for the wide and narrow sections of the rack. Their number depends on the number of shelves, and their dimensions depend on the configuration of the future structure. |
| For the shelves, OSB board with a thickness of 16-20 mm will be used. It is not afraid of moisture and has high rigidity, so the shelves will not sag under load. First, the elements are marked, and then they are cut with a circular saw or electric jigsaw. |
| Fold down one of the side supports of the rack. To do this, vertical elements are placed on the floor or a lining made of bars and leveled. Then jumpers are placed on them. This is best done using a special device, as in the photo: the triangle is pressed with clamps and fixes the connection at a perfectly even angle. In this position, holes for self-tapping screws are drilled in the block. The diameter of the drill should be 1 mm less than the diameter of the fastener. |
| All crossbars are screwed with self-tapping screws. Each connection must have at least two fasteners. The second rack is assembled in the same way.
|
| The racks should be placed on the floor at the desired width. They are positioned as they will be when assembled. |
| To set the racks to the exact width, insert a blank between them under the shelf. To prevent it from falling, it is better to secure it on both sides with clamps. |
| On the other side, a template from a blank for the shelf is fixed in exactly the same way. After this, measure the diagonals to make sure that the structure is level. |
| First we need to secure the upper and lower jumpers to give our frame rigidity. They are screwed with self-tapping screws, as in the previous case. |
| Then all the other jumpers are attached. It is important to set them straight using a construction triangle. |
| On the second side, the elements are attached in exactly the same way. You need to turn the frame over, insert the shelf templates on both sides, after which you can place the block and screw it with self-tapping screws. |
| Our frame is placed in a vertical position - the way it will be located later. Its rigidity and strength are checked. |
| The shelves are inserted and aligned as they should be positioned. OSB is excellent for tool racks, as it has high rigidity. |
| The shelves are screwed around the perimeter with self-tapping screws. The step between fasteners should be about 30 cm. |
| Wheels with brakes are used, this will ensure the safety of using the structure. Tool racks weigh a lot, so 6 mm hex head screws are used for fastening. |
| The wheels are placed in the corners. First, markings are made, then holes with a diameter of 5 mm are drilled. Then the wheels are screwed into place. |
| On one side there is a board with slots into which various tools can be hung. With the second one you can make the same device. |
| The shelves easily fit the entire set of power tools and suitcases with plumbing tools. All long elements are suspended on the sides. The rack can be easily moved from place to place. |
Metal rack
Now let's look at the finished structures.
If metal racks are being assembled, the instructions for carrying out the work will look like this:
| Illustration | Description |
| First of all, plastic thrust bearings are installed on the supporting part of the racks. They just need to be put on the end until it stops so that they are positioned evenly. |
| Next, you need to take a marker and mark the position of the shelves on the racks. This will make your work easier later and will help you quickly determine which hole you need to screw the fasteners into. Make sure that the marks on different stands match. |
| The shelves are being unpacked. They are 100 cm wide. We need at least 2 elements, since first of all we need to install the upper and lower shelves of the structure. |
| The bottom shelf should be located at a height of no more than 30 cm from the floor level. This is necessary in order to ensure structural rigidity. That is, it is possible to place this element lower, but not higher. |
| To increase the strength and rigidity of the rack, the upper and lower shelves are attached using special corners. They are placed at the shelf locations and screwed with two bolts to the racks. There should be two corners at each connection so that they hold the shelf on both sides. |
| Shelf fastening | The shelf is placed between the racks, the holes on it are aligned with the holes on the corner, after which the element is bolted. All work is done by hand - tighten the fasteners with your fingers, this is quite enough at this stage. |
| This is what the correct shelf connection looks like. All bolts must be tightened. |
| After installing the lower shelf, the upper one is installed. There, all the steps are repeated: the corners are attached, the element is positioned and secured with bolts. |
| After the shelves are attached to two posts, the structure is turned over and two more support elements are placed on top. Here the workflow is repeated. As a result, we get a strong frame with shelves on top and bottom. |
| The rack is placed on the floor and leveled. If you are assembling a structure and do not yet know where it will stand, then there is no need to level the frame. |
| The shelves are unpacked and placed according to previously applied marks. Check if they fit well and if there are any distortions at the racks. |
| Shelf fastening | The remaining shelves are placed without using corners. You just need to align them along the holes, insert the bolts, and tighten the nuts on the back side. Fasteners must be installed on both sides on each rack; this is the only way to achieve rigidity and reliability of the connection. |
| After all the shelves are installed and all the bolts are screwed, you need to firmly tighten all the connections using a wrench or a screwdriver. If you use a screwdriver, you will need a special M10 hex socket, with its help you will carry out this type of work in a matter of minutes. |
| We figured out how to assemble the racks - the instructions are not complicated and anyone can do the job. Finally, one more tip: if you place two or more racks together, then to ensure the reliability and rigidity of the structure, the supports can be twisted together. There are enough free holes; you need to mark the fasteners at three points - top, bottom and middle. |
Shelving cabinet
The shelving cabinet is perfect for a small room. The cabinet is placed along one of the walls, forming an area for tools. The shelving cabinet can be built in the form of one long shelf, or have several shorter ones.
The second advantage of a shelving cabinet is the stability of the structure, thanks to which larger and heavier tools can be stored on it.
Of course, the rack does not have the mobility of a suspended shelf, so its location needs to be thought out more carefully.
The process of designing hanging organizers
Hanging shelves are called organizers or shield shelves; you don’t need to have any special skills to make them. Usually they store small tools, so a lightweight material, such as plywood, is suitable as a base.
Then you need to apply a mesh in places where shelves or pockets will be made in the future. In addition to them, you can use various hooks and loops for additional fastening.
Now that we know how to make a hanging tool holder, let's move on to constructing wall shelves.
The process of designing wall shelves
Wall shelves are a universal design that can always be used in a workshop, workshop or apartment. There are two ways to assemble such a shelf: the easiest way is to attach a metal profile to the wall, then make the required number of partitions and shelves.
Note!
FIFA 22 (PS4)Why do you need interior dolls?
- How to choose shoes that don't go out of fashion?
You can go the other way: assemble the shelf by attaching corners to the wall, and then laying boards on them.
Main differences between the designs
First, let's figure out what a rack is. This is the name for structures consisting of a number of shelves mounted on the wall or mounted on vertical posts.
There are also console options and systems with holes for mounting shelves and hooks for storing a variety of tools and accessories.
Let's look at the main differences in designs and start with the material of manufacture - there are two main options:
- Wood is an easy-to-process and install material. It is distinguished by its availability, low price and variety of sizes of bars and boards. Of course, wood does not tolerate temperature changes and high humidity well, so it must be periodically treated with protective compounds. Another plus is that a system of any size and configuration can be built from wood;
The simplest design option
- Metal is a stronger, but also more difficult to process material. There can be two main varieties: ready-made products, they are sold in sets and assembled according to simple instructions, you need to choose the optimal sizes; homemade storage systems are made from a corner or profile pipe; most often the structure is welded, but it can also be connected with bolts. You can make tool racks with your own hands only if you have metalworking skills.
As for design options, the following varieties are most often found in a garage or workshop:
- Stationary structures on vertical supports. The simplest and most common option. Such racks usually stand in one place, often they are secured to the floor with corners or anchor bolts. If necessary, they can be rearranged; the process may not be entirely simple if the structure has large dimensions and significant weight;
Stationary option
- Mobile systems most often have wheels, thanks to which they can be moved from place to place or rolled closer to the place where work is performed. A very convenient option that allows you to always have everything you need at hand. The main thing is that the structure stands securely and there is no danger of it tipping over when moving from place to place;
Important! One or more wheels on the rack should have a brake so that you can lock the structure in a stationary position for safety.
The labor safety instructions for operating racks on wheels prescribe the mandatory presence of a brake.
- Wall shelves are fixed in the desired places on the wall and can be made of either wood or metal. This option is convenient because you can arrange the elements of the storage system in a way that is convenient for you. The disadvantages include the impossibility of rearranging the shelves; if you decide to put them in another place, you will have to remove the fastenings and drill new holes in the walls;
Wall storage systems can have a variety of configurations
- Ceiling shelving is suitable for garages with high ceilings. The main advantage of this option is that the design does not take up useful space; moreover, it allows you to use the garage volume to maximum benefit. Of course, storing a tool there that should always be at hand is not very convenient; it is better to store items that you use infrequently;
Garage Ceiling Rack
- Reversible structures, they are also often called transformers. These are ready-made kits that consist of racks with holes every few centimeters and shelf supports that can be placed in any convenient place. That is, you only need to securely fasten the racks, and then you can arrange the shelves in the way that is convenient for you. Their position changes very easily and quickly;
Removable tool racks are very convenient
- Perforated structures are a metal sheet with holes or a mesh. This is a base on which you can place hooks, shelves and clamps. Quite a convenient option for items that should always be at hand.
Great option for a tool
A tool rack in a workshop or garage should be selected according to several important criteria:
| Illustration | Description |
| Material of manufacture. There are two options, and we discussed them above. If you decide to make a tool rack with your own hands, then it is better to choose wood. And if you are inclined towards a ready-made design, then metal will be the best choice. |
| The dimensions of the structure should not be too large. Do not forget that there will be a car in the garage, and you need to move freely around it. The width of the shelves is also an important indicator. It should not exceed 100 cm so that the elements do not sag under loads.
|
| The design configuration is selected based on your needs. The location of the shelves, the distance between them, the presence of additional elements for storing tools and accessories - all this needs to be thought out in advance so that the storage system meets all your needs. |
| The approximate load on the shelves is also calculated in advance. If you have a lot of power tools, a lot of weight will be placed on the shelves. If only keys and other light elements are folded, then you can make the rack not so massive. |
| If the ability to adjust the position of the shelves is important to you, then it is better to choose ready-made modular options. Homemade systems are most often assembled on a rigid frame, and it is simply impossible to rearrange the shelves there. |
