- August 29, 2019
- Leisure
- Anastasia Moroz
If you start to notice that your child is drumming on everything he can, then it’s time to get a drum. But you don't have to buy it in the store. It's easy to make drums with your own hands from scrap materials. This way you will make your baby happy and get rid of stale junk. You can even involve your child in this process. You will learn how to make a drum in this article.
Benefit or noise?
Many adults believe that a children's drum is of no use. It is simply a source of noise and accompanies the appearance of a headache. Nevertheless, the drum is very often entrusted to parents and their children in kindergarten to make. However, this does not happen for the additional workload of the baby and the parent on the weekend. Most often, a loud attribute is intended for performing at a matinee. And you can’t do without this.
Do not think that making this item is a waste of time. Who knows, maybe the child has acting skills, and already in kindergarten he will decide on his future profession. And such a craft will bring a lot of benefits, even if it is carried out at the request of a kindergarten teacher.
DIY drum for kindergarten from a bucket or tin
If you think that a baby drum will do nothing but give you a headache, you are mistaken. There are many benefits you can get from this craft. Even if you decided to do it on the instructions of a kindergarten teacher.
It is often suggested to make a do-it-yourself drum for kindergarten not in order to add worries to parents. Most likely, this is done for some kind of developmental activities or matinees, which in itself is a sacred thing.
Among other useful things, there is one piece of advice that is not entirely serious, more of a joke. But as you know, there is some truth in every joke. See how else you can use a homemade children's drum if you decide to make it yourself.
Look around and you will discover how many different types of used packaging, cans and other things can be turned into a beautifully knocking drum. Even if you don't have anything stocked for crafts, everything can be found in the house.
Yes, and there are benefits for your family and home in this activity (or you can find them, if you wish). If there is a desire, there will always be a reason...
Why make a drum
For example:
- Joint creativity, as we know, brings people together.
- It's a fun activity to make such a cool toy yourself.
- An excellent opportunity to develop a sense of rhythm and train movement coordination. Try to march yourself and beat the drum, maintaining the rhythm.
- A reason to invite the child not just to beat with drumsticks, but to try to reproduce a familiar song in rhythm.
- You can keep a child occupied at the dacha with the help of a homemade drum for a long time, which is also a plus.
- If you want to take revenge on your noisy neighbors in your city apartment, a drum and a child are just what you need (just kidding, but...).
Don’t forget to buy earplugs for yourself or a pair of headphones for each family member not participating in the retaliation campaign.
The simplest DIY drums
The most unexpected objects can become the basis for a children's drum. A coffee tin, a plastic mayonnaise bucket, a cookie box (the round ones are also tin). It’s worth looking around your household and choosing what you’ll use to build this rattling thing.
And keep in mind that if it is very loud, it will drive you crazy. So decide - for a performance at a matinee, you can use a louder voice if it’s a matter of minutes. But if you are going to give a drum to your child for daily games, spare your nerves.
Coffee tin
This DIY drum is the simplest craft of all that we will now offer you. A coffee tin with a plastic lid is all you need. To prevent the lid from slipping off every now and then, secure it with film and, to be sure, place it on glue.
The holes in the lid, which will be the striking surface, do not need to be perforated, that is, there is no need to make holes in it. The sound will be dull, but it will be there. And our drum will not break through.
Do an experiment and see what sound the sticks produce. You can use Chinese sushi sticks by wrapping cotton balls around them (tightly). Well, you’ll also have to take care of the string with which your proud drummer will hang the new toy around his neck.
Although for the baby’s delicate neck it is better to take a wide ribbon or a gauze mother’s scarf. Here you will have to be creative: attract dad and tools or tie a tricky wrapping knot around the can.
But this must be done in such a way that the tape does not tear off the lid, which is not very firmly seated. Otherwise there will be no tears.
Cool drum made from a plastic bucket with a lid
A very simple and most successful drum made from a plastic bucket with a lid. (It’s better not to come up with revenge on your neighbors (again a joke...). It can be painted or decorated as your imagination dictates. You need to take a bucket of the same size or make several drums of different sizes to get a whole drum set. Their lids hold firmly and take care that that it won’t have to fly off.
We make sticks from scrap materials; pencils, felt-tip pens, and a design like the one in the photo will do. Even my mother’s silicone brushes for greasing the frying pan will give an interesting sound. Let your child try out whatever sound he wants. Don't nip your future celebrity's fantasies in the bud.
Hanging such a drum-bucket around your neck is not just simple, but very simple. Therefore, this homemade drum is number one in the range of DIY drums in terms of ease of execution, sound volume and time required.
Corrugated cardboard drum
You will have to sit over this drum and it is unlikely to be suitable for a keen drummer. Something tells me that he will not serve his intended purpose for long. More like a decorative option (for show, so to speak), but it has the right to life. The main thing is that it looks good and the drum will be made with your own hands for kindergarten. For check.
Step-by-step photos of a DIY drum from a jar
Not the easiest way to make a drum with your own hands for kindergarten. But if you can find a film that is thick enough for the striking face, or a film that can withstand the tightest possible tension, your drum will be a winner in drum crafts.
DIY souvenir drum
A paper drum is perfect for decorating the premises of kindergarten groups for New Year's parties. People are often asked to do something New Year's Eve for New Year's decorations with their own hands.
What do parents do most often? That's right, Christmas tree compositions with pine cones. Your decorative drum will stand out against the general background of New Year's crafts and teachers will be sincerely grateful to you. Original jewelry is always in short supply.
Drum made of paper, cotton swabs and gift paper with printed or music notes
Such a paper drum will require rolls of tape, or cardboard cartridges of paper towels. The size of the drum depends on the size of the cardboard cartridge. Twine, wire, beads, and even leftover thread from knitting will come in handy.
You can make a very small paper drum and place it in the paws of a teddy bear or doll. Place under the Christmas tree or hang on branches as Christmas decorations. Can be used in garlands or as an element of a winter composition to decorate a room.
A DIY drum for kindergarten can be either real, performing its musical functions, or symbolic. Listen to the request of the teachers and clarify for what purpose they are asking you to make a drum with your own hands.
Where will it be used and what quality should it be. We have offered you options. Go ahead and be sure to involve children in creativity. They remember such moments for the rest of their lives, unlike watching regular cartoons together.
Source: https://WebDomovodstvo.ru/baraban-svoimi-rukami-dlya-detskogo-sada/
What to make a tool from
Among the mass of useful tips for making drums with your own hands at home, it is worth highlighting one not entirely serious recommendation. It is rather of a comic nature, but every joke has its own piece of truthful meaning. A homemade drum for a child can be used for something other than a matinee. It all depends on the imagination of the parents.
One has only to look around oneself, each person can notice several tin cans or packages that are unlikely to be useful. From these materials you can make a drum for playing with your hands or special sticks.
Size selection
Once you've decided on the wood and tip, you need to choose the right drumstick size. Different manufacturers code their drumsticks slightly differently, so you'll notice a difference between the Vic Firth 5a versus the Zildjian 5a. However, they are nevertheless quite similar. There are 3 main categories of drumsticks.
7a. These are the thinnest and lightest drumsticks for a smooth sound on your drums. They are great for jazz music and young drummers.
5a. These are the most common sticks. They are medium in thickness and allow you to play both loudly and quietly. Great for rock music.
2b/5b. They are thicker than the previous ones and allow you to extract a loud sound from the drums and are ideal for metal and hard rock.
Reasons for creating crafts
This question probably worries all adults. Every parent wants to find out the reasons for such a pastime with their child. There can be several examples of reasons for such an activity:
- Getting closer to your child through joint activities.
- An exciting start to the evening for the whole family.
- Development of coordination of movements and sense of rhythm in the baby. After all, with a craft that was invented and created with your own hands, you can participate in an impromptu march.
- The baby may not easily hit the drum with sticks, but try to reproduce an interesting favorite melody from a children's song or cartoon.
- Drums played with hands can be an excellent way to keep your little ones busy for some time at their summer cottage.
- Finally, the drum can become a weapon of revenge against annoying neighbors who constantly do repairs on Sunday mornings.
It is worth considering that an act of retaliation for neighboring apartments can occur without disturbing the peace of adults. To do this, residents of an apartment with a newly minted drummer need to buy earplugs or a pair of headphones in order to muffle the noise in the room.
False rotation
One of the most common tricks. This is a good start to learning how to spin drumsticks on your fingers. The main attraction is that at high rotation speeds it feels like there is a small propeller built into the player's hand, looking really cool and professional. Although the stick itself remains in one position.
To perform, you need to hold the stick between the first phalanges of the index and middle fingers. The fulcrum is in the center of the stick, i.e. it should be balanced between your fingers and not fall in different directions. Your task is to minimize the intervention of the hand and start moving only with your fingers. “Wiggle” the stick from side to side, feel the weight, do not lose it from your hand. At high speed, this threatens to accidentally attack someone else’s property or health—the tree can fly far.
When you get the hang of it and understand how the wand behaves approximately in this position, try to give it forward momentum so that the tips “draw” not a line, but a circle, feel how the wand moves by inertia. Take your time, listen to your feelings, watch how the wand behaves. As soon as you get better, increase the pace.
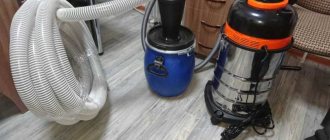
Plastic bucket with lid
Not every adult knows how to make a drum with their own hands from a plastic country bucket. You can paint such a tool with simple paints; it can also be covered with ordinary colored paper. It all depends on the imagination of the little master. The lid on such a bucket should fit tightly. After all, the tool will be damaged if the upper part of the tool falls off at the most inopportune moment.
A drum made from a plastic bucket can simply be held in your hands, or you can hang it around your neck. This action is very simple to perform. The material has two holes from the handle on the sides. It is through them that you need to thread an improvised strap, securing it with knots.
Sticks for such a plastic instrument can be selected from scrap materials. This role can easily be played by pencils or old felt-tip pens that are no longer used for drawing. So, things will be given a second life and the child will be satisfied. Kitchen brushes, which every housewife has, can also make interesting sounds.
A child can try out the sound of absolutely any object in the apartment and choose the most suitable one. You should not limit the imagination of a future musician or composer. Sometimes a child needs to be given freedom of action.
Dance drums
In addition to classic hand drums, you can make large floor drums for dancing. We take 10-liter plastic buckets, remove their handles, stack them one on top of the other and fasten them together with tape. We decorate the edges with green tape and cover the top with blue. We make the bottom red. Then we use self-adhesive film of different colors and cover the buckets. Top - red, middle - yellow, bottom - green. We glue blue tape between the yellow and green flowers. Next we decorate as desired. So we got big floor drums.
Paper product
A decorative drum for a little musician can be created from plain paper or cardboard. To do this, you need to cut out two circles of the same diameter. Their size can be any. Then a strip of paper is cut out, which will become the connecting element for the top and bottom of the instrument.
The paper structure can be glued together with glue or connected with tape. You can decorate the craft using paints or pencils, paste it with various paper illustrations, stickers, cover it with bright satin fabric and sew funny pom-poms on the sides. Thus, a children's craft with their own hands will acquire its own individuality. This part of the work, undoubtedly, can be done by mother’s little assistant himself.
Almost any idea of a little dreamer can and should be brought to life. And for this it is not at all necessary to go shopping and spend large sums. Do-it-yourself drums will not only look unusual and original, but will also not require much time to create.
Roll between fingers
How to really spin a drumstick? Start by placing the stick between the second phalanges of your index and middle fingers. As in the previous rotation, the stick should be balanced and rest in the center.
Gently rock the stick up and down, this should not cause much tension in the hand and fingers. Next, roll the stick over your middle finger with a forward impulse, without helping with your hands or hand, hold it between your middle and ring fingers. Continue rocking and getting used to this position. Perfect the transition through the middle finger, achieve freedom in this movement. The next step is to roll over the ring finger and fix the stick between the little and ring fingers. Continue rocking in this position, and if necessary, practice rolling over your ring finger.
Required tools and materials
In this case, the basis of the child’s craft will be a simple round tin jar. Other materials needed include:
- hole punch for leather fabric;
- a small piece of brightly colored fabric (can be replaced with colored paper);
- leather flap;
- glue gun;
- leatherette laces;
- glue for fabric elements;
- cotton wool
And also in the process of work it will be impossible to do without wooden sticks.
Reverse roll
Once you have mastered the transition from the index to the little finger, you need to master how to twist the drumstick in the opposite direction. To do this, hold it between the index and middle fingers, cross over the middle finger, wait a little, feel the balance and return the stick back by rolling over the middle finger in the other direction. This way the wand will be at the index finger again, and you can repeat the maneuver. The next step is the transition from second to third position. Those. to the location of the stick between the ring and little fingers, rolling over the ring finger - and the opposite movement.
Having mastered the downward and upward movements separately, combine them, gradually rolling the stick from the first position to the third and back. Later, when you get used to it, you will be able to perform turns in different directions for different numbers of times in this way. Everything will depend only on your imagination.
Making the tool step by step
First, you need to cut out a piece of suitable size from bright fabric and paste it over the jar. The fabric can be any. In its absence, the base is simply covered with colored paper, which is sold in any stationery store or supermarket.
A jar is placed on a piece of leather material and outlined. It is necessary to add 10 cm to the resulting diameter of the tool. Draw another circle.
Along the radius of the part, using a pencil, mark the areas where the holes will be located in the future. In any version of making a drum, make an indent of 1 cm from the edge with your own hands. Holes in the leather are made with a special hole punch.
A leatherette cord is threaded through the holes. It must subsequently be tightened tightly on one side of the jar. The same steps must be repeated when creating the bottom for making a drum with your own hands. The lace is also used for additional fixation of products diagonally. In this case, the element is threaded under the lacing, which is located at the top and bottom of the drum.
The final stage is making drum sticks by hand at home. To do this, a wooden stick is connected to a bead-knob. Glue a small cotton ball on top of the bead and wrap it with threads so that there are no empty spaces left. This is how a drumstick is made.
How to make a combined drum for a well with your own hands: practical tips
Despite the range of pumping equipment given to us by progress for pumping water from underground sources, many well owners are true to tradition and use the classic drum for these purposes.
You can buy ready-made models in specialized stores, but it is not difficult to assemble such a structure yourself.
Let's look at how to make a drum for a well with your own hands, what materials are needed for this, and what types of gates can be made at home.
What is a drum for a well ↑
For many centuries, water was traditionally raised from a well shaft using a cylinder rotating on an axis, one end of which served as a handle. As the structure moves, a chain or rope is wound around it, lifting the filled bucket. The well drum is installed above the shaft on two racks attached to the ground part.
There are 3 types of gates:
- wood;
- metal;
- combined (made of wood and metal parts).
The most popular is the combined one, so further we will consider the algorithm for manufacturing the combined gate.
The well with a drum has come to us from the abyss of centuries and continues to be popular
Interesting: the drum is still the leader in terms of frequency of use - well owners, like centuries earlier, use it to lift water, despite existing alternatives (crane and pumping systems). Even if water is supplied from the mine by a pump, some summer residents use the knob as a safety net in case of equipment malfunction or power outage.
Methods for attaching a drum to a well shaft ↑
The driver can be attached to the shaft in two ways:
- on racks fixed to the base of the shaft (supports are installed either during the construction of the well itself, or mounted on a finished foundation);
- on racks resting on a table top or a “belt” of reinforcement (attached to anchors).
Before you make a drum for a well with your own hands, decide on the materials from which you will make not only the cylinder itself, but also the auxiliary elements. For the manufacture of supports, brick, wood or metal are chosen - depending on the material of the well house and the expected loads on the structure.
A gate with a house will protect the mine from dust and other debris
Note: a drum for a well will not only help to extract life-giving moisture from the depths of the soil - it provides additional strengthening of its above-ground part and prevents debris from entering the shaft.
What materials will be needed ↑
Before starting work, prepare consumables and auxiliary materials:
- A cylindrical wooden base 20-25 cm thick. It should be shorter than the diameter of the well shaft (the gap between the supports is 4-5 cm on each side) for free movement during operation. Usually a length of 1.2 m is enough, but calculations are individual.
- Two channels, logs or bars 200-200 mm for racks.
- Metal sheet (50x50 mm) from 3 mm thick. Stainless steel will ensure the durability of the product.
- Metal rod for the axle and handle of the drum.
- A chain or cable for lifting the bucket (the length should be sufficient for the bucket to reach the water level in the well, preferably with a reserve).
- Welding machine.
- Drill for working with metal and wood parts.
- Grinder for cutting iron elements.
- Planer or sandpaper for sanding wood.
- Nails or self-tapping screws, a metal bracket plus anchors if you plan to attach the structure to an armored belt.
- Tape measure, compass, pencil and ruler for marking and measuring.
Log requirements. Choose hardwoods - pear, cherry, beech or willow. Beech will last for decades, but it is heavy - take this into account when calculating. Before work, clean the log from bark, sand it and treat it with water-repellent impregnation to protect it from wear, swelling in contact with water and mold.
By choosing a wide log, you will simplify the use of the well
Remember: The larger the diameter of the deck, the faster the chain will wind - the fewer turns required to lift a bucket of water.
Important: It is useless to open the log with varnish - after using the drum a couple of times, the coating will break off from the winding of the chain or cable and fall into the well.
Preparatory work ↑
To make a drum for a well, you need to place an axis - an iron rod - in a wooden block. To do this, the log is wedged, a hollow is made in the center for the reinforcement and the deck is fastened with metal staples. You can also perform through drilling for the axle. But these are labor-intensive and difficult to implement methods at home, we suggest doing something simpler:
Before starting work, make calculations and draw up drawings
- Draw up a project drawing with calculations.
- Mark the center at the ends of the deck.
Before drilling the ends, mark their center using a ruler or compass
- Using a drill, make 12-15 cm indentations at the ends of the deck. Their diameter should be slightly less than the diameter of the axis.
- Mark the iron rod with reserve for the handle and cut it into 2 parts with a grinder: one is slightly longer than the recess in the deck (about 20 cm), the second fragment, from which you will make the handle, should be longer (about 1 m). If the handle will be attached to the axle separately, just leave a couple of cm in reserve to fix the elements.
- Using a compass, draw circles on an iron sheet equal in diameter to the circumference of the log, and cut them out with a grinder. In the center of each, drill holes for the axles.
Cut circles from a sheet of metal
- At a distance of 1.5-2 cm from the edges of the circles, we drill holes for nails or mark places for screwing in self-tapping screws.
- Mark the sheet again and cut out two strips. Weld them into hoop-clips 5-6 cm wide. They will fix the log, preventing it from cracking over time.
- If the racks have not been installed previously, we make them from channels or prepared bars. We mark holes on them for the axle and in the first case we burn them with a welding machine, in the second case we drill them with a drill attachment.
The gate can be attached to the posts using a bushing with a bearing or through it.
To help: if you don’t have sheet metal at hand, you can use rectangular pieces of iron for the discs at the ends of the future gate. And the wooden deck can be replaced with a large-diameter pipe - this point must be thought through before starting to make the gate.
Selection of material for racks ↑
For trouble-free operation of a drum with metal axles, it is better to make the stands from wood. Rotation will be smooth if the holes in the support bars are lubricated to reduce friction and prevent abrasion of the wooden surface.
If you use a bushing and drill holes in the posts that are larger in diameter than the axles, this will increase the life of the support units and reduce friction to a minimum.
The bushings can be replaced with ball bearings. To implement such a system in the supports, it is necessary to make hubs for press-fitting the axles in the outer race and provide grease nipples for lubrication.
Algorithm for assembling a drum for a well ↑
We insert pieces of rods into the recesses at the ends of the deck.
We place circles on top and weld them to the axles.
If you want to immediately weld the discs to the axles, provide a groove instead of a hole in one of the posts; once these parts are fastened, the gate will no longer be installed any other way
We put hoops on the ends of the drum.
Important: The hoops must be put on before fixing the discs with nails in order to protect the wooden workpiece from cracking and deformation.
We use nails or self-tapping screws to secure the metal discs at the ends of the gate.
Using a bracket, we mount a bucket chain or cable in the center of the workpiece.
We install and fasten the racks to the above-ground part of the well with anchors.
We insert the drum into the racks, making sure that it is located directly in the center, symmetrically.
Important! If you immediately weld the circles to the rods on both sides of the deck, in one of the racks instead of a hole you need to make a hollow so that the long part of the rod can fit into it.
If you are planning a through fastening, then first insert a short rod with a disk welded to it into the log, put on a hoop and thread it into the rack.
Then we put the hoop on the other end and, holding the workpiece and the second disk, thread the long axle through the hole in the second rack and only then (!) weld it to the iron circle.
We bend the long rod twice by 90° (the first time – vertically, the second – horizontally, so that the handle is parallel to the collar). If desired, we decorate it or provide it with a wooden handle for convenience.
Make sure the handle is long enough
Please note: The longer the middle part of the handle, the less effort required to lift the water. But its upper part should not rise too high at full rotation to make it convenient to operate the drum. To avoid miscalculation, mark on the drawings the required height relative to the axis of rotation of the knob.
All you have to do is hang the bucket on the chain and you’re done.
After installing the structure, treat the metal elements with anti-corrosion impregnations.
To protect the mine from dust and make the structure more impressive, in addition to the drum, you can make a house for the well with your own hands.
No templates: non-standard solutions ↑
We have given an example of the simplest standard version of a drum for a well, but folk craftsmen make more intricate designs with their own hands. You can turn an ordinary gate into a spectacular element of the exterior by decorating the deck with carvings, or use non-standard design solutions:
- several thin logs instead of one - a cylindrical textured gate;
- a disk mounted on a pipe of a suitable cross-section is an option with urban notes;
- rack and pinion knob fixed on stiffening ribs (on wooden disks) – motifs of rustic comfort.
The handle can also be designed creatively - instead of rods, use painted pipes filled with sand for density, a steering wheel, a bicycle pedal, or a car steering wheel. Give free rein to your imagination.
Don't be afraid to experiment with design
Making a gate for a well with your own hands is easy if you have patience and take the time to make accurate calculations and thorough preparation. But if you are not 100% sure of the final result, seek help from professional carpenters or purchase a ready-made construction
Source: https://strmnt.com/dom/comm/d-water/kak-sdelat-kombinirovannyj-baraban-dlya-kolodca-svoimi-rukami-prakticheskie-sovety.html
Instead of a total
It's so easy to create your own drums. Without a doubt, your little one will love this exciting activity. After all, a child can act as an apprentice at work. And creative activities with the whole family will not only contribute to the development of the child’s imagination, but will also have a beneficial effect on the child’s imagination and thinking. If a child strives to create things with his own hands, then this activity should be encouraged by adults, because spending time like this contributes to the development of children, strengthening various household skills, and simply brings joy.