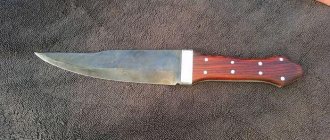
How to cut at 45 degrees
- - miter box;
- - construction square;
- - pencil;
- - hacksaw;
- - sharp knife;
- - metal ruler.
Most often you have to cut the baseboard for the internal corners of the room. To trim, place it in a miter box fixed in a stationary state. Press the very edge a little further than the slot at the 45 degree mark located on the right. Cut the baseboard using a hacksaw blade. If its long part is on the right, the cropped corner will be right-handed, respectively, on the left - left-handed.
Remember that the side of the plinth that is pressed against the side wall of the miter box when cutting the corner will be glued to the wall during installation, and the side that is pressed against the bottom of the miter box will be glued to the ceiling. After cutting off two corners: left and right, place the product in the corners to check the accuracy of the cuts made. Correct minor discrepancies using a sharp knife.
External corners are less common in apartments. When cutting the baseboard to create such corners, you must first make a mark at the beginning of the outer corner. To do this, use the markings to press the product against the wall and use a pencil to mark the edge of the corner of the wall where the cut will be made. Please note that before applying the mark, the baseboard must be prepared for gluing, that is, have an internal corner or be ready for direct joining.
Place the plinth in the miter box and press down. If its long part is located on the left, make a cut along the left mark of the miter box, corresponding to an angle of 45 degrees. The side pressed against the side wall, as when cutting an internal corner, will be glued to the wall during installation.
When gluing, make sure that the bottom side of the outer corner matches the outer corner of the wall or protrudes slightly beyond it. Cut the right side of the corner in the same way.
To cut an angle on a wide plane, use a square. Place it so that the inside fits snugly against the end of the product.
How to cut a 45 degree angle without a square and a protractor
Methods
In addition to cutting using a miter box, in which the angles are clearly defined (90, 45, sometimes 60 degrees), there are other methods. More expensive is to use a rotary miter box or rotary circular saw. Cutting an angle with a tool like this, where it can be adjusted and is fairly easy to install, is not difficult. Cutting is done either manually or using a circular saw.
Purchasing such equipment for finishing one room, bathroom or even an apartment is hardly justified; professional activity is another matter, in this case, of course, it is better not to save.
In order to file a fillet at home, you can get by with a more budget-friendly option by preparing a homemade miter box from plywood. It is important to clearly measure the corners and make cuts along which the plinth will be sawn off in the future.
In order not to confuse the sides of the plinth and to cut correctly, at first it is better to apply it together with the miter box to the ceiling; gradually the skill will be developed and you will be able to do without repeated movements up and down.
You can also prepare a kind of mock-up of the miter box on cardboard; the sawn-off plinth will have to be placed on the mock-up and marked with a pencil. In order to cut the required angle, it is better to move it to a more convenient place; in addition, it is important not to spoil the layout.
There are ways to saw off corners without a miter box. This is especially true since the angles are not always ideal, and the standard angle of 45 degrees may be incorrect. In order to make a corner in this way, you need to place a piece of plinth directly on the ceiling exactly as it will be mounted. Use a pencil to mark the width of the fillet on the ceiling. Having placed the baseboard on the other side of the corner, you also need to mark its width on the ceiling.
You will get two intersecting segments. Then you need to again attach the pieces of plinth to the ceiling and mark the same point on them.
It is necessary to cut from the edge to the marked point; it is important to remember the sides with which the plinth will be adjacent to the wall and ceiling; under no circumstances should they be confused. Small flaws can be corrected during the installation process, trimmed with a stationery knife, if the baseboard material allows this. With wooden fillets everything is much more complicated; a knife will not help there.
READ What Torque Does a Screwdriver Need?
“On-the-spot” measurements make it possible to cut both internal and external corners without large losses, although the latter are not common, yet their finish is significantly different.
How to cut the ceiling plinth at 45 degrees, see below.
Cut line
Anyone who brings the part to the saw blade with the casing lowered cannot see whether the cut line coincides with the marking line. In this case, you should not give in to the desire to lift the guard and work with an open saw, without protection.
It is better to put a mark on the workbench that will clearly indicate the cutting line and help process the parts in accordance with the markings. To do this, stick a self-adhesive label on the table, use the miter gauge to slightly move the bar towards the rotating disk, and immediately pull the miter gauge back along with the bar. After this, it will no longer be difficult to transfer the cutting line from the plank to the label.
It is recommended that the mark be made in the form of a clear stroke exactly the same width as the gap in the table. This makes it possible to control the position of the part during the sawing process, and will also make it easier to install the rip fence at the required distance from the cutting disc with millimeter precision.
Minor amendments
You should periodically check how accurately the stop is installed and, if necessary, adjust its position by removing the circular saw from the table at this time and working with it manually. It is also useful to do this check every time after replacing a saw blade, since with a new blade the cutting line may shift slightly to the right or left.
Using a test cut and a miter gauge, determine the axis line of the saw blade and mark it on the label.
How to cut a 45 degree angle: How to cut a 45 degree angle
Trimming using a miter box
How to evenly trim the corner of a ceiling plinth using it?
A miter box is a simple tool used by carpenters. With its help, you can cut any workpiece at the desired angle.
It is usually a wooden, metal or plastic tray on which special vertical slots are made for cutting at an angle of 45° and 90°.
There are complicated designs, which, in addition to the mentioned angles, also have a hole for making a 60-degree cut.
A special miter box is produced for professional work. Its rotating mechanism allows you to fix the cutting blade in relation to the workpiece at any given angle.
How I glued plastic corners to the wall and windows.
The process of trimming skirting boards to go around internal and external corners in a room is simple, but requires precision in execution. The video below provides you with additional information on this topic.
The design and principle of operation of a circular saw
The main parts of a hand-held circular saw include:
- Electric motor. With its help, rotational energy is created, which is needed for cutting the material.
- Frame. For its manufacture, plastic is used that is resistant to temperatures and shocks. It has holes for ventilation.
- Handle with start button. The latter is equipped with a lock designed to prevent accidental pressing.
- A platform with a guide (it is also called a sole or base plate). Thanks to this element, the tool is moved along the workpiece being cut.
- Spindle for fixing replaceable disks.
- Gearbox. It is designed to reduce the speed, load on the rotor and bearings of the electric motor.
- Main and additional handles.
The principle of operation of the equipment is to transmit torque from the motor shaft to the cutting disc. The latter rotates around its axis at high speed, this makes it easy to saw the prepared surface.
Circular saw device
How to form an angle?
Lay the cut tiles on the corner so that they look perfect, which is important, since the profile of the connecting edges has been changed and it is necessary that the tiles fit together evenly at the joint.
- The first tile is glued, the position is fixed with a level, the cut edge goes beyond the edge of the wall, which is normal.
- While the glue has not hardened, the tiles are glued to the other side of the wall, the cut edges are tightly connected, and then the tiles are glued in this order.
- It is important that the wall is level on both sides, otherwise it will not be possible to form the correct angle with the help of tiles.
Laying tiles is no different from what is done during regular tiling work. The main thing is that the walls on both sides are smooth, and the tiles are adjusted so that everything looks smooth and beautiful.
Important points
Let's look at how to correctly cut the corners of ceiling plinths and get an excellent result the first time. Follow some useful tips:
- Before fastening, both parts must be adjusted to each other. Attach both halves to each other. The wall surface must be dry. If you find any defects, you can easily smooth them out with a knife.
- Several trims may be required. Don't be discouraged if it takes a long time and you have to make several trims, especially if this is your first time doing the job.
- Correctly determine the length of the planks in the corners. For an internal corner, the length of the strip should be adjusted exactly from corner to corner; for an external corner, the measurement is taken from the internal point in the direction of the room.
- If the corners generally match perfectly, but there are small gaps in the middle, they can be sealed with putty.
How is cutting done?
Here's how to cut a corner of a tile for wall installation:
- when cutting, do not touch the glazed part, minus 0.5 mm and maximum 1 mm;
- if the coating layer is touched when cutting at a UCA (i.e. at 45 degrees), then treat it with sandpaper, giving the edge an attractive appearance;
- tiles, especially domestic ones, have a concave shape, so in principle it is impossible to make an ideal cut on a machine; the section that is concave is processed manually by grinding, but if there is a deflection in the tile, it is better to use a traditional plastic corner, it will turn out cheaper and faster;
- when cutting there is a secret - cut the tiles with an angle of less than 45 degrees, but for ceramic plinths such a tolerance is not applicable;
- the painted end is better suited for cutting, it is not finished to the end, leaving a gap of 1 mm;
- A tile cutter cuts the edge of a tile without dust; if you use water when cutting, an angle grinder leaves much more dust, so they work in a sealed mask or respirator.
Laying on corner surfaces is a costly method and takes a lot of time. In some cases, it is better to go the usual route - pick up plastic corners. But there are options when you can’t do without pruning. This refers to tiles that look like decorative stone. In this case, it is only possible to cut the edge of the tile at an angle of 45 degrees.
Edge cuts
If you need to form a large board from several boards, then round insert tenons or dowels in the form of narrow strips of plywood are used to fasten them together. Holes are drilled for tenons, and grooves are cut for dowels.
To cut a groove with a circular saw, the board is placed on its edge and in this position is brought to the saw, but this requires a reliable guide (if you hold the board with your hands, it is unlikely that you will get an accurate cut).
It is often enough to connect the workpiece to a wider board with two clamps or twings and thereby provide the workpiece with reliable support.
Boards in a stack
Still, it is better to use at least two or three boards (or strips of wood board) for support. This tsulaga (backing boards) is connected flush along the longitudinal edge and clamped to the workpiece so that it is fixed on the edge exactly at right angles to the table surface. If you need to cut grooves in the side edges of several boards, then these boards themselves can be used alternately as tsulagi. When replacing boards, you need to use a square with shelves to check whether the “package” assembled from boards is perpendicular to the plane of the desktop. The workpiece with the tulaga is moved along a precisely set parallel stop so that the groove being cut is straight.
Several boards clamped with a clamp support the part, providing it with a stable position when processed with a circular saw.
What tool to cut with?
In this version of tile cutting, the bottom part is cleared so that only the bottom tile layer is involved. And the top glazed part is not affected. Tools used to cut corners :
- an electric tile cutter is a convenient, practical tool that cuts an angle at 45 degrees, because it cuts tiles in the range of up to 45 degrees and firmly fixes the cutting edge in this position;
- an angle grinder, with which you can also cut a corner, but doing this is much more difficult than with a tile cutter, however, for home use, an angle grinder is the most reasonable option.
Cutting tiles at 45 degrees with a tile cutter
It is clear that a tile cutter is used by those who are engaged in professional tile laying, and an angle grinder is suitable for those who decide to do their own renovations in the bathroom or kitchen. But professionals also use an angle grinder to carry out the final work of grinding the cut corner. But making a cut on a tile with an angle grinder is not easy for an untrained person. Therefore, practice on used pieces of ceramic before you start finishing work, which will help you cut the corner correctly.
Cutting tiles at 45 degrees with a grinder
Drywall Cutting Tools
Every builder has a whole list of tools in his arsenal that are suitable for cutting sheet material. Each of them can be used in certain conditions.
Drywall consists of two layers of thick cardboard, which covers the sheet on both sides. Inside there is a gypsum core that crumbles and releases large amounts of dust when using power tools. For this reason, when working with plasterboard, manual processing is preferable.
- A construction knife is the most versatile tool for cutting drywall; working with a knife does not create a large amount of gypsum dust. At the same time, it is quite difficult to make figured and curved cuts with its help.
- The grinder is rarely used for cutting drywall due to the formation of a large amount of dust during the work. The tool is useful for creating holes in sheets.
- A hacksaw is used to create rectangular holes in sheets of drywall. It is not suitable for cutting along a long edge, as the edge turns out uneven with a large number of notches.
- A jigsaw is used for shaped cutting of drywall sheets. During operation, a large amount of dust is generated. To cut gypsum boards, use a metal file with a fine tooth.
How to cut drywall with a knife?
First, the cutting line is marked on the sheet, and the markings are made on the reverse side. With a knife, you don’t need to cut the entire sheet, but only the top layer of cardboard; it’s better to start from the back side of the sheet - there the cardboard layer is the densest. The incision is made along a ruler. The sheet is then moved to the edge of the table so that less of it hangs over.
It is recommended to apply the markings with a pencil; the marker mowing line may be visible through the putty layer in some places.
The overhanging part of the sheet is pressed to break the gypsum core. After this, use a knife to cut through the cardboard from the back side.
Laying tiles end-to-end
- externally aesthetically pleasing, and if the cut corner is made correctly, neatly, the wall is even, then it feels like the surface of the wall is monolithic;
- there is no need to match the plastic corner to the tile so that it matches the color of the cladding, which reduces time.
But tiles treated in this way also have disadvantages:
- such a corner is located in the passage part and since the cut part becomes thin, it is more vulnerable; a small blow with an empty bucket is enough to make a chip in this place, which will lead to the need to replace the tiles;
- Work with cutting a corner is labor-intensive, time-consuming, and the price will increase compared to using a plastic corner.
But still, cutting ceramic tiles at an angle of 45 degrees is a preferable and presentable technology, giving the room a cozy look.
Important features when choosing the right blade.
If you are a beginner and don't have the services of a circular saw expert, choosing the right blade can be a little daunting. There are different types of saw blades designed for different materials, types of cutting, and for different power saws. Then one of the most important characteristics when choosing is the diameter and type of blade. You just have to make sure that it is compatible with your circular saw model.
Here's a quick guide to help you find the right sheet:
- Hand saws accept smaller diameter blades, typically 4 to 7 inches;
- the saw will require a diamond blade with a diameter of 7-10 inches;
- table saws require 10 or 12 inches, and table saw blades must have a carbide tip;
- For cutting metal, 14-inch blades are typically used.
Another important feature is the RPM (or revolutions per minute). For example, smaller sheets have higher rotations and larger sheets have lower rotations. The recommended saw speed should be lower than the recommended blade speed
Please note that a saw's RPM does not directly indicate its cutting speed, so higher RPM does not mean it will cut faster
The diameter of the blade will affect the speed because the edge of the larger blade will move faster compared to the edge of the smaller blade as it covers more distance at the same time. On the other hand, don't rush to select a larger blade, as you also have to consider the desired cutting quality. So when looking for a suitable RPM indicator, consider the material you will be working on.
To do this, you must calculate the SFM, which is equal to Surface Foot Per Minute. The formula is as follows:
SFM = (diameter / 12) * O * RPM
Typically, you will need an SFM of 5,000 to 8,000 for wood materials, and less than 1,000 for metals.
Also pay attention to the cut line indicator when selecting a tool. This is so you can see where your sheet is going as you cut.
Without this, you will have a harder time cutting a straight line. The cut indicator is usually located on the motherboard and looks like two small notches. However, in some cases you may not be able to see the crop indicator. For such cases, a small window that shows you where the leaf is is helpful, so look for it. Feel free to grab the tool and see if it feels comfortable.
Next, take a look at the motherboard. What material is it made of? Magnesium base plates are more stable, but can break if you drop the saw. On the other hand, an aluminum base plate can flex when you need it most, while plastic base plates are stable and impact-resistant.
Regardless of the material, the base plate must be flat in length and width and have a straight edge. At the end, take a look at the guard. Guards with sharp or rough edges can get stuck on wood surfaces during cutting and make lifting difficult.
When it comes to what you are going to cut, you should also pay attention to the type of blade. Different types of materials work better with different types of blades
For example, there are blades designed for cutting wood, plastic and acrylic, metal and several materials. Here are some types you may need:
- Rip Cut is wood cutting; Consequently, cutting blades are designed to cut along the grain: these blades have fewer teeth, specifically designed for aggressive cutting;
- The cross-cut blade is designed for cutting grain and has 40 to 80 teeth designed to provide a clean cut;
- Combination blades are used to make both crossed and ripped cuts as they have groups of teeth separated by a throat.
Since the teeth make a cut larger than the disc itself, its shape and quantity must be taken into account. This is another aspect of the blade that will affect your cutting performance. The more teeth, the more accurate the cut will be. Additionally, the shape of your teeth determines the quality of your cut. For example, the alternative top bevel type is suitable for quick cuts in rough wood that are along the grain. Multi-material blades are good for cross-section, and radial arm blades have a negative angle to avoid automatic feed.
Where should you not use a turned 45° angle?
This type of corner becomes quite fragile due to the thinned (narrowed) edge of the tile, so it is undesirable to use it when facing steps. In the place of the greatest traffic, the tile will definitely come off, the corner will be chipped - it’s only a matter of time.
READ Converting a Screwdriver to Power from the Network 220
The steps are laid with the top tile overlapping the end tile (on the riser) or using aluminum corners/profiles.
And in general, before making such angles, think carefully about everything. If there is a big threat of hitting and knocking down a given corner, then most likely this is not your option. In this case, you can try using an aluminum corner (but not a plastic one).
The easiest way is a grinder
It is more difficult to achieve a high-quality result with a grinder, but, in principle, it is also possible. This is the easiest way to sharpen a 45 degree corner of a tile with your own hands at home.
The process of bevelling and polishing porcelain tiles in the video below.
First of all, you must have a good diamond tile blade.
Place the tile on the edge (perpendicular to the one that is being cut) and grind its back part (clay) at an angle of 45 degrees.
If it turns out a little uneven, then large rough irregularities can be gone over again with a disk, and in order to get a cleaner and smoother edge, you can use a grinding attachment like this (pictured below) with sandpaper or diamond “turtles”.
The sanding wheels are on Velcro, if they wear off, take them off and attach a new one. The base itself with Velcro is screwed onto the thread of the grinder. Diamond bits have a much longer service life, but they also cost many times more. If you are constantly laying tiles, then it makes sense to take diamond turtles. If you are doing the first and last repairs in your life, then you can get by with sanding wheels.
When working with such a thing, you need an angle grinder with adjustable speed (minimum speed!), otherwise the edge of the tile will melt and burn, rather than being sanded.
Some tips for cutting pipes
Sometimes households need to cut to connect a pipeline at different angles or along an axis. The main tool for performing these works is a universal grinder and metal discs.
Rice. 9 Pipeline slitting
Making a longitudinal cut
To make a high-quality, even longitudinal cut, you can use a simple device in the form of a metal corner. It is securely fixed to a flat wooden surface with screws and the pipe is pressed against it with a heavy weight. Using an angle grinder, make a longitudinal cut in the pipe top, lightly resting the disc on the surface of the angle.
The corner can be attached to the pipe with clamps and a slot can be made along the upper wall of the corner in a similar way.
How to properly cut tiles at 45 degrees?
In order for the corner of two tiles to look beautiful, when cutting the tiles you need to be a little short of the glaze (0.5-1mm). That is, only the clay is cut off. If you walk on the glaze (the front part of the tile), it will be “torn” and chipped. It will immediately catch your eye, it’s not beautiful.
We encountered this problem when cutting wavy tiles. But more on that later.
Surely many of you have seen such “art”, but most often everyone thinks that this is how it should be. And a tilemaker with twenty years of experience assures that it cannot be any other way.
Even if there is a need to cut the corner of the tile away from the “factory” edge and you have to cut the glaze, there is still a way to do it beautifully.
Firstly, to do this, you first need to cut the tile evenly (to the required size), and then, again, before reaching the glaze, cut it at 45°. This cut will be much cleaner and more beautiful.
You can also sand the edge of the glaze with fine sandpaper, this will make it even smoother.
Secondly, you can still cut off the corner from the beautiful edge (factory end), and sand the trimmed opposite edge and hide it in the other direction. It will be less noticeable.
For example, we once did this when tiling a toilet installation. Because a nice corner is more important than the bottom seam. Moreover, it also turned out to be very neat, and if you don’t know that it is trimmed, you will never pay attention to it.
Electric tile cutter
An electric tile cutter, or as tilers also call it, a wet cutter. It has a water-cooled disk, and the same water extinguishes all possible dust. The tile cutter cuts along one clear, fixed path and minimizes the human factor such as hand trembling, etc.
The tile cutter has two working positions - a straight cut and a cut at an angle of 45° (in fact, you can set any angle from 0 to 45°, but this most often makes no sense).
How to veneer and form a right angle?
First you need to glue the first tile and level it. The trimmed edge will “fly” beyond the plane of the wall.
Then you immediately need to glue the second (counter) tile on the other side of the corner. While the glue is fresh and adjustable, you need to form a beautiful right angle.
And so we gradually move up, row by row.
How to cut a baseboard at 45 degrees? Three best ways.
Before tiling the corner, make sure that your walls are vertical.
Because if the walls are even slightly heaped outwards, then without steps the corner will no longer meet. And this is not very beautiful, believe me! And you won’t cover it up or make up anything.
Combat degrees: why our grandfathers won
A warship is sailing. Or rather, a warship is coming, because ships do not float, but walk. The navigator plots a course on the map. And suddenly an adversary appears. Anxiety!
The navigator puts the map aside. He takes out a maneuverable tablet. Now he uses it to track the position of the ship relative to one enemy or several opponents at once.
It's all degrees here. Which of the adversaries is visible from what angle? The angle is a decisive value. It is necessary to take into account both angles and their sines and cosines.
Anyone who went to school remembers that the sine and cosine of an angle cannot be greater than one. No matter what you do, you can’t get more than one.
But during the war years, the navigator of a warship sometimes had cosines of angles up to four! That’s why we won because we did the impossible! Even with cosines limited by proper math!
So let us remember, contrary to mathematics: during the war, the cosines of angles can reach up to “four”. This is also why our grandfathers won!
How to cut a 45 degree angle correctly
Sometimes you need to cut a particular part or product at a certain angle. As a rule, you need to cut baguettes, fillets, platbands, baseboards and other similar interior elements at an angle of 45 degrees. Anyone can cope with this task. The main thing is not to rush, don’t be nervous and everything will work out.
READ How to Properly Cut Baguettes at Corners
Buy ready-made corner elements
For example, as for baguettes or fillets, special corner elements are sold for them that fit perfectly into the corner and do not need to be trimmed. They just need to be glued into place and pressed well.
Disadvantages of trimming tiles to form outside corners
When using the technology of sharpening the edge of tiles or porcelain stoneware at an angle of 45 degrees, the edge of the finishing material becomes thinner . As a result, its edge becomes very fragile and susceptible to destruction under external physical influences. Therefore, the use of this technology is not allowed when finishing steps and external walls in areas with high traffic. In such cases, it is recommended to use special decorative plastic or metal corners.
How to cut skirting boards at inner corners: step-by-step action plan
Begin installing the skirting boards in one of the corners. If this is your first experience, choose the part of the room in which something will stand. Not always, of course, the first pancake is lumpy, but still it’s better to play it safe. To make corner on the baseboard, work slowly. One was sawed off, checked, adjusted. Let's move on to the next one. It is better to fasten after two adjacent corners have been assembled. But you shouldn’t delay the assembly too much either.
Trimming skirting boards in corners requires certain skills. But by making a few joints yourself, you can beautifully design complex angles
How to use a miter box to cut baseboards? Place the device in front of you, preferably on a table, but it can also be on the floor. It doesn’t matter which way you turn it, it’s symmetrical. Insert the bar into the profile and turn it so that it will stand against the wall. When cutting down a floor plinth in a miter box, the “wall” is the wall that is farthest from you. Once again: firmly press the baseboard strip against the back wall in the position in which it will be installed. Insert a hacksaw into the required slots. You can start sawing.
How to connect to a door frame
You know how to carefully make a corner on a plinth, but that’s not all. Most often, the room has doors. By the way, they must be installed before attaching the baseboards. So, you still need to correctly connect the skirting boards with the trim on the door. If you just cut straight, it turns out rough. There are plugs for plastic - not the most elegant way, but quite acceptable. Wooden ones can also be trimmed by cutting off the “face” diagonally. Also “not ice”, but already something. What to do with MDF skirting boards, since their timber is unpresentable? There is a way to create a beautiful connection to the jambs. You will need to make two cuts at an angle of 45 degrees (see photo below).
How to properly design the joint between the baseboard and the door jamb
If the edge is not even, first cut it strictly perpendicular. We make a cut at 45 degrees relative to the aligned edge. A small cut piece will be useful to us for decorating the junction. We make the second cut at 90 degrees relative to the first, but if we lower the perpendicular from the corner, we also get 45°.
How to make a neat connection to a door jamb
Now we take the first cut piece and apply it to the cut we just made with the long side. This creates a beautiful rounded cut. If there are chamfers or recesses on the baseboard, they match perfectly. In the case of a wood pattern, you cannot be sure that the lines match. All the same, such a junction of the plinth and door trim is much more aesthetically pleasing.
How and with what to cut plastic skirting boards
All of the above applies to MDF and wood skirting boards. Cutting them with a regular hacksaw is not a problem. It is advisable to use a blade for metal, since it has a smaller tooth and the cut is smoother; you will have to work less with sandpaper. With plastic the situation is different - when you try to cut a piece, some thin-walled skirting boards crumble and break.
Cutting plastic is not very convenient due to the thin walls
To cut normal quality plastic skirting boards you can use:
- A hacksaw for metal.
- Grinder (angle grinder) with a diamond blade.
- Turned with a miter saw. Before cutting, accelerate the blade and only then start cutting.
- A jigsaw and a fine-tooth file. Here you have to try - select the speed and blade.
- Sharp knife.
- Metal scissors. In any case, it is not difficult to make straight cuts with them.
Only personal experience will help you decide which is more convenient for you to cut plastic floor plinths. If you have a miter saw, try using it. It’s not a problem to try a couple of times with a grinder with a diamond blade. If all this does not give a normal result, try a hacksaw, jigsaw or knife. There are, of course, special scissors for plastic, but for one-time use they are too expensive to buy.
Accessories for decorating corners and joints of PVC skirting boards
In plastic skirting boards, you can design corners and joints using special fittings. There are external and internal corners, plugs and connectors. In principle, they allow you to assemble the desired configuration. Each manufacturer makes its own fittings - according to its own profile, colors. But the principle of their use is the same.
How to decorate the corners of a plastic plinth
The first rule is that all cuts are made straight. Strictly perpendicular. Marks in the corners are placed 1-1.5 mm away from the corner. The fact is that the fittings for rigidity have their own jumpers. So for them you need to retreat a couple of millimeters, but no more. Otherwise, a gap will appear or the baseboards will pop out of these corners.
This is what comes out of the assembly:
I must say that not everyone likes the look of plastic corners. You can make a corner on a PVC plinth in the same way as described for wooden or MDF. The only difficulty is that you have to be careful with plastic - it breaks from excessive force. There is one trick - before cutting the plastic baseboard, add a little polyurethane foam on the back side and wait for polymerization to begin. It will be tougher, easier to cut, less deformation. If the foam subsequently gets in the way, it’s not a problem to remove it, but it’s actually easier to cut it.
Using Templates
If you don’t have a protractor, miter box or ready-made corner elements, you’ll have to look for a suitable template. Of course, the template must have the desired angle. It is applied to the workpiece and the workpiece is marked with a pencil. This is one of the easiest ways to achieve the desired result.
How to mark pipes for angle welding (marking device)
Hello, dear readers and DIYers! Surely some of you have had the opportunity to connect round pipes at an angle. An important point that usually causes difficulties is the preparation of the ends of the pipes and the corresponding holes for them. Without preliminary markings, fitting “by eye” will take a lot of time and will not be very accurate. In this article, the author of the YouTube channel “Wood Products” will tell you how to make a marking device for these purposes.
This homemade product is very easy to make, and is literally made from scrap materials.
In a recent article, the master already talked about making a copying ruler, the operating principle of which is very similar, and the finished ruler can be purchased on Aliexpress.
However, these rulers can only work “in the plane”, and with their help it will not be possible to copy a three-dimensional shape.
Materials. — Electrodes — Plastic bottles, old bicycle inner tube, cotton swabs — Sandpaper.
Tools used by the author. — Technical hair dryer — Grinder, disc grinder — Metal scissors — Nippers, pliers, file, hacksaw, hammer, knife, marker. Manufacturing process. So, as copiers, the master will use cores from conventional welding electrodes, from which the coating must be removed. Straight steel wire 1.5-3 mm in diameter or bamboo sticks are also perfect. The smaller the diameter, the higher the marking accuracy obtained.
The electrodes are too long for this purpose and need to be cut into two parts. After this, their surfaces are ground and the edges are cleaned of burrs.
Another design element will be a small sector from an old bicycle tube. Its length should be from 1/2 to 3/4 of the height of the cylinder.
This piece of rubber needs to be put on a plastic cylinder. To do this, the master first puts it on the pipe and then rolls it from it onto the cylinder.
Cotton swabs will serve as separators, from which the author cuts off the heads and leaves the tubes themselves. Their number should be the same as the number of steel pins.
These tubes need to be given a flat shape by flattening them with pliers along their entire length.
Having put the housing on the pipe, the author puts two marks on it. They must be in the same plane with the cylinder axis.
The author inserts the first and second pins parallel to these marks. A flat plastic insert is inserted between them. Maintaining alignment, all the sticks are inserted in this way, alternating with the separators.
By attaching the copier with its pins to the side of the pipe at an angle of 90 degrees, each rod is extended until it contacts the surface one at a time.
Having removed the copier, the master draws a line, and the excess material can be cut off.
As a result, the joint of the two pipes turned out well the first time. Moreover, the author rotates the processed pipe 180 degrees relative to the axis to demonstrate the result.
And now a slightly more complicated option - trimming the end of the pipe for installation in a corner.
And here the operation was completed the first time. When marking the counter holes, you will need to take into account the thickness of the pipe walls.
I thank the author for a simple but useful device for convenient and quick pipe marking.
Good mood, good health, and interesting ideas to everyone!
The author's video can be found here.
Source
Become the author of the site, publish your own articles, descriptions of homemade products and pay for the text. Read more here.
Miter box for skirting boards
A carpenter's miter box is a device for making cuts at a certain angle. It is used with a hacksaw. In principle, you can make a miter box yourself by assembling a guide from boards and making cuts in the walls. There are various models on sale ranging from 15 to several hundred dollars. They differ in capabilities and materials, although they are all called “miter box”. Professional models are made on the basis of a good hacksaw and have a scale that allows you to set the saw as needed. With such a tool, it is not a problem to set any desired cutting angle in order to correctly cut the plinth for a perfect fit.
Professional carpenter's miter box - a tool with a wide range
The simplest miter box is a plastic U-shaped profile with slots in the walls. These slots are used as a guide for the hacksaw. They do not allow the canvas to deviate. In any version there are two cuts - straight and at 45 degrees. Some may have a couple more options.
How to cut a baseboard at 45 degrees? One way is to use a miter box
Sometimes a hacksaw is included, sometimes not. Usually the ones included are not very good. You can use any hacksaw, selecting a blade for the material you plan to cut. It is important that the canvas moves freely in the slots.
Sources:
https://laminatepol.ru/21523-rezku-plitki-pod-45-gradusov.html https://instabur.ru/plitka-pod-45/ https://ingener-pto.ru/2019/12/12 /kak-pravilno-otrezat-ugol-45-gradusov/
JBTS-10 Table Saw Manufacturer Details
The supplier of the JBTS-10 table saw is JPW Tools AG Switzerland, which is a subsidiary of Walter Meier (Tool) AG. Website address: www.jettools.com
In Russia, Jet products are exclusively represented by ITA-SPb, St. Petersburg, founded in 2004, as a subsidiary endowed with all rights for sales, promotion and technical service.
Machines manufactured by JPW Tools AG, Switzerland, China
- JBTS-10
– circular table saw - JKM-300
– combined woodworking machine - JPS-10ts
– stationary circular saw - JPT-10B
— tabletop jointing-thicknessing machine - JPT-310
– stationary planer-thicknesser machine - JRT-2
– milling table - JTS-315sp
– construction circular saw - JWP-12
- table thickness planer - PKM-300
– combined woodworking machine - BD-3
- table lathe Ø 100 - BD-7
– table-top screw-cutting lathe Ø 180 - BD-8
– table-top screw-cutting lathe Ø 210 - BD-920w
– table lathe Ø 220