4.a.
Thus, when we screw a screw or self-tapping screw into wood without preliminary drilling, we must constantly overcome the strength limit of the wood under the tip of the self-tapping screw or screw and at the turns of the thread and the ever-increasing frictional force that arises due to the compression of the self-tapping screw by the wood. The friction force increases due to an increase in the contact area of the self-tapping screw or screw with the wood. As a result, with sufficiently large rod diameters or when screwing into harder types of wood or to greater depths, no normal screwdriver will have enough power to tighten a screw or self-tapping screw to the required depth. And the screwdriver will only chirp loudly, hinting that the strength limit has been exceeded and this is correct, because screwdriver manufacturers do not like to repair products damaged due to the stubbornness of the user for free.
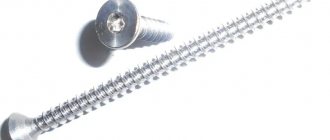
Self-tapping screws for polished soft metal and agglomerate
Such self-tapping screws have the property of being screwed in without preparing a hole. Pointed and threaded along the entire length, they do not damage the material when screwing.
They have a countersunk coated head and are made of bichromate (yellow screw), stainless steel or galvanized (silver).
4.b.
However, not all people use a screwdriver that has power adjustment; why buy an extra power tool when you have a drill and a screwdriver attachment for self-tapping screws. A drill, unlike screwdrivers, does not have power adjustment, and therefore when tightening self-tapping screws or screws of large diameter or to great depth, 4 scenarios are possible:
- You will break the slots on the head of a self-tapping screw or screw - a very high probability, especially when tightening at high speeds.
- You will very quickly ruin the screwdriver attachment. However, if the nozzle for self-tapping screws is Chinese, this can also happen with relatively small loads on the nozzle.
- You will break a self-tapping screw that cannot withstand the torque - not often, but it happens. The fact is that self-tapping screws, unlike screws, are pre-hardened and therefore more fragile than screws.
- You will burn the drill when tightening a large number of screws at low speeds.
I don’t think you will like at least one of these options, so it’s better to spend extra time drilling holes than to spend this time repairing the drill, buying new attachments, or unscrewing a broken screw.
Rules for fastening corrugated sheeting with self-tapping screws on the roof: selection of fasteners
The final roofing covering is one of the most important elements of the building, which takes on the “blow” of all atmospheric phenomena - wind, rain or snow. Since corrugated roofing sheets have a complex wave-like shape, there are certain rules for attaching corrugated sheets to the roof, which are discussed in this article. You will learn what screws are needed for corrugated roofing, their fastening schemes and consumption per 1 m².
Roofing option made of profiled steel sheet Source s-arena.by
Correct fastening of corrugated sheeting on the roof with self-tapping screws
When installing the outer surface of the roof, a very important point is the correct use of fasteners. In strong winds, the tearing loads on the finishing coating can be up to 600 kilograms per square meter. In addition, excessive deformation of the sheet when tightening the screw can lead to a violation of the tightness of the roof at the place of its installation. This often leads to the need to completely reassemble the roofing pie in order to determine the location of the leak and eliminate it. The first thing you need to understand is what kind of screws are needed for corrugated roofing. Not every screw is suitable for this, so you need to select special fasteners that ensure the force of pressing the sheet to the sheathing and the tightness of the fastening.
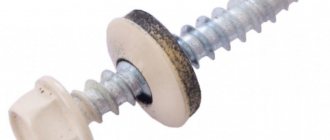
Design of special fasteners for corrugated sheets with a sealing washer Source ohiogas.info
Select fasteners that match the color of the roof covering and are equipped with an elastic plastic sealing washer.
When screwing the screw, a screwdriver with tightening force control is used. The screw is installed in the cavity strictly perpendicular to the surface of the corrugated sheet; during installation, the surface should not bend inward. If there is a skew when screwing, the screw must be unscrewed, a wooden plug must be driven into the hole using PVA-M glue and the self-tapping screw must be installed correctly.
For the final roof covering, profiled sheet CH35 or CH45 is used. Accordingly, fasteners are used in the form of self-tapping screws with a length of 20 to 50 millimeters:
- when installed in a cavity of a sheet - 20 mm long;
- when installed where adjacent sheets overlap – 50 mm;
- for attaching a ridge strip through corrugated sheeting - 50 or more millimeters, depending on the roof structure. In some cases, longer fasteners can be used.
How to properly install corrugated sheets on the roof
The roof is installed in a certain order, ensuring its strength and tightness.
Installation of individual sheets begins from the lower left end. On the first vertical row there is a gable overhang no more than 40 centimeters wide. But the sheets are not stacked in order, but in a checkerboard pattern, that is, the second will be the first sheet of the second vertical row, then the second of the second vertical row, then the second of the first. In this way, the slope of one side of the roof is formed, after which the installation of the second begins in the same order. The verticality of the rows must be controlled with a mounting cord.
The vertical overlap of the sheets should be at least 20 centimeters; horizontally, this figure depends on the design of the corrugated sheet. Under normal conditions, such an overlap is performed in one wave, in more severe climatic conditions - in two. The decision is made at the design stage depending on the climatic conditions in the construction region.
For a standard sheet 0.8x1.1, the distance between the screws is 0.5 meters, that is, there are 4 pieces per 1 m2. But you need to take into account that along the lower edge of the sheet of the first row of the roofing pie, fasteners are installed in each lower shelf.
The gable edges of the finishing coating are attached at intervals of about 250-300 millimeters. In addition, overlapping side, ridge and wind strips are attached with the same parts, increasing their specific consumption.
The average consumption of fasteners is taken to be 8 pieces per square meter, with 4 pieces 35 mm long, 2 pieces 20 mm and the same number longer, from 50 mm. But you need to keep in mind that this indicator directly depends on many factors:
Video description
How not to attach corrugated sheets to the roof is shown in the video:
Fastening the corrugated sheet with self-tapping screws on the roof is one of the most important points for the installation of the roof and this must be taken into account when installing it.
See also: Catalog of companies that specialize in roof repair and design.
Determining the amount of fasteners per sheet of corrugated sheeting
The easiest way to answer this question would be to simply count. If there are 8 screws per 1 square meter of roofing, and its area is: 0.8 x 1.1 = 0.88, it is logical to recalculate this way: 8 x 0.88 = 7 pieces, rounded. But in this case there is simply no point in calculating the specific consumption of fasteners; it is much easier to calculate the total roof area and use the generally accepted consumption rate per square meter. This value is always calculated when designing a structure. In addition, such a calculation is made taking into account the features and dimensions of the profile.
Installation of waterproofing and sheathing for corrugated sheets
The supporting surface for the finishing coating - the sheathing - is made of 25 mm thick boards or sheet materials such as plywood, chipboard, OSB or other similar ones. The material is attached to the rafters with nails or self-tapping screws. Waterproofing is installed on top of the sheathing, most often roofing felt is used for this, but the use of thick polyethylene film is possible.
Video description
You can see how to install a profile from corrugated sheets in the following video:
Installation is carried out in the following order:
- There are two types of board sheathing - sparse or solid. The latter is carried out with a distance between boards of up to 5 centimeters; the sparse packing step provides for a distance between boards of up to a meter, depending on the format of the finishing sheets.
- The boards are packed horizontally starting from the bottom edge of the rafter system.
- Two or three boards in the ridge space are installed closely without gaps.
- Roofing felt waterproofing is installed on top of the sheathing. The flooring starts from the bottom edge of the roof. The sheets are laid with an overlap of up to 15 centimeters, the joint is glued with construction tape or joined using bitumen mastic.
The main task of waterproofing is to seal the supporting base for the finishing coating and drain condensate from the under-roof space.
This coating structure is used when installing a “cold” roof. To make it warm, you need to form a roofing pie using insulation and vapor barrier films. The use of roof insulation reduces heating costs by up to 20-30%.
Causes of roof leaks
This phenomenon can only occur as a result of installation errors or breaks in the insulating material. Even installation of waterproofing on the sheathing is also important. If swelling of the material is observed in certain places, leaks are inevitable, and primarily from condensation, even if the finishing coating is applied perfectly.
The second cause of leaks may be poor-quality cutting of sheets, leading to deformation and loss of flatness of the roofing material.
Roofing installation
Fastening the corrugated sheeting with self-tapping screws on the roof, as mentioned above, is done from the lower left corner of the slope. The work is carried out in the following order:
- First of all, a drip tray is installed along the lower edge of the sheathing - a special strip for draining condensate from the under-roof space into storm water inlets.
- The first sheet is laid on the sheathing parallel to the rafters, thereby forming the amount of overhang. For a standard sheet it should be no more than 40 centimeters.
- Correct fastening of corrugated sheeting on the roof with self-tapping screws is carried out taking into account the above requirements - installation in the stream at a right angle.
- The second sheet is installed with a side overlap in one or two waves, which depends both on the properties of the coating (thickness) and the operating conditions of the roof characteristic of the construction region.
- Further installation is carried out in a checkerboard pattern until the slope is completely covered.
- The second slope is covered in the same way, after which wind strips are installed.
- The last operation to be carried out is the installation of the ridge strip, which finally forms the finishing covering of the roof.
Cutting corrugated sheets
If it is necessary to adjust individual cards to the installation site, various methods are used. It should be noted right away that cutting methods may be different, but you should immediately warn against using technologies that lead to heating of the sheet, for example, cutting with a grinder. In this case, the paint coating peels off, leading to its further destruction at an accelerated rate.
You should use other available methods: hand or mechanical metal scissors or a jigsaw.
Which screws are suitable for installing corrugated roofing
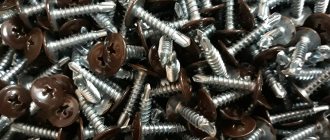
For this coating, special fasteners are used. In Russia, self-tapping screws for corrugated roofing are produced taking into account the requirements of GOST 17917-86. A distinctive feature of such screws is the presence of a drilling part at the front end, which allows drilling of the material while the screw is being screwed in. The second feature is that the head is hexagonal in shape, and the manufacturer’s hot stamp is applied to the end. There is also a support washer with a plastic spacer underneath it. (See Figure 2.)
The use of other fasteners, as a rule, leads to numerous leaks in the roof covering.
Conclusion
Despite its apparent simplicity, installing corrugated sheets requires certain skills and experience - starting with knowledge of how to properly “tie” cards together and ending with the skill of correctly screwing in self-tapping screws - so that they go to the required distance. Therefore, installation work must be trusted to professionals who will carry it out quickly, efficiently and with a guarantee.
4.c.
Despite the victorious march of electricity across the globe, the effect of brute physical force has not yet been canceled, and therefore even now it is not uncommon for screws or self-tapping screws to be tightened manually with a screwdriver. But to be honest, I myself don’t like having to go down and get a power tool when I’m working at height. When tightening screws or self-tapping screws by hand, the scenarios are almost the same as when working with a drill, only you won’t burn the drill, but instead of the attachment you will ruin the screwdriver and you can still get a couple of good calluses. But there is a positive side to this - your muscles will develop, and girls love it, just don’t tell them exactly how you pumped up your muscles.
Safety during work
At first glance, it may seem that screwing in self-tapping screws is not fraught with any troubles and the only thing to be wary of is licked slots. You will be surprised to know that every year tens of thousands of people around the world are seriously injured when working with these products. Problems related to safety violations, malfunctioning tools, or simple carelessness can range from abrasions and cuts to penetrating limb wounds and eye injuries.
To avoid trouble when working with screws of this type, you must follow a few simple rules:
- Always use the correct tool. This applies not only to corded and cordless screwdrivers, but also to regular screwdrivers;
- Always wear safety glasses when operating a screwdriver. A self-tapping screw that is screwed in with force can fly off in any direction in an emergency;
- Use gloves to protect your hands from punctures and cuts during work;
- Always carefully examine the place where you plan to screw in the screw. When working in an unfamiliar environment, you can get fasteners into electrical wiring, cables, plastic water supply or heating pipes;
- While working, store hardware in a special pocket on your work belt, box or other container. In this case, the likelihood of losing a sharp product is significantly reduced.
The safety measures listed above are quite enough to protect yourself while working.
4.g.
There is another method that is now little used - do not tighten screws or self-tapping screws, but hammer them in. However, this method is more suitable for screws; self-tapping screws, due to their increased fragility, more often break than bend, and only if the self-tapping screw sticks out 0.3-0.5 cm above the surface of the wood, then you can try to finish it off. We are not talking about special screws driven into dowels here.
In Soviet times, there were other recommendations for tightening screws (there was a lot of cheap electricity back then, but for some reason there were few available power tools), for example, it was proposed to first tighten the first screw until the slots were licked, then unscrew and throw away the first screw and screw the second one in its place , and if the slots on the second one stick together, then unscrew the second screw and screw the third one in its place. Another option was more gentle; it was proposed to lubricate the screw with soap before tightening it to reduce the friction force of the screw shaft on the wood. Nowadays, such methods of screwing in a screw seem exotic, however, the choice of method is yours.
Sometimes it is also necessary to drill holes for metal screws if the screws are blunt. This is especially often done when assembling a metal frame for plasterboard, plastic panels or MDF panels. The fact is that blunt screws do not cut through the tin of the frame, but push through and, accordingly, the contact area of the screw increases even more and you need to press very hard on such a screw. In this case, drilling holes will not only facilitate and speed up the assembly of the frame, but will also help to avoid unnecessary injuries, because it is very easy to damage your hand if a nozzle comes off a screw.
How to screw a screw into a metal plate if it spins?
So the task is simple, Google did not help. There is a storage locker with a lock and the lock needs to be changed by unscrewing the old one and starting to screw in the new one. I encountered a problem that the screws are not screwed in completely and start to turn, which is why the lock does not hold, changing the screws to shorter ones did not give the same effect. Installing dowels is not an option because the holes are small, it won’t fit there, rearranging the lock by lowering it higher or lower, too, since there will be a hole from the well and compared to other locks it won’t be nice.. how can you solve the problem with screws turning?
If, when you try to screw something (a self-tapping screw, a screw, a screw) into an old hole, a spinning situation appears, this means only one thing: the socket inside is broken. A screw, self-tapping screw or bolt is held only by the outer edge of the product.
This is what it looks like if shown schematically
You won't be able to screw anything into such a hole! Everything will loosen either immediately or after a short time of using the item.
It is necessary to make a clever twist on any type of coupling element, but it is better to take, nevertheless, a self-tapping screw - it has the deepest grooves, and that is exactly what we need.
The first step is to mix wood, metal shavings or ceramic sand with wood-metal glue (any of them). When the mass acquires the consistency of thick sour cream or batter, fill the holes as tightly as possible. You can compact it with something thin with a flat end, like a long bolt.
On a self-tapping screw of the required diameter (the reference point is at the extreme part of the hole that goes outward), we wind a thin wire made of copper or aluminum, you can even take a thin nylon thread in addition to it. The thickness of the wrap should ultimately be 0.8-1 mm in diameter. You need to wrap the self-tapping screw with this from the head to the end and back again like a cross (one wrap along the groove line, the back wrap goes with the intersection of the grooves, in this case this is normal!)
This wrap will be the main element of the connection between the self-tapping screw and the gasket in the hole made of glue with sawdust. A mixture of which will evenly and tightly fill all the spaces between the screw and the hole.
The finished self-tapping screw, with a wrap, is screwed into a hole filled with a mixture of glue and sawdust. The main point is to let the structure harden firmly and not use it for a couple of days!
Tools
In order to screw in screws correctly, you need the appropriate tools. If you plan to screw in one or two self-tapping screws, then you can get by with a simple Phillips screwdriver. If we are talking about several dozen, and even more so hundreds, then there is nowhere without a screwdriver.
Screwdriver
It will greatly facilitate and simplify the task. But on its own, such an electric assistant will not help much. It is necessary to have a serious arsenal of all kinds of attachments of various configurations.
Wooden “chopik” + glue
I think this method is the best. After such a repair, the door in my kitchen worked for several years, and nothing was torn out again.
The principle is this: Remove the sash - door, then you need to take a drill and drill out the torn holes.
We take a drill with a diameter slightly smaller than a wooden “chopik”, for example, my chopstick is 9 mm in diameter, and the drill is 8 mm.
We do not drill to the full depth of the door, usually 80% is enough, the main thing is not to drill further, because the drill will come out on the other side of the door, which is not always necessary. To do this, there is a special limiter on the drill, or at the required depth, you need to screw electrical tape onto the drill and not go beyond its limits.
Next we pour glue into the hole, I take “MOMENT” which glues the wood (you can take any other one; there are now dozens of different ones). Well, we hammer in the “chopik”, do it carefully so as not to break the back wall!
Let it set for about 15 minutes. Then in our wooden inserts, I drill another hole in the center, also not to the full depth. This is done in order to tighten the “screw” freely, but do not overdo it. For example, I have a “screw” with a diameter of 4 mm, and I take a drill with a diameter of 2 mm.
I tighten it on the removed door, try it - it holds perfectly! Now you can hang it on the closet .
This third method, I think, is the best for repairing chipboard doors. Moreover, it is suitable for frequent openings.
Now we are watching the video version
This is where I end, I think my materials were useful to you. Read our construction blog, there will be a lot more useful.
Source: remo-blog.ru
Classification
This fastener is made from different materials such as brass, stainless steel and carbon steel. Also, self-tapping screws have different coatings, such as:
- galvanized (available in yellow);
- oxidized black;
- phosphated black;
- without cover.
Differ by head type:
- semi-cylindrical;
- secret;
- hexagonal;
- hemispherical.
The use of one or another self-tapping screw depends on the density of the material that you plan to attach. Therefore, before purchasing this product, you need to decide on the following:
- Connection operating conditions.
- Is it necessary to drill a hole before screwing?
- What material should it be screwed into?
- What material will be attached.
Based on this, you make the appropriate choice, whether it will be a self-tapping screw for metal, wood or concrete.
The main difference between self-tapping screws for wood is the rare thread, unlike their counterparts intended for metal. Such fasteners can be black, gold and white. So, if it is necessary to screw a golden hinge on a door, then a golden self-tapping screw is selected accordingly. In most cases, the choice falls on a black self-tapping screw.
For metal
As already mentioned, the thread on such a self-tapping screw has a frequent pitch. This is due to the fact that metal is a fairly hard material, so the adhesion must be made strong. Moreover, some metals should not be pre-drilled, such as tin. For thicker metals, you will need to make a hole.
Roofing
Such self-tapping screws are used for fastening roofing sheet material. It must be equipped with a rubber seal. As a result, the connection, in addition to strength, becomes airtight.
Furniture or confirmation
This type of self-tapping screw requires pre-drilling a hole in the furniture piece. A hex wrench is used to tighten it.
These are perhaps the most common types of self-tapping screws that are used in various fields of construction. Let's look at the details of how to screw this or that self-tapping screw into different surfaces.
Glue + sawdust
The solution is as old as time, and it should be noted that it works well. Perfect if you have a piece of chipboard torn out.
The idea is simple - we take sawdust (you can take it from a chipboard, a piece of which has been torn out), or find it near furniture factories, next to large construction supermarkets (usually there are pieces lying around that no one needs), crush them, mix them with glue (previously we used PVA) this Apply the mixture to the broken areas and let dry. And that’s it, tighten the “screws”. It's holding up well.
However, now there are a large number of adhesives; on the Internet I even saw a guy pouring a lot of glue from a glue gun into broken places. And everything seems to be holding up
I used to repair hinges in the kitchen a long time ago. BUT due to the fact that the sash was used often, it broke quite quickly.
So this is again an option for a while, for constant use (10 - 15 openings per day), this is not the best way.
How to magnetize a bat yourself
If you don’t have special magnetic attachments, adhesive tape, or electrical tape at hand, then in this case you can try to magnetize the bat yourself at home. To do this, you need to take two magnets (preferably neodymium) and place a bat between them. It’s worth noting right away that this is a very lengthy process that takes a lot of time.
You can use a battery to magnetize the bit. To do this, you need to take a piece of copper wire, remove the insulation from it and wrap it in small turns along the bit. Then the edges of the wire need to be connected to the battery, after which the bit will begin to be magnetized. However, it should be noted that in this case the magnetization effect will last a short time.
It is worth noting that today there are special devices on the market that allow you to magnetize a variety of objects and hand tools. In addition to bits, such devices are perfect for magnetizing screwdrivers. Their advantages include the fact that they almost instantly magnetize any metal object.
There are several different methods and life hacks that allow you to screw self-tapping screws into hard-to-reach places, holding them directly on the screwdriver bit, preventing them from constantly slipping off. However, if you don’t have special magnetic attachments at hand, it is inconvenient to constantly use adhesive tape or electrical tape (after all, when carrying out complex work, when you need to screw in a large number of screws, constantly wrapping them with electrical tape is very problematic). In this case, you can take two small magnets, for example from the cheapest Chinese headphones, and attach them to the surface of the bat. After this, a magnetic field will appear that will not allow the screw to break off.
Location requirements
There are requirements for the location of hardware, for example, markings are necessary in order to screw in the necessary fasteners efficiently and at the required distance. There are the following rules for placing screws:
- from the edge of the product that is attached, it is necessary to retreat a distance equal to twice the length of this fastener;
- the hole in the wall should be slightly larger than the screw;
- the minimum dowel fit for light material is 6 cm, heavy material is 4 cm;
- the distance between the screws is from 12 to 15 cm, depending on the density of the concrete;
- The diameter of the hole is equal to the cross-sectional diameter of the self-tapping screw together with the dowel.
The best option for screwing in long fasteners
And now we come to the main thing. There is a safe and easy way to screw in hardware and wood, without drilling. In fact, it can be compared with the previous one, but here a paraffin candle is used instead of soap. Naturally, few people use these now, but you can find them (in extreme cases, holiday candles for a cake will do).
Before screwing in the fasteners, the threads should be rubbed with paraffin, and when screwed in, under the influence of friction, the screw and wood will begin to heat up, which will lead to the melting of the paraffin. It will begin to melt and soak into the wood around the screw. As a result, it will be easy to screw in the screw, and both the thread and the wood will be protected. Also, no matter how much time passes, it can be easily unscrewed to replace the board or even simply disassemble the structure.
Requirements for the location of self-tapping screws for concrete
Before using screws, you need to mark the fasteners:
- they retreat from the edge of the structure to a distance of at least twice the length of the anchor;
- the depth of the hole must be greater than the length of the self-tapping screw by the value of one of its diameters;
- the minimum recommended dowel insertion depth for lightweight concrete is 60 mm; for heavy ones - 40 mm;
- distance between anchors - 120 mm for porous, 150 mm - for dense materials;
- The diameter of the hole must correspond to the cross-section of the dowel.
The fasteners are positioned so as not to cause the formation of cold bridges.
