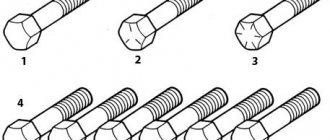
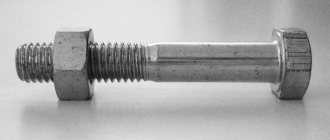
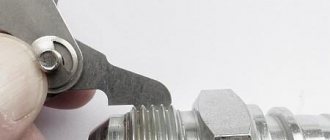
Metric threads share many characteristics with imperial threads, so care should be taken when trying to differentiate them. Firstly, if the thread is metric DIN 7631, then it will have a 30° chamfer on the external thread. For fittings in port applications, metric fittings (ISO 9974) are also virtually identical to BSPP rod ends (ISO 1179). The only difference is between the threads. BSPT fittings are very similar to metric taper fittings, although metric taper is much less common. There are also variations in sealing surfaces between different types of metric fittings, which can present challenges when trying to identify.
Features of metric thread
Bolt diameter is the diameter of the shank expressed in millimeters for metric bolts. Since it is approximately the same as the main diameter, its measurement can be used for fully threaded bolts.
The length of the fastener is measured from where the surface of the material is supposed to be to the end. For fasteners where the head is typically above the surface, the measurement is taken from just below the head all the way to the end. For bolts and screws that are intended to be countersunk, the measurement is taken from the point on the head where the surface of the material is to the end of the product.
Metric fasteners are manufactured with thread pitches. Therefore, instead of the number of threads, as is customary in inch threads, this is what is calculated. The thread pitch is the distance between the threads, expressed in mm (determined by the length of the fastener rod). For example, a thread pitch of 1.5 means that the gap between adjacent threads is 1.5 mm. Typically, smaller fasteners have finer threads, so they have a reduced thread pitch.
Metric thread table
For metric parallel threads, a caliper reading of 12.03mm indicates that it is most likely a 12mm thread. We still don't know, however, if it's a 1.0 or 1.5 thread pitch (or some other pitch).
These steps must be taken to ensure successful identification of metric threads:
- Determine whether the thread is parallel or tapered.
- Calculate the thread pitch in mm using the thread gauge or calipers (usually 1.0, 1.5 or 2.0, but other sizes exist).
- Determine whether the thread is external or internal using calipers.
- Find the closest match on the diagram (male thread and pitch combined into a "thread leader" such as M12 x 1.5 indicating 12mm with 1.5mm pitch).
- If a seal or corner sealing surface exists, it is worth using it to determine the specific type of metric fitting.
Metric Thread Specification Table:
| Thread leader | Thread pitch (mm) | External thread (mm) | Internal thread(mm) |
| M8 X 1.0 | 1.0 | 8.0 | 6.9 |
| M10 X 1.0 | 1.0 | 10.0 | 8.9 |
| M10 X 1.5 | 1.5 | 10.0 | 8.4 |
| M12 X 1.0 | 1.0 | 12.0 | 10.9 |
| M12 X 1.5 | 1.5 | 12.0 | 10.4 |
| M16 X 1.5 | 1.5 | 16.0 | 14.4 |
| M20 X 1.5 | 1.5 | 20.0 | 18.4 |
| M24 X 1.5 | 1.5 | 24.0 | 22.4 |
| M27 X 2.0 | 2.0 | 27.0 | 24.8 |
| M30 X 2.0 | 2.0 | 30.0 | 27.8 |
| M36 X 2.0 | 2.0 | 36.0 | 33.8 |
| M48 X 2.0 | 2.0 | 48.0 | 45.8 |
| M60 X 2.0 | 2.0 | 60.0 | 57.8 |
If you define a fitting as having metric threads, you still need to determine which version or style it is.
Designation rules
The marking contains several parameters. Each of them finds a letter or number display. If there is no such set at the end of the product (die and tap, ready-made metal fasteners), then it is probably a fake. What is indicated:
- The tolerance level, that is, the accuracy of compliance with the declared dimensions.
- Type. For metric - the letter M. For other options, other markings, for example for cylindrical - G.
- Internal thread diameter. The step is not indicated, since according to the standards, all structures have a similar move if they have the same cross-section.
There is also a designation for the make-up length. She may be:
- N – average.
- S – small.
- L – large.
All of the above is indicated both on the drawing during the design and manufacture of products, and already at the time of production - the engraving method is usually used. It is the most durable, and when trying to save money, paint is used.
DIN pipe fittings
International DIN tube fittings have a 24° tapered neck on the inside of the male fitting, which should clearly identify it as DIN if metric threads have also been identified. To determine which series and tube size a fitting is, you should examine the tube nut: most manufacturers indicate the series and tube size on the product itself. The system used for this marking combines a series of pipes with a male threaded tube, for example: the size of a 15mm tube in the L series is reduced to L15.
If the series and size are not indicated on the part, you need to match the pipe with the metric thread leader (thread size and thread pitch in mm).
Application of tabular information
As with many other metalworking methods, there are metric thread standards in tables. They are prescribed in regulations. Below we list the documents that you need to consult in order to find a suitable table:
- GOST 8724-2002. Here are standard requirements for diameters and pitches. Our domestic standard was published back in the days of the USSR, but then supplemented and updated. In 2004 it was tested for compliance with the international system. It turned out that our framework is much wider; we consider both miniature parts from 0.25 mm and large ones up to 60 cm. While the foreign range of standardized sizes varies from 1 to 300 mm.
- GOST 9150-81. Here we propose standards by which the interchangeability of spare parts is determined. After all, many parts fit, if not perfectly, then simply fit and can be used in everyday life.
- GOST 16093-81. Defines the level of accuracy as well as labeling rules. It is more necessary for manufacturers and is not used in everyday life.
These standards are applied by manufacturers, buyers for household use, as well as for working on machines.
Kobelco and Komatsu fittings
Kobelco fittings are essentially the same as 24° DIN metric pipe fittings, however all Kobelco thread sizes are 1.5mm pitch. All pipe accessories for Kobelco fittings are L series and are completely interchangeable. However, there are some sizes that are truly unique to Kobelco.
Komatsu fittings have a thread pitch of 1.5 mm in all sizes and seals through a 30°/60° cone seat. If they are identified as a metric nose cone thread, extreme care must be taken to discern whether it is actually a 30°/60° (Komatsu) cone seat instead of a 37°/74° (GB Chinese) seat.
37°/74° and flat end Chinese metric fittings
These fittings are increasingly being exported from China using heavy equipment to Chinese standards. What defines these standards is that they both use North American sealing styles, but with metric threads. This includes O-ring face sealing (ORFS) and 37° flared seat (JIC) sealing methods, however UN and SAE threads are replaced by metric threads and do not follow traditional thread pitches in all sizes.
In Russia, these fasteners are also found, but much less frequently. They are produced in Chinese factories primarily for export and sale on the North American market.
Geometric dimensions
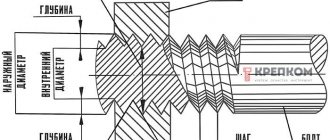
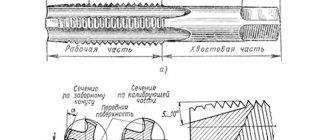
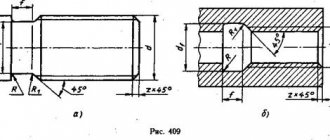
The performance characteristics depend on the parameters listed above. All three diameters determine which hole needs to be made with a drill when working with a tap. From the pitch and stroke - how firmly the screwing will occur, the more turns, and the more often they are, the better. This kind of work is more delicate, so it is virtually impossible to do it at home, only with special equipment. The strength of the connection depends on how deep the grooves are. There are limitations here too. If the bolt is made in miniature, then there should not be too much of a difference between the recesses and ridges, as this increases fragility. The profile angle, height and depth of the metric thread determines how well the front of the tap will fit into the material. It’s not so easy to start rotations, and besides, to do it quite smoothly, without distortions. The softer the material (for example, copper or aluminum), the better the screwing. The proportionality of the two elements that come into interaction is very important.
Metric thread pitch calculation
The procedure for determining the thread pitch:
- First of all, you need to measure the distance from one thread to another. The ruler should be held against the threads, lengthwise, to measure the distance from one high point to another in millimeters. To do this, you will need a very detailed ruler, since the distance between the threads can be no more than 0.4 mm. This can be difficult for very thin screws, so you may want to use a pitch sensor if possible.
- Determine the diameter and length of the threaded section. To do this, you need to measure the distance from the bottom of the head to the end of the threaded area in millimeters. For example, it could be 8 millimeters. Then the diameter (width) of the threaded section in mm is measured. It can be 4 millimeters across. You should always measure the main diameter, which is the distance across the entire threaded area from one high point of the thread to the next, instead of measuring low points that are opposite each other.
- Plug the measurements into standard metric form and start with the diameter with an "M" in front of it. Then add the following field. This is followed by the length of the threaded area in millimeters with an "M" behind it. So in this case the measurement will be represented as M4 X 0.4 X 8M.
In addition to a ruler, additional or alternative tools can be used to determine the thread pitch .
Using the caliper and pitch sensor
These devices are quite simple to operate, but with their help you can make accurate calculations faster. To do this you need:
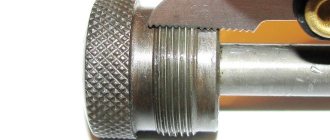
- Determine whether the threads are conical. To use a caliper, you need to place the measuring tool points on either side of the object that is being identified. The device must be aligned on the outside of the threads at the lower end, away from the head. It displays the width. Next, you need to move the tip until it touches the threads. The readings will pop up on the display if the instrument is digital. If it is a mechanical device, you need to read the data on the sliding part. Next, you need to do a similar action on the threaded area near the screw head. If the indicator is higher near it, then you are dealing with a tapered thread. If it is parallel, then the rod does not taper.
- Tapered threads are measured on the 4th or 5th thread down from the head, essentially in the center of the threaded area. If the fastener does not become narrower, you can take measurements at any point along the entire thread. Using a support allows you to notice that there are several points where the threads are not located closely. You should not place what you want to measure within the specified intervals. It is necessary to keep your hands close to the threads.
- Press the thread pitch sensor to find the pitch. The pitch sensor has little knobs that pull out. Each of them has teeth corresponding to specific steps. You should try to insert the teeth into the threads until you find one that matches. The number for this step will be on the handle. It will be in TPI or Metric, depending on the type of pitch sensor that is used.
- Place the obtained indicators into a standardized measurement. Once the pitch is determined, the length of the screw from under the head can be calculated, and then the numerical values can be placed into a standard measurement, which is diameter, thread pitch or TPI, and length. If you are measuring a metric screw or bolt with a diameter of 4mm, a thread pitch of 0.4mm and a length of 8mm, then the measurement will be M4 X 0.4 X 8M.
Many people believe that the metric system is actually simpler because many measurements are in the same unit and there are no fractions to complicate calculations.
At the First Fasteners store you will find a wide selection of fasteners: from standard bolts and nuts to anchors and fastening systems.
Tolerance fields
For a number of production cycles, maximum compliance of the parts being connected is important. Such values are called exact. It leads to:
- increased tightness - no extra gaps;
- strength;
- no vibration.
Manufacturing takes place exclusively on metalworking machines, which are based on a remote control. Here the operator is not responsible for the process, but only enters the design developed using a computer-aided design program into the computer. Tools grind teeth with high precision up to 0.001 mm. The second standard precision dimension for metric threads is the average table diameter. It is the norm and is used most often. It is this category that includes the fasteners that are supplied to the shelves of hardware stores. Manufacturing - machine, but using manual installation and fastening of the part, drill direction, etc. Third class - rough. This includes cuts that are made by craftsmen at home. Often do not have three-layer processing, in many cases the ends of the turns are broken or ready to crumble.
