Puller? Actually, there are special pliers, like pliers. There are two types of them - some bring the “mustaches” together when you press the handles, and others spread them apart. There are rings with holes in the locking rings - you insert the whiskers of these pliers there and press the handles, that's all.
In auto stores there are 300 rubles, they are quite normal, suitable for servicing cars and other things. I have the same ones myself.
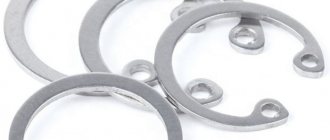
The retaining ring is designed to secure various elements to the axle and gearbox shaft, as well as the machine motor. The inner ring is used for mounting on the hole, and the outer ring is used for mounting on the shaft. Often, during repair work on a car, parts that contain these rings are disassembled, for example, when replacing bearings installed in wheel hubs.
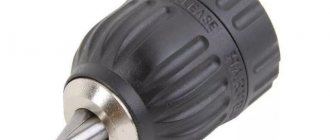
To remove the circlip you need a circlip puller, a vice, a bearing puller, and a hammer.
You need to remove the front suspension strut of the car. Place the part in a vice. Knock out the hub with a hammer and replace the bearing. You need to release the retaining ring located inside by lightly hitting the remaining part of the bearing with a hammer. Using a circlip remover, remove the circlip on the bearing. This hand tool resembles pliers with curved or removable straight tips. If you don’t have such a tool at hand, you can use two screwdrivers of the appropriate diameter to remove the retaining ring.
Use a bearing puller to remove the bearing. The part of the bearing that remains in the hub must be knocked out. To do this, you need to take a mandrel that has a suitable diameter. Clean all parts of old grease, lubricate the internal surfaces with a thin layer of lithol. Use a snap ring remover to install the inner snap ring, and then install a new bearing in the steering knuckle housing.
Install the outer retaining ring inside the knuckle socket. You need to press the hub into the bearing all the way, while the inner ring of the bearing must be fixed with a support, otherwise damage may occur. Reinstall the front suspension strut and check the wheel alignment.
Remove the wheel to replace the bearings in the rear hubs. Using a screwdriver, pull out the oil seal after removing the brake drum. Remove the inner race mounted on the inner bearing. To remove the outer ring mounted on the outer bearing, use a hammer on the beard. Press out the outer ring onto the inner bearing using the same tools. All parts must be cleaned, lubricated with new bearing grease, and the outer ring from the inner bearing must be installed on the hub using a mandrel of suitable sizes.
Press the outer race into the hub of the new outer bearing. Install the lubricated inner race from the inner bearing, as well as the oil seal. After installing the brake drum on the axle, it is necessary to secure the inner ring from the outer bearing using a washer and a hub nut. Reinstall the wheel and also check the wheel alignment angles.
Remove the wheel to replace the bearings in the rear hubs. Using a screwdriver, pull out the oil seal after removing the brake drum. Remove the inner race mounted on the inner bearing. To remove the outer ring mounted on the outer bearing, use a hammer on the beard. Press out the outer ring onto the inner bearing using the same tools. All parts must be cleaned, lubricated with new bearing grease, and the outer ring from the inner bearing must be installed on the hub using a mandrel of suitable sizes.
Read also: DIY scissor sharpener
Press the outer race into the hub of the new outer bearing. Install the lubricated inner race from the inner bearing, as well as the oil seal. After installing the brake drum on the axle, it is necessary to secure the inner ring from the outer bearing using a washer and a hub nut. Reinstall the wheel and also check the wheel alignment angles.
Retaining rings are widely used in the designs of a wide variety of mechanisms to secure a shaft, rod, axis of rotation or bearing. They are used in water valves and gearboxes, in ship gearboxes and in space stations. If it is necessary to replace or repair a mechanism assembly, the ring must be removed. For this purpose, special tools are used - ring removers.
How to remove a retaining ring: technology and tools
Retaining rings are widely used in the designs of a wide variety of mechanisms to secure a shaft, rod, axis of rotation or bearing. They are used in water valves and gearboxes, in ship gearboxes and in space stations. If it is necessary to replace or repair a mechanism assembly, the ring must be removed. For this purpose, special tools are used - ring removers.
To come in
Already registered? Sign in here.
There are currently 0 users on the page
There are no users viewing this page.
- DIN 6798 Serrated lock washer. Form J
- DIN 6797 Elastic lock washer. Form I (J)
The lock washer with internal teeth GOST 10462-81 is widely used in those industries where a conventional washer, for one reason or another, cannot satisfy all needs. However, this fastener element significantly affects the connections in which it is involved. Toothed washer GOST 10462-81 is used in industry, in the construction industry, as well as in furniture production.
Speaking about possible options for analogs* of the GOST 10462-81 washer, one cannot fail to mention the German standard DIN 6798. This fastener element partially complies with the GOST 10462-81 standard under consideration. One of its designs, DIN 6798 form J, has internal teeth. Just like a washer made according to the DIN 6797 standard. However, relying on complete interchangeability is not recommended, since Russian and German standards still differ from each other.
| Nominal fastener thread diameter | d | D | D1 no more | s | N. no less | Number of teeth | ||
| Nom. | HI4 | Nom. | h14 | |||||
| 2 | 2,2 | +0,25 | 5.3 | -0.30 | 4.2 | 0,2 | 0.60 | 6 |
| 2,5 | 2.7 | 6.3 | -0,36 | 4.9 | ||||
| 3 | 3,2 | +0,30 | 7.0 | 5.0 | 0,3 | 0.90 | 7 | |
| 4 | 4,2 | %O | 6.5 | 0,4 | 1.20 | |||
| 5 | 5,2 | 10,0 | 7.5 | 0.7 | 1.75 | 8 | ||
| 6 | 6.3 | +0.36 | 12.0 | -0.43 | 9.0 | 9 | ||
| 8 | 8.4 | 14.0 | 11.0 | 0.8 | 2.00 | 10 | ||
| 10 | 10,5 | +0.43 | 17.0 | 13.5 | 1,0 | 2.50 | 11 | |
| 12 | 12,5 | 19.0 | -0.52 | 15.4 | 1,2 | 2.75 | 12 | |
| 14 | 14,5 | 22.0 | 18.0 | 1,4 | 3,2 | |||
| 16 | 16,5 | 24.0 | 20,0 | 14 | ||||
| IS | 18,5 | +0.52 | 27.0 | 22,5 | 1,7 | 3,75 | ||
| 20 | 21,0 | 30.0 | 24,8 | |||||
| 22 | 23.0 | 32.0 | -0,62 | 28.0 | 16 | |||
| 24 | 25.0 | 36.0 | 32,0 | |||||
What is a snap ring
Due to the similar name and shape of the ring, many people confuse a locking ring with a lock washer. Despite the similarity in name and appearance, they have fundamentally different functions. A lock washer secures a threaded connection by preventing rotation of the nut or bolt head. A locking ring prevents axial movement of a bearing, shaft, axis of rotation or other structural element.
Retaining rings are made of high-quality spring steel; it has a narrow through cut and two areas along its edges, which are called ears. There are holes made in the platforms, by taking which, the cut can be reduced or enlarged. This changes the circumference of the product. On the mechanism parts that need to be secured against axial movement, a narrow shaft is machined or milled, slightly wider than the height of the ring. The ring, in a compressed or stretched state, is inserted into the groove and released. The part is compressed, enveloping the shaft, or expanded, fixing the bearing in the hole. To remove the fastener, you also need to unclench or close the ears.
Ring locking fasteners are widely used in all branches of mechanical engineering, from watchmaking to mining equipment, from paper machines to bicycles, from household appliances to spacecraft.
Multi-jaw washers
The fourth type of washer with teeth, called multi-claw, is a ring with a protrusion on the inner circle and rectangular claws on the outer contour. The inner protrusion is bent from the plane of the washer by 90º, and the legs - by 25º. This makes it easier to grab them in order to later bend them onto the side of the nut for locking.
The hardware in question is not spring hardware. What they have in common with previous products is their serrated form and functional purpose—locking a threaded connection. Toothed multi-claw washers have found widespread use in the manufacture of engines and other similar systems and components.
Such hardware is used for reliable locking of nuts on screw shafts and other parts. They are used only in conjunction with spline nuts and a shaft that has a longitudinal axial groove into which the internal protrusion of the washer fits. Thanks to these components, the washer cannot rotate around the axis.
When a slotted nut is pulled to it, one of the legs of the product is bent and inserted into the slot of the nut on the cylindrical side of the part (there are four slots in total). Thus, the nut, washer and shaft are securely interlocked with each other and do not unwind from vibration and deformation influences.
Toothed multi-jaw washers are manufactured according to DIN 5406, as well as according to the Russian GOST 11872. Splined round nuts - according to GOST 11871, DIN 981, DIN 1804. The specified standards for the described parts allow their manufacture for thread sizes from 4 to 200 mm.
Unlike the first three types, multi-claw washers are made not from spring washers, but from more ductile steels and alloys, which allow the teeth to be bent without harm to the product. Despite this advantage, such parts are considered disposable and must be replaced each time the connection is disassembled.
Types of retaining rings
There are two main types of locking ring connections:
- Internal. Serve to fix parts inside holes. Used for fastening bearings. The ears protrude inward. To install them, you need to compress them so that the length of the outer circumference decreases, insert the part into the inner groove and release the ears. The part will straighten and partially fall into the groove, and partially protrude from it. This protruding part will not allow the bearing resting against it to move in the axial direction. To remove the mount, the ears need to be spread apart.
- External. Used for fastening parts on shafts, axles, rods. They are put on the shaft from the outside, the ears protrude on the outer side of the product, the cut between them is minimal. For installation, the ears are moved apart, the length of the inner circumference of the product increases, and it can be put on a shaft or axle, placed in a machined groove. After this, the ears are released, the part is compressed under the influence of elastic forces, fits tightly into the groove, leaving an annular rim on the outside. It will not allow the part to move in the axial direction. To remove such a part, the ears are brought together.
Retaining rings also differ in size, thickness, deformation force, and the metal from which they are made.
In technology, locking rings without holes and ears are sometimes used. They are simply a partial coil of spring wire placed in a groove in a shaft or hole.
Such designs are used in lightly loaded components with small axial loads, such as starter drives or fastening the pressure gauge glass.
Buy washer GOST 10462-81
Externally, the GOST 10462-81 washer is a metal ring. The teeth are cut on the inside. When clamping, these teeth tend to cut into the material of the planes with which contact occurs. Thus, a kind of stopper is formed. The GOST 10462-81 toothed washer has proven itself when used in places where fastenings are subject to strong vibration.
If you are interested in a lock washer with teeth, standard GOST 10462-81, then you can purchase it from our OPM company. We have been working for a long time, so we can afford the constant availability of this product in our warehouses. In addition to this washer, you may also be interested in a flat washer of the GOST 11371-78 standard.
In order to buy a washer GOST 10462-81 , you need to contact our specialists by phone or leave a request in the feedback field in the Contacts section of our website.
*The use of the term “Analogue” does not mean 100% compliance.
To avoid misunderstandings when purchasing products, check the information with our consultants. All information on the site is for reference only and is not a public offer.
Source
Types of circlip pullers
In order to install and remove retaining ring fasteners, engineers have developed many models of different types of pullers. They all share common design elements:
- handles connected by a hinge;
- working bodies, or jaws, serving as a continuation of the handles on the other side of the hinge.
Structurally, there are two main types of ring removers:
- For external fastenings. When the handles are brought together, the jaws will diverge, stretching the part and increasing the length of the inner circumference.
- For internal fastenings. When the handles are brought together, the jaws will converge, compressing the part and reducing its outer diameter.
There are also universal pullers, the operating mode of which can be selected using a selector lever. Some devices are equipped with additional functions: a screw stroke, a lock in an extended or compressed state, gear lever mechanisms, etc.
Tool selection criteria
The correct choice is influenced by the approach, so you need to take into account a number of the following recommendations:
- If you plan to carry out long-term and serious work on repairing automotive equipment, it is recommended to buy a set of round nose pliers, which should consist of at least 4 copies
- For isolated cases of removing and installing rings, round nose pliers of the appropriate parameters are suitable
- The size of the jaws and handles affects the ability to access parts located in remote places. The length of the handles affects such a parameter as the ease of use of the tool
- Type of device - for external or internal clamps
- Availability of coating on the handles. This coating should not be smooth to prevent the tool from slipping in your hands. Expensive models have a coating on the handles, consisting of two components - plastic and silicone, rubber and silicone, etc.
- The presence of a protective anti-corrosion coating on the jaws of the tool - the absence of this coating will soon lead to the fact that the metal parts will begin to become covered with a rusty coating. As a result, this will lead to accelerated failure of the specialized tool.
- Type of release mechanism. What they are is described above, but which is the best - there is no consensus. All types of spring mechanisms perform their functions perfectly if they are made of high-quality materials
- The thickness of the jaws depends on the diameter that you plan to remove and install. If you don’t know the diameters, it’s better to buy universal pliers
- The shape of the sponges is straight or curved. There are two types of tools in shape, and if the device being fixed is located in a hard-to-reach place, then round pliers with bent jaws are better suited for such purposes
This is interesting! To prevent damage to the rings (especially for thin and small products), some models are equipped with special limiters for this purpose. Using the regulator, you can set the appropriate amount of compression or release force, preventing damage to parts.
Characteristics of circlip pullers
In order to navigate the variety of ring remover models offered by domestic and foreign manufacturers, it is useful to know the basic parameters that characterize these devices. These include:
- Jaw length. This parameter determines the puller's ability to work with fasteners located in recesses and other hard-to-reach places. It should be remembered that as the jaws lengthen, according to the law of leverage, the compression force decreases (with equal force on the handles)
- Length of handles. Affects the ease of use and the maximum force of compression or expansion of the ears.
- Tip shape. Both straight and curved at a certain angle (from 0 to 90°) are used. Straight ones allow you to develop more force, curved ones are more convenient when working in recesses.
- Diameter of tips. Should be as close as possible to the diameter of the holes in the ears. A tip that is too thick simply will not fit into the hole, and a tip that is too thin may not withstand the load and break. In addition, the ring can slip off from thin tips.
- Reverse bending of tips. Used on external pullers to open the ears. The bend increases the reliability of holding the ring.
These characteristics of circlip pullers are important for traditional designs. There are universal pullers available on the market. Their jaw tips are removable; they can be quickly removed and replaced with another pair that is more suitable for the given case. The selector switches the expansion/compression modes, an additional hinge allows you to change the angle of the jaws from 0 to 90°.
Some models are equipped with a force limiter. This allows you to adjust the maximum opening or closing force without damaging the thin rings.
When using universal pullers, you should be careful when choosing tips. It is permissible to use only those tips that are manufactured by the same manufacturer or indicated by him as compatible.
It is strictly unacceptable to share tips from different pairs that differ in length, angle of inclination or reverse bending. This may damage the device. Another unpleasant consequence is that the fastener may break off the jaws and go off into an unpredictable flight. Since metal stores a large amount of energy when compressed or decompressed, it can damage workshop equipment or cause serious injury to people.
When working with ring fasteners and pullers, it is mandatory to use personal protective equipment - unbreakable work glasses (face shield) and protective gloves.
Types of puller sets
Not a single master could manage to get by with the only puller for the internal retaining rings. To prevent assorted accessories purchased for the occasion from piling up in your toolbox, it makes sense to think about purchasing a set of circlip pullers. A typical set includes four pullers. Two are oriented to release circlips, with straight and curved tips. The other two are for clamping circlips. This kit allows you to work with most commonly found rings.
An interesting option might also be a universal set with single handles and sets of interchangeable pairs of jaws, secured to the base using a hex wrench.
Replacement kits include straight and curved tips, with elongated jaws that act on compression and expansion. The starter kit includes the most commonly used tips; others can be purchased as needed.
Licota
An interesting universal set ATB-0100 is offered by Licota. Its features are as follows:
- Operating mode selector. Allows you to change from squeezing to unclenching in one motion. Increases productivity and ease of use of the device.
- The rotary fastening of the jaws makes it possible to install and fix them at an arbitrary angle from 0 to 90°. With this tool you can get into the most difficult to reach places.
Force
A set of conventional pullers consists of a pair of devices that work to release. The second pair is for compression. Each pair has a tool with straight and 45° curved jaws. The average sizes of the devices will allow you to cope with the most common standard sizes and locations of locking ring fasteners. All elements of the set are placed in the slots of a convenient plastic suitcase
KING TONY
The company offers sets of circlip pliers housed in canvas apron pockets. Along the edges there are holes with eyelets for which the apron can be conveniently hung from a wall or workbench. This solution is designed for repair shops and vehicle service stations.
The kit includes four tools, two for releasing the locking rings. The other pair is designed for compression. Each pair has a puller with shorter straight jaws and longer curved jaws.
A matter of technology
in design and general functionality it is a close copy of the King Tony set. The same fabric apron, the same two pullers for compression and two for expansion.
The difference between the domestic set of retaining ring pullers is that the length of the jaws is increased compared to the analogue. This can help to reach fastenings that are inaccessible to conventional devices.
Removing the retaining rings
Removing locking split washers is carried out using two main methods:
- With partial disassembly of the main mechanism. In this case, the assembly containing the ring is dismantled. It is fixed in a vice or other clamping device on the workbench, and the part can be removed in the comfortable conditions of a warm and well-lit workshop.
- No partial disassembly. The unit to be repaired is not dismantled; its disassembly and replacement of parts occurs in less convenient conditions, conceived in the open air.
Lock removal and repair
Repairing interior door locks is difficult. The causes of malfunctions are different.
When using cheap, low-quality silumin door fittings, the 4-sided pin may break. The solution to the problem is to purchase a steel mechanism from trusted manufacturers and completely replace it.
A common problem with locks is the tongue not working properly. This is possible with a short pin. The square can move in the direction of the latch, pressing it, reducing operation.
Repair work on locks is carried out as follows:
- A long pin is purchased and the length is measured.
- Using a grinder, it is shortened to the required size.
- Then you need to disassemble the interior door lock.
- The square is changed, door fittings are installed.
When installing the handle, the base must cover all the holes that remain from the previous mechanism.
A lock with a handle can be replaced or repaired even by a novice master who knows how to use available tools.
Basic methods for removing retaining rings
Mechanics distinguish three main methods for installing retaining fasteners:
- Manual. The most common in everyday life.
- Mechanical. In order to install the outer ring, a mounting cone is used, equal in diameter to the shaft and centered on it. Using a special pusher, the part moves along the cone to the installation site, sliding from the cone into the groove.
- Auto. In mass production on automated lines, parts are placed using hydraulic or pneumatic drives.
There are many common methods among craftsmen on how to remove retaining rings without a tool specifically designed for this purpose. Awls, nails, thin Phillips screwdrivers and other improvised means are used.
To remove circlips without a puller, you can modify regular needle nose pliers.
Their ends are turned into a cylinder, with a diameter slightly smaller than the hole in the ears.
The pliers are also modified, in the side surfaces of the jaws, holes are drilled at the very end into which pieces of hardened rod of suitable diameter are inserted. In this way, the split lock washer can be either removed or put back.
The question often arises: how to remove retaining rings without lugs? To do this you will need two screwdrivers. One should open the stopper in its section so that its diameter increases slightly and it partially comes out of the groove. Using a second screwdriver, you need to pick up one of the ends of the ring and pull it out onto the surface of the shaft. Use the first screwdriver to grab this end, preventing it from sliding back into the groove. The second screwdriver needs to be run along the groove to pull out the remaining part of the lock washer from it.
What methods of installing split washers are known and how to remove them
There are three options for installing split washers:
- Manual is the most popular, which is used by craftsmen when repairing cars, motorcycles, bicycles and other types of equipment.
- Mechanical - based on the use of a mounting cone, which has the same diameter as the shaft. Using a special pusher, the part moves along the cone until it falls into the groove
- Automatic - installation and removal of rings is carried out using specialized hydraulic and pneumatic tools
Like most parts, retaining rings can fail. If after dismantling the part there is a loss of spring properties, it is recommended to replace it. Even if you manage to install it in its place, this does not mean that it will not fail in the process.
How to remove a retaining ring: technology and tools: types, techniques, characteristics
What is a snap ring
Due to the similar name and shape of the ring, many people confuse a locking ring with a lock washer. Despite the similarity in name and appearance, they have fundamentally different functions. A lock washer secures a threaded connection by preventing rotation of the nut or bolt head. A locking ring prevents axial movement of a bearing, shaft, axis of rotation or other structural element.
Retaining rings are made of high-quality spring steel; it has a narrow through cut and two areas along its edges, which are called ears. There are holes made in the platforms, by taking which, the cut can be reduced or enlarged. This changes the circumference of the product. On the mechanism parts that need to be secured against axial movement, a narrow shaft is machined or milled, slightly wider than the height of the ring. The ring, in a compressed or stretched state, is inserted into the groove and released. The part is compressed, enveloping the shaft, or expanded, fixing the bearing in the hole. To remove the fastener, you also need to unclench or close the ears.
Ring locking fasteners are widely used in all branches of mechanical engineering, from watchmaking to mining equipment, from paper machines to bicycles, from household appliances to spacecraft.
How to disassemble a door handle
Replacing a door handle is carried out for the purpose of repairing it due to breakage, wear, in the presence of abrasions, scratches, to improve the appearance, as well as when completely replacing the door block.
Before starting work, the type of mechanism and its features are established, because Some models with a simple device are easy to disassemble, while some have more complex elements, such as latches with locks. Carrying out such work is difficult. Therefore, it is necessary to consider replacing each type of door hardware separately.
Round
To disassemble a round door handle or knob handle, you must follow these recommendations:
- Using a tool at hand, hook up a decorative flange or trim with a simple keyless rotary lock.
- Use an awl, nail or special key to press the opened stopper.
- At the same time, carefully pull out the handle and remove it.
- From the side of the removed part, unscrew the bolts from the mounting plate and disconnect it from the door leaf.
- Unfasten the cylindrical mechanism, the latch.
- Remove the screws and detach the tab.
If there is no need to change, it is rearranged. It happens like this:
- Insert the latch so that the beveled part of the tongue faces the direction the door closes.
- Fasten with 2 screws.
- Insert the piece of hardware with the key drum on the other side of the door structure.
- Attach the clamping part and secure with 2 screws.
- The handle should turn without jamming and return freely to its normal state.
- Correct it. To do this, you need to carefully hold one side and align the other.
- Attach the decorative trim.
- Insert the rest of the handle.
The accuracy of installation and operation is checked both from the latch itself and from the drum device with the key.
Stationary
The stationary product has a simple design and is attached to the door with screws. Therefore, it rarely breaks, and is removed only when it is necessary to exchange it for a more functional model.
To unscrew the fittings for an interior door, you need to do the following:
- Inspect the door mechanism for the presence of an axle rod. To do this, hold the handle with one hand and turn it with the other.
- If the mechanism is located on a rod, remove one supporting side, the second comes off on its own.
- If the rod is not found in the handle, use a flathead screwdriver to remove the screws holding the handle in place.
- Remove it by gently pulling it towards you.
When unscrewing the mechanism, you must carefully hold it with your hand so that after removing the connecting screws, part of the product does not fall out of the connector and is damaged.
For interior doors
In the pressing device, the process of disassembling it causes difficulties. This is due to the fact that the fittings are attached to the axial rod and tightened with a 4-sided joint.
To repair the handle of an interior door, disassembling the push mechanism is carried out in 3 stages:
- Remove the screws that hold the cover in place and remove the plugs.
- Then you need to loosen the fixation of the rod and separate the 4-sided square.
- Remove the cover plate on the other side, the remaining part of the mechanism and the axial rod. After removing the parts, you need to pull the handle towards you.
The pressure product is ready for replacement or repair.
Types of retaining rings
There are two main types of locking ring connections:
- Internal. Serve to fix parts inside holes. Used for fastening bearings. The ears protrude inward. To install them, you need to compress them so that the length of the outer circumference decreases, insert the part into the inner groove and release the ears. The part will straighten and partially fall into the groove, and partially protrude from it. This protruding part will not allow the bearing resting against it to move in the axial direction. To remove the mount, the ears need to be spread apart.
- External. Used for fastening parts on shafts, axles, rods. They are put on the shaft from the outside, the ears protrude on the outer side of the product, the cut between them is minimal. For installation, the ears are moved apart, the length of the inner circumference of the product increases, and it can be put on a shaft or axle, placed in a machined groove. After this, the ears are released, the part is compressed under the influence of elastic forces, fits tightly into the groove, leaving an annular rim on the outside. It will not allow the part to move in the axial direction. To remove such a part, the ears are brought together.
Retaining rings also differ in size, thickness, deformation force, and the metal from which they are made.
In technology, locking rings without holes and ears are sometimes used. They are simply a partial coil of spring wire placed in a groove in a shaft or hole.
Such designs are used in lightly loaded components with small axial loads, such as starter drives or fastening the pressure gauge glass.
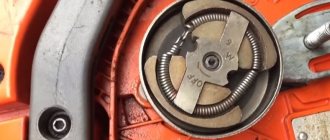
Where is the spindle lock button located on the angle grinder and how necessary is it?
The latch is a spring-loaded metal rod , on one end of which the button body is placed, and the other can fit into one of the holes in the body of the gearbox bevel gear. From the description it follows that the button should be located on the gearbox housing, not far from the spindle shaft .
Locking button on the body of the angle grinder Interskol. Photo VseInstruments.ru
By pressing the button and rotating the shaft, the locking rod gets into one of the holes on the gear. Holding the button in this position with one hand, unscrew/tighten the flat threaded washer that clamps the working tool with the other hand. The stationary spindle makes this operation possible.
Types of circlip pullers
In order to install and remove retaining ring fasteners, engineers have developed many models of different types of pullers. They all share common design elements:
- handles connected by a hinge;
- working bodies, or jaws, serving as a continuation of the handles on the other side of the hinge.
Structurally, there are two main types of ring removers:
- For external fastenings. When the handles are brought together, the jaws will diverge, stretching the part and increasing the length of the inner circumference.
- For internal fastenings. When the handles are brought together, the jaws will converge, compressing the part and reducing its outer diameter.
Yamaha diversion 600 reviews
Pros Excellent ergonomics. Acceptable acceleration dynamics. Good brakes. Excellent handling at all speeds. Small price. Cons Noisy clutch operation. The motorcycle was produced only for European and…
Any brand of door hardware can break. If your pen's lever has become loose or the mechanism itself isn't as good as it used to be, you can easily fix these problems by following these instructions. In 90% of cases, either the torsion spring or the key washer is to blame. These 2 parts press against each other to operate the lever or handle. This article will help you determine what's causing the problem, and then you'll learn how to remove the door handle and reinstall the unit.
What you will need:
• Expandable wrench
1. Remove the device from the door using a screwdriver. You don't need to remove the interior lock (what actually locks the door). Remove just 2 screws holding the lever on both sides of the door.
2. Unscrew the knob or lever using an adjustable wrench. Continue doing this until you have pulled the turning mechanism (the brass mechanism with the spring wrapped around it) out of the handle.
3. Remove the turning mechanism. You have now unscrewed the handle and can now remove the turning mechanism and spring. But this is not the same spring that caused the handle to sag.
4. Inspect all internal parts. It is these spare parts that make the handle mechanism tight. If the keyhole is loose, you will be able to see all these internal parts. If your device doesn't look like what we're describing now, stop. Perhaps you have a different lock model, and this article does not apply to it.
5. Using a screwdriver, unscrew the retaining ring. If you've loosened it enough, you can easily remove it with your finger. This part holds the torsion spring and key washer together.
6. Remove the top washer. Once you have removed the retaining ring, remove the washer underneath it (it cannot be broken).
7. Look for a break in the torsion spring. Typically, this is one of the most common causes of weakening leverage. Green arrows show 2 possible breakdown locations. If you are still not sure if your torsion spring is broken, then check to see if it is sitting tightly in place. Pull it out and inspect it. The picture below shows the handle with the new spring. If your spring is broken, you will need to buy a new one, but very importantly, look further in the article and check if the key washer is broken.
8. Pull out the torsion spring. We still need to check the torsion spring. Unscrew it using a screwdriver. If it is tight and difficult to unscrew, then this is very good. This means the spring is still strong and does not require replacement.
Characteristics of circlip pullers
In order to navigate the variety of ring remover models offered by domestic and foreign manufacturers, it is useful to know the basic parameters that characterize these devices. These include:
- Jaw length. This parameter determines the puller's ability to work with fasteners located in recesses and other hard-to-reach places. It should be remembered that as the jaws lengthen, according to the law of leverage, the compression force decreases (with equal force on the handles)
- Length of handles. Affects the ease of use and the maximum force of compression or expansion of the ears.
- Tip shape. Both straight and curved at a certain angle (from 0 to 90°) are used. Straight ones allow you to develop more force, curved ones are more convenient when working in recesses.
- Diameter of tips. Should be as close as possible to the diameter of the holes in the ears. A tip that is too thick simply will not fit into the hole, and a tip that is too thin may not withstand the load and break. In addition, the ring can slip off from thin tips.
- Reverse bending of tips. Used on external pullers to open the ears. The bend increases the reliability of holding the ring.
These characteristics of circlip pullers are important for traditional designs. There are universal pullers available on the market. Their jaw tips are removable; they can be quickly removed and replaced with another pair that is more suitable for the given case. The selector switches the expansion/compression modes, an additional hinge allows you to change the angle of the jaws from 0 to 90°.
Some models are equipped with a force limiter. This allows you to adjust the maximum opening or closing force without damaging the thin rings.
When using universal pullers, you should be careful when choosing tips. It is permissible to use only those tips that are manufactured by the same manufacturer or indicated by him as compatible.
It is strictly unacceptable to share tips from different pairs that differ in length, angle of inclination or reverse bending. This may damage the device. Another unpleasant consequence is that the fastener may break off the jaws and go off into an unpredictable flight. Since metal stores a large amount of energy when compressed or decompressed, it can damage workshop equipment or cause serious injury to people.
When working with ring fasteners and pullers, it is mandatory to use personal protective equipment - unbreakable work glasses (face shield) and protective gloves.
Advantages of knipex ring pullers
Knipex is deservedly one of the market leaders in ring pullers and other installation tools. High quality, precision manufacturing and high wear resistance have given Knipex products an excellent reputation. The manufacturer offers consumers several lines of semi-professional and professional devices, covering almost the entire variety of classifications.
Knipex models use the most advanced technical solutions, such as:
- screw hinge, guaranteeing exceptionally soft, smooth and precise movement of the handles;
- limit screw for adjusting travel, protecting the mount from excessive stretching or compression;
- a detachable locking device facilitates work and significantly increases its safety when installing external retaining rings of large sizes and thicknesses;
- forged tips combine unprecedented reliability, strength and elasticity necessary to mitigate dynamic loads;
- increased working area, preventing the ring from jumping off;
- special spring model, without holes for tools and increased thickness of working surfaces to 3.5 mm.
For work with complex mechanisms that combine power drives and precision control systems, Knipex universal kits are perfect.
The economical all-round starter kit includes only handles and the most popular replacement jaws of straight and curved profiles. Tips can be purchased as needed; a unique proprietary fastening system ensures their full compatibility.
Patented advanced metalworking technologies, most of which are developed and implemented by the company's engineers, high-quality production lines with a high degree of automation, ensure precision work accuracy, safety and long service life of products.
The ergonomic handle, lined with soft, pleasant-to-touch plastic, saves the worker’s effort, does not injure the palm and does not cause a feeling of fatigue even during a full shift.
The prices of the products are impressive, but only until they are compared with the prices of competitors offering products of similar quality. For those who plan large volumes of work, do not want to endure the inconvenience of a loose, inconvenient, inaccurate and fragile tool, who know the value of their hands, choosing Knipex products seems perhaps the most reasonable.
Removing the retaining rings
Removing locking split washers is carried out using two main methods:
- With partial disassembly of the main mechanism. In this case, the assembly containing the ring is dismantled. It is fixed in a vice or other clamping device on the workbench, and the part can be removed in the comfortable conditions of a warm and well-lit workshop.
- No partial disassembly. The unit to be repaired is not dismantled; its disassembly and replacement of parts occurs in less convenient conditions, conceived in the open air.
In both cases, it is better to remove the locking part using special pullers that match the type and size of the locking fastener.
If for some reason they are not at hand, craftsmen adapt one or another universal tool or modify it by making a puller with their own hands. This approach may be justified if you urgently need to remove one or two rings. For large volumes of work, factory-made pullers demonstrate their superiority in a number of ways:
- strength;
- reliability;
- convenience and speed of work;
- safety.
Experienced craftsmen have formulated a number of recommendations on how to remove the lock washer from the front suspension wheel bearing:
- The rack is removed from the car and clamped in a vice.
- The hub is knocked out with a hammer.
- Lightly tapping the side of the inner retaining ring with a small hammer loosens its contact with the groove.
- Next, using a suitable type and size ring remover, you need to remove the ring mount. In the absence of a standard tool, some craftsmen manage to remove the stopper with two thin screwdrivers.
- After pressing out and replacing the bearing, you need to check its position: the front end must be at the level of the far wall of the groove for installing the locking part.
- The ring is compressed with a puller and brought to the groove. After alignment along the entire perimeter, the handles are gradually loosened and the part falls into place.
Recommendations on how to remove the rear wheel bearing and its retaining ring are as follows:
- Remove the wheel and brake drum.
- Using a flat-head screwdriver, carefully pry up and remove the oil seal.
- Remove the ring from the inner diameter with a puller of suitable size and type.
- Remove the inner race of the bearing.
- Knock out the outer ring by lightly tapping it on the beard and remove it.
After lubricating or replacing the bearing, reassemble the assembly in the reverse order.
Lock washer - we will not allow arbitrariness on the part of the fastener
What can we do with such a locking connection? The main structural elements of these washers include the presence of teeth, tabs, notches, as well as a variety of shapes (grower, curved, disc-shaped and wavy). The material used for manufacturing is special spring steel. Unlike flat washers, lock washers provide sufficient contact area with the threaded surfaces, which prevents unscrewing. In fact, any washer that is not flat can be safely classified as a lock washer. Their use is envisaged in almost all connections.
When should you use lock washers ? These are situations in which during operation of the connection there is a possibility of exposure to large external loads, especially vibration ones. These conditions can cause the threaded connection to loosen or become loose, which this washer will not allow. This also includes the situation when they are used simply as insurance to provide additional strength and greater reliability. From this the following conclusion is drawn: locking washers can and should be used in any threaded connection, provided that the design conditions of the product or device provide such an opportunity.
Mechanics use three methods of installing rings in their work:
- Manual.
- Mechanical using a setting cone.
- Automatic using hydraulic or pneumatic drive. Used in continuous production.
An example of how to remove retaining rings with a ring puller in an auto repair shop using a vice and a hammer:
- The part is installed in a vice. The hub is removed with hammer blows. A ring remover removes the bearing ring.
- Using a puller, the bearing is removed.
- The parts are cleaned and lubricated. The inner ring is installed with a ring remover. A new bearing is installed.
- The outer retaining ring is placed in the knuckle socket.
It is more difficult to remove the retaining ring without a puller.
Craftsmen have already invented a number of ways to carry out such manipulations.
- Phillips screwdrivers, awls, and nails are used for the job.
- Modified needle-nose pliers imitate special pliers; their ends are ground in a special way to create cone-shaped tips. You can weld cones made by grinding from a bolt or stud.
- Modified pliers have holes drilled in the side to insert a strong rod that allows for mounting and removal of rings.
- If the ring does not have ears, take two screwdrivers: with one you open the groove, with the other you hook the ring from below and take it out.
Various “folk” methods of working with retaining rings delight inventors with their findings and quite reliably help craftsmen in their work.
Basic methods for removing retaining rings
Mechanics distinguish three main methods for installing retaining fasteners:
- Manual. The most common in everyday life.
- Mechanical. In order to install the outer ring, a mounting cone is used, equal in diameter to the shaft and centered on it. Using a special pusher, the part moves along the cone to the installation site, sliding from the cone into the groove.
- Auto. In mass production on automated lines, parts are placed using hydraulic or pneumatic drives.
There are many common methods among craftsmen on how to remove retaining rings without a tool specifically designed for this purpose. Awls, nails, thin Phillips screwdrivers and other improvised means are used.
To remove circlips without a puller, you can modify regular needle nose pliers.
Their ends are turned into a cylinder, with a diameter slightly smaller than the hole in the ears.
The pliers are also modified, in the side surfaces of the jaws, holes are drilled at the very end into which pieces of hardened rod of suitable diameter are inserted. In this way, the split lock washer can be either removed or put back.
The question often arises: how to remove retaining rings without lugs? To do this you will need two screwdrivers. One should open the stopper in its section so that its diameter increases slightly and it partially comes out of the groove. Using a second screwdriver, you need to pick up one of the ends of the ring and pull it out onto the surface of the shaft. Use the first screwdriver to grab this end, preventing it from sliding back into the groove. The second screwdriver needs to be run along the groove to pull out the remaining part of the lock washer from it.
Where are the split washers located and when will the use of pullers be needed?
Today there are a lot of mechanisms in which retaining rings are found. As mentioned above, they come in different types, but perform one function - they eliminate axial movement. Split washers are found quite often, and here are the main places where they are used:
- CV joints
- Car starter
- Half shafts
- Grenades
- Wheel bearings
- Door handles
- Pistons
- Hydraulic cylinder rods
- Screwdrivers, drills and hammer drills
- Turbines
The door handles use small parts, and the axle shafts have large devices. To dismantle certain products, you will need to use appropriate pullers. There are split washers that do not have ears with holes. These devices are found on automobile pistons and other types of equipment. Pliers are not suitable for removing and installing such rings. Their installation and dismantling is carried out using a screwdriver. The video below shows how to remove and replace the piston retaining ring using a screwdriver.
How to remove the retaining ring?
Any owner of a vehicle, regardless of how new his vehicle is, faces some operational problems. This can range from minor troubles such as a broken wheel to more serious problems, such as the need to replace a wheel bearing. Based on their level of experience in maintenance and repair, some car owners take the car to a service station, while others decide to carry out repair work themselves. And in this case, drivers who are not fully savvy often have various problems and many questions, for example, about how to remove the retaining ring. Especially for those who have encountered this problem in one way or another, we have prepared a step-by-step method for solving it.
Results
Car owners with minimal auto repair skills can replace the rear axle bearing on a Chevrolet Niva. These operations do not require special tools; replacement can be done on a suitable level area near the garage. This way you will not only save on service costs, but will also be confident in the quality of the work performed. It is recommended to combine bearing replacement with other maintenance work on the rear axle: repair of brakes, suspension, replacement of current seals.
Source
What is a snap ring?
Before performing all operations, you need to remember a little theory and understand what a retaining ring actually is? This is the name of a special element that reliably fixes various rotating and moving parts located both on the shaft and in the hole. At the same time, despite the name, the product has an open appearance. It is important to note that one of the main purposes of this element is considered to be high-quality fastening of rolling bearings. To do this, the rings are mounted strictly in the grooves or grooves made under them.
The production of retaining rings involves making them from carbon-containing or stainless steel, as well as from beryllium copper with the application of special coatings. Weight, size and other parameters are prescribed according to the existing standards GOST 13942-86 for domestic products and DIN 741 for foreign ones, and regulate production based on the subsequent installation unit. By the way, the installation location plays an important role, since there are inner and outer rings that are placed on the shaft or in the hole, respectively.
Installation and removal of lock washers
In order to install a lock washer, it is placed between the head of a threaded fastener (bolt, screw, etc.) and the surface into which it is screwed.
When the connection is tightened, it contracts, which is prevented by its elasticity.
As a result, a friction force is created that prevents the connection from self-unwinding.
Since the strength of the connection using lock washers is quite high, dismantling them is a more difficult task than installing them.
It should be noted that in some cases this requires the use of tools such as a hammer and chisel.
The main task is to slightly move this fastening element from its place, as a result of which the connection will loosen, and the threaded element can simply be unscrewed.
Another method is to use pullers designed specifically for “eliminating” lock washers and rings from connections.
Read also: DIY TV holder on the wall
However, it should be borne in mind that their use almost always leads to damage to these parts.
Topic of the section Electric motors, regulators, power plants in the Aircraft category - Electric Airplanes
; While I was tinkering with the turnstile motor, I broke the retaining ring (I think that’s what it’s called), can I replace it with something? Shaft diameter 3 mm. They .
Removing the retaining rings
Now, in order to clearly understand how to remove the lock ring of the front or rear hub, we suggest that you familiarize yourself with the following manual, following which you will be able to perform this procedure yourself. So let's begin:
- First, we dismantle the front suspension strut of your vehicle. After this, it should be clamped tightly in a vice.
- Now, using a regular construction hammer, you need to knock out the hub.
- Next, using the same hammer, you need to release the retaining ring from the part remaining in the hub.
- Using a special tool called a circlip puller, the fastener is removed from the bearing. However, if such a device is not at hand, you can use standard screwdrivers with the correct suitable diameter.
Actually, at this stage the dismantling ends. Using a puller, it is not so difficult to carry it out, but you will have to carefully pry off the ring with a screwdriver, and this may not work the first time. Therefore, we advise you not to save money and purchase such an effective tool, as well as buy retaining rings in advance to update them. If you need to replace a bearing, the next steps are:
- We treat all removed elements with special substances to remove dirt and grease.
- We apply lithol to them, while lubricating the internal and external surfaces.
- We install the inner retaining ring, and then place a new bearing in the housing.
- The outer ring is mounted in the fist socket.
- The stand is assembled and put back.
- Wheel alignment is set.
When you need to replace a rear wheel bearing, the initial steps will be slightly different. Thus, you will have to remove the wheel itself, from where the brake drum will be removed and the oil seal removed. After which, all operations are performed similarly to the methods described above.
Making a puller from old pliers
If you have broken pliers or pliers in your arsenal of tools, then you can use them to make a full-fledged puller. To make it you will need tools such as a grinder, a welding machine and a sharpening machine. Before you get started, it should be noted that you can use unnecessary pliers to make pliers for removing and installing external snap rings. The manufacturing instructions look like this:
- Initially, we cut off part of the jaws on the tool so as to align them
- After this, we prepare the tips for the future puller. We will make them from bolts or studs with nuts
- The threaded part of a bolt or stud is ground on a sharpening machine to form a cone
- Finished tips must be welded with the side of the cap to the pliers
- After this, we calcinate the tips so that when removing or installing retaining rings, we eliminate the possibility of damage to them.
- We remove the weld seams, and you can test the tool in action.
The resulting do-it-yourself puller for removing and installing split rings will please the craftsman when it is necessary to use it. After all, the main advantage of this tool is that it is made by hand, and instead of disposing of broken pliers, they can serve for a long time and effectively.
In conclusion, it should be noted that removing the retaining rings is not difficult if you have knowledge of the principle of operation of a specialized tool. Some craftsmen resort to dismantling rings using nails and other improvised means, but these methods are not only ineffective, but also dangerous. If you don’t want to buy new pullers, then make them yourself, which is not difficult to implement.
Design features
Stationary handles are produced without latches or locks. The fastening elements to the door block are screws or self-tapping screws. Such fixed structures are decorative in nature and serve solely for the movement of the door. They can be 1-sided or 2-sided of different shapes, connected by an axial element. They are installed on interior or plastic balcony door blocks, rarely on entrance ones.
Pressure products are 2 L-shaped levers, which are connected by a rod passing through the door block. In such a device, when turning, the halyard tongue enters the inside of the door and locks it. Using the elements, external and interior doors are mounted.
Requirements
In order for the fixing part to guarantee long service, it must meet the technical requirements set out in GOST 11872-89. The main requirements, according to GOST, include:
- calculating angle tolerance;
- the possibility of selling parts of a different thickness not specified in the tabular list;
- washers are also made without bent legs, but this is agreed with the buyer;
- the steel used to create the element must have a surface hardness ranging from 41.5 to 49.5 HRB.
Bronze can also be used as a material for manufacturing, but such a part will be 2 times more expensive. According to the requirements of the document, the fastening object cannot have visible defects. Cracks and chips will seriously reduce the fastening strength and other characteristics, so they are unacceptable. The technical requirements also include the dimensions indicated on the drawings.
The control method is a visual inspection of the part (for the presence of cracks and dents). It detects most defects, but still does not determine basic performance characteristics. To test the basic properties, the part is tested in special installations to study strength, reliability and hardness.