Home / Devices
Back
Reading time: 4 min
0
1985
Welding technology using argon gives the master many possibilities. The argon arc method will help connect steels, alloys and carbon metals of any thickness.
But a welder who works for himself may not have the opportunity to buy a production machine for such welding: some doubt the manufacturers, others will not find a machine at the right price.
This problem can be solved in the same way as many other technological problems in welding - by making a device for the argon arc technique yourself from an inverter. It can replace simple factory models without being inferior to them in functionality and ease of use.
We will tell you the basics of assembling an argon apparatus.
- general information
- Assembling a homemade argon apparatus What to assemble from?
- About the current source
- About the oscillator and protection unit
- About the burner and gas
- About the reducer and hose
general information
Argon welding differs from simple manual electric arc welding by the presence of a gas cylinder with argon and filler material. The remaining details of these methods are similar.
Argon arc welding (also known as TIG) necessarily involves the use of a tungsten refractory electrode, which ignites the arc. The seam is formed by an additive.
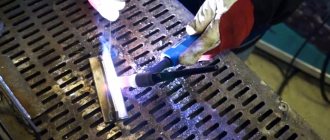
Tig welding itself is not complicated. Shielding gas is supplied from the torch to the weld formation area. Once the feed starts, the arc is ignited. To ignite the arc, the torch with the inserted rod is brought to the metal part.
At what point and why does arson occur?
This is done by the oscillatory mechanism. It charges the argon and directs its particles. This charge provokes the ignition of the arc.
The filler wire is fed into the welding cavity only after the electric arc has stabilized. It is moved either by the feeding mechanism or by the welder’s hand.
The metal is melted by an arc, and weld beads are formed from an additive. The latter melts simultaneously with the metal and merges with it into a homogeneous mass.
In the next block we will describe the assembly of the machine for argon arc welding and what is needed for it.
Accessories
Popular consumables:
aerosols with non-stick effect;
spirals for nozzles;
clamps for these tips;
guide parts of a special channel.
A glass nozzle for a TIG torch is often used. Advanced designs of this kind reduce gas consumption and allow you to work even in hard-to-reach places. Special glass is very resistant to heat and lasts quite a long time. The gas lens is the holder of the collet element. You can even make an ignition arrester yourself, using industrial devices with an operating voltage from 900 to 1300 V as a basis.
Assembling a homemade argon apparatus
What to collect from?
An argon welding machine does not require the purchase of complex components. We will tell you about the main components that will be needed for this equipment.
First, you must have a power source for welding. We will take an inverter welding device.
Next, you need an oscillator device, the purpose of which we talked about. In addition, we need a protective unit for the device. Secondary parts include gas cylinders, welding torches, reducers, gas hoses and connecting cables.
Next, we’ll talk specifically about each of them.
About the current source
Transformer and rectifier devices can be used as a source of welding current. But they are not technically new, and may not be able to handle some aspects of argon arc welding.
A functional inverter device will perform better in this role.
But making a machine for argon arc welding from an inverter device is somewhat more difficult. If you try to just connect an oscillator to it, the inverter may fail instead of cooking in an argon environment.
To prevent this from happening, you need to add a protective block to the device. It is assembled on the same board with the oscillator, and the board itself is equipped with an individual housing.
Welding technique
It has an indirect relation to the design of the device, but as background information you need to know that when TIG welding, the shortest possible arc is used - about 2 mm.
The electrode is guided only in a straight line, without carrying out movements characteristic of MMA perpendicular to the direction of the seam in two planes. This achieves two goals - the argon flow does not leave the weld pool area and does not allow it to oxidize, and it becomes possible to make a very thin weld, almost invisible on the surface of the metal.
VIEW Welding machine on AliExpress →
Assembling the device
Once you have all the components, you can begin assembly. First of all, connect the oscillator and the protective unit to the inverter apparatus. To understand how this is done, look for visual diagrams.
Connect the ground to the terminal of the oscillator device with the plus sign. Connect the cable that comes from the burner to the negative terminal. To weld aluminum, the cables must be connected in reverse.
Connect the burner to the gas hose and combine the cylinder with the reducer. Connect the hose with the burner to the gas hose and cables. Then connect the reducer and hose together.
Only after this can the device be connected to a regular power supply of 200 volts. The power of the oscillator should be about six volts. After all these steps, you need to configure the inverter equipment for argon arc welding technology.
Execution options
There are several approaches to making an argon welding machine yourself, differing in different levels of material costs. The cheapest option involves the use of ready-made modules and spare parts.
This approach allows us to obtain a simple-to-execute design of an inverter unit that can cook with both direct and alternating current.
In addition to this, you will need a set of hoses assembled with a factory torch and a special unit (oscillator), which greatly facilitates ignition of the arc. And finally, you will need to worry about purchasing a ready-made current supply delay unit.
The second approach to implementing an argon welding project is to make all the prefabricated modules and electronic boards yourself, which somewhat reduces the total costs. However, in this case, the performer will need high professionalism, as well as a sufficient supply of free time.
Regardless of the chosen assembly method, when making an inverter for argon welding with your own hands, you will need a housing in which all structural elements will be placed.
Before collecting spare parts and components, you should carefully study the electrical diagram of the future device and draw up a clear plan for connecting the electronic units.
Variants of schematic diagrams of a welding machine with an oscillator
The basis for a kit for argon welding is always a standard power supply, assembled on the basis of a transformer converter and a diode bridge with capacitive filter elements at the output. With their help, a reduced voltage is generated (from 45 to 60 Volts), which, after pulse conversion in the inverter, is rectified again and provides the required amount of welding current at the output.
Making an inverter module yourself is fraught with great professional difficulties. The easiest way is to use a ready-made pulse unit from a household appliance with suitable characteristics after it has been modified and reconfigured.
Setting up a homemade device
Even a factory device must be properly configured. This also applies to homemade equipment. This way the welding will take place without problems and will produce seams of good quality. We will note what you need to consider when setting up a converted inverter.
The first stage is sharpening the electrode rod. For this you need a special sharpener. The tip of the rod should be sharp, like a pencil.
A dull electrode will destabilize the welding arc, and it will not be able to follow one straight line. Therefore, it is impossible to avoid the sharpening stage.
After sharpening, the electrode is inserted into the torch holder. The latter is turned on by turning the valve on the cylinder and pressing the ignition button. Use the gearbox to correct the flow of argon.
It should not be more than fifteen liters per minute. After the gas flow has been adjusted, turn off the burner and pause the flow.
After this, connect the oscillator device with the protective block and bring the torch to the workpiece. Before doing this, place the mass on the metal. The burner should be very close to the metal.
After switching on, an electric arc will occur. Then open the gas and at this time move the burner a little further.
Now the converted inverter can work.
Features of argon welding
Welding in an argon atmosphere differs from conventional MMA in the following features:
- produced with constant argon blowing;
- current can be used either alternating or direct (reverse polarity);
- it is necessary to use a tungsten electrode;
- Only very thin sheets can be welded without filler wire;
- an oscillator is required to ignite the arc;
- The electrode wiring technique has certain specifics.
Let's consider all points separately. It may seem that they do not directly relate to the topic of how to make professional argon welding from a regular inverter, but knowing these subtleties, it will become easier to take into account all the features of the device and technology.
Argon welding scheme:
Why is argon needed?
This element (Ar) is part of group (18) of inert (can be seen in the periodic table) gases, which in the normal state practically do not interact with most substances, including metals, acids, salts and alkalis.
In terms of prevalence in nature, it is in third place after oxygen and nitrogen, which determines its rather low price compared, for example, with helium. Practical properties during welding are determined by its weight - it is more than twice as heavy as nitrogen and oxygen; when it appears in the weld zone, it simply displaces these gases and envelops the bath, preventing the occurrence of chemical oxidation reactions. This fact must be taken into account when welding outdoors - strong or moderate wind can deteriorate the quality of welding.
Welding current
Electric current with a voltage of 30-80 V and a force of 20-200 A - ranges used when welding non-ferrous metals in an inert atmosphere. The choice of current parameters is made according to special tables and depends on the diameter of the electrode and the thickness of the metal being welded. By choosing the right current characteristics, you can perform the most complex seams even on a homemade machine.
Electrode
A sharpened tungsten rod used as an electrode is convenient because:
- it does not melt (melting temperature is above 3000 0C, even at red heat it does not soften) at welding temperatures of non-ferrous metals;
- allows you to get a very thin arc, makes it possible to form a compact seam;
- evaporation of the electrode is no more than 0.01 grams per 1 m of seam.
At the same time, the industry produces such electrodes in more than 25 types; choosing the right one will not be difficult.
VIEW Tungsten electrodes AliExpress →
Filler wire
An additional material that, when welded, is melted by an electric arc and fills the seam.
When hardened, it forms a monolithic compound. On particularly thin sheets, wire is practically not needed, but for welding three-dimensional parts it is necessary. The wire material is selected in accordance with the metal being welded: for aluminum - aluminum, for stainless steel - from alloy steel of a certain grade.
VIEW Filler wire on AliExpress →
Oscillator
When welding with a direct current tungsten electrode, it is quite difficult to ignite an electric arc. If you perform this operation by touch, as when welding MMA, then the electrode may burn, the metal will melt, part of the material will be welded to the tip of the electrode, and other troubles.
An oscillator is a special device that generates a high-frequency current to supply an ignition pulse. Subsequently, it periodically generates supporting pulses that stabilize the arc and allows the welder to confidently work with both direct and alternating current.
Before you do a full-fledged argon TIG welding yourself, you need to buy an oscillator, for example UVK 7, or assemble it yourself according to one of the schemes:
№1
№2
But practice shows that a factory-made oscillator works much more reliably. And its price is not so high that you would spend a week searching for parts, assembling and configuring a homemade device.
Moreover, the factory oscillator is very easy to connect to almost any inverter or transformer type device - just use special connectors to hang it on the welding electrical cables. It works in parallel with the machine and does not affect the welding current, maintaining only the stability of the arc.
But when purchasing an oscillator, you should take into account that some models operate at an open circuit voltage of 40 V. If you are planning to weld at U = 28-30 V, the pulse generator may not work.
How to make a burner with your own hands
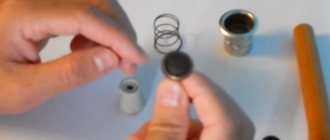
You can assemble a torch for argon arc welding with your own hands. An example of such a device is shown in the photo (photo 1). Next to the burner there is a clamp for fastening when operating in semi-automatic mode. The photograph shows the main components of the device (photo 2).
For the manufacture of the collet clamp, brass grade LS59-1 was used. The clamp at one end has four slots to secure the electrode and allow argon to pass through. In the burner body, made of brass of the same grade, six slots are cut and a mounting location for the nozzle is machined. The optimal material for making a burner is copper due to its lower resistivity and higher thermal conductivity. To seal between the body and the nozzle, you need to install a gasket made of heat-resistant rubber. A special steel nut is tightened by hand, fixes the electrode and at the same time presses the nozzle.
Photo 1. An argon arc burner can be air or liquid cooled.
The nut is sealed when it rests on a fluoroplastic washer. On the back side of the housing, the electrode is sealed with a second steel nut with a fluoroplastic sealing washer. A copper tube for supplying argon is soldered into a hole drilled in the housing. The seam is made with refractory silver solder. At the same time, the tube acts as a conductor for connecting the electrode to the welding machine. The seam area is covered with a thermally insulating sleeve made of fluoroplastic, which is loosely placed on the tube. At the second end of the tube, a structure is soldered for connecting the welding cable and fixing the handle.
Gas torch for welding
When carrying out gas welding work, a gas welding torch is used.
Gas torch welding heats and melts the metal, welding the parts together. The material for this type of burner is mainly brass, and the tip is copper. Aluminum alloys are used in the manufacture of gas burners to lighten the weight of the burner.
Gas burners are divided into two types:
- injection;
- not injection.
The difference between these two types is the amount of gas pressure that is permissible for use and in their design. Low pressure injection burners, not high pressure injection burners.
Since hot and welding work requires special skills from the work manufacturer, compliance with technical and industrial safety standards, as well as approvals, periodic certification is carried out in order to extend or obtain permission and admission to hot work of various categories. Read more about welder certification.
The welding work log is a special technical document that allows you to monitor the implementation of welding work, their quality, time of work, and other things. Read about the welding magazine here.
Pros and cons of argon technology
Scheme of argon consumable electrode welding.
When using argon arc technology when welding aluminum, a number of advantages can be identified:
- Low level of metal incandescence. This makes it possible to weld structures of any level of complexity without damaging the original forms.
- When argon is exposed to the welding seam, a strong connection of materials is ensured.
- With the help of a high temperature arc, welding work can be completed quickly.
The appearance of shortcomings when using this technology can only be affected by the inexperience of the person carrying out the welding work and the equipment, that is, the accuracy of its settings. Also, the cost of argon itself and tungsten-coated electrodes is significantly more affordable.
During argon arc welding, pure argon should be used for the quality of the work performed.
But since it is an expensive gas, you can resort to some tricks:
- Adjust the gas jet parameters yourself.
- If you install a solenoid valve in the welding machine itself, you can regulate the amount of argon supplied during welding.
When argon arc welding, helium can be used in a ratio of 30% argon to 70% helium, using constant current.
TIG welding with MMA inverter
- Log in to reply to this topic
#1 shaggy
I have this Sturm 220A inverter. Can it be used for TIG welding? naturally + argon cylinder and burner
- Top
- Insert nickname
#2 Shurpet
Heaviness is good. Heaviness is reliable.
- Participant
- Messages: 4,117
- Saratov city
I have this Sturm 220A inverter. Can it be used for TIG welding?
- 1
- Top
- Insert nickname
#3 schkaliki
- City: Tverskaya village.
- Top
- Insert nickname
#4 BAN
- Top
- Insert nickname
#5 shaggy
the cheapest Kharkov one I saw was about 200 UAH (800 rubles)
- Top
- Insert nickname
#6 Klyavlin Vasily
I also bought one with a faucet for 5 thousand. rub, I haven’t tried it yet, but the burner itself looks high quality.
I took it with a button + 12 volt power supply + solenoid valve from gas equipment, it turned out very convenient
- Top
- Insert nickname
#7 Simfer
- City: Simferopol
Excuse me, but how did you connect a burner with a button to a regular non-Tig inverter, and what does this magic word mean? A 12V power supply is what it’s for?
- 1
- Top
- Insert nickname
#8 di4
- Top
- Insert nickname
#9 Simfer
- City: Simferopol
I won’t argue or challenge, let those who know tell me how this can happen and whether it can happen at all
- Top
- Insert nickname
#10 Vadimovih
Hi all. I have a question . Will this inverter Resanta SAI-190 PN cook using TIG welding if an argon torch is connected to it? Thanks everyone in advance
- Top
- Insert nickname
#11 tehsvar
- City: Nizhny Novgorod
- 2
- Top
- Insert nickname
#12 Bizet
Please tell me, my Svarog inverter (Jasic j96) has a toggle switch for switching MMATIG modes. How are the operating modes of the device fundamentally different?
And also, is it really possible to use the TIG mode on such machines for welding low-carbon steels and stainless steel? In general, I bought it for RDS, but I’m tempted to try RADS.
- Top
- Insert nickname
#13 tehsvar
- City: Nizhny Novgorod
How are the operating modes of the device fundamentally different?
Lower arc voltage. The characteristics are slightly different.
- 3
- Top
- Insert nickname
#14 Shurpet
Heaviness is good. Heaviness is reliable.
- Saratov city
Bizet , J6501. I constantly forgot to switch it when I just started learning TIG DC with the “no HF” ignition, there wasn’t much difference.
- Top
- Insert nickname
#15 Peacemaker
- City: Irkutsk. Alexander, can you please
I have a TIG SAI 160 without the MMA function, I tried to cook with electrodes, but it cooks worse, the only problem was that with the oscillator the arc is ignited well and works with a button (in a limited space it is very convenient).
Assembly and performance testing
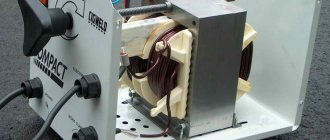
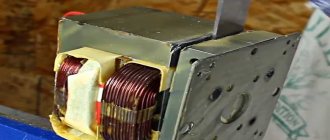
For the manufacture of an input converter for argon welding, a power transformer designed for an operating power of about 1 kilowatt and providing the required voltage reduction ratio may be suitable.
In addition, you should worry about purchasing an oscillator that produces an output voltage with an amplitude of two and a half to six thousand volts and an operating frequency of about 200-500 kilohertz. The specified parameters are selected so that air ionization occurs in the gap between the electrode and the workpiece, which significantly facilitates ignition of the arc.
Setting up the assembled argon welding device consists of checking the functioning of its individual components, including the oscillator, pulse converter and power supply. Testing of the operation of the main components of the unit is usually carried out in welding mode, that is, in real conditions. To do this, you will need to follow the following operating procedures.
Firstly, through the valves the required concentration of the gas mixture is set, determined by the value of the welding current and the parameters of the workpieces being fused.
