The installation technique for special profiled sheets used for roofing is relatively simple. To master it, it is enough to familiarize yourself with some of the features of the material used, as well as the basic rules for handling it.
Before covering the roof with a metal profile with your own hands, you need to carry out a number of preparatory operations of the following nature:
- determine the angle of inclination of the future roof;
- choose the right brand of profile sheet blanks for the selected angle of inclination;
- prepare fasteners corresponding to the selected material.
Complex roofing made of corrugated sheets
The complexity of installation work increases significantly in the case of erecting roofs of complex configurations.
Corrugated sheeting: pros and cons
For the production of profiled material, rolled steel of the highest and first grade with a thickness of 0.45-1.2 mm is used. In production, a relief in the form of longitudinal strips is formed by cold rolling. This treatment increases the rigidity and load-bearing capacity of thin metal, which makes it possible to use it as a coating for enclosing structures.
Corrugated sheet structure
Advantages of corrugated sheeting as a roofing material:
- Strength. Thanks to the stiffening ribs, the coating can withstand greater loads compared to rolled sheets of the same thickness.
- Low weight. The weight of 1 m² does not exceed 6 kg, so no reinforcement of load-bearing structures is required.
- Corrosion resistance. Galvanized and polymer coating reliably protects the metal from moisture.
- Durability. Corrugated sheeting can last 30 years or more depending on the thickness of the metal and the type of protective coating.
- Decorative look. Manufacturers paint their products in different colors, so you can easily choose the right roofing material.
- Quick installation. The roof slopes are covered with whole sheets, which are laid on the sheathing. This creates a minimum number of joints.
There are few disadvantages of corrugated sheeting; they can be successfully eliminated using available technologies:
- Low sound insulation. To reduce the membrane effect, which is expressed in a multiple increase in impact noise, elastic gaskets are used at the attachment points.
- Susceptibility to corrosion if the protective coating is damaged. In case of careless transportation and violation of installation rules, scratches may form on the surface. To prevent rust from spreading, they must be painted over with special aerosols or anti-corrosion compounds.
- High thermal conductivity of the metal. To reduce heat loss, effective heat insulators are used - basalt wool, foamed polymers.
Corrugated sheeting is an analogue of metal tiles. Given its general properties, with the exception of decorative relief, it is much cheaper, which allows you to save up to 40-50% on roofing.
Preparatory activities
Roof waterproofing
Before covering the roof with a metal profile, you will need to worry about arranging waterproofing that protects wooden structural elements and insulation from the destructive effects of moisture. Waterproofing, which is usually thick polyethylene film, is attached directly between the rafters using small construction brackets. There is a small overlap (about 15 cm) at the junction of adjacent film strips.
Particular attention should be paid to the fact that the protective waterproofing film should be stretched with a slight sag (about 2 cm), and between it and the insulating material there should be a small gap of about 2–3 mm.
Special ventilation slats are installed on top of the waterproofing layer, creating conditions for air circulation in the free spaces under the sheathing and eliminating the possibility of unwanted moisture vapors accumulating in this place.
Preparing the sheathing
To install metal profile blanks, a special lathing must be used that provides the required strength of the roof structure and resists its breaking or deflection under the influence of wind loads or the weight of fallen snow.
Scheme of a roof made of corrugated sheets
Manufacturers of roofing metal products indicate the main parameters and the procedure for arranging the sheathing for them in the instructions attached to the product. That is why, before starting work, it is recommended to carefully study all the instructions on the procedure for using the purchased material.
Fastening the end strip
After completing the installation of the sheathing, a special end board is nailed to its pitched edge, the width of which must correspond to the height of the selected roofing profile.
Thus, the general composition of the roofing covering, the final layer of which is the metal profile itself, usually looks like this:
- an internal facing layer, for example made of plasterboard;
- ceiling slats used as internal lathing;
- vapor barrier protective film;
- slabs of insulating material laid in the niches between the rafters;
- waterproofing protective coating, eliminating the possibility of moisture accumulation in the area where the insulation is located;
- special ventilation gap;
- external sheathing;
- the coating itself (metal profile).
Types of corrugated sheets
Corrugated sheets can be used not only as roofing material, but for the installation of fencing, fences, and facade cladding.
According to purpose, corrugated sheets are classified into types:
- Wall is quite thin, the thickness does not exceed 0.6 mm, and the wave height is in the range of 8-20 mm. It is mounted vertically, as it is not intended to bear heavy loads. Marked with the letter C, the height of the relief is indicated next to it. For example, C8, C10, etc.
- The load-bearing material is corrugated sheeting with a corrugation height of 60-160 mm and additional reinforcing grooves. Has increased strength and rigidity. Metal thickness up to 1.2 mm. It is used for constructing roofs and interfloor monolithic ceilings as permanent formwork. Denoted by the letter N.
- Roofing - can experience significant loads without deflections or deformations. A sheet with a thickness of 0.4-0.8 mm and relief waves from 20 to 45 mm ensure the bending strength of the material. Used as roofing for residential and industrial buildings.
It is not recommended to use corrugated sheeting that is too thin and has a low wave height for roof construction. Under the influence of snow and wind loads, it can become deformed. It is optimal to use grades NS35, MP35, C44, which provide the required strength.
What tools will you need?
When studying the instructions for installing corrugated sheeting for arranging a roof, it is impossible not to dwell on the list of necessary tools and materials, including:
- The corrugated sheet itself.
- Wooden material for making lathing.
- Antiseptics for treating wooden sheathing.
- Waterproofing products.
- Sound insulation products.
- Screwdrivers.
- Scissors for metal material.
- Hacksaws.
- Jigsaws.
- Hammers.
- Construction levels.
- Measuring instruments (rulers, tape measures).
It should be noted that this list is not exhaustive, since each roof requires an individual approach.
Protective coatings for corrugated sheets
To increase corrosion resistance, the surface of the sheet is coated with zinc and polymer compounds. The durability of the material and its price largely depend on their type, thickness and quality.
Made of zinc or its alloy with aluminum
It is applied by dipping the workpiece into molten metal, and the layer thickness reaches 30 microns. Galvanized steel is supplied for further processing with polymer compounds or used for the construction of commercial facilities where there are no high requirements for decorativeness and durability.
Polyurethane PURAL
The most durable polymer that retains its properties for up to 70 years. To protect against fading, polyamide or acrylic is added to the composition. A thin film - only 50 microns - has high mechanical and chemical resistance, protects the corrugated sheet from aggressive environmental influences, even in areas with harsh climates.
Polyester
An inexpensive coating with a thickness of 25 microns can last up to 25 years if handled with care. Does not fade for a long time and is not afraid of temperature fluctuations. To obtain a matte surface with a metallic sheen, a Teflon additive is used. Such protection is much stronger and prevents the development of corrosion for up to 40 years.
Corrugated sheeting coated with a polymer protective coating Polyester
Plastisol
The plastisol film is quite thick - 200 microns. It is made with embossing to resemble leather, stone, or wood. It is made on the basis of PVC with the addition of modifiers. The coating is very resistant to mechanical and chemical influences, but is sensitive to ultraviolet radiation and temperature fluctuations.
Appearance of plastisol coating
PVDF
This abbreviation refers to the complex polymer polyvinylidene fluoride with an acrylic additive. The protective layer is only 27 microns thick and is resistant to scratches, UV radiation and critical temperatures. Its service life is 40 years.
Selection and purchase of material
Not every brand of corrugated sheeting is suitable for installation on the roof. Basic requirements for the material:
- Availability of polymer coating. Of course, you can use regular galvanized corrugated sheeting, but this version of the material is less resistant to external influences.
- The thickness of the base is 0.5-0.7 mm. This material is strong enough to be used as a roofing covering, but is lightweight.
- Corrugation height 21-57 mm. The greater the profile height of the material, the greater rigidity it has.
How to handle metal profiles during transportation and unloading?
- It is best to transport metal profiles in bundles laid on a rigid base. It is not allowed for part of the bundle to hang outside the vehicle body.
- When loading by mechanized methods, equipment with soft slings should be used. When loading material manually, a fairly large number of workers must be involved.
- When transferring individual sheets, they are taken by the edges along the long side so that the sheet is positioned vertically. When carrying a sheet, 1 person should be involved for every one and a half meters of length. So, if the sheet is 4.5-5 meters long, then at least three people should be used to carry it.
Advice! The metal profile has sharp edges, so workers unloading must wear protective gloves.
- To lift sheets onto the roof, you should use logs that can be assembled from two boards. You need to lift the sheets onto the roof strictly one piece at a time.
Advice! It is strictly forbidden to lift sheets onto the roof or generally carry out roofing work in windy weather.
How to calculate corrugated sheets
The calculation is carried out to determine the number of roofing sheets, fasteners and additional elements. You can do it either manually or using an online calculator.
The simplest algorithm for pitched roofs. First, the area of the slopes is determined as rectangles, taking into account the overhangs of the cornice and pediment. For roofs of complex shapes - hip, multi-gable - the area is determined for each slope separately. These are rectangles and triangles, where you also need to add the width of the overhangs.
The next step is to determine the area of 1 sheet based on the working width. It is indicated in the marking and is given taking into account the installation overlap.
Now you can find the required amount of corrugated board. To do this, divide the area of the slopes by the area of the sheet. For complex figures, you need to perform the layout, and then calculate the actual consumption.
If the sheets are not long enough, they are stacked in 2 rows. The calculations need to include a vertical overlap size of 100 to 200 mm.
Additional elements are calculated according to the length of overhangs, ridge, joints and interfaces with other structures. The consumption of fasteners is determined from the ratio of 7-8 pcs/sq.m of roof.
Installation procedure
Rules for installing corrugated
sheets Laying roofing sheets with the appropriate angle of inclination overlapping should be carried out starting from the lower corner of the roof. In this case, the following installation sequence must be observed:
- the first sheet is placed on the roof so that its lower cut protrudes beyond the overhang by 3–4 cm;
- then this sheet is attached using special self-tapping screws with rubber seals, screwed into pre-prepared holes located at the bottom of the wave;
- in this case, each subsequent sheet, laid overlapping, is aligned along the edge of the previous one, and then also baited;
- after forming a row of 3–4 sheet blanks, the latter are finally fixed to the sheathing;
- the second and all subsequent rows of covering are installed in the same way (taking into account the overlap with the previous row specified in the instructions).
Fastening
The sheets are attached to the sheathing every second wave.
During work, you should always remember that movement is only allowed on finally secured workpieces. In this case, the feet should be placed in the grooves of the waves, resting on the elements of the sheathing.
The amount of overlap is important
How to choose the angle of inclination
If the roof area is small, the load allows the use of corrugated sheeting grades C18-C21. For large spans the load-bearing capacity of such materials is not enough, so more powerful types of flooring NS35-NS60 are used.
The minimum tilt angle for residential buildings should not be less than 10°, for industrial facilities or sheds - 8°. But with such a slope, the sheathing boards should be laid almost flush together. In addition, if the angle is too small, there is a high probability of leaks, which requires additional sealing of the seams and laying corrugated sheets with an overlap of 2 waves.
The angle of inclination of the roof is selected based on the loads and the architectural design. It should be taken into account that the more snow falls in the region, the steeper the slopes should be.
Wind load is a risk factor for roofs with a steep slope. In strong winds it needs to be made flatter.
The wind tore off the roof
The optimal angle for pitched roofs is 20-45°. It allows you to lay the lathing in increments of 500-1000 mm without the risk of deformation under load.
Installing the junction bar
Its length should be 2 meters. Lay the plank with an overlap of 200 millimeters. From the side where the plank joins the roofing sheet, secure it using 4.8 x 19 mm self-tapping screws. The pitch should be at least 400 millimeters.
Fastening to the wall is usually hidden under the cladding of the house with corrugated sheets, or is done using a groove (see: “How to properly cover a roof with corrugated sheets”).
Do-it-yourself installation of corrugated roofing, see video for details:
How to organize roof ventilation
A metal sheet is the boundary between warm and cold air, where condensation occurs when the temperature changes. To prevent moisture from accumulating in the under-roof space, it is necessary to arrange effective ventilation. For this purpose, a gap of at least 40-50 mm is provided between the surface of the roofing material and the waterproofing.
For proper operation of ventilation, supply and exhaust openings must be organized. These are cornice and ridge vents, which can be slot-shaped or point-shaped. Their function is to ensure free circulation of air due to draft. Slots 25-50 mm wide are arranged in the ridge or between the roof and the wall. For point vents, small holes measuring 10-25 mm are made.
To prevent moisture from getting inside through the vents, they are covered with aerators on top. They are a pipe with a visor or an overlay for a ridge strip. Made from metal profiles with polymer coating.
We cover the roof with corrugated sheets with our own hands: technology
The technology itself is quite simple. However, this does not mean that you can be lenient about your work. Follow all recommendations from the instructions. Carry out the work step by step, take your time - only then the result of the work will please you and your loved ones (similar article: “Roofing from corrugated sheets - technology”).
Tip: when purchasing material, ask the seller for instructions. Remember that it is very important for product manufacturers that their products are popular. Therefore, if a product is certified, it must have installation instructions. In addition, a high-quality product has greater reliability and warranty.
- Roof waterproofing. Never forget about this process. After all, properly installed waterproofing will reliably protect the roof from condensation that forms due to temperature changes. The necessary waterproofing is sold in hardware stores. The material should be located between the rafters on the roof sheathing. Tip
: When laying waterproofing material, leave a little slack.
Important
: The step on the sheathing must be uniform, because you will attach the corrugated sheeting to it (see article: “The pitch of the sheathing under the corrugated board”). - Performing ventilation. To do this, place wooden slats on the waterproofing layer. Do not neglect this process, because some moisture gets between the roof and the waterproofing.
- Installation of corrugated sheets. Before covering the roof with corrugated sheets with your own hands, study all the instructions.
How to lay corrugated sheets: installation rules
Following simple rules will help extend the service life of roofing materials:
- Careful handling during loading, unloading and transportation will help avoid scratches. If they do appear, you need to paint them over with aerosol or conventional anti-corrosion paints.
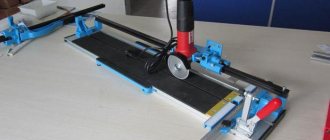
- You cannot use a grinder to cut sheets. It can damage the protective coating, which will cause rapid rusting. The best tool is electric metal shears or a jigsaw.
- All lumber for sheathing and counter-lattice must be treated against rotting.
- Galvanized self-tapping screws with a colored head and an elastic polymer washer are used as fasteners.
- Self-tapping screws need to be installed in the lower wave. The outer rows of sheets and overlaps are screwed into each deflection, the intermediate rows are screwed in a checkerboard pattern.
- Along the gables, corrugated sheeting is attached to each sheathing board to avoid blowing.
- You can move on the surface only in shoes with soft soles, so as not to leave dents.
- Strictly follow safety precautions.
To ensure tight connections and no corrosion, self-tapping screws must be of high quality. They are usually equipped with sealing washers. For fastening sheets, fasteners with a diameter of 4.8 and a length of 30-35 mm are recommended; for extensions - the same section, but longer - 50-60 mm.
Assembling the sheathing
A sheathing is mounted on top of the counter-lattice, perpendicular to it. It serves as the basis for the location and fastening of corrugated sheets, while simultaneously leveling the plane of the rafters.
Dry boards used for sheathing must be impregnated with a protective compound - this will prevent them from rotting and burning in the event of a fire.
The pitch of the sheathing under the metal profile is from 30 cm to 1 m, depending on the angle of inclination of the slope and the area of the roof. The optimal distance between the sheathing boards is 50–60 cm: unlike metal tiles, corrugated sheets do not require too frequent or carefully adjusted base pitches.
Installation of additional elements
Parts of various profiles serve to protect joints from water ingress and decorate the roof, giving it a finished look.
Horse
The profile strip can be triangular, trapezoidal, round or rectangular. To ensure that it adheres tightly to the corrugated sheet, the contour of the additional element is sealed with foam rubber. By allowing air to pass through, it simultaneously prevents insects and small birds from penetrating under the roof.
Installation of a ridge with ventilation
The ridge is equipped with end caps. When fastening, it is laid along the direction of the prevailing winds and joined along the length overlapping the previous part or connected with a locking fastening.
Attaching the ridge strip
Eaves filing
To design eaves overhangs, perforated or solid soffits are used. They do not interfere with the ventilation of the under-roof space, protecting it from wind, debris and birds.
Soffits are attached across the eaves overhang. For installation, a frame of bars and guides is arranged. If the width of the overhang exceeds 85 cm, it is recommended to fix the spotlights at at least 3 points.
We install the end overhang assembly on the roof
A roof made of corrugated sheets with your own hands definitely needs filing. It should be installed after installing the cornice strip. As a rule, the fastening material in this case is nails and screws.
Important: The location of the eaves strip must be below the waterproofing carpet. This is necessary so that condensation can roll down the waterproofing, fall on the eaves strip and flow to the ground.
A do-it-yourself metal profile roof must have a cornice strip under the corrugated sheeting. It is important to provide ventilation. This is necessary to eliminate water vapor. Be sure to install a seal that should not let air through.
Maintenance and repair of corrugated roofing
Profiled sheet is an easy-to-maintain material. It can be washed with water, but should not be scrubbed with a wire brush. It is recommended to remove snow with a shovel with a plastic tip, without using excessive force.
Repair is usually required if pockets of corrosion have occurred. They need to be cleaned, degreased and coated with anti-corrosion paint.
If a leak occurs where the fastener is installed, the gasket must be replaced. From exposure to the sun or improper installation, it can crack and the connection will lose its tightness. Large cracks should be filled with polyurethane or silicone sealant.
Painting over scratches and abrasions on corrugated sheets
Installation of end and ridge strips
The length of the end strip should be about 2 meters. When building up 50–100 millimeters, overlap the planks on each other. According to experts, it is best to lay the end strips from the side of the roof overhang, gradually directing them towards the ridge.
If there is excess length, cut it off at the ridge. The end strip must occupy at least one wave of the profiled sheet. The plank is fastened not only to the end board, but also to the profile sheets. To do this you will need the same screws. The step should be up to 1 meter. Use smooth ridge elements when installing the ridge strip. Be sure to install ventilated insulation. It should be located between the ridge elements and sheets of material with a trapezoidal profile. If the sheets include fine corrugation, then install ridge seals.
The difference between a drill for metal and wood sheathing
The type of base to which the metal profile will be attached is a key point when choosing fasteners. There are two types of fasteners for sheathing: for wooden or for metal structures.
When attaching corrugated sheets to metal purlins, it is important to choose self-tapping screws with a wide drill bit that allows you to pass through the corrugated sheet and the metal base of the structure. This type of hardware is equipped with a waterproofing washer with a rubber gasket.
With a metal base, you need to choose fasteners taking into account the thickness of the metal:
- mount 4.8*19 mm - for metal slats up to 3 cm thick;
- self-tapping screw size 5.5*25 mm is suitable for metal thickness from 3 to 6 mm;
- fasteners 5.5*35 mm and 5.5*50 mm are used for metal purlins up to 12 mm thick.
Attaching corrugated sheets to wooden sheathing is characterized by its own characteristics. This type of fastener has a large thread pitch. This type of self-tapping screws has a rarer thread than fastenings for metal. Fasteners for wood have a thinner drill bit, which also goes to a cone, which ensures a tighter fit of the screw in the wooden structure.
Wood fasteners are longer than metal fasteners.
For wooden sheathing, use self-tapping screws measuring 4.8*28 mm or 4.8*35 mm.
Experts advise choosing fasteners in the following quantity: 20% for a long rod and 80% for a short version.
If, to fasten a metal profile, you give preference only to self-tapping screws with a long drill, then the quality of work will not deteriorate, but it will be more convenient and easier to tighten a short rod.
What is prohibited to do
Due to the fragility of the covering material, sheets for roof installation should not be fed slack. This process should be organized using installed boards.
It is not recommended to transport corrugated sheets on vehicles whose body or trailer length is significantly less than the length of the metal profile. Sagging of the corrugated sheet, even when packaged, can lead to its deformation.
It is forbidden to walk on the laid sheets in heavy shoes, or step on them in places where there are no sheathing boards.
Metal profiles are a very fragile material; heavy products and construction tools cannot be placed on them. If scratches occur, you must use the specialized paint that comes with the material. It will hide these defects.
Preparing the base
To install a high-quality roof made of metal profiles, you need to correctly assemble the substrate. For any roof structure, waterproofing work must be carried out.
To do this, it is recommended to purchase a modern waterproofing material - superdiffuse roofing film. It is spread along the rafter legs so that it sag slightly between them.
An overlap of 15-20 cm wide is made between the individual panels of film. The film can be secured using galvanized nails with flat wide heads or staples driven in with a construction stapler.
To ensure timely removal of moisture from the under-roof space, it is necessary to leave a gap for the passage of air between the waterproofing and the roof covering. To do this, install a counter-lattice made of timber with a cross-section of 50 mm. The bars are nailed onto the rafter legs using galvanized nails.
Lathing
It is very important to build the sheathing correctly, since it is on this flooring that the main covering will be laid. The sheathing can be solid or lattice with different spacing of elements. The choice of sheathing design depends on two factors:
- Slope slope;
- The rigidity of the material, which in turn depends on the height of the corrugation.
The greater the slope of the slopes and the greater the height of the corrugation of the corrugated sheeting used, the larger the step between the sheathing elements can be made.