Unlike a welding transformer, an inverter is compact, light weight and high efficiency, which explains its popularity in home workshops, small garages and workshops.
It allows you to cover most needs for welding work, but for high-quality cutting you need a laser machine or plasma cutter.
Why do you need a plasma cutter?
In some cases, a plasma cutter is an indispensable tool for processing metal products, since the temperature of the plasma leaving its torch reaches 25-30 thousand degrees. Thanks to these characteristics, the scope of application of plasma cutters is quite extensive:
- production of various types of metal structures;
- laying of pipelines;
- fast cutting of any metals, including high-alloy heat-resistant steels containing titanium, nickel and molybdenum, the melting point of which is above 3000°C;
- shaped cutting of thin-sheet materials (conductive) due to high cutting precision.
In addition, plasma cutters (as an alternative to laser cutters) are used as part of automatic lines at large enterprises for cutting parts of various configurations from sheet materials.
It is necessary to distinguish between concepts such as plasma cutting and plasma welding. The latter is available only on expensive, professional equipment, the cost of which starts from 100 thousand rubles.
Inverter or transformer
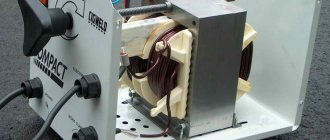
There are various methods, as well as drawings and diagrams, according to which you can make a plasma cutter. For example, if it is made on the basis of a transformer welder, then the plasma cutter diagram provided below is suitable, which describes in detail what parts are needed to manufacture this module.
If you already have an inverter, then in order to convert it into a plasma cutter, you will need a little modification, namely adding an oscillator to the electrical circuit of the device . It is connected between the inverter and the plasma torch in two ways, as shown in the following figure.
The oscillator can be soldered independently according to the diagram provided below.
If you make a plasma cutter yourself, then choosing a transformer as a current source is not recommended for several reasons:
- the unit consumes a lot of electricity;
- The transformer is heavy and inconvenient to transport.
Despite this, the welding transformer also has positive qualities, for example, insensitivity to voltage changes. It can also cut thick metal.
But the advantages of an inverter-based plasma cutting machine over a transformer unit are obvious:
- light weight;
- high efficiency (30% higher than that of a transformer);
- low electricity consumption;
- High-quality cutting thanks to a more stable arc.
Therefore, it is preferable to make a plasma cutter from a welding inverter than from a transformer.
Electrodes used
Electrodes play an important role in ensuring the arc burning process and cutting with a plasma torch. Beryllium, hafnium, thorium and zirconium are used in their manufacture. Due to the formation of a refractory surface film, the electrode rod is not subject to overheating and premature destruction when working at high temperatures.
When buying electrodes for a homemade plasma cutter, you should find out what material they are made of. Beryllium and thorium produce hazardous fumes and are suitable for use in special environments that provide adequate protection to the welder. Therefore, for home use it is better to purchase hafnium electrodes.
Typical plasma cutter design
To assemble a device that will make air plasma cutting of metals possible, you will need to have the following components available.
- Power supply. Required to supply electric current to the burner electrode. The power source can be either a transformer (welding) that produces alternating current, or an inverter-type welding unit, the output of which is direct current. Based on the above, it is preferable to use an inverter, and with an argon welding function. In this case, it will have a connector for connecting the hose package and a place for connecting the gas hose, which will simplify the modification of the device.
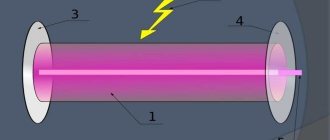
- Plasma torch (cutter). It is a very important piece of equipment that has a complex design. In a plasma torch, a plasma jet is formed under the influence of an electric current and a directed air flow. If you decide to assemble a plasma cutter with your own hands, then it is better to purchase this element ready-made on Chinese websites.
- Oscillator. Required for effective arc ignition and stabilization. As mentioned above, it is soldered according to a simple scheme. But if you are not strong in radio, then this module can be bought in China for 1,400 rubles.
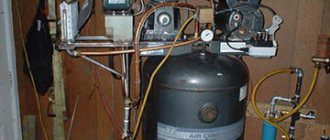
- Compressor. Designed to create an air flow entering the burner. Thanks to it, the plasma torch is cooled, the plasma temperature rises and the molten metal is blown away from the cut site on the workpiece. For homemade work, any compressor that is usually connected to a spray gun is suitable. But to remove water vapor from the air pumped by the compressor, you will need to install a filter drier.
- Cable hose. Through it, current flows into the burner, facilitating the ignition of the electric arc and ionization of gases. Compressed air is also supplied to the burner through this hose. You can make a hose cable yourself by placing an electrical cable and an oxygen hose inside, for example, a water hose of a suitable diameter. But it’s still better to buy a ready-made hose package, which will have all the elements for connecting to the plasmatron and to the unit.
- Ground cable. It has a clamp at the end for attaching to the metal being processed.
APR-91 – conversion scheme
A detailed drawing for the manufacture of a plasma cutter is shown for the APR-91 inverter. Experts consider this model the most convenient for remodeling.
In addition to the inverter and compressor, many parts are used in the manufacture of a plasma cutter. From the plasma torch itself, to the cables and hose connected to it.
Electrodes and cable
Electrodes are selected from their refractory metals: beryllium, vanadium, tungsten. They must withstand the temperature of the arc and not collapse for a long time. Their length relative to width is 1.5 - 1.8. Long parts will burn quickly.
The cable ensures a uniform supply of current to the plasma formation zone. It must have a cross-section of 12 mm2 and good insulation.
Air hoses from the compressor to the holder are connected for high pressure.
Ventilation
Instructions for safe working practices require that ventilation be present . The hood of the inclined structure should be located at a height of 35 cm from the cutting plane. The power of the exhaust equipment is adjusted so that all smoke from the burning metal is drawn into the system. In this case, there should be no turbulence in the working area.
Assembling the device
After all the necessary elements have been prepared, you can begin assembling the plasma cutter:
- connect a hose to the inverter through which air will be supplied from the compressor;
- connect the hose package and ground cable to the front side of the inverter;
- Connect the torch (plasma torch) to the hose package.
After assembling all the elements, you can begin testing the equipment. To do this, connect the ground cable to the part or metal table on which it is placed. Turn on the compressor and wait until it pumps the required amount of air into the receiver. After the compressor automatically turns off, turn on the inverter. Bring the torch close to the metal and press the start button to create an electric arc between the torch electrode and the workpiece. Under the influence of oxygen, it will turn into a stream of plasma, and metal cutting will begin.
Options for direct and indirect action
The design of a plasma cutter torch is quite complex; it is difficult to do at home, even with various machines and tools, without a highly qualified worker. Therefore, the manufacture of plasma torch parts should be entrusted to specialists , or even better, purchased in a store. The direct action plasma torch torch was described above; it can only cut metals.
There are plasma cutters with indirect action heads. They are also capable of cutting non-metallic materials. In them, the role of the anode is played by the nozzle, and the electric arc is located inside the plasma cutter torch; only the plasma jet comes out under pressure.
Despite the simplicity of the design, the device requires very precise settings; it is practically not used in amateur production.
Tips for using a homemade plasma cutter
In order for a homemade plasma cutter from a welding inverter to work effectively and for a long time, you should listen to the advice of specialists related to the operation of the device.
- It is recommended to have a certain number of gaskets that are used to connect the hoses. Their presence should especially be checked when the unit has to be transported frequently. In some cases, the absence of the necessary gasket will make the device impossible to use.
- Because the cutter nozzle is exposed to high temperatures, it will wear out and fail over time. Therefore, you should worry about purchasing spare nozzles in advance.
- When selecting components for a plasma cutter, you should consider how much power you want to get from the unit. First of all, this concerns the choice of a suitable inverter.
- When choosing an electrode for a burner, if you make it yourself, you should give preference to a material such as hafnium. This material does not emit harmful substances during heating. But it is still strongly recommended to use ready-made cutters manufactured at the factory, in which all parameters for air flow swirl are observed. A homemade plasmatron does not guarantee high-quality cutting and quickly breaks down.
As for safety rules, work should be carried out in special clothing that protects against splashes of hot metal. You should also wear chameleon welding goggles to protect your eyes.
Examination
To check the assembled device, it is necessary to make a test cut of the metal:
- supply power to the transformer;
- after 10 minutes, turn off and check the windings for heating;
- if they are cold, reapply power;
- turn on the compressor;
- after filling the receiver, open the air valve and direct the air flow through the plasmatron;
- by pressing the microswitch button, light the auxiliary arc;
- If available, make a test cut of the metal.
After completing the tests, disconnect the device from the mains and again check all elements for heating.
