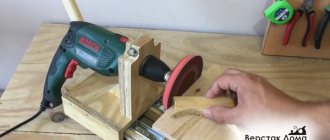
A stand for a drill allows you to significantly expand the functionality of hand tools, which is not difficult to make with your own hands. Placing a drill on such a stand (it can also be made rotary) allows you to turn an ordinary hand tool into an effective drilling machine that can be successfully used to perform various technological operations.
Homemade drill stand made from wooden elements
Advantages and disadvantages of a homemade stand
A homemade drill stand has a number of advantages, the most significant of which include the following:
- manufacturing such a drilling machine costs much less than purchasing a serial model of such a device;
- You can make such a tripod for a drill from improvised materials, using components from old and unused equipment, which can always be found in any garage or home workshop;
- drawings of similar devices of various designs and even video instructions for their manufacture are in the public domain, finding them will not be difficult;
- If you wish, you can always create a machine from a drill of your own design, which in its characteristics and ease of use will surpass all existing models.
The simplest factory rack made in China can be bought very inexpensively (from 1,200 rubles), but its functionality and quality will not satisfy all craftsmen - too often there are complaints about significant play in budget models
But, of course, making your own device for securing a drill also has its disadvantages, which include the following:
- in order to produce some parts of such racks, the use of lathes, welding and other equipment is required, which naturally increases their cost;
- due to the fact that the structural elements of such drilling devices are not fitted very well, play often occurs in them, and this negatively affects the accuracy and quality of the processing performed with their help;
- a homemade stand for a drill is quite limited in its functionality; for example, it cannot be used to make holes located at an angle.
Drill stand made of wood: option No. 1
A stand option with fairly detailed assembly instructions in the format of a photo selection illustrating the manufacturing stages. To create this model, you will need boards with a thickness of at least 20 mm, a small box with furniture guides and a threaded rod for the moving part of the stand, a couple of dozen short and three dozen long screws, wood glue plus a standard tool in such cases, such as a saw, a clamp , screwdriver, drill and sandpaper for finishing.
Wood stand assembly: general view
DIY drill guide
We bring to your attention the third budget version of a homemade device. The design is also quite simple to manufacture, but is made of metal. This idea belongs to the author of the YouTube channel Be Creative.
Materials that will be required for the manufacture and assembly of the drill stand:
- profile pipe;
- metal bushings;
- clamp for drill;
- steel plates;
- guides;
- return springs.
First of all, it is necessary to make a movable part of the stand to which the electric drill will be attached. In the previous version it was made of wood, in this one it is made of corrugated pipe.
Cut a piece of square profile and cut out the ends of the saddle. Then we weld two bushings to it.
In the middle you need to weld a clamp to attach the electric drill. It can be made from a piece of round pipe, two nuts and a bolt.
Next, we cut off three pieces of steel strip and weld the base of the stand (support platform) from them.
We weld guides made of smooth reinforcement to the base. We put springs on them.
We fix the drill with a clamp, and then put the moving part on the guides.
The homemade drill stand is ready. Yes, it looks very primitive and flimsy, but it can be made very quickly from scraps of metal.
The detailed manufacturing and assembly process of this structure can be seen in the video below.
Wow??? Genius Idea
Metal drill stand: option No. 2
If you don’t have time to study drawings and various options for rack designs, then we invite you to watch an informative video about creating a very functional mechanism that can satisfy the needs of most home craftsmen.
The result of the work will be a stand like this with an original cable drive of the carriage
Main elements of the rack
A stand for a drill, which is not at all difficult to make with your own hands, allows you to use this hand tool to perform various technological operations. The functionality that such a drill machine has is limited only by the power of the hand tools used to equip it.
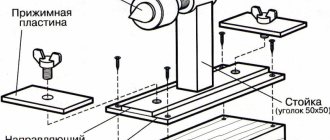
Diagram of one of the options for drilling stand design
If a homemade stand for a drill is made only in order to perform only drilling operations with its help, then its structural elements can be made from wooden blocks. If you are interested in a mobile drill stand, which is highly versatile, then for its manufacture you must use structural elements made of steel. Such drill stands consist of the following structural parts:
- a supporting frame on which all the necessary elements of the machine are mounted;
- racks are a guide for the drill, on which it is fixed and moves together with the carriage in the vertical direction; This movement is controlled by a special handle and a number of additional elements;
- handle - an element that controls the vertical movement (feed) of the drill and the tool fixed in it;
- additional components designed to make the drill attachment more functional.
According to the drawings below, you can assemble a rack like this:
Drawings of rack parts (click to enlarge)
A homemade drill holder is an easy-to-install device, and equipping it with additional components allows you to turn such a drill holder into universal equipment with which you can perform various technological operations. Before you start making such a holder for a drill with your own hands, you need to understand its design features.
Do-it-yourself vertical stand for a screwdriver
Now let's look at the second option for a homemade stand. In general, the design is very simple, but most importantly, it works. The idea belongs to the author of the YouTube channel Gökmen ALTUNTAŞ.
In this case, it is quite compact, since it is designed for use in conjunction with a screwdriver.
However, you can adapt it for an electric drill by slightly increasing its size. And then you will get a homemade drill stand.
The advantage of this design is that its manufacture requires a small amount of materials. You don’t even have to buy many parts - you can find them in the garage.
We will make the drill stand stand from 20 mm thick plywood. You can also take a piece of board.
First of all, we saw off a blank of the required size from the plywood. Then we mark and drill two holes in it. Using epoxy glue, glue the guides.
We round the sharp corners of the base on a grinding machine. We make a movable platform from wood or plywood.
In the moving part we drill holes with a diameter of 19 mm for the bearings. Lubricate the outer part of the bearings with epoxy glue and insert the bearings into the holes.
We screw an adapter into the drill chuck, onto which we put a round tube. It must not only be put on, but firmly fixed with epoxy glue.
In the moving part we drill seats with a diameter of 29 mm for round bearings.
We put the first bearing on the tube and press it into place from the bottom of the platform. Then we put the second bearing on the pipe and also press it into the seat. For reliability we use epoxy glue.
We put springs and washers on the guides. Then we install a movable platform with a drill chuck.
It will be necessary to press wooden “plugs” onto the upper part of the guides to limit the stroke.
We clamp the shank of the drill chuck in the screwdriver chuck, and then use a crown of a suitable diameter to drill a hole in the base.
At this point, the process of making a homemade product can be considered complete. Then all that remains is to paint everything or coat it with mineral oil. Of all the racks, this option is the simplest and most cost-effective.
You can watch the author's video for details on how to make this device.
Awesome Homemade Drill Guide // El Yapımı Matkap Kılavuzu v2.0
Device bed
The frame for the drilling device from the drill is made of metal (10 mm thick) or wooden (more than 20 mm thick) sheet. The massiveness of the bed that you will use as a base directly depends on the power of the drill used. The dimensions of the frame for a drill machine depend on the specifics of the work performed on such equipment. You can use the following recommendations for choosing frame dimensions:
- machines for vertical drilling - 500x500 mm;
- equipment for performing various technological operations - 1000x500 mm.
The metal frame is a thick plate with welded corners
The frame, made of metal or wooden sheets, is a very simple structure. A stand is placed vertically on it, the stable position of which is ensured by a special support. Such structural elements can be secured to each other using screw connections.
DIY drilling machine from a stand and a hand-held electric drill.
Good afternoon everyone! In this review, I will show how I managed to make a small, simple drilling machine from a purchased drill stand and an existing, but rarely used, hand-held electric drill. I tried to make a complete and convenient device for amateur and household needs, without claims for professional use. As always, the review contains a description of the process, drawings, and the result obtained. All previous years, for drilling holes, I got by with a screwdriver, and very rarely with a hand drill. This was quite enough; there were no problems on parts with a small thickness. Another issue is drilling clearly vertical holes in thick material; sometimes you can control the verticality of the drill, sometimes not so much. Drilling a smaller hole with a larger diameter drill: often, when drilling, the original center of the hole could shift, depending on how the drill finds itself there.
To avoid all these problems, critical parts and workpieces must be drilled on a drilling machine, which naturally does not exist. I have already reached the point where I need a drilling machine, but I don’t know exactly what I want from it, what parameters are important to me, and which one I should choose. Therefore, in order to gain experience and shape my future needs, for a better and more effective investment in a drilling machine in the future, I decided to practice on a homemade machine from a stand for a hand drill.
I could just buy a stand, place the drill in it and use it, but I needed to make it easy to turn the drill on and off, as well as conveniently adjust the rotation speed. Therefore, I decided to make a small pedestal for the stand, with controls placed in it, as well as a box for drills and other accessories. And at the very base of the rack I decided to make a wider table for placing and fixing workpieces for drilling. During the design process, we came up with this design (the stand and drill in the model are different, taken from 3D Warehouse):
The design of the box is as follows, with an organizer installed in it for frequently used drills:
Drawings with dimensions:
Having studied the Internet and reviews, we chose the already well-known stand for the Enkor 20090 drill with an all-metal column and a cast iron base and carriage. (Rack passport) Several photos of unpacking and assembly:
People in reviews write about play in the plastic guide of the carriage, and a small play at the column-carriage point, but not for everyone. I got a play in the plastic guide, which was cured simply by placing a piece of plastic from a paper folder. The play disappeared completely, the carriage began to move up and down with difficulty, but thick silicone grease eliminated this problem. The stand is excellent, heavy, monumental!
The working part of our machine was an old but vigorous drill Interskol DU13/780ER:
The drill fits tightly into the receiving socket on the stand, there is no play, the fixation is excellent:
We begin to assemble our pedestal with a box. We file the details of the pedestal. In the project, I laid plywood 10 mm thick, but it so happened that I had an already started sheet of 12 mm, which for some reason I mistook for 10 mm, because of this my dimensions were floating and for a long time I could not understand why):
We assemble using self-tapping screws and PVA:
We saw the parts of the internal drawer, the bottom of the drawer is made of 6mm plywood:
Assembling the box:
Prepare and glue the back and front plugs of the pedestal:
For the drawer we use furniture ball guides:
To attach the box to the hinges, I placed a sheet of plywood next to it and placed four 10-ruble coins to create an even gap between the box and the base of the pedestal:
We cut out and glue the front panel of the drawer onto PVA; we also adjust the gaps with coins:
Don't forget to make a handle to open the drawer:
As a filling for controlling on/off and adjusting the speed, I picked up this kit from the bins: a relay with a 230V coil, two buttons, with NO and NC contacts, and a triac speed controller (2000W) from Aliexpress:
On the front panel we mark the holes for the buttons and the regulator potentiometer:
We drill holes. I had to make a small recess under the potentiometer handle with a Dremel and a cutter, since the thickness of the front panel is 6 mm, and the handle did not fit properly onto the potentiometer shaft:
Let's try the buttons:
On the back plug of the button block I decided to install a socket for the drill plug, as well as a gland entry for the mains power cable:
We take the top cover of the pedestal, mark and drill holes for attaching the base of the stand (I did not glue the top cover of the pedestal, attached it only with self-tapping screws):
Let's move on to making the drilling table. We will make it from two sheets of plywood:
We connect two sheets with four self-tapping screws, mark and cut out a groove under the column of our rack with a jigsaw, and finish it with a Dremel:
Mark the rounding of the corners:
We mark, take a router and use a 10mm groove cutter along the plywood stop to make grooves for moving table clamps, as well as table roundings:
We disassemble our part, take the bottom sheet, mark and drill holes in it for attaching the table to the base of the stand:
On the reverse side, for fastening I used the following fasteners with an M8 thread to recess the caps and made indentations with a Dremel:
We take the top sheet of the table, mark it and cut out a 70x70 mm square hole for a replaceable insert. We place the insert offset relative to the center so that it can be turned over and all sides of the square of the insert can be used:
We glue both sheets of our table using PVA:
We are preparing clamps for the table. I made them from scraps of plywood, beveled the resulting heel a little to get a good clamping of thin parts. The 8mm hole for the clamping bolt was slightly worked out in the longitudinal direction so that the bolt in the part could deviate relative to the vertical axis.
Let's try our clamp in action, using a long M8 furniture bolt, washers and a wing nut:
We take all the received machine parts, grind them and coat them with oil:
We install all the components of the power and control system, buttons and relays are connected according to a self-retaining circuit:
We check the inclusion, install everything and fix the wires:
We place rubberized legs at the bottom of the pedestal:
We fasten the drill table to the base of the stand with M8 nuts:
Next, we attach the base with the table to the top cover of the pedestal with M6 bolts and nuts:
We insert the box and see what has happened so far:
Let's move on to making an organizer for drills. All parts of the horizontal compartment of the organizer are made of 6mm plywood. We cut out the base according to the drawing, cut thin strips of plywood, and assemble the sides using PVA:
We saw 6mm wide dividers on the table (for such operations I had to make a zero-gap liner from aluminum on the sawing table, since the original surface of the table had already worn out, and the plywood had become severely chipped):
We glue the separators using a 14 mm template using PVA. I took the depth and width (6x14 mm) of the compartment based on my fingers, so that I could easily take a small drill from the bottom of the compartment:
I decided to make a vertical organizer for the most common drills (two compartments for drills for metal and wood) from 12 mm plywood, but glue a strip of 6 mm plywood on top, since drilling into the end of the plywood is very difficult:
Let's try our vertical organizer against a horizontal one:
We mark and drill holes in the organizer on our table using all available drills, from 8mm to 1mm with a diameter increment of 1 mm:
Let's try both organizers in a drawer:
We coat the new parts with oil and put them in a box. We place the vertical organizer on small hinges so that it can be folded into a completely vertical position and have access to the drills in the lower compartment. In front of the horizontal organizer, I glued a stop made of a piece of 6mm plywood in the box; after it, in the box a little later there will be an organizer for cutters, countersinks and other large drills. I also prepared several square replacement inserts:
We assemble all the parts of the machine, roll up and fasten the drill cable so that it does not interfere:
We work:
The drilling machine turned out to be suitable. Drilling this way is much more convenient, and most importantly, more accurate and accurate. Of course, there is no speed control, it would be even more comfortable with it, but I’m already starting to get used to what speed should be set on the drill and the immersion force for the material, so as not to sag the drill, but also not to spoil the workpiece or part with high speeds. This is all worked out through experience. I’ll work on it, understand what I need and what’s important from the machine, what parameters will be critical for me, so that I can possibly consider an “adult” machine in the future.
My immediate plans are to make a small vice for vertical fastening of workpieces and a grinding drum for the machine; I need them for upcoming projects.
3D model of the machine in SketchUp: link
Equipment rack
The stand where the guides for the drill will be located can also be made from a metal or wooden plate. In addition to guides for moving the drill in a vertical plane, a clamp is mounted on the stand, with which the tool is fixed to it. The procedure for assembling the rack can be seen in the training video, and you must adhere to the following sequence of actions:
- a support is fixed on the stand-frame;
- the machine stand is secured to the base using screw connections, which is then connected to the support;
- guides are fixed on the rack, which can be used as telescopic furniture devices;
- a carriage is mounted on the moving part of the guides, where a fastener is placed for fixing the drill.
You can select suitable profile pipes for the rack
When choosing guides for your homemade machine, you should pay attention to ensuring that there is no lateral play in them.
The length of the carriage, also made of metal or wood, depends on the size of the drill that you will use to equip your machine. This structural unit, which is equipped with a mobile drill stand, can be made in the following two options.
With the drill secured using clamps. The clamps used in this design are threaded into holes pre-drilled in the carriage. Clamping of the drill and its reliable fixation on the carriage is ensured by tightening the clamps.
Steel pipe stand
Below in the video you can see the details of making this version of the drill stand. The author talks in detail about the process of creating his homemade drilling equipment.
A special block is used to attach the drill. This block is a bracket where the drill is secured. The bracket is made from a wooden plate, which is attached to the carriage at an angle of 90 degrees, for which metal corners are used. To fix the drill, a hole is drilled in the block, the diameter of which is 0.5 mm smaller than the diameter of the tool itself, and a slot is made to allow the tool to be inserted into the mounting hole.
The hole in the block on the machine, intended for installing a drill, is made according to the following algorithm:
- a circle is drawn on the surface of the block, the diameter of which corresponds to the diameter of the drill being installed;
- in the inner part of the circle, trying to adhere to the line that limits it, drill a series of holes of small diameter;
- the partitions that have formed between the drilled holes are cut using a hacksaw or any other tool;
- Using a file or needle file with a semicircular shape of the working surface, the edges of the resulting hole for the drill are processed, making them smooth.
Wooden stand with carriage on furniture rails
Mechanism for moving the drill in the vertical direction
A homemade drilling machine must be equipped with a mechanism that will ensure the movement of the drill in the vertical direction. The structural elements of such a unit are:
- a handle with which the carriage with a drill attached to it is brought to the surface of the workpiece;
- a spring necessary to return the carriage with the drill to its original position.
Spring mechanism for moving the drill
You can make such a mechanism using two design schemes:
- the spring is connected directly to the handle of the machine;
- the springs are located at the bottom of the carriage - in special grooves.
According to the first option, the design is carried out according to the following scheme:
- two metal plates are fixed on the machine stand using screws, between which an axis is installed, where the installation handle will be placed;
- on the other side of the rack, plates and an axis are also installed, on which one end of the spring is fixed, and its second end is connected to the handle;
- the pin with which the handle is connected to the installation carriage is placed in a longitudinal groove made in it.
The basis was an old stand from a Crocus photo enlarger made in Poland
If the springs are located at the bottom of the return mechanism, then the handle of the device is also fixed using two plates and an axis that ensures its movement. With this design, the springs are located in the lower part of the guide grooves, which are modified using metal corners that limit their movement.
The principle of operation of a drilling machine, in which the springs are located at the bottom of the carriage, is quite simple: moving down during the drilling process, the carriage with the drill attached to it presses on the springs, compressing them; after the mechanical impact on the springs stops, they unclench, lifting the carriage and drill to their original position.
How to make a simple drill stand for an electric drill
The first version of the homemade design, despite its simplicity, combines several advantages: low cost and functionality.
This stand is more reminiscent of a tabletop mini drilling machine.
The costs of implementing this idea are minimal. In any case, such a homemade product will cost less than buying the most primitive factory model.
The idea of making a stand for a drill with your own hands belongs to the author of the YouTube channel MakeTools. The main material for the manufacture of the structure is a profile pipe with a wall thickness of 1.5 mm.
The size of the drill stand frame is 300x300 mm (however, you can make the base larger if necessary).
The height of the vertical stand is 500 mm (again, you can change it up or down if necessary).
The movable T-shaped part to which the electric drill is attached consists of two parts: vertical (length - 150 mm) and horizontal (length - 100 mm).
Additionally, fastening elements are used in the form of bolts and nuts of different sizes: M10 - for connecting parts, M8 - for fastening the door spring (return mechanism).
Let's start making a stand for the drill with our own hands.
The first step is to make a frame (base). We cut four pieces of corrugated pipe with the edges at an angle of 45 degrees and weld them together.
After this, we cut off four more blanks and weld them inside the resulting frame.
Next you will need to make adjustable legs. To do this, drill four holes in the frame along the edges and weld the nuts. We screw the bolts into them (they will act as legs).
At the next stage, we make the movable T-shaped part. The end hole in the short section (the holder for the drill) will need to be plugged. We cut a piece of a square plate of a suitable size from sheet metal, insert it into a profile pipe, and scald it.
After this, you need to make a clamp to attach the drill. It can be made from a piece of metal round pipe. We cut it, adjust it to size, and then weld two nuts.
We cut a profile pipe 25x25 mm (500 mm long). We weld the stand to the frame. We put the moving part on it. We weld a clamp to the holder.
Now you will need to make a drive lever that will lower the moving part along with the drill.
We cut a piece of profile pipe 20x20 mm with a length of 500 mm. We weld an extended nut to the lever, and a bolt will need to be welded to the moving part.
Next, you need to make another lever from a professional pipe 200 mm long. We weld an extended nut on one side of the profile, and a bolt on the other. We weld a second elongated nut to the long lever.
Let's make one more part. We weld an elongated nut to the bolt head, as shown in the photo below.
We drill a hole in the rack frame, insert and fix the part. We attach a short lever to it. And we already attach the drive lever to it.
At the last stage, all that remains is to install the door spring, which, after drilling the workpiece, will return the mechanism for moving the drill to its original position. The spring is secured with two extended nuts and bolts.
The lower nut is welded to the moving part, the upper one is secured with a bolt connection.
To do this, you need to drill a hole in the rack into which a bolt is inserted (from inside the profile). An extended nut is screwed onto it. We clean the welds and paint all structural elements.
With this simple device, you can drill vertical holes in pieces of wood, plywood or metal, and not worry that something will turn out crooked.
We recommend watching the step-by-step process of manufacturing the main structural parts and assembling the drill stand in the author's video.
Drill stand. Homemade Drill press
