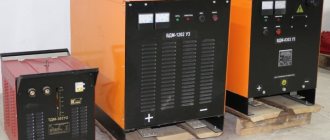
Spot welding machines are not used as often in everyday life as arc welding machines, but sometimes it is impossible to do without them. Considering that the cost of such equipment starts from $450-$470, the profitability of its purchase is questionable.
Household spot welding machine CBA-1.5AK
The way out of this situation is resistance spot welding with your own hands. But, before we tell you how to make such a device yourself, let's look at what spot welding is and the technology of its operation.
Welding process: manufacturing diagram
When assembling the device yourself, it is necessary to take into account the Joule-Lenz law (Q = I² X R X t), which states: thermal energy is released in conductors in a certain amount in proportion to their resistance, the coefficient of current strength in time and squared.
Experts advise paying due attention to the homemade mechanism, taking into account the large loss of energy in thin wires, and using a high-quality electrical circuit.
Types of contact welding:
- Suture
- Spot
- Butt
In spot welding, the device technology is based on the thermal effect of current. This ensures welding of the part at one or several points.
The size and structural features of the electrode contact surface differ. This affects the strength level of the connections.
We list several existing stages in spot welding technology:
- The mating components are connected and placed between the electrodes of the device. The components should be positioned tightly against each other. This will ensure the formation of a sealing belt near the molten core, which will prevent hot metal from splashing out during the pulse.
- The next step is heating the parts. They become thermoplastic, which makes it possible to modify them. It is possible to make high-quality welding at home, the main thing is to follow the key principles of the technology: maintain the speed of movement of the electrodes, a constant pressure value and a tight connection of all parts.
When current passes, a pulse is generated, which heats the welding machine and allows the metal to melt at the points of contact with the electrodes.
Then a common core of liquid consistency 4-12 mm in diameter is formed. After the current is applied to the parts, they will hold securely until the core cools and its further crystallization.
Domestic use of homemade spot welding allows you to ensure mechanical strength of metal seams without high costs, but does not allow you to create hermetic seams.
The state standard regulates safety precautions, work processes and welding equipment.
Diver92RUS › Blog › Do-it-yourself spot welding machine for batteries.
It all started, oddly enough, not with the need to cook batteries, but with my love of solving non-standard problems.
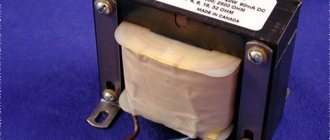
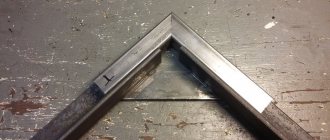
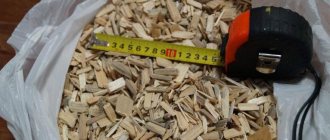
Plates for welding batteries arrived at my store. I looked at them, then at a pair of 18650s, in which one jumper was held “on the snot,” and tore it off. So I got an incentive... I spent three days scouring the Internet. As it turned out, everything is quite simple. The problem was a transformer from a microwave, which did not fail to be found in our office’s supplies. I will not describe the process of cutting off the old winding; this is all described on many resources. It took more time to find the wire for the secondary winding. Found at 16 sq. mm. No problem, of course, others over there are shaking 50 squares. Particularly persistent with some mother and all 70 are slaughtered. But what is, that is, we begin experiments. The first press of the button was like having sex for the first time - you know in theory what will happen, but it’s still exciting. I prepared to the fullest - safety glasses, gloves, a flashlight on in case the machine on the dashboard flew out... No, it's not what you thought - everything was fine with the first sex.)) But the experience of short circuits... No, just like that - SHORT CIRCUITS . So I have plenty of such experience. The remains of side cutters are still screwed to the wall, which accidentally (Oh! this is a great “accident!”) cut through the cable coming from the battery of my electric bike. But we digress. The first attempts were so-so. Something was welded, something fell off. I didn’t sharpen the electrodes, I thought I was a fool and everything would work out. In general, a purely Russian approach. Nevertheless, inspired by success and blinded by sparks, I began to think about the design. A stand for a drill caught my eye. This seemed like a good idea, and work began to boil... It’s good that I didn’t have time to ruin a good thing. As it turned out, the idea was not the best. Having dived deeper into the theory and reviewed a bunch of designs of other homemade and factory analogues, I decided on the concept - two separate horizontal arms, spring-loaded to provide a clamping force of about 400 grams. Most Chinese and many DIYers simplify the design by attaching the electrodes rigidly to the body. But pressing a flat surface against two electrodes with the same force is not so easy. Especially if you are holding a battery of round, slippery batteries that are just about to run away. But we are not looking for easy ways! Therefore, only hardcore, only separate fastenings. The concept is a concept, but the design was born in pain. Due to the lack of turning and milling resources, I never plan the entire project. I go from one base point to another. Moreover, all this is interspersed with moments of contemplating a rack with a proud sticker “Construction Materials”, on which all kinds of scraps of metal, plastic, cardboard and other useful things for the household are stored, and scouring the dark corners of the workshop with a flashlight in the hope that some kind of material will catch your eye. some unknown crap that, after lying in the dust for 7-8 years, through cunning manipulations will turn into the part I need. At such moments, I, like no one else, understand Michelangelo, who came to the workshop for four months and looked at a block of marble, and when he was asked, “What are you doing?”, He answered, “I’m working...”. In the process, a thicker wire was found for the winding - 25 squares. According to the experience of other creators, this is enough for welding batteries. Well, I don’t plan to weld nails... I won’t bore you with a description of the process of building the mechanics. This is simple in words - “assembling the unit”, but in reality it involves countless drilling, re-drilling, boring, twisting, unwinding, adjusting, and screwing again. The result is two independent spring-loaded rods, electrodes made of 6 mm copper soldering tips, sharpened accordingly to ensure a distance between points of about 5 mm.
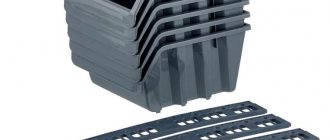
The electrodes are clamped in holders made from electrical connecting strips.
I think the design turned out to be successful, with a minimum number of intermediate connections of power lines. This reduces the likelihood of losses due to connection resistance. The body was immediately planned from composite. This is a “sandwich” of plastic sandwiched between aluminum layers. My favorite material for crafts since the days of working in an advertising agency - it is easy to process and does not require final painting. Comes in different colors. Used in advertising. This is a life hack, use it!