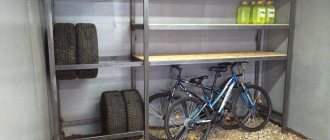
To restore order and free up space occupied by accumulated things, a metal rack is assembled. You can buy a ready-made design or make it yourself. If the weight of the objects is small, an aluminum corner is used as the material. To store preparations for the winter in city apartments, racks made of steel corners are installed on the balcony. To accommodate a large number of heavy objects, make a rack from pipes in a garage, shed, or cellar.
Advantages and disadvantages of metal shelving
The advantages of metal structures include:
- Reliability and durability. The shelves can support significant weight without damage.
- Easy to care for.
- Wear resistance. Even with intensive use, metal pipe racks retain their characteristics and appearance unchanged.
- Full compliance with fire safety requirements.
- Storage of items made of any material.
- The metal frame is resistant to moisture and temperature changes.
Disadvantages include:
- It is more difficult to make a rack from a metal profile than from wood;
- the price of metal structures is higher.
Types of shelving
When choosing a metal storage system option, the complexity of manufacturing and operating conditions are taken into account:
- Modular structures are assembled from perforated profiles of different sizes. They are reliable, and the height of the shelves can be easily changed if necessary. However, the price is steep.
- Aluminum frames are attractive in appearance; their low weight allows you to quickly move the collapsible rack to another place. The disadvantages are the high price and deformation from impacts.
- Shelves of any size and configuration can be made from profile pipes. The shelves can withstand a lot of weight. For manufacturing you will need a welding machine and skills in working with metal.
- In terms of price and labor costs, frames made from metal corners are similar to the previous option, but are inferior in strength and aesthetics.
- The CD profile for fastening drywall is good because welding and expensive tools are not required to assemble the frame. Sold in building materials stores at affordable prices.
Features of installing shelving at an angle
The corner type of rack is perfect for installation in small spaces. For example, it is suitable for a loggia for pots with indoor plants or narrow cellars for arranging jars of pickles.
The collection principle is similar to stationary racks, only a few points differ:
- In the place where the corner shelf is attached, you need to install additional reinforcing metal corners, firmly securing them.
- Fix the corner shelves to the racks using corners.
- Connect the structure with thrust bearings.
- Push the vertically placed rack into a corner and evaluate the correctness of the assembled structure.
Connection by welding or bolting
Metal structures assembled with bolts are easier to make than welded racks, but their rigidity is low, since there are backlashes at the joints. To increase stability, the frame is attached to the wall with plates with holes screwed to the posts. They are nailed down with crutches or dowels. They are attached to a wall made of foam or cinder blocks with anchor bolts. The prefabricated option is chosen if rearrangement is expected in the near future or there is no possibility of welding. Perforated angle frames are assembled without bolts. The horizontal crossbars have hooks that are inserted into the grooves of the posts. However, such a connection also suffers from backlash. Therefore, when installing high racks, the structure is welded.
How to assemble a metal rack for a warehouse
Metal racks mounted with hooks are placed in warehouses and large retail outlets. The differences are only in the thickness of the metal and the dimensions of the products. Assembling such structures is much more difficult: this requires the work of several workers, the installation of scaffolding, as well as lifts as additional technical devices.
The vertical posts of these products have holes at the bottom into which anchor bolts are inserted. They are installed in special holes made in the floor using a hammer drill, and then screwed into the base of the structure. Racks used for industrial purposes must withstand heavy loads, which means that, in addition to the floor, they must be attached to the walls.
After fastening in a similar way, the shelves are installed on vertical racks, the hooks are put on the hooks using rubber hammers.
To properly assemble a metal rack, you should prepare. For example, build scaffolding that will help strengthen the upper parts of the product, install railings, be sure to follow safety regulations, and use safety belts. Construction scaffolding and scaffolding should be made strong and stable.
Requirements for racks
To ensure that the metal rack is safe to use, the installation is guided by the requirements of GOST 16140-77:
- distance between racks 0.9 - 2.9 m;
- rack width 0.45 - 1.35 m;
- the curvature of the posts and crossbars should not be more than 3 mm per 1 m or 0.1% of the length;
- permissible deviation of the racks from the vertical is 1 mm per 1 m without load, and under the influence of weight 4 mm, but not more than 6 mm in length;
- sharp corners and edges must be smoothed;
- if the load does not exceed 60 kg, the shelf does not need an additional bar (stiffening rib), for 90 kg one crossbar is installed in the middle, for 120 kg - two;
- Cracks, lack of penetration, sagging, slag inclusions larger than 1 mm in size, and undercuts deeper than 0.5 mm are not allowed on welded seams.
Rack assembly – Stellazhoff Company
When assembling pallet racks in one line, the rest are attached to the first rack by attaching shelves and 2 racks of the previous rack are used (as in the figure)
Corners are placed only on the inner corner of the rack (as in the figure). For example, a single rack uses 4 racks, and a double rack uses only 6 racks, while all loads are preserved and this design is the most stable, since the racks are interconnected by single elements.
Corners are supplied as a set for the lower (8 pieces) and upper shelves (8 pieces) in racks with a load per shelf of up to 80 kg and up to 120 kg - to give a frame to the rack since the load on the shelf is minimal! In total, these racks have 16 corners, and the additional section has 8 corners.
As you noticed in our video, when installing a rack, there is a fairly large number of racks, shelves, corners and work is carried out in a certain sequence. Assembly using a video with instructions is not difficult, but it will take a lot of your time and may not be safe in the future if the sections are assembled in violation of conditions that affect safety. Since when assembling any structure, it must, first of all, be safe. And the installation of large shelving structures can be quite problematic if you have not previously encountered assembling such a device. The entire structure must be stable because the rack is designed to store large loads for a long time. Section nodes must be correctly connected to each other and be resistant to external pressure.
In warehouses, garages or basements, and kitchens, storage loads are not placed evenly on the racks, and to move this load, workers often use the racks as a support for stepladders. Also, many people use the shelves of the rack as a ladder to gain access to the upper racks, which can be quite traumatic if the structure was not installed by a specialist who knows the nuances of assembling iron racks for their strength. For example, during assembly there may be a need to strengthen the surface of the floor covering and our workers will carry out this work using metal plates. To secure all equipment to the floor surface, our craftsmen use anchor bolts.
The Stellazhoff company offers all its clients to carry out installation only by our company, because the result of the installation work carried out through our efforts will guarantee you a high-quality assembly result. And only after the racks are assembled by our specialists, we provide a guarantee for the safe operation of our warehouse equipment.
How to assemble a rack from an aluminum profile with your own hands
Assembling a rack with your own hands from a profile can be done even by a person taking up this task for the first time. It is easier to work with than wood.
The main advantage of the modular design is the ease of assembly from a ready-made kit
Materials and tools
To calculate how much material is needed, first sketch out a sketch indicating the dimensions and number of shelves. Profile dimensions are selected depending on the expected load. To connect the parts, you will need self-tapping screws with press washers, since their fastening is more reliable. It is better to take pointed ones, since drill ones make large holes, so the strength is reduced. Shelves are made from boards 2 - 3 cm thick, 10 mm or more plywood, OSB sheets no thinner than 12 mm.
To work you need to stock up on tools:
- Tape measure, pencil or felt-tip pen, square for checking angles.
- Metal scissors for cutting profiles.
- Screwdriver. If you screw in each screw manually with a screwdriver, it will take several days to assemble the frame.
- A wood hacksaw for cutting shelves. The process will speed up if you have a circular saw or jigsaw.
Build process
When the materials and tools are prepared, begin assembly:
- On the profile, mark the length of the racks, crossbars, and crossbars along the width of the shelves. To prevent the rack from turning out crooked due to errors with the dimensions of the workpieces, you need to re-check the correctness of the markings.
- On the side walls of the profile, cuts are made to the base and bent at this point. The workpiece is cut along the fold line.
- Longitudinal cuts are made on the crossbars to a depth equal to the width of the profile of the vertical supports. Internal bends, if any, are cut off.
- The crossbars are inserted into one another to form a rectangular cross-section. The cut ends are bent 90⁰. You need two of these parts for each shelf. They are installed on both sides of the frame.
- The assembly of the sidewalls, so that there are no distortions, is carried out on a flat surface, possibly on the floor. Cross members are inserted between a pair of vertical supports. After checking the corners, each bend is screwed with 1 - 2 self-tapping screws.
- After both sidewalls are ready, the rack is assembled from the profile. First install the lower crossbars, then the upper ones. If no distortions are found during inspection, the rest are fixed. It is more convenient to screw in the screws by placing the frame on its side. Having secured the parts on one side, it is turned over to the other.
- On profile racks with wide shelves, additional supports are installed from below in the middle of the lower crossbar. After determining the height, bends are made on them and screwed with self-tapping screws.
- After measuring, the shelves are cut. To increase the rigidity of the frame, cutouts are made in the corners so that they extend onto the side crossbars. To fasten wood, it is better to use self-tapping screws with fine threads.
Manufacturing technology
Shelving - a universal storage solution for the garage
For convenience, we divide the manufacturing process into several stages:
- Drawing up a drawing;
- Preparation of materials;
- Frame assembly;
- Finishing.
Next, we will look at the work process step by step from start to finish.
Drawing up a drawing
Before assembling a metal rack, you need to decide on its design and basic parameters. To do this, first of all, consider the dimensions of the structure. To be on the safe side, go to the garage and measure the area where you want to install the furniture.
Before you start work, decide on the basic parameters of the product
In addition, decide on the height of the future product. In a garage, especially if it is small, it is advisable to make a storage system right up to the ceiling. Due to this, you can reduce its size, i.e. length and depth, without sacrificing capacity.
For a garage, it makes sense to build a rack right up to the ceiling
When parameters such as length, depth and height are known, decide on the distance between the shelves. To do this, think about what items you are going to store.
For example, the height of the wheel storage compartment should be several centimeters greater than the outer diameter of the wheel, i.e. the distance between the shelves should be approximately 65-70 cm. Make the remaining compartments smaller so that more shelves can fit.
A wall rack with two rows of supports for the garage is the most practical
As for the design, we will make the most practical option - a wall frame. It has two rows of racks, so it is not attached to the wall and, if necessary, can be moved from place to place.
The advantage of the wall structure is its mobility
All racks are connected to each other by longitudinal and transverse crossbars. These same crossbars are also the basis for the shelves. Accordingly, the distance between the shelves depends on their position.
The open design allows you to store even long items
That, in fact, is the whole structure. Therefore, as we have already said, DIY metal shelving is quite simple to make.
The metal rack can withstand the heavy weight of stored parts
Advice! When you have decided on all the main parameters, be sure to “sketch” a drawing on paper, even by hand, and indicate on it the dimensions of all parts in millimeters. Thanks to him, you will not go wrong when making blanks and assembling the frame.
The design drawing can even be done by hand
Materials
The frame of the structure will be made from profiled pipes 20x20 mm. The wall thickness must be at least 2 mm so that the structure has sufficient load-bearing capacity.
You can even use metal mesh for shelves
As for the shelves, they can be made from any boards, slats, plywood, OSB, reinforcement rods or any other materials that you have at hand.
A rack with metal shelves will cost more
Note! Instead of a profiled pipe, you can use a corner, the price of which is slightly lower. However, a product made from a pipe looks neater.
To make the frame, use 20x20 mm pipes
It must be said that the assembly of the frame can be done in two ways:
- By welding - in this case, to connect the parts except a welding machine and consumables for it, you will not need anything;
- Bolted method - this assembly option is suitable for those who do not have a welding machine. Its principle is based on the use of special fasteners (brackets) for perforated pipes, which are tightened with bolts.
To connect parts you can use special clamps
If you are going to assemble the frame using the second method, count on the drawing how many and what connections the structure has, and purchase the appropriate fasteners.
Among other things, we will need paint and varnish material to immediately paint the frame and shelves. If this is not done, the structure in the garage will quickly become corroded and begin to rot.
The metal elements of the shelving must be painted.
Frame assembly
So, we’ve sorted out the preparatory stages, now let’s look at how to make metal racks with your own hands.
The sequential action is as follows:
| Illustrations | Actions |
| According to the dimensions specified in the project, mark the pipes for making blanks. |
| Use a grinder or a hacksaw to cut the workpieces, namely the racks, as well as the longitudinal and transverse crossbars that connect them. |
| Now you need to make a sidewall from the blanks. To do this, follow these steps:
|
|
|
| When the jumpers are welded to the rack, attach the second rack to them, as shown in the photo. |
| File the welds with a grinder or file. |
| Now you need to assemble the second side panel in the same way:
|
| At the same level as the transverse jumpers, weld the longitudinal ones to the sidewall. As in the previous case, when joining, be sure to use a corner so that all corners are even. |
| Now weld the second side panel to the jumpers. |
| Make the legs. To do this, weld metal plates to the ends. |
| To secure the shelves, we will make embedded parts from metal plates. Each mortgage is a plate 5 centimeters long with two holes for self-tapping screws. |
| Weld the plates to the crossbars, placing them in increments of 30 centimeters.
|
This is what the finished design looks like
We can say that we have already made a metal rack with our own hands. All that remains are the small touches - painting and making shelves.
Finishing
The instructions for finishing the product are quite simple:
| Illustrations | Actions |
| Treat the surface of the metal structure with metal paint. You can apply the paint with a regular paint brush.
|
| Now all that remains is to prepare and install the shelves:
|
| Secure the shelves with self-tapping screws to the mounting strips. |
That's all we wanted to tell you about how to make metal shelving with your own hands.
How to make a metal rack from a profile pipe with your own hands
Depending on the capabilities, the profile pipe frame is assembled with bolts or welded. An alternative option made from metal corners will be cheaper, since their price is lower. To simplify installation, make a combined rack with your own hands. Instead of a pipe for the side posts, use a metal corner.
You can make racks of any size and configuration from profile pipes
Preparatory work
To determine the dimensions of a rack made from a profile pipe, you need to measure the location of its installation. When installed along the entire length of the wall, its sides should not reach the corners by 10 - 15 cm. A metal structure for a garage where there is little space is made up to the ceiling. Due to this, you can reduce the length and width without sacrificing capacity. The height and depth of the shelves depend on the size of the items being placed. Having decided on the parameters, drawings are drawn up indicating the general dimensions, dimensions and cross-section of the parts. Even a simple sketch will help you avoid mistakes when cutting workpieces and installation, as well as accurately calculate the amount of materials.
How to assemble a commercial metal rack for a store
To assemble a metal rack yourself, you don’t need any special skills. There is no need for special tools. You can assemble it using the parts, racks and shelves included in the kit; no additional ones are required.
Metal racks are made in such a way that they can be easily disassembled and reassembled at any time.
The entire installation process is divided into certain stages, the sequence of which should not be changed, because the structure must be assembled strictly in parts.
You can assemble a metal rack with your own hands as follows:
Step 1. Preparing the racks.
The parts of the stand are a perforated double-sided profile, screws for adjustment and a base. First you need to assemble a stand from the indicated parts. We determine the top and bottom of the profile, for which we inspect the rack and look for the absence of a notch in the bottom perforation, this will be the bottom. The notch is removed during production in order to better connect the profile and the base. To fix the base with the profile, heels or screws, whoever calls them, snap into place at the bottom of the stand. Then the adjusting screws are tightened on the base.
When installing a wall rack, only one base is used, in the case of installing a free-standing structure, two bases are used, one on each side.
Step 2. Installation of the rear panels.
The back panels are considered the base of the metal shelving unit. To install them, the racks are pulled together, this prevents the panels from falling. They can be perforated or solid. To carry out the screed, traverses are also used, which strengthen the structure, increase its load-carrying capacity and make it resistant to other loads that arise during operation. This can be a simple movement of the product around the sales floor or mechanical impact on it during product placement.
Let's continue assembling the rack. To do this, we put panels on two assembled racks along their entire height. It is important to check that the teeth on the panels snap into the holes on the posts. Otherwise, they will fall out, which is very inconvenient when working.
Helpful tips and layout ideas
The functionality of a metal rack will improve if you implement the recommendations of knowledgeable people:
- to increase the number of shelves for storing jars with blanks, they are made 30 cm high;
- in order not to be distracted from work by searching for what you need in garages and workshops, workbenches are built into the storage system;
- metal rack on wheels with a stand for tools, convenient to roll out for repairs on the street;
- to increase the usable area of the greenhouse, racks are installed, on the shelves of which boxes with soil are placed;
- space for wheels and bulky items can be left under the bottom shelf, raising it 60 - 70 cm from the floor;
- If you make a drawer with compartments for hardware on one of the shelves, they will always be at hand.
Example of rack layout 1
Example of rack layout 2
A self-made metal rack is not only cheaper than a factory one, but also more convenient to use. It is collected taking into account the characteristics of the room, the number and size of objects. The assembly of a metal structure with the required parameters can be performed even without a welding machine.
Safety precautions when assembling a metal rack
Assembling a metal rack must comply with safety precautions, which are quite simple, but require mandatory familiarization with its rules before starting work.
Special care is required to assemble the metal structure. Let's look at the basic recommendations for assembling the product:
- It is mandatory to have protective equipment such as hard shoes, a hard hat and gloves.
- Sufficient free space is required.
- Good lighting in the room will help to assemble the metal structure efficiently.
- The tool that can be used to assemble the product must be fully functional.
- A level place is required to install the product.
- Installation is carried out strictly in tiers, the next one is assembled after the previous one is completed - this is the only way to correctly assemble a metal rack.
- Haste is not the best assistant for quality assembly.
- In a state of alcoholic intoxication, it is unlikely that you will be able to assemble the structure as expected.
- Children should not participate in assembly.
- Operation of a wobbly product is not permitted. To correct the situation, it is necessary to assemble and immediately attach the structure to the wall or install a support under the base of the product.
