| № | Name | Rating | Nomination |
| The best sharpeners for household drills from AliExpress | |||
| 1 | HIMOSKWA ZFY16BK | 4.90 | Best sharpening speed |
| 2 | Prostormer PTET1058 | 4.85 | The most popular |
| 3 | POSENPRO PPMS65 | 4.80 | Powerful engine |
| 4 | Leiming S1D-DW01-56 | 4.70 | Silent operation |
| 5 | Alloet Drill Bit Sharpener | 4.60 | Best price |
| The best industrial sharpening machines for drills from AliExpress | |||
| 1 | YunlinLi MR-13A | 4.95 | Better accuracy |
| 2 | Vunson Drill Bits Grinder | 4.90 | Minimum weight |
| 3 | ZJMZYM GD-314 | 4.80 | The most reliable |
| 4 | JoyFay MR-26A | 4.75 | Maximum power |
| 5 | QilongPower EWT-U3 | 4.60 | Full set |
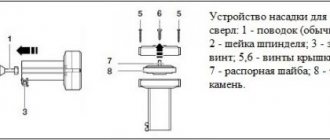
The working edge of the drill wears unevenly during operation. Its outer part is subject to more active wear. First, scratches appear on the front and back sides, then they transform into grooves, and the geometry changes. The original characteristics of the tool can be preserved by sharpening the drill. During this process, it is important not to violate the edge parameters provided by the manufacturer. For this purpose, machines for industrial and household use are used, as well as various attachments and attachments for electric drills, which allow you to turn the tool into a sharpener. On AliExpress you can order almost any equipment for sharpening drills. We presented the most reliable and productive sharpener options in the review. When choosing participants in the rating, the technical characteristics of the equipment, the opinion of experts and user reviews were taken into account.
The best sharpeners for household drills from AliExpress
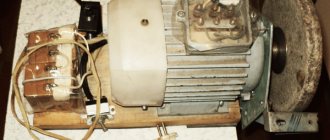
Household models of sharpeners are produced in compact sizes. All models in this category are portable. Their design is based on a powerful frame and an electric motor that rotates an axis with an emery wheel. All this is covered with a protective casing for safe use. Many models have various attachments that allow you to sharpen not only drills, but also other cutting tools. The recommended operating time for household sharpeners is no more than 2 hours a day. Power is usually in the range of 150–250 W.
Sharpening quality control
To restore the original parameters of the tool, it is necessary to select a grinding wheel, the hardness of which allows you to qualitatively obtain the original parameters. At the initial stage, the rear surface is restored. The main task is the correct choice of feed angle to the surface of the grinding wheel. After completing this work, they begin to bring the leading edge to normal condition.
Failure to comply with these requirements will lead to deterioration in the quality of drilled holes and disruption of cutting technology. After the operation is completed, the quality of the obtained parameters is checked. If certain deviations from the requirements were made, the drill is adjusted to the required condition. In enterprises where drills are used to produce a large number of holes, finishing is mandatory.
After completing all technological operations to restore the tool, it is recommended to check its basic geometric parameters. To solve this problem, the following devices are used:
- manufactured templates;
- device developed by V.A. Slepnin.
In the first case, ready-made templates are used, which are made according to a pre-calculated method. Such templates can be purchased ready-made through a retail chain or made independently. Methods for their manufacture are given in specialized literature or on Internet portals.
The basis of the device developed by Slepnin is made up of two disks. They rotate relative to each other. Its main advantage is the variability of possible measurements. This versatility eliminates the need to create a large number of individual templates. Therefore, the time required to check multiple products is significantly reduced.
When checking each tool after completing the sharpening operation, it is necessary to check not only the obtained parameters, but also the equality of the lengths of the opposite cutting edges. If they differ in length, this will lead to an increase in the diameter of the resulting hole. Next, you need to check the change in the clearance angle of the cutting edge. It should gradually increase towards the center of the instrument.
Top 5. Alloet Drill Bit Sharpener
Rating (2021): 4.60
354 reviews taken into account from resources: AliExpress
Best Price Due to the fact that this sharpener works without electricity, it has the lowest price on AliExpress. This option is suitable for hiking conditions.
- Characteristics
Average price: 411 rub.
- Power: no
- Noise level: no
- Rotation speed: no
- Grinding disc diameter: 32mm
- Suitable for drill bits: 2–12.5 mm
The principle of operation of a motorless sharpener is the simplest - the plastic part of the nozzle is installed on the chuck of an electric drill. After turning on the motor, the chuck begins to rotate the grinding wheel. Thanks to this, the drill comes into contact with the abrasive stone at the desired angle. The model has 3 grooves of different sizes for fixation. The quality of this sharpening is not ideal, but the product turned out to be a useful tool for home craftsmen. A significant advantage of Alloet is its small size. The sharpener takes up minimal space and is always at hand. The downside is the lack of rigid fixation of the drill during operation. Therefore, you have to hold it with your hands. This means that the quality of sharpening depends on the skills of the master.
Advantages and disadvantages
- Minimum price
- Light weight and dimensions (185*40*32 mm, 120 g)
- Simple and intuitive controls
- Various configuration options
- You need to hold the drill firmly in your hands
- Average sharpening quality
Buy on AliExpress.com
Technology
To properly sharpen a drill, you need certain devices. Whether it is a small or large drill does not matter - the technology is the same: the main work is performed by the cutting edges at the end, and the side spiral edges align the hole being drilled, diverting chips into the spiral channels.
The simplest way to sharpen a drill is to use a sleeve; its internal diameter is equal in diameter to the cross-section of the drill itself. The sleeve is fixed rigidly at the desired angle. It is selected as follows - the drill must clearly and forcefully enter the template, without deviating even a degree. If the drill deviates, the cutting edges will not be restored accurately, and as a result it will “walk” during operation. The bushing can be equipped with tubes made of non-ferrous metal, the internal diameter of which is equal to the most common diameter values of the product.
The template includes a tool that makes it easier to feed the drill to the grinding wheel for sharpening and prevents the product from moving in the opposite direction. The harder the type of wood from which the block is made, the more accurately the angle is set: for example, the master uses an oak block to feed the drill, and the swing of the drill in it during sharpening is eliminated. A machine - for example, the same sharpening machine - can be homemade: the main thing is that the sharpening stone is not misaligned and does not vibrate during operation.
Correct angle
The size of the angle is determined by the type of steel or other metal (or alloy) in which the holes are drilled. The lower the hardness of the metal or alloy, the greater the sharpening angle. So, for steel, cast iron and bronze, workpieces from which need to be drilled, the sharpening angle reaches 120°, for plastic and soft alkali metals such as magnesium - 85°.
Any type of tree requires 130°. For stainless steel, 115° is sufficient. The fact is that easily yielded metal produces more chips in a short time, excessive friction occurs, and the tip of the drill heats up stronger and faster. And excessive heat dulls it - even the hardened steel from which the drill is made is released when heated. The steel of the product loses its hardness and begins to dull more quickly.
Finishing
You can polish a restored drill at home using special grinding wheels that combine coarse grinding of high-speed steel with fine-grained steel. These wheels contain a relatively soft filler that eliminates rough scratches, nicks and gouges that form during work. They are eliminated without changing the outline of the cutting edges. These discs are placed on a grinder or drill, and the drill is clamped on a separate clamp or in a vice. If the processing using wheels turns out to be rough, the product itself is sanded using a rotating emery wheel.
Examination
A quick check of correct sharpening is achieved using a special template that measures the length of the cutting edges, the location of the tip, the bevel angle of the outlet channels on the drill and the angle of the longitudinal edge.
Point
If a craftsman’s 10mm drill becomes dull, the product is sharpened from the front edge. The goal is to increase the angle of the cutting edge and reduce the bevel of the front tip and the narrowing of the transverse edge.
This prevents the accelerated breakdown of the smallest grains of steel from the tip, which means it extends the life of the drill and makes it possible to drill faster and more. The product is additionally ground at a slight back angle, which reduces the friction force in the holes being cut.
Top 4. Leiming S1D-DW01-56
Rating (2021): 4.70
53 reviews taken into account from resources: AliExpress
Silent operation The noise level during operation does not exceed 68 dB, this is the lowest figure on AliExpress. There is also virtually no vibration.
- Characteristics
Average price: 2243 rub.
- Power: 96 W
- Noise level: 68 dB
- Rotation speed: 1350 rpm
- Grinding disc diameter: 56 mm
- Suitable for drill bits: 3-13mm
Leiming S1D-DW01-56 is another multifunctional sharpener from AliExpress. It is suitable for any drills, knives and scissors. The device weighs just over one and a half kilograms, so you can even take it with you to work. The seller offers two configuration options – a budget option and a set with a spare grinding disc. Reviews note that the case seems flimsy, although the accessories are made of durable materials and should last a long time. There is also no angle adjustment function, which means you have to spend more time sharpening. In general, buyers were satisfied with the quality and packaging of the goods, but there were complaints about the delivery service. Often you have to wait for a parcel for more than a month.
Advantages and disadvantages
- Minimum noise level
- Reliable and high-quality accessories
- Good packing
- Kit with spare disk
- Flimsy plastic body
- No sharpening angle adjustment
- Long delivery
Buy on AliExpress.com
Save up to 10% or more when shopping on AliExpress! Use current promotional codes and coupons.
Top 3. POSENPRO PPMS65
Rating (2021): 4.80
25 reviews taken into account from resources: AliExpress
Powerful engine Despite the average power, the engine of the device performs up to 6700 rpm at idle. This is the maximum result among sharpeners from AliExpress.
- Characteristics
Average price: 2286 rub.
- Power: 65 W
- Noise level: 80 dB
- Rotation speed: 6700 rpm
- Grinding disc diameter: 51mm
- Suitable for drill bits: 3-13mm, 6-51mm
POSENPRO PPMS65 is ideal for those who have previously only used mechanical sharpeners. It is equipped with a powerful motor that will allow you to feel the difference between manual and electric sharpening of drills. Unfortunately, because of this, the device does not operate as quietly as we would like, although the noise level is not critical. Reviews on AliExpress say that the sharpener takes some getting used to, but it is definitely worth attention. Thanks to rubber feet, the equipment stands firmly on the surface, and the adjustable sharpening angle (15–50°) will allow you to return the sharpness to any tools. Buyers consider the main disadvantage of this model to be the low build quality: the plastic is thin and there are noticeable gaps.
Advantages and disadvantages
- Non-slip feet for better stability
- Convenient sharpening angle adjustment
- Impressive engine speed
- Suitable for any instrument
- Noise during sharpening
- Poor workmanship
Buy on AliExpress.com
Recommendations
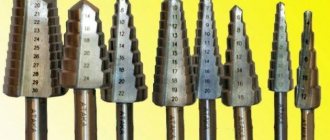
Conventional drills are sharpened with your own hands on a simple sharpener, a saw with a large grinding disc, an angle grinder or a drill with an attachment. But crown molding may require a special machine. The fact is that the crown has an axis - the main drill, which is a regular product. And if it is sharpened in a simple way, then the toothed, saw-like edge of the crown will require machine conditions. The same is true for cone-step drills.
In the worst case, due to the intoxication of the steel rusting in the salty environment, a person will easily lose it. Be careful not to drill into the ceiling without a helmet - falling chips will also get into your unprotected eyes.
Choose the correct point angle. A drill that is too “flat” will not drill through steel; a drill that is too “steep” will not drill through wood, aluminum, bronze, magnesium, or plastic. An incorrect angle will either cause the drill to wobble and the hole to move, or it will jam and break.
Do not drill with ordinary high-speed steel in glass, porcelain tiles, granite, ceramics, or high-strength clay. For these materials there is a so-called win. Pobedit alloy significantly exceeds high-speed steel in strength. Do not try to drill into tempered glass - it will immediately crumble.
Do not sharpen pobedit drills with simple sandpaper and stone-vitrified wheels - for these products there is a diamond, like those wheels that are used to cut stone, brick and hardened steel. Grind pobedit drills at low speeds.
Do not overheat the drill when turning - overheated steel will experience tempering and become noticeably worse. It will no longer be hardened or high-speed (tool-based).
Do not cool a red-hot turned drill in water or other cold liquids - sudden cooling will cause it to become riddled with microcracks. The first time you try to drill into a workpiece, the product will immediately break.
Do not deflect the drill while turning. The slightest care - even by a degree - will lead to uneven grinding, vibration will arise, breaking the drill itself and loosening the gearbox and motor of the drill.
The length of the working part should not be less than a centimeter. If the drill is broken in half and part of the cutting area is thrown away, then do not grind the drill, whose working part is now less than a centimeter.
Drills tipped with carbide (for example, with a pobedit tip, diamond coating) are sharpened using the same means as solid drills made from the same materials.
How to easily sharpen a drill, see below.
Top 2. Prostormer PTET1058
Rating (2021): 4.85
574 reviews taken into account from resources: AliExpress
The most popular This electric drill sharpener already has 1250 orders and almost 600 reviews on AliExpress. In them, site users praise the device and recommend it for purchase.
- Characteristics
Average price: 1912 rub.
- Power: 95 W
- Noise level: 64–75 dB
- Rotation speed: 1600 rpm
- Grinding disc diameter: 75mm
- Suitable for drill bits: 3-12mm
A stationary household sharpener, the main advantage of which is its low price with a good level of quality. PTET1058 does not require any additional accessories; you just need to connect the device to a power outlet and it will be ready for use. The device is suitable for processing most drills due to the increased diameter of the grinding disc. The main complaint from users is the complexity of the sharpening process. The set with the sharpener itself includes instructions in English, and video tutorials are also posted on the Internet, but figuring out how to properly control the sharpening angle of the drill is not so easy. Those who managed to master the intricacies of the process speak very positively about the device.
Advantages and disadvantages
- Fast connection without additional devices
- Large diameter grinding disc
- Operational sharpening
- Durable material and quality build
- Complex control and sharpening angle control
- Not suitable for the smallest drills
Buy on AliExpress.com
See also:
- 20 best knife sharpeners from AliExpress
Save up to 10% or more when shopping on AliExpress! Use current promotional codes and coupons.
Useful tips
We can talk a lot about the nuances of sharpening, but it is important not only to sharpen the tool correctly, but also to do it safely and then store the products correctly. So, the rules for the safety and maintenance of drills:
So, the rules for the safety and maintenance of drills:
- When sharpening, the tool gets very hot. This not only requires careful handling and – very desirable – wearing protective gloves. This also affects the properties of the metal. Therefore, the tool should be fed to the sharpening device in short periods, 2...3 seconds, and cooled after each period in water or other cutting fluid (cutting fluid);
- During work, sparks fly from the drill and grinding wheel. You need to protect not only your hands, but also your face. A transparent shield or glasses will be very useful;
- For delicate work you need to see very well what exactly is being done. Accordingly, a magnifying glass may well play the role of a protective shield;
- Additional lighting is necessary, but the lamp must be positioned so that the fragile bulb cannot be damaged by random fragments of metal or abrasive.
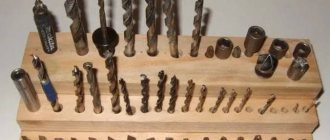
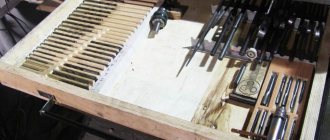
Regarding storage, the rules are simple: sharpened drills should not touch each other and should not be in a damp or aggressive environment. Special organizers – industrial or homemade – are very convenient for permanent storage. If there are inscriptions about the diameter, the search for the desired tool occurs almost instantly.
Top 1. HIMOSKWA ZFY16BK
Rating (2021): 4.90
160 reviews taken into account from resources: AliExpress
Best sharpening speed The sharpener returns sharpness to drills of any diameter in just a few minutes. She works quickly and accurately.
- Characteristics
Average price: 2273 rub.
- Power: 96 W
- Noise level: 75.3–88.3 dB
- Rotation speed: 1350 rpm
- Grinding disc diameter: 78 mm
- Suitable for drill bits: 3-12mm
HIMOSKWA ZFY16BK is the best of the inexpensive models for processing metal drills. The power is small, but the sharpener does its job perfectly. It works quietly, without unnecessary vibrations. The equipment handles drills with a diameter of up to 8 mm very quickly. But for a diameter of 10 mm or more it takes a lot of time - sharpening takes up to 7 minutes. The low power of the device affects it. The design of the product is as simple as possible. The assembly is of high quality - the plastic is not flimsy, there are no gaps in the body. An important nuance - it is not recommended to use a sharpener on broken drills, as you can damage the geometry of the sharpening stone. The seller of the product also warns about this on the AliExpress page.
Advantages and disadvantages
- Great for sharpening metal drill bits
- Quiet operation without vibration
- High quality workmanship
- Quick sharpening of small drills
- Rubber feet for better grip
- Low power
- Cannot be used for broken drills
Buy on AliExpress.com
See also:
- 10 best drill manufacturers
to the beginning of the rating
Personal experience of making a Wishbon instrument at home with your own hands
You can choose any body material, of different compositions:
- aluminum sheet or soft alloys;
- plastic;
- laminate or fiberboard;
- polyethylene or fiberglass;
- even a wooden plank.
I settled on a plate made of getinax: it is easy to process and has high strength.
To make the case, I drew a sketch on a squared notebook sheet. No drawings needed. Scale 1:1. I placed a small drill on it as a size guide.
For clarity, I outlined the dimensions with a red pencil and showed the corners.
After that, I drew the dimensions on the getinax. I drilled holes in the body of the future device.
Since I didn’t have a normal drill, I had to make a homemade one based on the cannon drill principle. I used a piece of a spoke from a Soviet bicycle. Diameter 2 mm.
I filed off part of the side edge and sharpened the end into a central corner. On the one hand, it is a parody of a cannon weapon, but it is a completely working design for soft materials.
It is permissible to make them even from nails and wire of different diameters. This way you can make different types and diameters of such tools. No special precision is required. My finished drills are shown in the photo.
From the getinax I used a hacksaw to cut out a body blank and an additional part for attaching the wheel - a regular washer for an M3 nut. I used a 4 square piece of copper wire as an axis. In order for the wheel to rotate well, a spacer had to be installed.
The method of connecting parts is conventional riveting. Vishbon showed the rest of the details in the photo.
The clamping block (a pentagonal figure in the photo) was made with holes with a diameter of 4 mm.
In the central part of the body, I had to use homemade drills to increase the diameter of the hole and cut the thread. I made the tap with my own hands from an M4 hairpin: I sharpened one end slightly into a cone and cut part of the thread along the length from opposite sides with a hacksaw.
From the opposite end of the thread, I clamped two nuts against each other, which allowed me to work with it with a wrench.
Homemade tap
I must warn you: it’s easier to work with a factory tap. But, in a critical situation and for soft materials, this design is justified.
In the middle of the 120 degree angle I scratched a bisector, which serves as the basis for laying the thinnest drill bits.
I reduced the height of the body so that even the smallest drills protrude from it: this makes it easier to install them.
In the upper part of this, Vishbon made a mark at the exit of the angle bisector to facilitate the assembly process: centering the axes of large drills when fixing them in the fixture.
The mark indicates the center of the drill.
Top 5. QilongPower EWT-U3
Rating (2021): 4.60
8 reviews taken into account from resources: AliExpress
Full set The machine is suitable for sharpening drills, cutters and other tools thanks to a large set of collets and bowls made of two different materials.
- Characteristics
Average price: 38831 rub.
- Power: 99 W
- Rotation speed: 5200 rpm
- Drill diameter: up to 16 mm
- Sharpening angle: 0–180°
- Weight: 45 kg
With such a machine, even a non-professional can control the drill sharpening process. It is the best at automating processes, so it will be useful in production. The machine can sharpen drills, cutters and turning tools; for this purpose, special accessories are included in the delivery package. The device was equipped with functional lighting for ease of operation and was equipped with collets of various diameters, diamond and corundum sharpening bowls. The design of the machine includes a universal dividing head, which facilitates adjustment and provides fixation of tools in 24 positions. Reviews advise lubricating the adjusting screws before starting work, otherwise they may jam.
Advantages and disadvantages
- Impressive equipment
- Quite bright backlight
- 24 options for fixing instruments
- Very fast delivery
- Not the most accurate sharpening
- Adjustment screws jam
- Weighs twice as much as analogues from AliExpress
Buy on AliExpress.com
Sharpening process
Sharpening a drill must be done in a certain way. To begin, we take the tool with our left hand near the front (working) part. We tightly grasp the shank with our right hand. We start the rotation of the disk on a grinder or machine and carefully (without strong pressure) bring the back part of the cutting edge of the drill to it.
Continuing to lightly press the drill bit against the disc, we turn it with our right hand to sharpen the back part. All this time we check the desired angle of the drill. We also make sure that the cutting edges are the same in length and sharpened at the same angle.
Top 4. JoyFay MR-26A
Rating (2021): 4.75
5 reviews from resources taken into account: AliExpress
Maximum power The stated power of this model is 450 W, which is significantly more than other household and industrial drill sharpeners.
- Characteristics
Average price: 41047 rub.
- Power: 450 W
- Rotation speed: 4800 rpm
- Drill diameter: 8–32 mm, 13–26 mm
- Sharpening angle: 85–140°
- Weight: 27 kg
This professional DC sharpening machine is used to restore the original geometry of the drill rake, back angle, and bridge. All functions are implemented very well. The sharpener is reliable and has a long service life. It can be used not only by professionals, but also by people without experience working with such equipment. The price of the machine is quite significant, but it is justified by its high functionality. The device pays for itself quickly. The security system here is one of the best - all protective covers have reliable fastenings. The sharpener is convenient to use. To get started, simply connect the machine to the network.
Advantages and disadvantages
- Excellent reliability and safety
- High power
- Controlled sharpening angle
- Can be used for any drills
- Easy control and quick connection
- Very high price
- There is no point in buying for home use
Buy on AliExpress.com
Save up to 10% or more when shopping on AliExpress! Use current promotional codes and coupons.
How to tell if a drill is dull
You should not let the tool become too dull, because... A dull drill heats up faster; excessive heating can lead to its breakage. If a tool breaks, it is not always possible to remove the parts remaining in the hole, which leads to damage to the part. In addition, the fragments fly in different directions and can injure the worker.
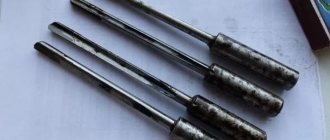
Dull metal drills
Set drills for metal
Bag of dull drills
Signs of wear on cutting edges:
- rapid heating of the drill;
- the appearance of a creaking sound during drilling;
- operating time increases;
- to the touch the cutting edge becomes smooth and rounded;
- the appearance of burrs, chips, and irregularities on cutting surfaces;
- The degree of wear is clearly visible when viewed through a magnifying glass.
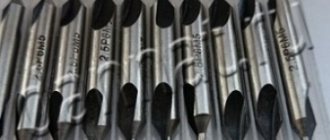
Dull drill bits under a magnifying glass
Dull drill bits under a magnifying glass
Top 3. ZJMZYM GD-314
Rating (2021): 4.80
10 reviews from resources taken into account: AliExpress
The most reliable Manufacturers use high-quality materials and modern technologies to ensure that the machine serves customers for at least 3 years.
- Characteristics
Average price: 24930 rub.
- Power: 300W
- Rotation speed: 5000 rpm
- Drill diameter: 3–14 mm
- Sharpening angle: 90–110°
- Weight: 12 kg
A stationary machine used for simultaneous sharpening of a large number of drills and cutters. Among the main advantages, we note the speed and accuracy of the process, ease of operation (despite the label “professional equipment”, experience and any special skills are not necessary for normal operation). GD-314 is suitable for interaction with drills with a diameter of 3 to 14 mm. The machine is equipped with a diamond grinding disc, which is used at all stages of processing, has high angular accuracy and good reliability (the stated service life is more than 3 years). Not all buyers were satisfied with the workmanship - and this is the only drawback of the ZJMZYM GD-314.
Advantages and disadvantages
- Simultaneous sharpening of several drills
- Suitable for cutters with cylindrical shank
- Excellent accuracy and speed
- Long lasting diamond blade
- Mediocre build quality
- Few reviews on AliExpress
Buy on AliExpress.com
How to sharpen a drill for metal
The process of sharpening drills for metal is not complicated and can be completed in a couple of minutes, but only if you have a suitable tool after a quick study of the theory and a little practice.
A little theory
First, you need to understand the design of the instrument and understand which of its characteristics will need to be restored and which to preserve without spoiling it. In the process, you will need a tool to check the angles and lengths of the cutting edges.
Drill design
A metal drill consists of: a shank and a working part. These two parts are made of different metals, which are joined into one piece by welding. The shank is made of unhardened steel.
The working part is made of high-speed hardened tool steel. It can be divided into several parts: calibrating and cutting. The working part contains the following structural elements:
- two cutting edges ;
- two rear surfaces (back of the head), extending backwards at an angle from the cutting edges;
- two front surfaces located under the cutting edge and turning into a groove for chip removal;
- bridge at the top between the cutting edges and the rear surfaces;
- two grooves for chip removal ;
- two backs forming the outer surface of the drill;
- two ribbons located on the backs.
The main parts of a twist drill for metal
The cutting edge is formed at the intersection of the surfaces of the front part (groove) and the back part (back). To restore the sharpness of the cutting edge, it is the rear surface that is processed using a sharpener or other tool.
During operation, it is the cutting edges that become dull. When sharpening, you need to restore their sharpness, geometry, as well as the angle at the apex between the back and front.
Settings to restore
When sharpening a metal drill correctly, you need to restore its following parameters:
- Apex angle . It is formed by the cutting edges at the intersection with the jumper. The angle value should be within 116° - 118°. But this value is not strict; for working with materials of different hardness and viscosity, it can be in the range from 60° to 150°. There are also special cases in which it reaches 180°.
- The angle between the cutting edge and the axis . It is half the value of the apex angle, i.e., approximately 58° - 59°, if the value of the apex angle is 116° - 118°. It should be the same for each of the two cutting edges. This is very important because... if it is asymmetrical, only one edge will work, the drill will quickly wear out unevenly, heat up more, and cut into the material worse.
- Shape and length of cutting edges . The lengths of the cutting edges must be equal on both sides. Edge length is measured from the center of the bridge to the edge (side apex). If the lengths of the cutting edges are different, then runout will appear when drilling, and the diameter of the hole will be greater than the nominal value indicated on the drill. In rare cases, the cutting edges are deliberately made of different lengths to produce a hole slightly larger than the nominal diameter.
- Rear cutting angle . One of the most important parameters during restoration, if it is not observed, drilling performance can decrease several times, up to complete loss of performance. Depending on the material being processed, it can vary from 7° to 17°.
Drill tip angle
Relief cutting angle value
Angle between edge and web
Dependence of the sharpening angle on the material being processed
The value of the sharpening angle at the tip and the rear cutting angle when working with metal and other materials may differ up or down. The smaller the apex angle, the longer the cutting edge, which has a positive effect on heat dissipation and durability of the drill. As the angle decreases, strength decreases, and as it increases, it will be more difficult to keep the tool centered at the beginning of drilling.
The value of the apex angle must be selected based on the hardness of the material to be processed. The harder the material, the larger the apex angle should be.
A point angle of 118° ±2° with a clearance angle of 7° to 12° is considered universal; they are meant when talking about a twist drill for metal without specifying the material for processing. It is these angles that we will consider in this article as an example, as typical.
Table with metal drill sharpening angles recommended when working with different materials:
| Processed materials | Vertex angles | Relief cutting angle |
| Soft woods, rubber, soft fiber materials, plastics | 60° | 12°-15° |
| Hard woods, bakelite, hard rubbers, hard fiber materials, soft cast iron (ductile iron) | 90° | 12°-15° |
| Heat-resistant and corrosion-resistant steels and their alloys, stainless steel | 127° | 12°-14° |
| Tool steel | 118°-150° | 7°-15° |
| Copper | 100°-118° | 12°-15° |
| Copper alloys | 118°-150° | 12°-15° |
| Aluminum alloys | 90°-140° | 12°-17° |
| Magnesium alloys | 70°-118° | 12° |
| Titanium alloys | 135°-140° | 12° |
| Structural and soft steels, cast iron, hard bronze. When working with cast iron, drills with a diameter of 12 mm or more are double sharpened with a transition edge angle of 70°-75°. | 118° ±2° | 7°-12° |
Tools to check for proper sharpening
To check the correctness of angles and lengths, use different measuring tools: a protractor, a protractor, a caliper, a ruler, etc. You can also use a template for sharpening drills, which already has all the correct angles and a scale for checking the dynes of the edges. You can buy such templates for testing in a store, but it will be difficult to find them on sale.
You can make a template for checking sharpening yourself from sheet steel, tin or stainless steel using the sample templates from the store in the images above, mark it with a tap or a diamond pencil. Or make the simplest template of two or three nuts. The nut is ideal for these purposes, because... it is a regular hexagon, each internal angle of which is 120 degrees. When connecting two nuts, the angle between their edges will also be equal to 120 degrees.
This device is only suitable for checking the apex angle. Nuts can be fastened by welding or hot glue. To do this, the nuts need to be heated so that the hot-melt adhesive rod melts on them, coated with hot-melt adhesive, pressed tightly against each other and held there until they cool down. Despite their apparent flimsiness, the nuts fastened with hot melt adhesive will hold very tightly.
Drills and nuts
Nut angles and nut bundles
Checking the sharpening angle at the tip of the drill with a bunch of nuts
Sharpening methods for removing the rear plane
There are several basic ways to properly sharpen drill bits. They differ in the method of drawing out the back plane, its geometry, complexity of implementation and the final characteristics of the tool:
- Single-plane sharpening . A method in which the entire rear surface forms one plane at an angle equal to the rear cutting angle. It is used for drills with a diameter of up to 3 millimeters inclusive, for which it is difficult to sharpen along two planes. In this case, the rear cutting angle is selected in the range from 15° to 25°. If you make it smaller, the back part begins to touch the material being processed and interfere with drilling. It can be used for drills with a diameter of more than 3 mm, while the rear cutting angle is selected depending on the material being processed, 7° - 17°. But you will have to remove the occipital part, making an additional bevel at an angle of 15° - 25°.
- Two-plane (two-sided) . On the back surface of the tooth, two planes are sharpened separately at different angles. The first is adjacent to the cutting edge and forms a rear cutting angle at an angle of 7° - 17°, selected for the material being processed. The second plane is ground at an angle from 25° to 40°. The edge of the intersection of the planes passes through the axis of the drill at an angle from 0 to 40° to the main edge. A large clearance angle of the second plane reduces the axial force and increases drilling accuracy, but a sharp angle weakens the cutting wedge, reduces its rigidity and impairs heat dissipation. Therefore, for working with high-strength materials, an angle of 25° - 30° is chosen, for medium and low strength 35° - 40°.
- Conical (curvilinear). The most common method, which we will consider further. With this type of sharpening, the clearance angle gradually increases from the cutting edge and along the entire rear surface. Those. the rear surface becomes not one straight plane, but takes on a curved shape. At the cutting edge, the angle should correspond to a value from 7° to 17°, selected for processing specific materials. Conical sharpening is more difficult to do than straight sharpening; it will take more practice to get the hang of it. In the process, the drill shank is slightly twisted from top to bottom, due to which a rounded shape is created on the back surface, shaped like a cone.
Methods for removing the rear plane when sharpening a drill
There are other sharpening methods, they differ both in the equipment on which they can be performed and in the resulting shape of the rear part of the tooth:
- screw and its subtypes : pointed screw , complex screw ;
- cylindrical;
- elliptical;
- shaped.
Screw methods are used in machines for manufacturing and sharpening drills in production. There is no point in describing the mechanism for their implementation, because This process cannot be repeated manually. The cylindrical method is a special case of conical sharpening and is used very rarely.
The elliptical method is one of the simplest, but it requires hollow abrasive stones of a specific shape, which wear out very quickly. For shaped sharpening, abrasive wheels of different shapes and not straight profiles are also needed. Therefore, we will not consider them in this article.
Sharpening methods according to the number of bevels on the cutting edge
Sharpening methods are divided according to the number of cutting edges formed. In this case, the angle at the apex will not be constant - it will change in steps from greater at the central apex to smaller at the side apexes. This is done in order to evenly distribute heat removal and reduce the heating of the tool as its diameter increases, because the cutting edge does not heat evenly - it heats up less in the center than at the edges.
The following methods are distinguished:
- Single (normal) . The most common method, which we will consider further. During normal sharpening, the geometry of the cutting edge does not change - it remains smooth throughout its entire length.
- Double (two-angle) . Used for drills with a diameter of 12 millimeters or more for processing hard steels and cast iron castings. Sharpening is done at two angles at the apex. First, at an angle of 116° - 140° over the entire surface of the cutting edge, as with a normal (single) one. Then we reduce it by 40° - 50° at a length corresponding to 1/5 of the drill diameter from the outer edge. In this case, two cutting edges are formed: the main or first sharpening zone and the transition - the second sharpening zone. The cutting edge becomes longer, which improves heat dissipation, improves chip removal due to chip crushing, and significantly increases durability.
Types of sharpening according to the number of angles at the tip
On the Internet you can find such a term as three-angle sharpening of drills, but this is, in fact, two-angle sharpening with a sharpening of the ribbon with chamfering along the entire outer edge. This method of sharpening a ribbon is used for both two-angle and normal sharpening.
Pointing the jumper and ribbon
In addition to the main sharpening, you can sharpen the bridge and ribbon. An untreated jumper creates significant resistance to drilling - the advancement of the drill deeper into the material being processed. To reduce resistance, the jumper is sharpened on both sides, but not completely. Complete grinding of the jumper is unacceptable, and sharpening of the tool will have to be started all over again in order to restore it.
There are several types of pointing the jumper edge:
- with a groove for chip removal;
- with increasing rake angles at the edge of the bridge;
- with an increase in the front angles on the edge of the bridge and trimming the back of the tooth;
- with grinding down part of the lintel;
- with grinding off part of the lintel and sharpening the cutting edges;
- with a cutting lintel.
Types of sharpening the transverse edge of a drill
We will consider only one method with increasing the front angles on the edge of the jumper, but we will do it with an abrasive wheel with a rectangular profile, while the rear edges will be slightly sharpened, as in the method of trimming the back of the tooth.
The pointing of the jumper must be done from the side of the grooves on both sides in turn. The drill is installed so that the angle between its axis and the tool rest is approximately 45 degrees. The angle relative to the plane of the side surface of the disk is selected in the range from 0 to 10 degrees depending on the material being processed; the softer the material, the larger it is.
Position of the drill in the horizontal plane for grinding the jumper
Position of the drill in the vertical plane for grinding the jumper
The jumper is ground to a depth of 0.1 - 0.15 of the tool diameter. As a result, durability increases, the tool cuts into the material better, drilling performance increases, and the feed force decreases. The jumper can be sharpened with a drill of any diameter, but for diameters less than 5 millimeters you will need special tools, for example, a diamond file.
When performing two-plane sharpening, sharpening the jumper is not required, because in this case, it will already be sharpened according to the conditions for performing two-plane sharpening.
The ribbon, or rather its side apex, is the most vulnerable point of the drill and can also be sharpened by making a small chamfer, which will increase the durability of the tool and extend its service life. The pointing occurs along the entire length of the outer edge, starting from the side apex on the ribbon. The edge is cut at an angle of 6° - 8°, the chamfer is 0.1 - 0.2 mm wide or more, this depends on the diameter of the drill. This method is used with a tool diameter of more than 12 mm for processing hard and heterogeneous materials.
Chamfering a tape
Chamfer taken from the side of the ribbon
When working with materials that require increased sharpness of the drill, chamfering on the side edge and strip is not performed. For such work, the tape needs to be sharpened from the groove side, i.e. front edge.
Sharpening the ribbon from the groove side
Ribbon sharpened from the groove side
Sharpening rules
To sharpen drills in workshops and in production, they most often use a sharpener, or less often special equipment. In the process of restoring the cutting edge, you must adhere to the following rules:
- the harder the material from which the drill is made, the lower the speed it should be processed;
- it is necessary to observe short sharpening cycles, removing a small layer of material with one touch of the wheel, without allowing the tool to heat up;
- the drill is not pressed tightly against the grinding wheel - this will increase its heating;
- periodically cool the drill, for example, in a previously prepared jar of cold water.
During sharpening, you must not allow the drill to overheat; it will lead to cracking, softening of the metal, and a decrease in the durability of the tool. You can tell that a metal is getting very hot by a change in its color.
When sharpening, the surfaces are cleaned until all chips and nicks disappear. We must strive to make them perfectly smooth, while controlling all the necessary angles and lengths of the edges.
Sharpening a drill on a sharpener
Twist drills for metal are most often sharpened on a sharpener, which is also called an emery machine, a sharpening and polishing machine, a grinding machine, or simply a sharpening machine. The sharpener is used for processing metal blanks and parts, grinding and sharpening them. It is perfect for sharpening twist and other types of drills.
Makita sharpening machine
Elitech sharpening machine Patriot sharpening machine
For sharpening you will need an abrasive wheel made of white electrocorundum with a straight profile. Its grade must be 14A (A) or 25A (WA). They are designed for processing carbon, alloy, high-speed and stainless steel grades, sharpening hardened steel tools.
Abrasive wheels are also called emery and grinding wheels. Less commonly they are called emery and grinding stones.
White abrasive wheels
The working surface of the stone must be smooth, without curves, potholes or depressions. If there are defects on the surface, they must be eliminated by a rule; this process is called dressing the grinding wheel. At the same time, its surface is ground down, acquiring the desired shape, in this case, flat.
To edit the grinding stone, diamond and CBN pencils (inserts), diamond dressing combs are used, less often they use cutters, improvised materials, and cutting wheels with diamond and CBN coating.
Diamond Dressing Dies
Diamond pencils for dressing grinding wheels
Roller holder with roller cutters
The process of dressing grinding wheels with different dressing tools is well presented in this video clip:
A tool rest must be installed on the sharpener; without it, it will be difficult to perform high-quality sharpening. A tool rest is, most often, a metal adjustable platform that is installed in front of the disk so that you can lean on it or use it as a guide when working with sandpaper.
The tool rest must be positioned horizontally so that its upper plane is flush with the axis of rotation of the emery wheel. The gap between the wheel and the tool rest should be kept as small as possible; a gap of one millimeter will be ideal for sharpening.
Exposed tool rest on a sharpener
As an example, let's consider performing a single conical sharpening with cutting the jumper. Because This type of sharpening, although not the simplest, is the most common and is suitable for restoring the sharpness of drills with a diameter of 3 millimeters or more.
Make sure that a stone made of white electrocorundum is installed on the sharpener, its geometry is corrected, and the tool rest is installed at the same horizontal level with the axis of rotation of the abrasive wheel and at a distance of 1 mm from its surface.
Important! For safety reasons, it is prohibited to work with a sharpener wearing gloves, no matter whether they are fabric or medical. This is true for any machine where there are rotating parts due to the threat of material winding and body parts being pulled in.
First you need to work through all the steps with the sharpener turned off. On the tool rest you need to draw a line with a marker at an angle of 60 degrees to the plane of the end of the emery wheel. This is necessary to get the apex angle to be approximately 120 degrees.
Draw a line on the tool rest at an angle of 60 degrees
The drill must be taken with both hands, the leading hand by the working part, the second hand by the shank. Afterwards, you need to place it on the tool rest so that its side edge, when viewed from above, coincides with the line drawn on the tool rest.
You need to place your index finger between the tool rest and the drill - it will act as a swing when sharpening conically. When the tool lies on your finger, an angle approximately equal to 7° - 12° is formed between it and the emery wheel. This is the value that needs to be maintained on the cutting edge.
Take the drill in your hands and place it on the tool rest
Now you need to work out the movements that will be used to perform conical sharpening. Lightly press the leading edge of the drill onto the sandpaper, while the edge should be in a horizontal plane. Next, slowly lower the shank down, without loosening the pressure, until the back of the back surface lies on the surface of the circle. In this case, the circle should turn.
We practice the movements for sharpening with the sharpener turned off.
We move the drill back from the circle, turn it over with the other cutting edge and apply it to the circle again in the same position as the first time. We repeat the oscillatory movement with the shank so that the emery rotates again. This movement with turning the sandpaper and turning the drill over must be practiced several times until it is performed automatically.
Afterwards you can turn on the sharpener and start sharpening. During the process, the same actions are performed:
- align the drill according to the mark drawn on the tool rest at an angle of 60° to the sharpener;
- We apply the leading edge to the sharpener, ensuring its horizontal position;
- lower the shank until the rear edge is completely processed;
- retract and turn 180° around the axis;
- repeat the whole process.
The process of sharpening a drill on a sharpener
We turn the drill over and sharpen the second cutting edge.
After performing several approaches, when upon visual inspection, the cutting edges are smooth and sharp, and there is a rounded bevel on the back, you need to check the correspondence of the angles and lengths of the cutting edges. To do this, it is advisable to have on hand a special template, a protractor or protractor for measuring sharpening angles, and a caliper for measuring the lengths of cutting edges.
The first mistake that can be made during the sharpening process and identified during inspection is the cutting edge falling forward. Because of this, it will not be the highest point of the tooth, but on the back surface there will be a kind of hill, a hill. In this case, the drill will not work, because when drilling, it will simply rub its back surface against the material. The error must be corrected by sharpening again.
Correct and incorrect sharpening of a metal drill
The second thing to check is the length of the cutting edges, measured from the center point on the web to the side apexes of the cutting edges. These distances must match on both sides, otherwise the hole will break when drilling, its final diameter will be greater than the nominal value indicated on the drill.
Checking the length of the cutting edges with a caliper
Next, we check the angle at the tip of the drill using a special or homemade template. When checking, you may find that the angle is slightly larger or smaller than 120 degrees; in general, you can close your eyes to this and leave it as it is. But, if the apex angle of one tooth is greater than that of the second, then this needs to be corrected, otherwise one side of the drill will not work, and the other will get very hot and wear out faster
The apex angle corresponds to 120 degrees
Apex angle slightly greater than 120 degrees
The final stage of the test will be drilling some unnecessary metal workpiece. In this case, the drill should bite into the metal smoothly, without beating from the center, the chips should evenly come out of the grooves on both sides in the same amount. The resulting hole should not exceed the nominal diameter indicated on the drill by more than 0.05 - 0.1 cm.
Uniform release of metal chips along the flutes of the drill
Drilling a metal workpiece
Now you can sharpen the jumper, which should reduce the effort when drilling, the tool will cut into the metal better, and its durability will increase.
Sewing the jumper
Video instructions for sharpening
We also strongly recommend watching the video instructions for sharpening twist drills on a sharpener from Viktor Leontyev. This video explains in detail the entire sharpening process, from theory to practice.
Top 2. Vunson Drill Bits Grinder
Rating (2021): 4.90
16 reviews taken into account from resources: AliExpress
Minimum weight The machine weighs less than 10 kg, its dimensions are 350*200*220 mm. Due to its compactness, the sharpener takes up little space and is suitable for use at home and in the workplace.
- Characteristics
Average price: RUB 12,784.
- Power: 120W
- Rotation speed: 5000 rpm
- Drill diameter: 2–13 mm
- Sharpening angle: 90–145°
- Weight: 9.5 kg
This machine is designed for sharpening carbide and solid cutting tools. All processes are automated, which greatly simplifies the work. With AliExpress the machine comes with a collet chuck, which comes with a set of collets with different sizes. The model has the ability to change the sharpening angle of the drills, the adjustment is convenient. There is a scale on the body of the device that simplifies this process. The security issue here is also well thought out. But there is one difficulty - it’s not possible to align the drill the first time. The markings on the diameter adjustment knob are offset, so the size has to be selected experimentally. This is the only drawback mentioned in the reviews.
Advantages and disadvantages
- Excellent sharpening quality
- Process automation
- Scale for convenient adjustment of the sharpening angle
- Protection against accidental damage
- Compact and light weight
- Offset markings on handle
Buy on AliExpress.com
See also:
- 10 best sharpening machines
Save up to 10% or more when shopping on AliExpress! Use current promotional codes and coupons.
Signs of dullness
Equipment for working with wood can last for a long time without deforming. Metal drills fail faster. There are a number of points by which you can determine that the equipment is dull:
- There are chips, irregularities, and microcracks at the top of the drill.
- Visual deviations from the original state.
- When drilling, an uncharacteristic whistle or noise occurs.
- Burrs and irregularities remain on the inside of the hole.
- The chips accumulate in the hole and are not discharged out.
These deviations indicate equipment failure. It is necessary to stop the work process, correct inaccuracies or replace equipment.