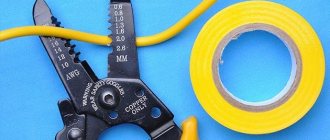
In order to properly crimp a wire, you must follow 3 main rules:
- First, choose the right connector or tip so that its size matches the cross-section of the wire being pressed.
- Secondly, use a professional tool. These are press pliers equipped with a ratcheting mechanism that will allow you to perform a full crimping cycle.
- And thirdly, select the desired matrix. Its geometry and shape must correspond to the crimp part of the tip.
Crimping or crimping wires with insulated or non-insulated lugs has become very accessible recently. This process even has a number of advantages over tinning wire cores:
- faster
- more reliable
- cheaper
When the wire is tinned and used for a long time, due to temperature changes, the contact may weaken. This causes the tinned connection to heat up.
And since the melting point of solder is low, it easily burns out or melts under load, weakening and significantly reducing the contact area. Next, sparking occurs with all the current negative consequences.
Historical perspective
Initially, as a tool, pliers were intended to remove hot metal blanks and crucibles of molten metal from forges.
They were also used by blacksmiths to hold various workpieces during forging. Archaeologists prove that the prototype of pliers - tongs, which had a rod-axis - was invented back in the Neolithic era. Back then this instrument was made from burnt wood. The first depiction of hand pliers tools dates back to the 6th-5th centuries BC. In the Bronze Age, blacksmiths used primitive pliers as clamps. They are currently found in the burials of blacksmiths as burial goods, indicating that the deceased had a special and fairly high social status.
Since ancient times, pliers have been two castor beans connected by a rivet that acts as an axis. This tool has been evidence of specialized blacksmithing skills since ancient times. Together with the anvil and hammer, pliers were an attribute of numerous ancient Greek and Roman blacksmith gods and lords of thunder (Thor, Vulcan, Hephaestus, etc.).
Much later, pliers began to be used in construction work, in plumbing activities, widely used in electrical work, etc. Depending on the specialization and principle of the device, various pliers are called side cutters, pliers, wire cutters, pliers, etc.
Terminal block connection
A development of the bolted connection is the terminal connection. Terminal blocks come in two types - with a rectangular pressure washer and with a round one. When using a terminal block with a pressure washer, the insulation is removed to a length equal to half the width of the terminal block. The bolt is released, the wire is slipped under the washer and the bolt is clamped again. On one side, you can connect only two wires, preferably of the same cross-section and only flexible or only single-core.
Connecting to a terminal block with a round washer is no different from using a bolted connection.
The connection of the wires is reliable, but cumbersome. When connecting wires with a cross-section of more than 16 mm², the connection is unreliable or the use of lugs is necessary.
Why do you need crimping and crimping wires?
Is it even possible to do without sleeves and crimping? What's wrong with simply attaching wires to machines and other devices?
With a simple clamp, the bundle of wire fluffs up and is crushed to the sides. Some individual conductors may even be damaged. Such conductors, destroyed and separated from the main bundle, no longer take part in contact and the passage of current load through themselves.
All this leads to the fact that the remaining cores are not enough and the connection points heat up. In addition, the bare copper from which the wire strands are made remains accessible to moisture and oxygen. And this leads to its darkening and oxidation. By crimping the conductor once with a tip or sleeve, you will save yourself from all these problems in the future.
Connection Features
The technology involves two options for crimping. This is a method of local indentation and continuous compression. Copper or aluminum wires are used for work. The sleeve must also be made of these materials. There are also elements made of copper-aluminum alloy.
Since aluminum cables are prone to the appearance of oxidative films on them, the sleeve must first be cleaned and treated with special lubricants. Copper wires are also pre-treated. The use of lubricants in the process reduces the risk of possible damage to the cores. The friction force is also noticeably reduced. Pressure testing is carried out using manual or hydraulic tools. In the latter case - with a figure press. It is usually used in large industries.
How it works? The two ends of the cable are crimped until they take a round shape. Next, the core is inserted into the sleeve until it stops. It is possible to connect not exactly end-to-end. But in this case, the cross-section of all cores does not exceed the bushing. In the case of local compression, contact directly depends on the depth of the pits. The latter can be measured with a caliper. If continuous compression is used, then check the cross-sectional area. Then, when the crimping of the wires is completed successfully, it is necessary to treat the outer layer with electrical tape or elbow cloth. Next, the wire and cable are carefully laid in the junction box.
How to choose the right wire and tip
First, you need to find out what cross-section of wire you will be crimping. This can be done by following the inscriptions on the core insulation, or using a caliper. Further, when choosing certain sleeve tips, you can be guided by the color marking of their insulated skirt. Each color must correspond to a specific section and size of the tip sleeve.
True, there are also manufacturers who don’t bother with this and produce single-color products of different sections. After choosing, be sure to physically check how tightly the wire fits into the sleeve or tip. In this case, there is absolutely no need to twist the wires before inserting them into the tip.
The tip at the entrance has a special skirt that will help you put it on even a slightly fluffy wire. In addition, this skirt acts as an insulation retainer. You can compare how many kinks in different directions the wire will withstand and without a skirt. As you understand, the result will not be in favor of the latter option.
Another important point that needs to be remembered: many wires are manufactured not according to GOST, but according to their own technical conditions.
And therefore, their actual cross-section may be less than that stated in the nomenclature. Accordingly, because of this, a slack is formed in the pressed part of the tip, although as it seemed to you, you selected everything according to the tables and seemed to have made no mistakes anywhere.
It often happens that a 2.5mm2 wire easily fits into a tip with a cross-section of 1.5mm2. Therefore, choosing from tables is, of course, good, but you can’t do without practical fitting of the sleeved part and wire.
Types of connecting tubes
Crimping of wires can be carried out using connecting sleeves in several designs. The choice of connecting tube will depend on the electrochemical properties of the metal from which it is made and its interaction with the material of the wire.
There are several options for materials for the manufacture of sleeves:
- copper;
- tinned;
- combined universal;
- isolated.
Copper tubes (CM) are used for copper wires, the crimping of which cannot damage the protective layer due to its absence. The tubes cannot be used in aggressive environments.
Tinned sleeves (GML) are suitable for copper type cables used in aggressive conditions. The white protective layer covering the surface of the product fully copes with the main functions. The tubes are not suitable for working with aluminum wires due to possible contact of the protective layer, which is partially destroyed during compression, with aluminum.
Combined wire sleeves have a distinctive feature - their shape. The aluminum part is larger than the copper part. This is due to the resistance of aluminum, which exceeds the resistance of copper. During the crimping process using such tubes, wires are inserted on each side, taking into account the type of metal.
The last option for sleeves is insulated (GSI). They replace additional insulation with PVC tapes due to the presence of heat-shrinkable tubing. Their structure is similar to the structure of GML tubes, with the exception of a PVC layer that does not transmit electricity. The protective layer is quite plastic and reliable, indestructible even during the crimping process, taking the shape of a metal.
Crimping solid wires
Many people often wonder whether it is possible to crimp solid wires? Yes, of course, it is not prohibited to do this, you just need to use the appropriate tool for this. Ordinary crimpers are no longer suitable here, since they are designed for less force required when compressing a monocore. You will have to purchase specially designed press pliers PK-16u or PK-35u for this.
This is a universal tool and can also be used for crimping stranded wires. In order for the compression on the monocore to be high-quality and there is no play inside the sleeve, the basic rule here is to choose a sleeve or tip one size smaller than the cross-section of the wire being pressed. These pliers are also convenient for pressing several conductors simultaneously in one sleeve. This is done, for example, when making connections in junction boxes.
Twist connection
The easiest way to connect wires is twisting. Previously, this was the most common method, especially when wiring in a residential building. Now, according to the PUE, connecting wires in this way is prohibited. The twist must be soldered, welded or crimped. However, these methods of connecting wires begin with twisting.
In order to perform high-quality twisting, the connected wires must be cleared of insulation to the required length. It ranges from 5 mm when connecting wires for headphones to 50 mm if it is necessary to connect wires with a cross-section of 2.5 mm². Thicker wires are usually not twisted together due to their high rigidity.
The wires are stripped with a sharp knife, insulation stripping pliers (ISR) or, after heating with a soldering iron or lighter, the insulation is easily removed with pliers or side cutters. For better contact, bare areas are cleaned with sandpaper. If the twist is supposed to be soldered, then it is better to tin the wires. Wires are tinned only with rosin and similar fluxes. This cannot be done with acid - it corrodes the wire and it begins to break at the soldering site. Even washing the soldering area in a soda solution doesn’t help. Acid vapors penetrate under the insulation and destroy the metal.
The stripped ends are folded parallel into one bundle. The ends are aligned together, the isolated part is held firmly with your hand, and the entire bundle is twisted with pliers. After this, the twist is soldered or welded.
If there is a need to connect the wires to increase the total length, then they are folded opposite each other. The cleaned areas are placed crosswise on top of each other, twisted together by hand and tightened tightly with two pliers.
You can only twist wire made of the same metal (copper with copper, and aluminum with aluminum) and of the same cross-section. Twisting wires of different sections will turn out uneven and will not provide good contact and mechanical strength. Even if it is soldered or crimped, these types of wire connections will not ensure good contact.
Tip material
Another relevant point in choosing a tip is the material of manufacture. When purchasing, make sure that they are selling you copper or tinned tips. To do this, it is enough to first purchase one tip and file it with something foreign.
With copper material, especially if high-quality copper is used, the cut will be reddish in color. If ordinary copper alloys are used, which is most often the case, then the cut will be a pale yellowish color.
When exposed to air, copper may darken and lose contact quality. Copper tinning is a long-known method that makes the contact durable and reliable.
Advantages of crimping wires with lugs
- the crimped end of the wire is considered airtight
- the ferrule sleeve prevents individual wires from being damaged or excluded from contact
- tinned tip surface – reliable protection from environmental influences
GOST
GOST has not been developed for the crimpers themselves, but literally all types of tips with which this tool works are standardized.
This means that the crimper dies are also manufactured to the tip standards.
So the following GOSTs are considered the most popular:
- For cable lugs this is GOST 23981-80 and 9581-80;
- For cable sleeves these are GOST 23469.0-81, 23469.2-79 and 23469.3-79;
- For cable pin lugs these are GOST 23598-79 and 22002.5-76;
- GOST 9688-82 has been developed for cable ring lugs.
Technical specifications
The main types and brands of thin-walled insulated lugs and terminals widely represented on our market are the following:
NKI ring tips - all their data and technical parameters are given at the beginning of the article above.
NVI insulated fork lugs:
Insulated flat pin lugs NSHPI:
Insulated round pin lugs NShKI:
Connectors—flat insulated “female” terminals RPI-M:
Connectors - flat insulated male terminals RPI-I:
You can view the current prices for tools for crimping such tips here.
Pliers, pliers, round nose pliers, pliers and wire cutters
Main types of ticks
Crimping pliers are divided into two types. The most common type is a design that works like pliers. That is, the sleeve is compressed on both sides. Other pliers are diaphragm crimpers. Crimping pliers.
Pliers
The tip is crimped in the same way as pliers grip a part. The working surface of the dies has cutouts into which the tip shank is threaded. This design is suitable for those fastenings that do not require special reliability.
To increase crimping force, hydraulic ferrule crimping tools were invented. Thanks to this improvement, the pliers became more efficient. The design uses cylinders with pistons filled with oil, which creates a large pressure of the matrices on the tip sleeve.
Pliers with removable dies
Some crimpers are equipped with several types of removable matrices. The versatility of the tool eliminates the need for pliers for each conductor cross-sectional size.
Diaphragm pliers
The originality of the design of diaphragm crimpers lies in the comprehensive coverage of the tip shank. The principle of operation is similar to the movement of the aperture blades of photographic lenses. The only drawback of such devices is the impossibility of inserting pliers into the connection of the two ends of the wires.
The diaphragm tool is used as a press for pin or flat metal tips. The all-round clamp is much more effective than the plier type for covering the end switches of wire products.
Design features of adjustable pliers
Since adjustable pliers are the most versatile tool, it is worth getting to know their design features in more detail. Based on the type of mechanism used, adjustable pliers are divided into two categories of tools.
The adjustable mechanism can consist of an axis fixed to the movable jaw of the tool and a groove on a stationary clamping element, which is a series of aligned circles. On the axis, so that it can be moved along the groove and thereby adjust the degree of opening of the jaws, a sector is specially cut out. This adjustable mechanism works as follows: the axis for moving along the groove is rotated so that its bevel is parallel to the side of the cutout. Having positioned the axis in this way, the adjustable pliers are set to the required amount of jaw opening.
Pliers with grooves on the fixed part.
More common are adjustable pliers, the jaw opening mechanism of which is made according to the so-called American system. On the fixed jaw of such pliers there is a number of circular grooves along which the “tide”, made on the movable handle of the tool, moves.
Pliers with circular grooves.
To adjust the degree of opening of the pliers, you must perform the following steps:
- Remove the “tide” from its engagement with the side walls of the grooves.
- Place the mite lips as far apart as possible from each other.
- Place the tool handles in the required position and bring them together again.
Adjustable pliers equipped with a mechanism of the second type are considered more reliable and easier to use.
Many experts, when comparing adjustable plumbing pliers with conventional adjustable wrenches, emphasize that the former are easier to use and the required degree of opening of their working jaws is carried out more quickly. As a rule, adjustable pliers, equipped with adjustable mechanisms of both the first and second types, have about seven fixed positions of the clamping jaws.
Pliers
Pliers are a type of pliers that have a flat working surface. Often it is equipped with small notches. They are designed to grip and hold relatively small parts. For ease of working with parts, two such tools are sometimes used at once. They can have various shapes of working surfaces, which is why they got their name: long-nose pliers, duck-billed pliers, narrow-nose pliers. Often, pliers are equipped with cutting edges designed for cutting wire.
Combination pliers are also called pliers. Such tools include pliers equipped with a cutting edge for cutting nails and wire, and serrated grooves designed to hold tubes, nuts and other cylindrical parts.
Round nose pliers
The difference between round-nose pliers and pliers is the circular cross-section of the jaws, which taper towards the end (cone-shaped jaws). Round nose pliers are designed for curly bending of wire; the conical shape of the jaws makes it possible to make bends with different radii; they are an important tool for jewelers. Round nose pliers can have jaws of different sizes, both in length and thickness, and there are models that have jaws of different shapes in one tool, and there are round nose pliers with curved jaws.
Standard crimping errors
There are several typical mistakes that novice electricians or those who carry out the core crimping process themselves make. For example:
- The used sleeve has a cross-section smaller than the wire. There is never any need to reduce the cross-section of the cores and adjust it to the diameter of the sleeve. This leads to an increase in resistance and a decrease in throughput. Where there was a combination, the vein will heat up and collapse.
- Large size sleeve. If the socket is used with a large diameter, it will not bring a strong and reliable connection. Even if you bend the wire several times, this will not lead to good performance, since the mechanical strength will drop by almost half.
- Cutting the sleeve into several parts. When crimping a cable with a short length of exposed ends, it is inconvenient to work with pliers, and the contact area is reduced.
- Crimping should be carried out exclusively using press jaws. Special tools were invented for this joining method. Therefore, you should not use pliers or a hammer, as this can damage both the sleeve and the cable. To prevent this from happening, it is necessary to use a tool such as press pliers, as they greatly simplify the work of crimping cable connections.
That's all I wanted to tell you about how wires are crimped with sleeves. We hope the information provided was useful and interesting for you!
You probably don't know:
- Methods for connecting LED strip
- Which electrical tape is best for electrical wiring?
- How to find a junction box in a wall
Application area
Now let’s look at the main areas of using press pliers for terminating wires. Depending on the specific situation, choose a tool of the desired shape and design.
Stranded wires and thin-walled ferrules
Thin-walled lugs are used for small-section wires - from 0.5 to 3.5 mm2. The elements are marked NSHVI. The abbreviation stands for as follows:
- N – tip;
- Ш – pin;
- B – bushing;
- And - isolated.
NSHVI lugs are used for crimping stranded copper wires with subsequent insertion into sockets of various electronic devices. The crimper handles are compressed until the spring mechanism of the device is activated.
Note! Multi-stage clamp matrices allow you to work simultaneously with wires with a cross-section in the range indicated above. This eliminates the need for a large number of hand crimping tools.
Press pliers create a strong and reliable compression of the tips. Without them, one would have to twist stranded cores or solder the terminals of switchgear devices. The use of pressed end switches completely eliminates problems associated with breakage of thin wires, wire breakage, and the risk of short circuit.
Stranded wires and thick-walled ferrules
Thick-walled shanks are used for crimping multi-core power cables. Their maximum cross-section reaches 16 mm². Press pliers PK-16 are used only for multi-core wires. The tool can compress the sleeve so tightly that it can easily break a single core.
The cable crimping process occurs in several stages:
- At the end of the wire, mark the length of the sleeve.
- Using special nippers, remove the insulation from the marked area.
- Place a piece of heat-shrinkable tubing so that it does not touch the exposed wire.
- The cleaned end of the cable is inserted into the sleeve. The insertion of the wire should be tight, but without force.
- The tip is crimped using pliers.
- The protruding veins are bitten off.
- Use a hair dryer to heat the heat shrink tube until it tightly grips the cable.
If the letter “U” is indicated in the marking of the tool, this means that the ratchet mechanism is located inside the handles, which creates a large force on the jaws of the crimper. The PK-16-U pliers compress more easily during cable crimping.
Pliers PK-16-U
For large cables
In the case of large cross-section power wires, a large hydraulic press should be used instead of pressing tongs. This type of crimper appeared much earlier than crimpers, but, as in the case with them, what kind of high-voltage cable can be crimped depends on its dimensions. The tool is not used in the domestic sphere, since the crimped bushings, tips and sleeves have considerable dimensions. This option, for example, is suitable for laying and switching power wires in electrical panels in the entrances of houses, etc.
To compress the matrix, you need to apply a lot of force to the lever. If the valve is slightly open, the rod begins to slowly move away. A fully open valve allows the stem to be quickly removed all the way to the stop. During full compression of the matrices, blocking occurs. In this case, there is no possibility of excess pressure forming, which could damage the mechanism.
Since the dies are selected depending on the overall dimensions, the hydraulic press is produced together with a cassette of several dies. The upper part is magnetized, so it automatically returns to its original position. Only the lower element of the press changes. Regardless of the position of the equipment, parts will not fly out. The tool has a rubberized handle that increases electrical safety.
Required Tools
Crimping is carried out with a special tool that allows you to create the necessary force. The following tools are popular:
- Press pliers for crimping PK2 and PK2M lugs are used for terminating cores with a cross-section of up to 10 sq. mm;
- PK1 and PK1M brand tools are a more powerful version of hand pliers;
- hydraulic pliers allow you to crimp wires up to 10 sq. mm;
- In industrial production, a hand press is used. It is suitable for wires up to 240 sq. mm;
- hydraulic press with electric drive is used for cables up to 300 sq. mm.
Types of instruments
Press pliers with hinges increase the pressure of the tool, which makes the manual crimping process easier. Devices with a ratcheting mechanism are especially convenient. They prevent the instrument from unclenching until the procedure is completed.
You can watch how to crimp a wire without tools in this video:
Types of press jaws
The manual crimper is used for crimping non-insulated cable lugs, contact connectors, terminals and contact sleeves of various sizes. If a manual crimper has special blades (usually they are located where the handles are attached), then this tool can also be used for cutting cables and wires.
Electric pliers are a multifunctional tool for professional use. They can do almost any work with wires. Electric pliers are mainly used for cutting and stripping wires, but they can also be used to crimp uninsulated and insulated cable ends.
A crimper is a tool for crimping wire lugs, twisted pair cables, and connectors. It has two long handles (one or both can be movable) and a massive working part in the form of metal jaws, which have holes for cables.
When the handles are brought together, the jaws close and the cable connector is crimped using forceful pressing. Some models have a blade on the working part, which simplifies the work - no additional tools are required to cut the cable.
How to choose press jaws
The choice of crimping tool is determined by the cross-section of the wire. The larger it is, the more powerful the device should be. Human effort is not enough to create a tight and uniform pressure, even when using household tips.
Crimping of cable lugs is performed using one of the following tools:
- Press pliers of brands PK2 or PK2M - for manual use, suitable for wires with a cross-section of up to 10 sq. mm.
- Hydraulic pliers – designed for terminating cables up to 10 sq. mm.
- Press pliers for crimping terminals, brands PK1 or PK1M - similar to the first tool, but reinforced with long handles, due to this they are capable of crimping a wire up to 50 sq. mm.
More powerful devices, such as manual and hydraulic presses, are used in production. With their help, you can crimp wires with a cross-section of up to 30 sq. mm.
Hand press pliers for home use
How to work with crimping pliers - important nuances
The process of crimping wires is intuitive - a sleeve or tip is put on the wire(s), a pliers matrix is attached to it, the handles of the tool are closed and the contact is ready. In practice, most often the “first pancake”, or even several, turn out “lumpy”, and almost in the literal sense - the connections may be far from ideal. There have also been cases when contact in a seemingly well-crimped wire deteriorated over time.
If the shape of the terminals is not maintained
In the first case, the culprit is the settings for the compression force of the matrix parts, which can be different both for individual wires and for the tips themselves. Because of this, professionals prefer to have at least two tools so as not to have to reconfigure the spring to work with different wires or sleeves.
The quality of work is also influenced by the material from which the sleeves are made and their thickness. Crimping for dense terminals is always much easier and they subsequently hold their shape better than those made of soft materials.
The correct orientation of tips with a “U”-shaped cross-section is a requirement that lies on the surface, but is often ignored, and the misalignment of parts in any mechanism does not always fall within the zone of permissible error.
Twisting stranded cores before crimping
For every experienced electrician who started with twisting and soldering wires, this movement is most likely already a reflex, but when crimping for stranded lugs is performed, then you need to get rid of it. The validity of this statement can be verified by a simple experiment - take a pair of single-core single-wire wires, arrange them crosswise and squeeze them with pliers.
In some cases, both wires are deformed, and sometimes only one, but in this case it will be almost completely broken and begin to dangle on a thin isthmus. Of course, the conductivity of this vein will decrease significantly. If the wires do not twist, then when crimping the tip they will be located parallel to each other and when deformed they will simply fill all the voids without squeezing each other.
Color marking of sleeves and dies
Some manufacturers mark different sizes of sleeves with separate colors and the same marks are applied to the plier matrices. We must remember that a unified system for this has not yet been developed, so if you purchase cartridges based only on color, you may end up with consumables that are not entirely suitable.
Why can't you twist the wires?
The wires inside the bushing are crimped under very high pressure, so that they can even change their original circular shape if they lie parallel to each other. From a circle they turn into a hexagon, and this increases the area of their contact surface with each other.
And when you twist them, during crimping, in those places where the veins intersect, they can be pressed against each other.
Video description
The master talks about the features of using hydraulic press tongs in this video:
Tool for sequential crimping of cable products
This type of crimper allows you to prevent air from entering the inner cavity of the sleeve during crimping. This nuance is very important when connecting an aluminum cable to a copper wire. The absence of air reduces the likelihood of oxidation at the point of contact between two metals.
Computer wire crimping pliers
Twisted pair cable is used to connect a computer to the Internet. Special crimpers are used for the LAN cable. This type of tool belongs to a separate group of press jaws. Their design has a special matrix, which differs in shape. It is this that allows the installation of RJ 45 type plugs. It is also used during the installation of telephone networks.
This type of crimper does not crimp. The tool displaces contacts that cut through the insulation protection on each thin twisted pair conductor.
Professional crimping of computer wire Source stroy-okey.ru
