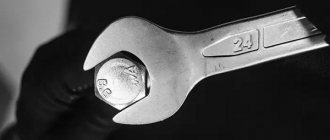
What to do first
Before proceeding to the main actions, you can carry out preliminary “operations” - this will increase the chances of successfully removing the debris, and, perhaps, will help get rid of it immediately.
First of all, you can try to knock on the fragment, if possible, with a hammer. No need to hit hard. Such actions will loosen the bolt, making it easier to remove.
You can also try to warm up the part well in the place where the fragment remains. A gas burner is used for this. This will relieve internal tension
Remember: it is important to use the burner carefully if the part is made of aluminum - it can simply melt it
You must first warm up the part in the place where the fragment is located.
This must be done extremely carefully. It wouldn't hurt to pour a little liquid like W-40 into the hole.
If not, you can use a dirt and rust remover. Such lubricating fluids will help facilitate the “exit” of the bolt fragment
It wouldn't hurt to pour some W-40 type liquid into the hole. If not, you can use a dirt and rust remover. Such lubricating fluids will help facilitate the “exit” of the bolt fragment.
W-40
If during the preparatory process the fragment has not yet come out, it’s time to move on to a more radical method. Let's look at it in more detail below.
How to remove a broken bolt: step-by-step instructions
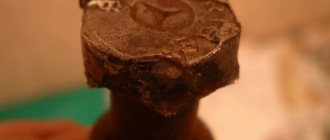
The most difficult thing to remove is a bolt fragment that has a non-flat surface - during the drilling process, the drill can simply slip, and the part will be damaged, and removing the bolt will become more difficult.
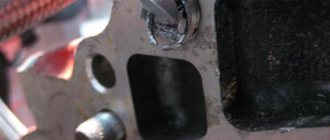
This is what a broken bolt looks like in detail
To make it easier, it is worth injecting the lubricant again, and then using a guide bushing that matches the thread. It must be screwed into the hole until it stops, and then tightened with a lock nut.
Matched bushing
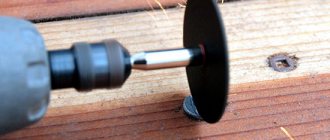
Using a drill, you need to make a small hole in the fragment for the extractor. It is recommended to lubricate the end of the drill with lubricant.
Important! It is better to drill exactly in the center - this will make it easier to remove the fragment.
Making a hole with a lubricated drill
If everything is in order, you can continue drilling - you will not damage the thread, since the recess has already been created. You just can’t drill through the fragment - you can damage the part, especially if it is made of soft metal.
The next step is to drive a suitable size screw extractor into the hole. Make sure it is firmly secured and does not slip out. If this is the case, you can begin to carefully and slowly unscrew the extractor along with the fragment.
Screw extractor We turn out the fragment
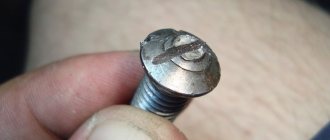
The broken bolt has been removed, all that remains is to check whether the thread is intact - to do this, you need to screw a new bolt into the hole. To make this easier, you can lubricate the threads with lubricant.
The extracted bolt fragment. As you can see, his thread remained intact thanks to careful actions. The item is not damaged
In the process of removing the bolt, you will use chemicals, possibly heat the part in the hole, use impact tools and drill, so it is important to take care of personal protection: it is better to wear gloves, long sleeves, glasses, and, if possible, a respirator to protect the respiratory tract.
This method will help you remove a broken bolt even from a deep hole, if you do everything correctly and follow safety precautions. There are other methods, but we cannot vouch for their effectiveness, while the method described above always works flawlessly.
How to unscrew an internal hexagon with torn edges
To unscrew a bolted connection with a through hole, you can use a file. With its help, the hexagonal hardware is bored to the next size and unscrewed with a wrench.
The second way is to use Torx. They can punch out new splines and reuse the hex hardware, but subsequently it can only be unscrewed with a Torx sprocket.
Torx sprockets
In addition, before unscrewing the torn hexagon, you can saw through the internal axis of the hexagonal fastener for a screwdriver and unscrew it. With this method, it is not always convenient to get to the fastener; sometimes its location does not allow the use of a screwdriver.
How to unscrew a licked bolt
When turning the bolt, pry it up with a nail puller and pull it out to the maximum possible height, leave it in tension and gradually unscrew it with a wrench. When you don't have a nail puller, you can use a screwdriver. A small bolt is removed using pliers by the head. If it does not give in immediately, then rotate it, clamping it with pliers counterclockwise with upward force.
Use a tap and insert it all the way. If you don’t have it at hand, then a screwdriver with a cone-shaped edge will do, which you carefully hammer in until it stops and try to unscrew it.
To prevent such situations from reoccurring, they must be treated with graphite lubricant before tightening the bolts. But solid oil or lithol are not used for this purpose, because they are used for rubbing parts, and after lubrication, bolted joints become jammed with them.
Photo tips on how to unscrew a broken bolt
Method 2 - drilling and unscrewing with a chisel
Suitable for cylinder head bolts with the outer edges torn off.
Algorithm of actions:
- Using a drill and a 10mm drill bit, drill a hole in the center of the bolt, the depth of which should exceed the height of the edges of the head.
- Place the chisel at a right angle and, using strong blows, drill the blade into the bolt to a depth of 2-3 mm.
- Place the chisel at a 45-degree angle to the surface of the head and begin to twist it counterclockwise with strong blows. Typically you need to wait 4 to 5 minutes to start the process.
What do special bolts look like?
Special fasteners have been installed on the steering column for quite some time. It can be found on both domestic and foreign cars. There are three types of shear bolts:
- With a classic hat and an additional “skirt” at the bottom. Such structures work to break. That is, they are tightened with a certain force at the manufacturer’s factory. Once the fastener is in place, it can no longer be removed using a regular wrench. The top cap will simply break off under load, leaving a “skirt” in the form of a cone-shaped protrusion at the installation site. It cannot be picked up or unscrewed.
- With a round head without slots like a ratchet. Such a bolt can only be tightened using a special wrench. It will not turn back out due to angular lifts, which will rip any key off the head.
- With a regular hex head. Until they are screwed in, these bolts look like regular fasteners, but after tightening they take on a new look.
We will take a closer look at the design and operating principle of the latest product.
Method 7 – special extractor heads for licked edges
Special heads - extractors - are available for sale. They are precisely designed for unscrewing torn bolts with licked edges.
But such heads have their own peculiarity of use - they cannot be unscrewed using an impact tool, but only with a key with a 3/8-inch square.
The algorithm of actions is very simple. An extractor head of a suitable size is taken from the kit and, using a hammer, is pressed onto the licked head of the bolt so that it fits onto it.
Next, take a 3/8-inch square wrench, a lever, and unscrew the bolt.
Many people ask whether it is necessary to change the gasket if it was not possible to remove the cylinder head due to one broken bolt.
Most experts say that yes, it needs to be changed. After all, if all the bolts were torn off except for one, then the first clamping of the gasket was broken, and the second time it may not seat correctly and subsequently leak or burn out. Therefore, if you have already taken up the task, then bring it to the end. And we told you how to do this above.
Replacing the stud
How to remove a bolt with stripped threads
It is better to carry out planned replacement of studs and repair of the head at the same time. For a simple replacement, before unscrewing it, it should be moistened with brake fluid or a brake fluid. It should be unscrewed using a special stud puller or a gas wrench. Unscrewing, especially at the beginning, should be done smoothly, without jerking.
If the force is not enough, you can use an extension cord
It is important to feel the effort here and not miss the moment when the pin begins to twist and break. At the first sign, it is better to reapply brake fluid and let it sit. Move on to the next part
The pin is unscrewed, move on to the next one. After unscrewing all the studs, we return to the soured part
Move on to the next detail. The pin is unscrewed, move on to the next one. After unscrewing all the studs, we return to the soured part.
We are trying to unscrew it. It may work out, but often such a part breaks off. If it works, install the head with the gasket in place and begin tightening the nuts according to the diagram, observing the tightening torque:
- First, we tighten each nut, going in a circle with a special wrench with a dynamometer;
- Then we go through it several times after a short break to seal the gasket;
- We do the final tightening of the nuts. The cylinder head tightening torque is different for different engine models; it is better to find out this value from the repair manual.
Combined
It combines a drill and the extractor itself. However, for its application it definitely requires a reversible drill with a variable speed (from 350 to 800 rpm).
This model consists of two parts: a bushing and a drill screwed into it. Drill - left rotation. On its middle part there is a thread cut into which the bushing is screwed. The bushing has a tapered left-hand thread, like the tapered model previously described. In its upper part there is a hexagonal profile for using an open-end wrench or a spanner wrench.
How to drill out a broken bolt using a combination model? Drilling out broken bolts and removing studs using this model involves four steps.
Common Mistakes
Despite the fact that automakers clearly indicate the procedure and nuances of tightening the cylinder head, many car enthusiasts make mistakes when assembling the engine. The most common of them are:
- Pouring oil into the mounting holes to lubricate the threads (the liquid is incompressible, so poured oil will not allow the head to be properly tightened);
- Over-tightening (exceeding tightening forces leads to damage to the cylinder head and the fasteners themselves);
- The use of damaged or inappropriate keys (the edges of the bolt heads may be torn off, after which it will be problematic to tighten or unscrew them normally);
- Use of unsuitable bolts as replacements (fasteners from different engines may differ in length, thread spacing, head height and diameter);
POPULAR WITH READERS: Cylinder misfires, causes, diagnostics, repair
To avoid problems in the future, you should use only fasteners designed for a specific engine and fully comply with the work conditions.
Causes and types of bolt “breaks”
There are several reasons why a bolt may break when removed. Most often, this problem is encountered by owners of old cars or those that were improperly operated or stored. The most common cause of a broken bolt head is the application of excessive force when unscrewing it. This happens if the hardware has become “stuck”. Outwardly, it is almost imperceptible, and only when the master tries to unscrew the bolt does he realize that the thread cannot be turned. Often hardware breaks due to rust, which appears as a result of its constant contact with moisture and an aggressive environment. In turn, this leads to uneven wear of the bolt and its breakage at the most inopportune moment.
Rust is one of the reasons why bolts break when unscrewing
Bolt “breaks” can be different, but the most difficult to solve are when the hardware is “cut off” flush or inside the threaded connection. You will be very lucky if the hardware breaks above the surface of the unit, and it can be removed using a screwdriver, pliers, welding, etc.
If the fragment sticks above the surface, then you are very lucky
How to unscrew the cylinder head stud
Threaded connections are the most widely used among detachable connections. They come in a variety of sizes; screws, bolts and nuts are found in both a smartphone and a nuclear reactor. Each connection must be tightened with proper torque. Sometimes the threads become clogged with dirt or become a victim of corrosion. When you try to unscrew the connection, the maximum force is exceeded and the thread breaks. It even reaches the point of destruction of the fastener body. In order to remove a damaged pin from the body, various techniques are used.
Features and advantages of cylinder head studs
In any engine, the cylinder head (cylinder head) is attached to the block itself with studs. They are screwed into the block in such a way as to ensure the best and uniform pressing of the cylinder head to the block. A high-quality compressed gasket prevents the leakage of oil and antifreeze and the penetration of gases from the cylinder into the engine crankcase. Fasteners are made from high quality steel. However, over time, the threads on them may corrode and become clogged with various contaminants. Due to exposure to high temperatures, these contaminants are sintered, and the nut “sticks.” When you try to unscrew such a stuck nut and exceed the maximum force, either the thread breaks off or the fastener breaks off. In both cases, it is necessary to replace the broken part.
Replacing the stud
Experienced craftsmen recommend unscrewing and changing all the studs at the same time. Parts from the same batch have similar physical and mechanical characteristics, will bear loads evenly and will last much longer.
Before unscrewing, thoroughly moisten the thread with WD 40 or kerosene. In extreme cases, brake fluid will do. If you don’t have a special puller at hand, you can unscrew it with a gas wrench. You need to pull smoothly, without jerking. If you can’t unscrew it right away, you should apply WD 40 again and wait 5-10 minutes.
After all connections have been unscrewed, they should be replaced with a new set. The threads can be lubricated with graphite lubricant - this will help you easily unscrew the parts if necessary. Next, you should install the cylinder head in place and begin tightening the nuts according to the diagram from the user manual.
- First, all nuts are tightened to light resistance.
- Using a wrench and a dynamometer, achieve the specified tightening force value.
- In the sequence described in the manual, all nuts are finally tightened.
The nuts can also be lubricated with graphite grease.
How to unscrew the remaining fragment
If the pin does break off, don’t despair. To unscrew the broken part, several techniques are used. Some require the use of industrial equipment, while for others, simple equipment available to a home craftsman is sufficient.
How to unscrew a broken hairpin
If a fragment remains sticking out, then use one of the following techniques:
- Put on a nut with a slightly larger diameter and weld it. Next, you can use a key to unscrew the broken pin.
- Weld a transverse rod (reinforcement) 30-40 cm long. Using it as a wrench, you can unscrew the fragment.
- Use a file to sharpen the top to a square. Now the fragment can be unscrewed with a tap wrench.
Unscrewing a broken pin
If the breakdown occurs flush with the surface of the cylinder head (or other unit), the fragment will have to be drilled out.
Drilling out the threads of a broken stud
Before drilling, cover the cylinder head with a thick cloth to prevent sparks and waste from entering the cylinders.
Next, you need to use an angle grinder with an abrasive disc to level the surface of the fragment. It should become strictly horizontal. A point is marked in the middle.
Next, take a drill with a diameter slightly smaller than the internal diameter of the thread. It is best to place the cylinder head on the workbench of a stationary drilling machine - this way there is less risk of the drill deviating from the vertical.
Drilling out the threads of a broken stud
After passing the hole to its full depth, you should unscrew the remains of the drilled fragment from it using pliers or needle-nose pliers. Next, you must go through the hole with a set of standard taps.
Replacing a stud with a repair part and cutting a larger thread
If all of the above measures fail, there is another replacement method. To do this, take a so-called repair pin of a larger diameter. In place of the old hole, a new, larger one is drilled. The thread is cut into it using appropriate taps, and the repair pin is screwed in. Of course, you will have to take the corresponding nut for it.
When installing the head, you need to be especially careful not to damage the threads on the new stud - it will fit into the hole on the cylinder head with less clearance than the standard ones.
How to unscrew the threads remaining in the block?
There are two options here, but each of them begins with drilling out the fragment. To do this, you should cover the engine block with a thick cloth to prevent sparks and dirt from entering the engine, then cut off the top part with a grinder and place it strictly in the middle.
Drilling out the threads of a broken stud
Using a drill of a slightly smaller diameter, we drill out the fragments on a drilling machine, or most often with an electric drill. Here it is very important to hold the instrument strictly vertically, without distortion. We reach the edge of the trim and try to unscrew the rest of the thread. To do this, before unscrewing, you can try to drive it with a tap or try to hammer the edge of the metal inward with a thin chisel, freeing the threads.
If you fail when unscrewing or drilling, you need to move on to the second option.
Flat head screwdriver and hammer
This method will give a positive result if the bolt breaks above the thread and there are irregularities on the surface. Then a handy set of tools for repair work of any complexity will come in handy.
On the cleaned surface of the fragment we find the largest protrusion. Take a flat-head screwdriver and place it at an angle, pressing it to the desired location.
Check it out here too!
- Replacing a pressure tap - a step-by-step description of how to change a pressure tap with your own hands (80 photos + video)
- What is an acoustic switch: device, operation, types and features of the device (100 photos)
- Low and high pass filter: making frequency filters and how to create high-end circuitry (95 photos + video)
For strong support, use a core, which makes the uneven surface deeper. Then, using gentle pushes, carefully turn the thread. If necessary, the emphasis on the surface can be increased.
It is generally accepted that
...a self-tapping screw is the same screw, but only in a modern version. In the old days, almost all fastenings were made using screws. To do this, you had to drill a hole and then screw a screw into it. Unlike screw fastening, self-tapping screws do not require additional preparation that will involve drilling a hole. They can be screwed using a screwdriver or even a regular screwdriver into any suitable surface.
According to external data, the differences between these two fastening elements are small. Screws in the upper part under the head have a smooth part of the shaft that does not have threads, but self-tapping screws have threads throughout the entire shaft up to the head
Ignorant people may not even immediately pay attention to such features, and will not even find the differences. In construction markets, small self-tapping screws are sold by weight, but large samples are sold individually
How to unscrew a broken bolt without damaging the thread in the hole :: SYL.ru
Quite often, when using fasteners such as a bolt, situations arise when the head of the product breaks off, and the hardware itself remains inside. In this case, it becomes necessary to remove this residue without damaging the threads, so that the hole can continue to be used. Considering this, the topic of how to unscrew a broken bolt is very popular and requires more detailed consideration.
Types of fractures
Typically, such fasteners break at the end of the thread, although there may be exceptions. As a result, the hardware itself can be recessed into the hole, protrude above the surface, or be level with it
Based on this, you need to decide how to unscrew a broken bolt by paying attention to this very moment
Surface cliff
This type of failure includes the option when part of the hardware protrudes above the surface. We can assume that such a problem is easiest to solve without using radical measures. However, before any unscrewing of the broken bolt, it is worth treating the area with kerosene to remove carbon deposits and loosen the contact of the surfaces.
- If the protrusion is quite large, then the easiest way is to use tools such as pliers, pliers or a clamp, with which you can grab the part and unscrew it along the threads.
- Some experts, answering the question of what to do if a bolt that fits very tightly in the hole breaks, recommend using a welding machine. With its help, you can weld a lever to the hardware, which will result in a large arm for rotational movement.
- You can also use a drill with a diameter slightly smaller than the bolt itself. Using a drill, make a hole along the central axis of the bolt to the full depth. After this, the remaining fasteners are removed using a hook, trying to unscrew the thread from the very bottom.
Flush break
It is believed that this breakdown is the most difficult, since sometimes it is very difficult to determine the diameter of the hole, especially if the fastener has been cut off. Therefore, in order to determine how to drill out a broken bolt of this type, you should first clean the surface, determining the gaps.
Quite often, the break point has very uneven shapes, which, given this arrangement, are very difficult to straighten. It will not be possible to drill the product in this state. That is why a core is first used to prepare a place in the center for working with a drill.
Further steps describing how to drill out a broken bolt are described in the paragraph on surface breakage. After making the hole, the remaining threads are simply removed with a hook.
Cliff below the surface
Such damage is quite complex, especially if the part itself is made of soft metal. Therefore, you need to solve the problem of how to unscrew a broken bolt without damaging the threads in the hole.
First of all, using a core, mark the center of the hardware. In this case, it is best to use a thin tool made of durable metal so as not to accidentally damage the part.
The next step is to purchase a tap with reverse thread. Its diameter should be smaller than that of the bolt itself.
After this, a hole for the tap is drilled in the hardware itself, but not deepened too much. Next, it is enough to install the thread cutting tool and turn it as you go, which will lead to unscrewing. If this does not happen, then the tool is used as a regular bolt, but you should not apply too much force so as not to break it.
Extractor
The most correct answer to the question of how to unscrew a broken bolt is considered to be the one that suggests using a tool specially created for this purpose. It is called an extractor and is sold as a set of products of different diameters. Outwardly, it resembles a tap, but without longitudinal slots and with a conical notch for cutting.
To use the extractor, it is enough to drill a hole in the center with a diameter that allows the tool to go several turns. Then they begin to turn it all the way, and then until it is completely unscrewed.
Conclusion
There are several options for removing broken bolts from a hole that can be used for certain types of damage. However, it is best to purchase a set of extractors in advance, which can be considered the best tools for such tasks.
Effective ways to remove a broken bolt from an engine block
Not only will the bolts become loose, but they may also be over-tightened or mis-threaded. This may not have any effect on operation, but the next time you disassemble the connection, it will be difficult to unscrew the hardware. You have to put in a lot of effort. Because of this, the following consequences arise:
- the thread breaks;
- fasteners crack;
- the hat breaks off.
For one or more reasons, the fastener cannot be unscrewed from the seat in the usual way.
If we are talking about the cylinder head, then a large tightening torque is used here, which is why the above consequences arise. Before unscrewing a broken bolt, you need to perform preparatory measures:
Clean the hardware itself and the area around it from accumulated oil, rust, and dirt using a wire brush and solvent. The joint should then be further treated with a penetrating compound such as WD-40, brake fluid or clean engine oil. Thanks to this procedure, the bolts should loosen.
If the bolt breaks above the threaded surface
This case is considered easy, because the protruding pin means that the bolt has been unscrewed at least a little, and this also allows the use of clamping tools, as well as other manipulations to unscrew the fragment with a screwdriver or using a rod.
- To break up the rust and tear off the hardware, it is recommended to first tap the fastener with a hammer through the extension and heat it with an induction bolt heater or a blowtorch. The rotating pin is unscrewed using pliers, an adjustable wrench or another similar tool. When tapping, do not use much force, because you can break the threads in the hole or damage other parts.
- Using a hacksaw or grinder, slots are also cut into the fragment for a flat or Phillips screwdriver, and then unscrew it.
- If the fragment protrudes above the surface to a sufficient height, then a through transverse hole can be drilled in the body, into which a thick long nail, a metal rod or even a screwdriver is then inserted. The protruding parts of the tool at hand will not only allow you to influence the rest of the bolt, but will also play the role of a lever.
Method 1 - bolt shrinkage
Suitable for VAZ 2107 (other classic models), as well as cars where the cylinder head is secured with bolts to the outer edges. On models of the 2108 series and higher, this method is also acceptable, but at a certain stage of the work there you will have to resort to drilling.
Our goal is to seat the bolt using strong blows. As a result of vibrations and other complex physical processes, it will weaken.
But before you hit, try setting the head to 11 on the bolt with the licked edges and try to unscrew it that way.
If it doesn’t help, then take two hammers. We place the first one with the flat side on the problem bolt, and with the second hammer we hit the first one hard.
Next, the head is pressed onto the flattened head and the bolt is unscrewed using a large lever.
If the first attempt fails, then the second and third will definitely be successful. Typically this can take up to 20 minutes.
It is advisable that all other cylinder head bolts are tightened in order to press the head as much as possible. The method is described in more detail in the video.
Method 5 – cylinder head bolt is broken
The method is suitable for cases where the bolt has burst and part of it in the form of a pin remains inside the cylinder block. We use welding, a tube, a nut.
Advantages of the method:
- there is no need to disassemble the engine;
- saves time.
Take a tube with the following diameters:
- The outer one is slightly smaller than the diameter of the cylinder head bolt.
- Internal – such that an electrode of 2–3 mm fits freely into the tube.
Weld a 17 - 19 nut onto one side of the tube.
- Insert the tube into the hole so that it touches the broken pin.
- Insert the electrode into the hole of the tube at a slight angle, so that its end is located where the edge of the tube touches the pin.
- Weld the tube to the stud.
- Use a wrench to unscrew the pin.
Another way if the cylinder head bolt breaks.
Suitable for cases where the broken pin is not deep, no more than 5 cm.
To unscrew the stud from the block, first use a drill and a long 10 mm drill bit. This will help you level and center its surface. Next, using a 4 mm drill, drill a hole in the stud with a depth of at least 1 cm.
Carefully drive a 25mm Torex key into the stud and use a lever tube to unscrew it. You need to unscrew without jerking, gradually increasing the force on the lever.
Features of the work performed using the example of some cars
To prove the proposition that each power plant has its own characteristics of tightening the cylinder head, let’s consider the nuances of performing work on specific models.
VAZ-2112 16 valves
A number of modifications of the VAZ-2112 were equipped with two types of 16-valve power plants (factory indexes - 21120 and 21124). These two motors, despite some design features, have identical head tightening technology.
These units use 93mm long tension bolts. In this case, reuse of fasteners is allowed, but under one condition - if their length does not exceed 95 mm (if it is longer, they should be replaced). 10 bolts are used to secure the head.
Tightening is carried out in three approaches:
- The bolts are tightened according to the order with a force of 2 kg/m;
- Turning 90 degrees;
- Repeated tightening to 90 degrees.
The drawing diagram is shown below.
Between the 2nd and 3rd approaches you need to take a 20-minute break.
Since these engines use tensile bolts, additional tightening is not required during vehicle operation.
VAZ-2107
On the VAZ-2107, all installed modifications of power units are 8-valve.
The block head is attached to them with 11 bolts, 10 of which are main, and 1 is an auxiliary side bolt (installed in the side protrusion).
On this car, tightening fasteners is also performed in three approaches:
- 10 main bolts are tightened in order with a force of 3.5-4.0 kg/m;
- The same bolts reach with a torque of 11.5-12.0 kg/m;
- The auxiliary is tightened with a force of 3.5-4.0 kg/m.
Additional tightening of the cylinder head is not required when operating the VAZ-2107.
"Samara", 10th family, Priora
On models of the Samara family (2108-21099), as well as VAZ 2110-2112 with 8-valve units, tightening is already performed in 4 approaches:
- Tightening with a force of 2.0 kg/m;
- Reaching with a moment of 7.5-8.5 kg/m;
- Turn 90 degrees;
- Repeated rotation by 90 degrees.
The break between points 3 and 4 is 20 minutes.
As for the VAZ of the “tenth” family, which are equipped with 16-valve engines, their tightening technology is the same as that of the VAZ-2112 (described above).
The same applies to the Lada Priora; on 8-valve units, a method with 4 approaches is used (VAZ 2108-21099), and on 16-valve units, 3 approaches are used (VAZ 2112 with a 16-valve engine).
"Volga"
On ZMZ-406 engines installed on the Volga, according to the automaker’s technical documentation, tightening the engine block head bolts is carried out in two approaches:
- With a force of 4.0-6.0 kg/m;
- With a moment of 13.0-14.5 kg/m.
But many car owners of this car note that this technology does not allow the cylinder head to be properly tightened, so they use techniques with a large number of approaches.
A common method is the cross method, performed in 4 stages and with the following efforts:
- 4.0-4.3 kg/m;
- 7.5 kg/m;
- 11.0 kg/m;
- 14.3-14.5 kg/m.
Subsequent tightening of the bolts is not required when operating on this engine.
Ways to remove bolts
Broken Bolt Extractors
There are several ways to unscrew a broken bolt. Let's look at them in more detail.
Using the top of the cap screw
When deformed, a kind of “antennae” is formed on it, which can be caught on the remaining part of the bolt in the hole
The easiest way to unscrew a broken but well-lubricated bolt is to use its already broken off upper part.
The probability of success when using this method is low, but it is worth a try, especially if the bolt breaks at the initial stage of tightening.
Using a small screwdriver or chisel
Unscrewing damaged bolts
You can try to unscrew the remaining bolts using a small screwdriver or chisel. In this case, there are two options: either simply unscrew the broken part, using the irregularities at the break site, or make a kind of small slot on the upper side of the broken part, clinging to the edges of which and twist it out.
The last method can only be implemented if the material from which the chisel or screwdriver is made has a higher strength than the material from which the bolt was made.
Using the extractor
The extractor is a drill with a long cone-shaped tip
This is the most effective method, since with its help it is almost always possible to achieve results. The design features of the extractors are that they are screwed into a hole located in the central part of the bolt being unscrewed. In this case, the thread present on the extractor has the opposite direction to the bolt thread (the so-called “left-hand thread”).
Usually, the kits sold come with several drills of different diameters.
They all have the same shape, while on the other side of the cone-shaped thread there is a rectangular mount for a drill or tap.
In the process of screwing into the bolt, the extractor wedges it and at some point stops. Further rotational movement is transmitted through the extractor to the bolt and unscrews it.
Let's look at the sequence of actions that need to be done to unscrew a broken bolt using an extractor.
No. 1 Drilling out the remaining bolt
It is recommended to make a bushing of short length, from the outer part of which cut a thread with a pitch equal to the thread of the hole into which the torn bolt was screwed
First you need to make a hole in the remains of the broken bolt. This is a very difficult operation because the diameter of the bolt is relatively small. In addition, when drilling, you need to be very careful not to damage the threads.
In this case, two drills with different tip shapes are used - with an obtuse and an acute angle
In the center of the sleeve you need to make a hole large enough for a drill to pass through, which will drill out the remains of the bolt.
Unfortunately, this method is not always applicable, since to implement it you need to have a lathe on hand. Therefore, another method is used.
The first is used to level the top of the remaining bolt, and the second is used directly to drill the hole for the extractor. In this case, the diameter of a drill with a tip having an obtuse angle should be slightly less than the diameter of the threaded hole. The diameter of the second drill should be equal to the diameter of the extractor.
What to do first
Before proceeding to the main actions, you can carry out preliminary “operations” - this will increase the chances of successfully removing the debris, and, perhaps, will help get rid of it immediately.
First of all, you can try to knock on the fragment, if possible, with a hammer. No need to hit hard. Such actions will loosen the bolt, making it easier to remove.
You can also try to warm up the part well in the place where the fragment remains. A gas burner is used for this. This will relieve internal tension
Remember: it is important to use the burner carefully if the part is made of aluminum - it can simply melt it
You must first warm up the part in the place where the fragment is located.
This must be done extremely carefully. It wouldn't hurt to pour a little liquid like W-40 into the hole.
If not, you can use a dirt and rust remover. Such lubricating fluids will help facilitate the “exit” of the bolt fragment
It wouldn't hurt to pour some W-40 type liquid into the hole. If not, you can use a dirt and rust remover. Such lubricating fluids will help facilitate the “exit” of the bolt fragment.
W-40
If during the preparatory process the fragment has not yet come out, it’s time to move on to a more radical method. Let's look at it in more detail below.
Bolt failure below surface
Complex failure, especially for a soft metal part. Therefore, it is very important to unscrew the broken bolt without damaging the threads in the hole. The procedure here is as follows:
- The center of the hardware is outlined using a core. It is best to use a thin and durable metal tool; it will not damage the product;
- Then a tap with a reverse thread is purchased. Its diameter should be smaller compared to the diameter of the bolt;
- A not very deep hole is drilled for the tap;
- The tool is installed to cut the thread. It turns in a circle and then the element can be unscrewed.
If the last point could not be achieved, then the tool can directly become a bolt. However, you should not make excessive efforts, as there is a possibility of breaking it. As a result, you can remove the old broken part and screw in new elements.
The reason for the breakdown of the edges of screws and bolts
There are several reasons. They usually occur in three cases:
- When choosing hardware for fastening certain parts of a mechanism, device or structure.
- In case of violation of technology when working with fastening tools.
- When using low-quality, faulty tools during installation or dismantling.
The choice of fastening elements (screws, bolts, studs, nuts, etc.) must be done carefully. Purchase only high-quality products, taking into account the scope of application and the influence of external factors
It is important to pay attention to the certificates of products and manufacturers, since now there are many handicraft workshops in gateways that produce hardware from ordinary wire and low-quality rods
As a result, the service life is short, the most vulnerable places of bolts and screws become corroded, and due to a violation of the technological process, the strength of the metal in critical areas of the product decreases (the transition from the body to the head, splines and edges on the head). When purchasing such fasteners, there is obviously a risk of damage to the hardware by the tool during operation.
When installing or dismantling any structure, you must use a serviceable tool to screw in and unscrew screws, screws and bolts. Make sure that screwdrivers and keys do not have “licked” or chipped working surfaces. Do not allow screwdrivers to slip through the edges of the head or keys around the bolt head.
Also, the causes of failure may be: “sticking” due to exposure to high temperatures, wear due to prolonged mechanical loads, corrosion due to long-term operation under aggressive environmental influences, use of the wrong tool for unscrewing, etc.
How to unscrew a stuck bolt
Car repairs are often made more difficult due to corrosion and oxidation of fasteners. For example, during assembly at the factory, the master did not treat the threads with lubricants, and during operation water got in there. As a result, the bolt seemed to be stuck tightly, but such a nuisance can be dealt with in several ways.
Unscrew a rusty bolt or nut by tapping
, rust and scale come off the bolt , so it becomes easier to unscrew it. The operation is carried out with a hammer, turning with a special tool to create torque. Be careful, as you can damage the product and have to drill it out. After removing the fastener, it is cleaned of rust and treated with graphite lubricant. If available, place a boot on the connection.
Using solvents
In the arsenal of any experienced car enthusiast there is always a set of liquids to combat rust and other deposits. They mainly use WD-40 with good penetrating ability into micro-gaps, the cost of which starts from 100 rubles . Along with it, brake fluid, white spirit, kerosene, and Coca-Cola are used. Unlike WD-40, other liquids have a weaker effect, and it is better to pour them into a container and place the stuck compound in it for greater effect.
If the bolt is stuck on the front pillar, the solvent can be carefully poured into the “glass”. The main thing is not to damage the rubber bands on the racks, otherwise you will have to change them.
Moisten a rag with any product, wrap it around the nut and leave it for a while. Then they tap the bolt to destroy the softened rust and begin to unscrew it.
Thermal method
When the solvent does not cope with the task, you can try exposure to fire and cold . Any large auto or hardware store sells a gas torch; it is used to heat the bolt until it turns bright orange. Then they cool it with machine oil and try to weaken it. If the attempt fails, the process is repeated again.
This method does not always help, and if it is close to the paintwork or fuel tank it is very dangerous. When working with a gas burner, you must follow fire safety rules and do not use it if you do not have a fire extinguisher at hand.
Use freezing sprays to preserve the bolt for later use. But such reagents are mainly used by professionals, since in domestic conditions this is a costly and unprofitable matter .
How to drill out a high strength bolt?
The sequence of actions is the same until the thread is cut in the drilled hole. In this case, before drilling the hardened bolt, it is necessary to make the following part: a bolt with a wrench head is machined from carbon steel. The end of the bolt is given a tetrahedral conical shape using a forging hammer.
Next, the bolt is driven into the drilled hole to the full depth where it should jam. Using a spanner wrench, loosen and gradually unscrew the broken piece of the bolt.
But how to drill out a broken bolt if no other method helps? In this case, the only drastic way is to completely drill out the rest of the part. This is the most difficult and responsible way to drill a bolt without damaging the threads in the mechanism parts.
To begin with, a hole is drilled in the fragment using a thin drill. Then thicker. And so on until most of the remaining piece is drilled out. This is one of the most effective ways to drill a bolt from a car hub.
How to drill out a broken bolt from an aluminum block?
It happens quite often that a small diameter bolt in an aluminum car engine block breaks. It is not easy to drill out such a remaining bolt. The Internet offers a lot of options on how to drill out a broken M6 bolt from aluminum without much difficulty.
In fact, the most reliable method is classic drilling followed by tapping. In this case, all the preparatory operations discussed above must be carried out very carefully.
All sorts of Chinese extractors are advertised, but they very often break inside the hole, which greatly aggravates the situation. In addition, this tool, with its conical shape, creates additional friction between the walls of the bolt and the block, which makes extraction difficult.
Unscrewing a broken bolt or stud from a cylinder block and other elements: solving the problem
In the process of repairing and servicing a car, as well as any other equipment, there is often an urgent need to remove individual elements of the internal combustion engine or chassis, body panels, etc. At the same time, removing engine components, attachments and suspension is often the most problematic operation. The reason is that the units can be tightened with bolts or studs, and the tightening torque is quite large.
If we add to this temperature changes in the engine compartment, oiling, accumulation of dust, dirt and other deposits, it becomes clear that unscrewing various bolts and other fasteners is not only a responsible and time-consuming, but also often a difficult task. In this article we will talk about what you can do if a stud or bolt breaks, as well as how to unscrew a broken bolt.
Drilling
And finally, the third and most radical way. It is used to remove broken bolts and studs from the hole. This is drilling. The method is very difficult. It is much more complex than all of the above and is the most dangerous. There is a risk of damaging the threads in the bore of the engine block or cylinder head. The drill should be held securely, as if it is a cylinder block, there is a serious risk of damaging an expensive part. The stud is often made of harder grades of steel, and the head is made of aluminum. The commutator body is cast iron, so it is also softer than a steel stud. The drill will definitely move away from the hard stud and towards the softer metal. This happens especially often if the work is carried out in a confined space and the drill is installed at a slight angle. The principle of drilling is as follows: you need to make a hole strictly in the center of the stud with a thin drill, having previously cored it, then install a thicker one in the drill and repeat the entire procedure.
The main thing here is to drill strictly in the center. When practically nothing remains of the stud body, the wall will become thin. It can be broken. You should very carefully break off the remaining pins using pre-sharpened wire or tweezers. It must be remembered that any action is carried out as slowly and carefully as possible. If you act rashly, you will need to think not about how to unscrew the broken block stud, but also about how to restore the cylinder head itself. And these are significant costs.