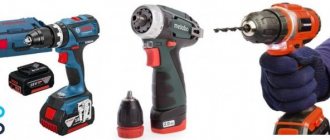
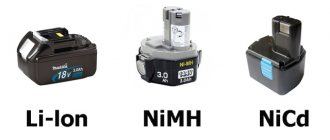
Everyone knows that a screwdriver battery sooner or later begins to lose its former performance and needs to be replaced. Usually only a couple of elements in the overall combination “sit down,” but this negatively affects the entire battery. Therefore, there is a need to either replace several elements with new ones, or change the battery pack completely. Since any screwdriver - Hitachi, Makita and other models - includes two batteries, if you wish, you can try to assemble an entire homemade battery from two. Owners of power tools who use them constantly sooner or later begin to wonder how to convert a screwdriver battery to lithium. As for beginners who are puzzled by this goal for the first time, they first of all have the question of how to disassemble the battery from a Makita screwdriver or any other, so as not to damage the fragile plastic box.
Experienced electronics enthusiasts assemble different types of batteries, including power supplies for an uninterruptible power supply (UPS). This is much more difficult than disassembling the battery of an electric drill. Any drill is often produced with so-called “non-separable” battery packs, which are either firmly sealed with tape around the perimeter, or their two parts fit so tightly to each other that, at first glance, it is impossible to disconnect them without causing forced external damage. However, among folk craftsmen you can also find people who have already thoroughly “get their hands on” using such batteries and can gladly share their secrets with everyone.
Types of fasteners, preparation for work
The battery module can be secured using:
- Glue;
- Valves;
- Screws.
It is not uncommon for a combined fastener to be used when different types of fasteners, such as self-tapping screws and glue, are used simultaneously.
Before disassembling the battery from the Makita screwdriver, you should measure the voltage produced by the battery pack. This indicator will help determine the number of faulty cans. After compiling the measurements, they are carried out again, checking the correctness of the work performed.
How to disassemble a Makita 12V screwdriver battery held together with glue
The adhesive seam should be especially carefully removed so that cracks and splits do not appear on the plastic, and when installed, the housing completely encloses all electronic parts and ensures safety. To do this, it is rational to use a hammer with a rubber impact, or another hammer made of soft material.
The entire perimeter of the seam is struck using medium force, ensuring that the gun bounces slightly away from the body. The procedure is not short-term, it takes about 10 minutes. And more needs to be done without haste. Along the way, the halves of the body periodically pull slightly away from each other, helping them separate. The adhesive layer breaks down with a characteristic sound when the concrete clicking becomes more frequent, you can help separate it with a thin knife blade or similar tool, trying to open the seam with it.
Another way to carefully unfasten the glued module is to use a thin knife or a flat screwdriver. This takes a little longer, the work must be carried out carefully, since the risk of injury and plastic cracks is very high. Using a blade, carefully loosen the seam around the entire perimeter, then insert the tip of a screwdriver into it and slowly separate the halves of the module.
Before disassembling the battery
Makita 12 volt screwdrivers, you can heat the adhesive layer using a hair dryer, which will speed up and make the work easier. By placing the battery module at a safe distance, a hot stream is directed to the connection, heating it along the entire perimeter. When the glue softens, the case will be easy to open.
Important: gloves used during work will help avoid burns.
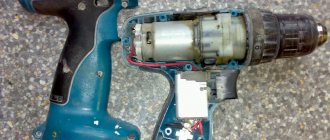
How to disassemble the battery from a Makita screwdriver
Disassemble the battery with a Makita screwdriver to replace one / more cans (batteries) or transfer it to another type of battery. The work must be carried out as carefully as possible, movements must be neat and careful so that the housing, banks, electronic boards and wires are not damaged, and the module, after assembly, functions properly and safely.
Connection with screws, latches
Loosening the screw fastening also requires care. Take a screwdriver with the appropriate tip shape and shaft length. They remember from which holes each screw was unscrewed, and when assembled they are screwed strictly into place. This is necessary because the equipment can be of different lengths. A short screw screwed into a deep hole will not be able to secure the connection, and a long screw located in a short hole can pierce the case wall, power elements and even the electronic board. If electrolyte leaks as a result of this, the microcircuits that are nearby will be damaged, and in the event of unfavorable events, an explosion is possible.
The module, secured with latches, is easy to open: just find them and open them with moderate force. Most often, one valve or two side valves are used.
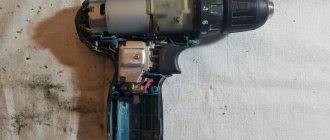
How to disassemble a screwdriver battery yourself?
We take the battery and begin to carefully cut with an ordinary, but very sharp knife at the junction in the battery
Then, to tear off the layer of glue located below, I scrolled along the entire length with a self-tapping screw. This must be done carefully because the body may crack and then you will have to get a monk's haircut