How to make a grinder from a drill?
Hi all!
In today’s article I will tell you how to make an angle grinder (angle grinder) from a drill so that it can not only drill, but also, for example, cut metal. But first I will try to dissuade you from this matter. Why? Well, because I believe that each tool is intended only for its own purpose and trying to give it the functions of another, firstly, does not provide a 100% replacement, and, secondly, almost always leads to unsafe operation.
If we talk specifically about our case, then most drills produce a maximum of 3000 revolutions per minute, while for working with a small disk, grinders reach 11,000 revolutions per minute. That is, sawing will not be as effective.
As for safety, it is worth remembering that the cutting wheel on an angle grinder is surrounded by a protective casing, thanks to which sparks and fragments cannot fly in all directions, and it also protects if the disc suddenly gets caught and it breaks. There is no way to fit the casing onto the drill, so safety will be at risk.
And one more argument is the opportunity to buy a full-fledged angle grinder for cheap. There are also very cheap options in stores, which in any case will be better than buying something from a collective farm. At the lowest prices you can make a purchase, for example, here. In addition, you can choose something from your own hands by searching on Avito.
If the above reasons do not stop you, then read on.
Summarizing
There are several options for making a grinder from a drill, and all of them are quite effective depending on the tasks. It is better not to try to set serious tasks for the resulting tool, but it will cope with basic ones perfectly.
It is better to work on a hard surface, because... this will significantly improve operational safety.
And the most important thing is safety precautions, because... When repurposing, you can make minor mistakes, which will later have a very serious impact.
Grinder from a drill
Actually, the easiest way is to take some kind of adapter, which on one side can be clamped into the cartridge, and on the other it should be possible to secure the disk.
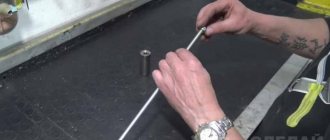
There are two options here. The first involves using a spindle from an old grinder, which at one end has an M14 thread where you can attach a disk, and the second end is in the form of a rod that can be clamped well in the chuck.
The only problem here is finding this spindle. Perhaps you have an old broken angle grinder. You can also contact any service center for servicing power tools - perhaps they will have an extra one and will sell it to you.
But it is much easier to purchase a special adapter in the store, which also has an M14 thread at one end and a cylindrical spindle at the other. It should come with a clamping washer and nut.
Another option is to purchase a sanding disc designed for both of these tools. It has a seat with M14 thread. It fits onto the grinder by simply screwing it onto the spindle. But it is attached to the drill using the included adapter, which is the same as in the previous paragraph, only without the washer and nut, which in this case will have to be looked for separately.
Well, further actions become clear. We take the adapter and clamp it into the socket. And then we attach a cutting wheel to it. So the grinder is ready for you.
Well, I hope everything works out for you. The main thing when working with such a device is not to make sudden movements to avoid rupture of the disk. Well, you should work in thick work clothes and safety glasses. But still, my advice to you is to buy a better inexpensive angle grinder.
Wind generator
Using a screwdriver , you can design a small wind generator for a summer house or personal plot, and be independent of the power supply. It will also help during a power outage.
It will take a little time to create a wind generator. from the screwdriver . The motor shaft is attached with a bracket to a plastic plate. We attach the flywheel to the end gear with bolts and attach four blades made from PVC pipe to it. You can use a tea can for the body, carefully sealing the cracks with sealant. The wind generator is ready to provide electricity that costs you nothing.
Wood lathe
A wood lathe will become an essential tool for home craftsmen. Round blanks, door handles, spherical and cone-shaped fragments for wooden railings, chair legs and much more - all this can be made using a homemade lathe based on a screwdriver .
There is no need to spend money on factory equipment, if such a lathe can be made with your own hands from an old screwdriver without much effort, using a minimum of funds and materials.
We can briefly describe one of these options for a “homemade” machine. A rectangular box (frame) is made from plywood with three sides. A seat is cut in the short side. A screwdriver is installed in this simple wooden frame, with the button up.
The bed, in our case a rectangular wooden box, is screwed to the table and pressed with a clamp. This is done in order to securely fasten the frame along with the tool to the work table.
A wooden block is used as a support bar for the cutter, which is also screwed to the table with a clamp.
A piece of rod with a thread that is convenient for hooking is clamped into the screwdriver chuck. A wooden blank (blank) is mounted on the rod. The screwdriver turns on and spins the wooden piece. Using a cutter, leaning on a support bar, the craftsman cuts out the desired volumetric-shaped part.
The tool is extremely necessary for craftsmen who use wooden parts and fragments in their work.
Electric snowmobile
How much fun winter days bring to children! Skis, skates, sleds. How many times do kids ask adults to ride them on a sled? It is difficult to deny children such pleasure. Home craftsmen approached this issue more thoroughly and made the sled “self-propelled.”
All you need for this is a source of torque. This source, or rather the base, will be a screwdriver with a working battery.
READ Lever With Speed Adjustment Which One To Choose
First, the iron structure of the “sleigh” itself is selected. This could be a real sled with steering. Or maybe homemade ones that are mounted on frames and also have a handlebar, sometimes a bicycle handlebar. But be sure to install a handle on the steering wheel, which will serve to turn the engine on and off. Outwardly, it will look like the brake handle on a sports bike.
Since home craftsmen come up with different designs for snowmobiles, the systems for attaching a screwdriver to an iron platform are also different. Only by generalizing can we bring together the principle of installation and action, which looks like this. A wheel is installed on the back of the sled using a special metal structure, and a screwdriver is installed above it. In fact, a screwdriver imparts torque to the wheel through a system of two sprockets and a chain. screwdriver rod rotates the drive sprocket. The sprocket transmits rotational motion through the chain to a second sprocket, which is mounted on the wheel. Thus, the screwdriver makes the wheel spin and push the sled.
All that remains is to bring the control system to the steering wheel. The control is a cable system, one end of which is connected to the screwdriver power button, the other is attached to the handle on the steering wheel.
the screwdriver mechanism on and off .
Of course, it will take effort and time to cope with such work. Buy a sled or material for the base, a battery-based screwdriver itself. But the efforts you make will more than pay off with children's joy and those emotions that cannot be described in words and cannot be calculated in monetary terms.
Electric car
How to remain indifferent to a small car passing by? This “homemade transport” will interest both adults and children.
All kinds of cars are created by the talented hands of our craftsmen. In their work, they use PVC pipes, gears from motorcycles, wheels from a garden wheelbarrow, and frames from a bicycle. Surprisingly, all these not very necessary details turn into a wonderful “adult” toy.
There are a wide variety of designs - three-wheeled, four-wheeled, made of metal, wood, plastic. The driving mechanism of all these cars has the same tool - a screwdriver with a battery.
The screwdriver transmits torque to the rear-wheel drive wheels through a chain drive (a large sprocket on the wheel and a small drive sprocket on the screwdriver shaft, a chain from the bicycle). The screwdriver turns the small driving sprocket; through the chain, the torque is transmitted to the large sprocket, and from it to the rear-wheel drive wheel. Thus, the rear wheels push the front wheels and the car moves.
The on/off control is output to the pedal via a button pressed by the pedal lever. Just a small press of your foot is enough - the button is pressed and the “vehicle” is set in motion!
Converting a chainsaw into an angle grinder
Sometimes it becomes necessary to cut off a pipe or corrugated sheet in a place where there is no electricity. For this, a chainsaw grinder is used, which can be easily converted using a purchased attachment.
- drive pulley or drum;
- protective casing;
- belt drive and a set of keys and studs.
To install this device on a chainsaw you need:
- remove the bar and chain;
- empty the oil tank and remove the clutch drum;
- mount the device pulley on the drive shaft of the drive sprocket;
- secure the protective device and install the belt drive;
- install the cutting disc - and the mechanism is ready to work.
The main advantage of the design is that it can be used in places where there is no electricity. When working with such a machine, extreme caution must be taken, since the chainsaw has a higher torque than a standard angle grinder. In this case, the risk of cutting blade destruction increases.
Screwdriver upgrade
If you don’t have a drill or chainsaw at hand, but you need to cut materials, you can make an angle grinder from a screwdriver. The algorithm for its modernization is almost the same as for making an angle grinder from a drill. The main element of the design will be the purchased attachment - an adapter or spindle of a faulty angle grinder.
The advantages of such a power tool include the rapid transformation of the mechanism and the ability to use it away from the electrical network. The homemade product can be used in cramped conditions where a standard angle grinder is not suitable due to its large size.
The main disadvantages of a homemade device are:
- short battery life (when using a cordless screwdriver);
- low rotation speed of the cutting disc - about 700 rpm;
- insufficient power of the electrical device.
Such a mechanism can only be used as a low-power angle grinder. With its help you can cut metal with a thickness of no more than 1.5 mm or a 20*20 corner. They can cut reinforcement with a diameter of less than 8 mm. Using a screwdriver as a full-fledged cutting tool will not work.
Making a cutting machine with your own hands
Preparatory stage
Work on a cutting machine begins with design. It is impossible to give the exact dimensions of the device, since the design depends on the model and size of the specific angle grinder. Nevertheless, from the presented drawings you can get an idea of the dimensions and structure of the equipment.
The design sketch begins with a drawing of the body. You may not need a frame, but a separate platform that can be attached to a bench. In any case, determine the dimensions of the device and the location of the main components on the body. Next, the angle grinder and the center distances of the mounting holes on the gearbox housing are measured. Based on these indicators, a drawing is drawn up for attaching the angle grinder to the pendulum. After this, the rotary unit itself is designed. The shorter the distance from the hinge joint to the cutting wheel, the stiffer and more accurate the machine will be.
In other words, the length of the pendulum should be as short as possible.
At the last stage of design, they calculate how much and what material will be needed.
Read also: How to scan in Word? —
Photo gallery: Drawings for making a homemade cutting machine
Drawing of a frame-type cutting machine. Frame dimensions are selected based on the size of the tool used
Drawing of a pendulum type cutting machine. The dimensions of the base are indicated on the left. On the right are the design features of the pendulum.
Step-by-step instruction
- In accordance with the drawing, blanks of the future machine are cut. For the frame and pendulum, profile pipes are used, and for the cantilever mounting, a metal profile, a metal tire and a steel rod are used. If the design provides for a load-bearing platform, then sheet steel 4–5 mm thick is cut to size.
- A transverse axis (shaft) is welded to the pendulum arm, which is a section of a profile pipe, for an articulated connection. In this case, it is important to ensure that the shaft is attached to the pendulum perpendicularly. After cutting the material, a shaft is welded to the pendulum arm
- A U-shaped bracket is bent from a steel tire, holes are drilled in its sides for bolts, with which the gearbox housing of the angle grinder is secured. To attach to the threaded holes on the angle grinder gearbox housing you will need a U-shaped bracket
- A U-shaped clamp (ladder) that goes around the angle grinder and a clamping bar for fixing the tool body to the pendulum are made from a steel bar. The latter is a metal plate 15–20 mm longer than the width of the clamp. The threaded ends of the stepladder fit freely into the holes at the edges of the pressure plate, and fixation is carried out with nuts with suitable threads.
- Trying on the U-shaped bracket and clamp to the angle grinder, mount these parts onto the console using a welding or threaded connection. This is what the console for attaching the angle grinder to the pendulum arm looks like, complete with a U-shaped bracket and clamp
- The bearings that will ensure the rotation of the pendulum are pressed into the supports. As the latter, you can use either ready-made factory bearing units or sections of steel pipe (15–20 mm) with a diameter equal to the outer race of the bearing.
- Bearing units are pressed onto the shaft from both sides. It is important that the connection is tight - this will eliminate unwanted longitudinal and transverse displacements. If the resulting connection is weakened for some reason, you can use a proven method - tin the axle with a soldering iron, applying a thin layer of tin to its surface (you will need soldering acid as a flux).
- At a distance of 50–60 mm from the edge of the platform, the pendulum assembly with support units is welded. At the same time, it is important not to overheat the bearings, so these parts are wrapped in a wet rag or constantly watered with water to cool. The pendulum arm assembly with bearing units is welded to the platform at a distance of 50–60 mm from the edge
- A console with an installed clamp and a U-shaped angle grinder mount is welded onto the pendulum arm. The position of the grinder is chosen based on personal preferences. There are different opinions on how to attach the angle grinder (“from yourself” or “towards you”).
Professional mechanics work with the tool, orienting the sheaf of sparks towards themselves, arguing that if the grinder falls out of their hands for any reason, the tool will fly off in the opposite direction. Hobbyists most often work with medium or small sanders, so they prefer to have the disk rotate “pull”, as this allows for control of the cut and prevents damage to clothing. When securing the tool, do not forget to place the protective casing correctly - it should protect the worker in the event of a disk rupture. - An angle grinder is attached to the assembled machine. Based on the weight of the tool, select and install the return spring. To do this, hinges are welded to the frame and pendulum or holes with a diameter of up to 5 mm are drilled. In order not to damage the plastic body of the angle grinder, strips of rubber are laid between it and the brackets
- Perform a test run of the grinder. First, check the operation of the machine in idle mode. At the same time, pay attention to vibrations and play in the working parts of the equipment, which are eliminated if necessary.
- Using a cutting wheel of maximum thickness, a groove is cut in the machine platform for the cutting disc. If necessary, the grinder is removed and the slot is expanded to the desired size. This is what an improved stop with a clamping device looks like
At the last stage, workpiece stops are attached to the platform. Most often, two strips are provided (for cutting at an angle of 45 and 90 degrees), fixing them with a welded or threaded connection.
Often, devices for holding the workpiece are equipped with a measuring tool. By attaching a metal ruler to the stop bar with a reference point from the grinder disk, you can quickly and accurately cut the part to the required length. Also, if desired, you can install protractors, vices and clamps of various designs. Such additional details allow you to make, for example, a full cut or groove in the workpiece at any angle, free your hands, and so on.
Don’t forget to paint the fixture after all finishing work has been completed. Even a thin layer of enamel will protect the equipment from rust and make its appearance more aesthetically pleasing.
Mini grinder made from improvised means
This device is suitable for those who are engaged in modeling - they often have to cut parts from hard materials. It is impossible to use standard angle grinders in this case: it is necessary to cut very small elements. For this work you need to make a mini grinder. It is made from a small electric motor. It could be from a faulty VCR, printer, or children's toy. Such a device is powered by a cell phone charger, USB input, battery or several batteries.
DEWALT DW625
Advantages
Excellent balancing, good visibility of the cutter during manual milling.
Flaws
- To install the included 8mm collet, you must first remove the 12mm collet from the nut, then insert the 8mm collet into the nut; we would like each collet to have its own nut.
- The hole in the sole makes it difficult to use cutters with a diameter of more than 63 mm.
- The speed controller with numbers from 1 to 5 does not allow you to know the real speed. You have to find it out from the table in the manual.
Additionally
Although the motor of this router lowers smoothly, it is fixed by force by turning the lever. This is less convenient than the Bosch and Porter-Cable 7539 models.
FESTOOL OF2200EB
Grinder from a drill + (Video)
For this conversion you will need the following tools on hand:
Before you begin the conversion, you need to make sure that the drill itself will not be needed in the near future. Then just follow the step-by-step instructions:
- Choose an attachment for your future grinder.
- Take a small diameter steel bar and grind off one of its edges. This action is necessary for better entry directly into the nozzle. Also, for better adhesion, you should lightly grind off the places that will come into contact with the petals of the cartridge and the rod itself.
- Fix all elements.
A quick and easy way to create an angle grinder
There is a second, more complex way to achieve the desired result.
- The chuck is removed from the drill. The grinder does not require it, so it can be cleaned, lubricated and stored.
- Choose a nozzle for your future tool. It would be better if it were a part made of durable steel; a lightweight version would be inappropriate here.
- Rod selection. It needs to be of such length that part of it protrudes beyond the drill by 1.8-1.9 cm. Next, one of its ends should be ground off with a rasp so that the result is a rod that perfectly matches the socket in the nozzle itself. Before the joint, it is worth smearing its ends with machine oil for better passage.
- The ball bearing is mounted in place for the output. A rod will be threaded through it with further fixation at the base. If this step is not required, the rod is fixed in its place.
Following the instructions, the grinder can be obtained in 1-2 hours
You can make an angle grinder this way in a few hours and still get the necessary tools.
Support structure and minor modifications
- steel strip or rod;
- welding machine;
- clamps;
- pliers.
Almost always, such an angle grinder is made as a stationary tool, so the working surface must be prepared. Any wooden or metal tabletop is suitable for it, and metal has an undeniable advantage.
The working platform is bent from a 12 mm ribless reinforcing rod or a steel strip (2-3 mm). Externally, it should completely follow the contours of the model used, because during immersion, maximum fixation should be ensured. Typically, 4 transverse stripes are used to form a contour and 3 perpendicular to them for rigidity. The joint is made using electric arc welding.
After such a bowl is installed on the table, it must be tightly screwed to the surface using bolts and nuts (bolts only with flat heads). The fixation must be quite rigid, therefore there are at least 4 mounting points.
At the very end, the tool turns over and falls into place (handle up). The final fixation is carried out using clamps, with which everything is pulled together on both sides.
If you have to work with the tool for a long time, then make a protective casing. To do this, you just need to cut a piece of sheet steel and bend its edges so that it occupies the entire space above the working area. To fix it to the tool, you need to make a clamp from a steel strip (exactly the size of the drill) and fix it with your own hands.
READ How to reduce speed on an angle grinder with your own hands
Grinder made from a chainsaw and an electric saw + (Video)
The easiest way to make an angle grinder with your own hands is to convert it from a gas or electric saw. As a result, the finished device
Working of a disc for an angle grinder
will have a number of advantages:
- Possibility of autonomous operation.
- High power.
- Cost of operation.
In order for a chainsaw or its electric type to turn into an angle grinder, you can purchase special attachments at any hardware store. With their help, you can make these transformations in just a few steps.
When creating an angle grinder, it is necessary to reduce the risk of disk failure. For these purposes, the saw is equipped with a special protective casing. It is also worth reducing the number of revolutions using a speed reducer.
Bench Drilling Machine
No less important in a home workshop is a drilling machine. An old screwdriver is also perfect for doing it yourself.
First you need to disassemble the tool, removing the engine, gearbox and cartridge from it. You can secure the head of the future machine using clamps made of textolite. To avoid distortions, it is recommended to process the clamps simultaneously. Restrictive posts are made of bushings with threads located in the inner part. The bushings must be the same size.
After this, you should start making 2 bosses from caprolon. A hole is drilled in their central part. The result is 2 eccentric bushings.
Install a clamp on the rod and adjust the backlash. An eccentric is used for this. To ensure the possibility of returning the drilling head to its initial position, the wooden lever is attached to a metal rod with a spring.
Grinder 12 volt + (Video)
In order to use an electric tool on the road, it is necessary to convert its power of 12 Volts to 220. Thus, you can power it from a car in which a direct current with a voltage of 12 Volts flows, by installing a special invector.
The process of connecting an angle grinder to a 12-volt battery
Low-power invectors should be connected to the cigarette lighter; there are no special requirements here. The only nuances are:
- Use under temperature conditions from -15 to +50 0 C and average humidity.
- Do not allow devices to operate in direct sunlight.
- Do not use the space under the seats for storage, as the invector will heat up during operation. To cool it, unobstructed air flow is necessary.
Cool ideas and lifehacks for using a screwdriver at home
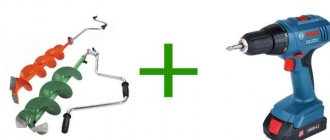
In addition to the listed mechanisms, a screwdriver can also be used to implement other ideas on the farm. This hand-held power tool will help you automate the opening of an entrance gate, make a winch for a car, or make scissors for cutting metal. If you attach an attachment for cutting tin to it, you can turn an ordinary rubber boat into a motor boat, and modernize the process of drilling holes for ice fishing. In addition, everyone knows that a screwdriver is used as a drive for a mixer, meat grinder or juicer.
After reading the article, the reader gained knowledge about the unconventional use of a screwdriver. Now he can use this hand tool to create carpentry equipment, improve children's vehicles and other useful things in the home.
How to make a grinder from a drill?
Hi all! In today’s article I will tell you how to make an angle grinder (angle grinder) from a drill so that it can not only drill, but also, for example, cut metal.
But first I will try to dissuade you from this matter. Why? Well, because I believe that each tool is intended only for its own purpose and trying to give it the functions of another, firstly, does not provide a 100% replacement, and, secondly, almost always leads to unsafe operation.
If we talk specifically about our case, then most drills produce a maximum of 3000 revolutions per minute, while for working with a small disk, grinders reach 11,000 revolutions per minute. That is, sawing will not be as effective.
As for safety, it is worth remembering that the cutting wheel on an angle grinder is surrounded by a protective casing, thanks to which sparks and fragments cannot fly in all directions, and it also protects if the disc suddenly gets caught and it breaks. There is no way to fit the casing onto the drill, so safety will be at risk.
And one more argument is the opportunity to buy a full-fledged angle grinder for cheap. There are also very cheap options in stores, which in any case will be better than buying something from a collective farm. At the lowest prices you can make a purchase, for example, here. In addition, you can choose something from your own hands by searching on Avito.
If the above reasons do not stop you, then read on.
Summarizing
There are several options for making a grinder from a drill, and all of them are quite effective depending on the tasks. It is better not to try to set serious tasks for the resulting tool, but it will cope with basic ones perfectly.
It is better to work on a hard surface, because... this will significantly improve operational safety.
And the most important thing is safety precautions, because... When repurposing, you can make minor mistakes, which will later have a very serious impact.
