A screwdriver is a versatile tool that can drill, cut, clean, grind and perform other tasks, depending on the attachment installed in the chuck. Like all tools, the device in question (regardless of its quality) breaks. In this case, only repairing the screwdriver or buying a new device will help. Repairing it yourself is a simple task that even a beginner can handle. If difficulties arise, the instructions on the website will always help you quickly fix the problem.
The principle of operation of a screwdriver
Almost all screwdrivers have the same design, which includes the following components:
- Start button
- Pulse width regulators
- Transistors
- Electrical engine
- Planetary reductor
The device itself has two varieties: cordless and corded screwdriver. They differ from each other only in the type of power supply, since a corded tool operates from an outlet, while a rechargeable tool runs on a battery.
In general, the reasons for the breakdown of these devices are almost the same, except for damage to the cord for one and the battery for the other.
How to replace brushes
Each of the graphite brushes is located at the end of the motor near its connection with the button. Graphite brushes are located at the end of the motor on the side connected to the button. The brush can be located in the middle of the engine housing under the rear covers or outside. If the wear of one brush is at least 40%, then two are needed. You also need to check your contacts. If the brushes have wear, this is indicated by:
- the engine runs jerkily;
- the occurrence of sounds unusual for working equipment;
- the appearance of sparking and a burning smell.
Disassembling a screwdriver
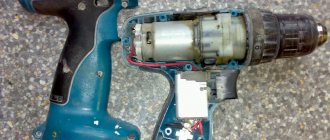
Disassembling the tool is not difficult, since it has a relatively simple and understandable design. First you need to remove the battery, then unscrew all the screws. The case opens carefully so as not to damage anything when opening.
An open screwdriver can be photographed to know how and where the parts were located. Then all the parts are carefully removed, you need to inspect each of them and arrange them in the order in which they were removed.
How to repair a cartridge
The chuck for each specific screwdriver model differs from similar elements of other models. The main distinguishing feature is the method of mounting the cartridge:
- Morse cone.
- Threaded connection.
- Threaded connection with fixing screws.
To determine the mounting method, it is best to use the markings that are applied to the cartridge case:
- The marking value “1–6 B10” indicates the method of fastening using a Morse taper.
- an inscription like “1.0–11 M12x1.2” or “2–13 mm ½-20 UNF” indicates a metric or inch thread.
If the cartridge is attached by means of a thread, then it is necessary to perform the following steps:
- Unclench each jaw of the chuck.
- If there is a screw, remove it.
- Clamp the L-shaped hex key (10 mm) with the short side into the chuck.
- Start and immediately turn off the screwdriver at low speeds, so that the long edge of the hex key hits the table. In order not to turn on the device, you just need to hit the hexagon with a hammer several times. This will cause the thread to shift and the cartridge to unscrew.
If there is no result, you can disassemble the screwdriver and remove the assembled gearbox from it. To do this, it is enough to use an L-shaped tubular wrench (often “19”) to unscrew the cartridge, clamping the gearbox mounting bolt with the socket heads of the keys on the other side. They provide the necessary support, making the cartridges easy to unscrew by hand.
When disassembling the cartridge, the plug at the base is removed. The plastic plugs must be carefully pryed off with a knife. Metal ones should be knocked out with a hammer, striking the base of the cartridge:
- It is necessary to provide in advance the presence of a large bolt, which should be secured in the chuck and pressed with light effort to perform alignment. The protrusion of the bolt head should be more than 2-3 cm above the chuck.
- Next, hit the surface of the bolt head with a hammer. The cartridge should pop out of the holder.
The most common cartridge malfunction:
- bits are not clamped evenly;
- backlash occurs between the bit and the cam;
- The cam extends unevenly.
To find out the causes and eliminate them, you need to perform the following steps:
- Disassemble the cartridge.
- Remove the cone nut, which consists of two elements.
- Unscrew the clamping jaw.
- Check the threads on the nut and cam and replace any defective parts.
- Completely assemble the cartridge.
Possible faults
All damage can be divided into the following types:
- Failures associated with the electronic filling of the instrument;
- Breakdowns due to mechanical damage;
When a screwdriver stops working, the following symptoms appear:
- The tool does not turn on
- The speed controller does not work or does not work well
- Reverse doesn't work
Often, if any of the nodes is seriously damaged or worn out, it begins to make a characteristic sound in the form of a cracking sound.
The most common tool failures also include:
- The battery is faulty, it stops charging;
- Serious wear of the brushes located in the engine;
- Breakdown of the start button;
- Cartridge runout;
- The bit is not clamped;
- Uncharacteristic vibration when switched on;
The purpose of all parts and components of the tool - what they are called
If a screwdriver breaks down, then before you repair it, you need to figure out which specific part has failed. To find out the malfunction yourself, you need to understand the purpose of each unit and its design parameters.
- The start button is where the tool starts working. This mechanism performs two options - it turns on the power circuit, that is, it supplies voltage to the electric motor, and also regulates the number of engine revolutions. The harder you press the button, the faster the chuck will rotate. An electronic PWM generator, which is installed on the board, is used as a speed controller. When you press the button, the contact moves along the board. A field-effect transistor is used as a contact, which plays the role of a rotation speed regulator
- Electric Motor - Portable tools use single-phase brushed-type DC motors. The advantages of these units include high reliability and ease of maintenance. An electric motor consists of magnets (playing the role of a stator), an armature and brushes. The use of magnets significantly reduces the cost of the unit
- Reverse - this option is implemented by changing the polarity at the terminals. To prevent the user from manually changing the polarity, the design of the tool uses changeover contacts in the form of a switch. This switch is located near the Start button.
- A gearbox is a set of gears that increase the torque of the cartridge or reduce the speed. Shuriks use two types of gearboxes - planetary and classic. Classic ones are similar to those installed on drills, only they are very rarely found in screwdrivers. More popular are planetary gearboxes, consisting of a ring (intermediate) and sun gear, as well as satellites. The sun gear is driven by the motor shaft. Its rotation sets the satellites in motion, transmitting torque to the ring gear. Depending on the number of speeds, planetary gearboxes can be two-stage or three-stage. The more speeds, the more expensive the tool will cost
- Force regulator - usually 16 force positions are used, but there are also models that have a larger number. The ability to screw a screw into wood depends on the amount of force. If you need to screw a screw into drywall or other soft materials, then a lot of force will not be required, so the regulator can be set to positions from 1 to 7
- The cartridge mechanism has a simple operating principle. The device consists of three cams that securely fix the installed attachments. The advantage of quick-clamping devices is the high speed of changing attachments
- The case is a plastic impact-resistant structure, inside of which all the components are located. To repair the device, you need to disassemble the housing. For this purpose, manufacturers produce housings made of two parts, connected with screws
- Battery - Manufacturers make two types of portable batteries, nickel-cadmium and lithium-ion (like those found in cell phones). Lithium-ion batteries are longer lasting and more reliable, but they cost 3-4 times more than nickel-cadmium batteries. Typically, a screwdriver comes with two nickel-cadmium batteries, which is due to their short service life
This is interesting! If you come across batteries that have a one-piece body design, this means that they are not intended for self-repair.
If a screwdriver breaks down, it is not difficult to repair it at home, if only you can find the breakdown. Frequent problems with screwdrivers include battery failure, replacing which can cause some difficulties. Let's look at mechanical and electrical faults, as well as the features of eliminating them on your own.
Gearbox failure
If the screwdriver vibrates more than usual and other strange noises are heard, the gearbox may be damaged.
It includes:
- Ring gears
- Pinion gears
- Drivers
All these elements must be removed, cleaned and lubricated.
Damaged components are replaced with new parts; if the shaft is damaged, the gearbox itself must be replaced.
Engine failure
The most common causes of engine failure are damage to the brushes or armature winding.
- The brushes can be easily replaced, but if the winding is damaged, then the motor itself needs to be replaced.
- There is a pressed gear on the motor shaft; as a rule, it is not damaged.
- The motor must be disconnected in such a way as to leave the gear intact.
Start button failure
The screwdriver button consists of three simple elements:
- On/off button, speed control.
- Reverse button.
- Soft start lever.
As a rule, the button can simply be replaced with a new one, since repairing this part is impractical.
Charging repair
The charger may be faulty for the following reasons:
- The network cable has broken;
- The fuse has blown;
- The diode has broken down;
- The transformer winding is damaged;
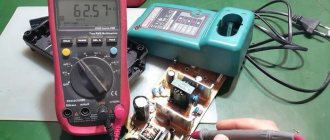
To repair the charger, you need to make sure that this is the case. To carry out repairs and determine the performance of components, it is necessary to use such a useful device as a multimeter. It can be used to determine which battery in the charger needs to be replaced.
In some cases, it is better to replace the charger, since replacing one of the batteries is a complex process.
History of the device
A screwdriver is a power tool. Its main purpose, as the name suggests, is to tighten or unscrew a fastener. After the electric drill was invented in 1868, the development of power tools became widespread. Founding companies DeWalt, Bosch, Black & Decker, Makita and Hitachi developed the industry by creating new devices.
The introduction of the Phillips head screw in 1934 created a demand for electric tools to tighten them. It was especially in demand in mechanical engineering. The first device of this kind was called a wrench. With the advent of batteries, the device gained mobility, and the name screwdriver came into use. Its mass production began in the early 80s .
Modern devices are constantly improving, but to a greater extent this relates to the method of autonomy and control. The design of the device remains unchanged.
Battery repair
If the charger is working properly, the problem may be with the screwdriver battery.
To understand that the problem is there, you can use two methods.
- Connecting the testing battery to the terminals. You need to charge the tester battery, then check it with a multimeter. If the rating is less than the norm, then the problem is with the battery.
- You need to insert another battery into the screwdriver; if the device works, then the problem is with the old battery. It is worth remembering that repairing a battery can be dangerous, so it is better not to disassemble the battery without special knowledge.
Inappropriate repair
Not all components and parts need to be repaired; in some cases it is better to replace them with other elements.
These nodes include:
- Power button
- Armature winding in the motor
- Bent gear shaft
- Damaged cartridge parts
Mounting methods
There are three methods for attaching the clamping cylinder to the spindle:
- using thread;
- using a fixing screw;
- using a Morse taper.
The first method involves the presence of threads on two contacting parts.
The screw is used as an amplifier of contact between the sleeve and the shaft.
In this case, screwing also takes place, but the fixing component serves for additional fastening.
The screw usually has a left-hand thread and a Phillips head.
To see the element, you need to move your cams as far apart as possible.
The Morse cone is an option that has been used for more than a hundred years.
The surface of the shaft has a cone-shaped format, similar to the shape of the cartridge.
The matching characteristics of both cones make it possible to firmly and quickly combine parts.
This option is used in almost all modern models (pneumatic, etc.).
Why does a screwdriver break?
Like any equipment, a screwdriver needs to be used correctly and treated with care, according to the instructions. Most breakdowns are associated with incorrect user actions; these include the following points.
- Incorrect operation. The screwdriver must be used only for its intended purpose, otherwise the tool will break very quickly;
- The screwdriver runs longer than necessary. Typically, the operating time varies between two and four hours; if it is exceeded, the device may burn out or fail;
- Improper storage. Electrical appliances should not be stored in damp or damp places, as this can lead to oxidation of the parts. The screwdriver must also be kept away from direct sunlight, as this may damage the battery;
- Incorrect charging. The tool should not be left unloaded for a long period of time; the charging time should also not violate established standards. If the screwdriver is rarely used, then once a month you need to take it out and turn it on for a short amount of time, then put it back in place.
Graphite brushes. Power tool life element
The widespread use of power tools has made work easier for everyone, both professionals and amateurs. Often, even people who do not work with automatic tools every day have a jigsaw, drill or screwdriver at home for household purposes. Intensive use of various electrical devices leads to wear and tear over time. Accordingly, there is a need for repairs. One of the most common breakdowns is the failure of the tool’s electric motor due to wear of the graphite brushes.
Purpose and properties of brushes for power tools
Graphite brushes are an element used to create sliding contact in electric motors. Their main purpose is to supply and remove electric current on the collectors of various devices, units, and tools where electric motors are used. Brushes are a part of almost any power tool; they serve as a conductor of current.
Brushes for power tools must have high thermal conductivity, reliability, abrasion resistance, as well as good resistance to chemical, mechanical and temperature influences. In addition, they must be durable, affordable, and spark as little as possible. Their sizes can be quite varied, so you need to be very careful when choosing. It is best to use brushes for a specific tool model and the same manufacturer.
Common malfunctions and causes of their occurrence
Brushes fail regularly - this is due to the very principle of their operation. During operation, they constantly rub against the collector and, accordingly, are subject to wear. Well-made graphite power tool brushes are designed to wear slowly. Therefore, units used in everyday life rarely require repair - a significant service life with rare use of the tool ultimately leads to the fact that wear of the brushes to a critical level occurs only in exceptional cases.
Wear of graphite brushes causes loss or disruption of their contact with the commutator. When contact is partially lost, increased sparking often occurs. Sometimes a “jerking” appears and the engine rotates unevenly. In severe cases, the engine does not start at all - there is a break in the circuit. Often the brushes “hang” when they get stuck in the guides and the spring cannot provide reliable pressure to the commutator.
Failures such as a broken brush drive, a broken pressure spring, or damage to the commutator-brush assembly are easy to determine visually.
The causes of malfunctions are:
The most common of the listed reasons is normal wear and tear, as they say, “from time to time.” Eliminated by replacing brushes.
How to choose graphite brushes wisely?
Manufacturers of power tools guarantee trouble-free operation only when using recommended spare parts. If malfunctions occur, brushes must be replaced with similar ones. Any kind of adjustment of non-standard products to the original brush assembly is not encouraged by tool manufacturing companies.
Brushes are divided into hard and soft. When choosing, this can be decisive, because collector copper is also divided into soft and hard. If this parameter does not match between the commutator and the brushes, rapid wear of one of the elements occurs - either the hard commutator will “eat up” the soft brushes, or too hard brushes will damage the commutator. Neither one nor the other has anything to do with normal operation.
