Features of the sawmill
Typically, wild logs are used for sawing using a sawmill.
They have an irregular shape and uneven structure. Therefore, they are fixed in a static position, and the cutting is carried out by a carriage with a sawing tool. Otherwise, it will be very difficult to ensure an even cut. The exception is large industrial sawmills, where the saw is stationary and the logs are fed to the cutting element by a hydraulic press. Important! Cutting a long log longitudinally is always carried out from the bottom of the trunk to its top. Otherwise, any saw will get stuck or break
In general, a wood sawing machine consists of the following parts:
- The cutting element is a saw.
- The engine drives the cutting parts.
- Carriage for feeding the saw onto wood.
- Guides for the carriage.
- A carriage for fixing wood and a log feeding block.
- A frame that holds all parts together into a single structure.
Depending on the design features, some parts may be combined with each other. For example, a chainsaw, often used in homemade sawmills, combines a cutting part and a drive.
For large industrial logging sites, complex structures are used with tools and saws specially designed for this purpose. There is no need for such tricks in the household. As a rule, improvised materials are used that can cut an average log into bars.
Next, we will look at what available devices you can use to make a sawmill at home with your own hands.
Subtleties of the process
Before you begin directly manufacturing the sawmill, you will need to pay attention to the following design features of the machine:
- If it is necessary to cut large-sized logs, it will be necessary to make a powerful base and use a long bar with a chain.
- The presence of an additional log feeding mechanism will significantly simplify the work with the sawmill.
- It is necessary to take care of high-quality fixation of logs during sawing.
- The sleds and guides for the chainsaw should be further strengthened.
- The more powerful the saw is used, the easier and better quality the wood is cut.
- It is preferable to use electric chainsaws, which will reduce subsequent wood processing costs.
- When choosing a chain, you should give preference to carbide models, which are reliable and durable.
- The handle that controls the movement of the saw should be fixed in one position, which will simplify working with the machine.
You can find relevant videos online that tell you how to make a sawmill at home.
How to make
Let's take a closer look at how to make your own sawmill from a regular chainsaw using the example of a stationary structure.
What you need
For work you will need the following materials:
- Chainsaw.
- Welding machine.
- Square metal pipes.
- Metal squares.
- Rollers.
Expert opinion Kulikov Vladimir Sergeevich
If square metal pipes are not available, you can use regular water pipes instead. Only in this case it is necessary to select pipes of sufficient strength. But it is best to use metal channels, if possible. It is more convenient to work with them during installation, and they can be fixed more reliably.
Manufacturing process
To manufacture the device you will have to perform the following steps:
- Assemble the base of the future sawmill from pipes and angles. There is no need to install the structure immediately. First you need to fold it and check how smoothly all the elements are connected. They do this using a level. Only after this the pipes are connected to each other by welding.
- When the base rectangle is assembled, for greater structural strength it must be strengthened with at least two ties. They can be made from the same metal pipes. The ties are fastened transversely at an equal distance from each other. The best mounting option is bolted.
- Then thinner pipes or metal profiles are welded on top of the pipes from which the base of the structure is assembled. They will serve as guides for the logs being cut and will not allow them to fall off the sawmill. Transverse guides are also welded. Ideally, they should rotate - this will ensure smoother movement of the log and minimize the effort that needs to be applied during operation of the device.
You can do without transverse guides if you used round pipe ties. The log will also move along them quite easily. But you need to remember that its movement will not be as easy as in the case of rotating transverse guides.
- After the base is completely ready, it is installed on racks. Steel squares are best suited for their role. They are welded in the corners of the base. For greater structural strength, braces can be welded between the posts.
- Afterwards, the trolley for the cutting part is assembled. It is a rectangle of metal pipes supported by two longitudinal steel strips. Between these strips and the walls of the rectangle, two slopes are installed so that the structure is stable. Rollers are placed under the strips, which will ensure the movement of the cutting part along the base. Then another pipe is welded to one of the strips, connecting it to the rectangle on top. This is the attachment point for the saw.
- When the cart is ready, secure the saw. This can be done in a variety of ways. The most common method is to secure the saw body using clamps or metal ties. It is quite reliable and does not cause irreversible damage to the device. If necessary, additional transverse strips are welded to the trolley from the same pipes from which the remaining parts of the structure were made.
There is another way to fix the saw - by the blade on which the chain is attached. It is less reliable, requires drilling out the blade and holds the chainsaw worse. However, with this installation method, the saw chain vibrates less (most of the vibration is transferred to the base of the sawmill) and makes smoother cuts.
Making clamps for a chainsaw bar
First, we arm ourselves with a tape measure and a marker, and mark the profile pipe. We saw off four pieces 15 cm long from the profile pipe.
Next, mark the already cut pieces and drill holes along the edges.
We cut off square pieces of metal and weld them to the ends of the blanks from the profile pipe. We clean the weld seams with a flap wheel.
After this, we cut off four pieces of thick metal. We weld them in the center of each piece of corrugated pipe.
We connect the parts of the clamps to each other using bolts and wing nuts. The bolt heads must be welded to one of the clamp parts.
Stages of self-production
A sawmill requires special woodworking equipment - a sawmill. You can buy it ready-made in the store, but it will be quite expensive. Therefore, the question of how to make a sawmill at home remains relevant.
Homemade device from a chainsaw
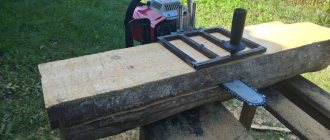
A DIY device for sawing logs with a chainsaw is the most common option for making this type of equipment at home. The process takes little time, and the homemade product can work for a long time without repair.
For work you will need the following materials:
- welding machine with electrodes;
- screws;
- nails;
- columns;
- electric saw;
- roller bearings.
Before making a sawmill with your own hands, experts advise paying attention to the following points:
- If you plan to saw large diameter logs, you need to use more powerful saws with a long chain and bar for the job.
- To supply heavy wood, it is necessary to provide a special jack. The board will be accepted using a loader.
- When working, it is necessary to consider a mechanism for fixing logs. This will prevent vibration of the working material.
- The chainsaw should be quite powerful, which will help make cutting faster and easier.
- It is recommended to equip the machine with an electric motor. This will help save production costs.
- The do-it-yourself attachment for a chainsaw for longitudinal cutting must have a height at which the operator’s back and arms will not get tired.
A homemade sawmill from a chainsaw, drawings of which can be found in specialized literature, is quite simple to manufacture. Manufacturing is carried out according to the following scheme:
- Create a frame by welding corners or pipes into a structure of the required size;
- To make the slide, you can use wooden boards, which are covered with a galvanized sheet or stainless steel in the area where the slide moves. You can also use the corner along which the rollers will move. It is also possible to make this device from rails. It all depends on the load to which the machine will be subjected;
- You can make a sled from a 50 mm board;
- Making a mechanism that will regulate the thickness of the board. You can use the option that experts offer. The movement of the working material occurs in it, and the cutting element is fixed motionless. This design is suitable for working with small logs.
You can also use an option in which the log remains stationary, and the cutting part of the machine moves along a special ruler. The chainsaw is mounted using special fasteners on the equipment frame.
Upon completion of work, it is necessary to check the strength of the machine and adjust its functions.
A device made from a grinder
There is also the possibility of making a sawmill at home, the basis for which is a grinder. This version of the machine is practical in operation and easy to implement. To perform the equipment, you can follow these instructions:
- The stop is made of corners located on the sides of the frame. Their edges must be rounded.
- A metal clamp is placed on the body and secured with screws along the edges.
- The handle is made independently from a metal rod, pipe or transverse bracket.
- To make an adjustment rod, you can use a steel rod with a diameter of 0.4 - 0.6 cm. Its end is bent in the form of a loop.
- To ensure that the rod fits into the handle, it is necessary to cut a small thread on the back of the handle.
The grinder is an angle grinder. Therefore, it is necessary to take into account the following points:
- The duration of continuous use of a homemade sawmill from an angle grinder should not exceed 20 minutes to avoid overheating of the machine motor;
- Standard disk protection is not suitable for a homemade device. You need to make a protective casing yourself.
Before using this type of sawmill, the mobile chain mechanism requires preliminary checking and adjustment. The cutting depth can be adjusted using nuts that are either tightened or loosened. The manual version of the sawmill is characterized by its simple design. This makes working with it much easier.
Originally posted 2018-07-04 07:46:16.
Step-by-step manufacturing instructions
You can start making a homemade machine only if you have a high-quality schematic drawing that will be optimized to meet the necessary requirements.
Initially, the frame is manufactured, for which pipes and corners are welded. The completed base should be as strong and heavy as possible. Such a heavy, properly executed frame will eliminate the vibration of the sawmill when cutting logs, which improves the quality of the resulting board edges.- The slide can be made from a wooden board or metal profile. The higher the load on the sawmill, the stronger the sled should be. It is best to choose small rails or durable stainless steel for moving elements.
- It is necessary to consider the mechanism used to adjust the thickness of the resulting boards. The lifting mechanism can be made in two versions. Tire sawmills can lift a log, which is achieved by moving the base, while the cutting part remains stationary. The second option is a design with fixed logs and a rising or falling cutting tool.
- The electric saw is fixed using a bolted connection, ensuring maximum strength and reliability of fastening.
- The saw advancement mechanism can be made of lace or clothesline.
- Commissioning work is carried out and, if necessary, the cutting element feed mechanism is adjusted.
In each specific case, the technology for manufacturing a sawmill from gasoline and electric saws can vary significantly, depending on the selected machine design.
Making a sawmill with your own hands is not particularly difficult. You will need to find a high-quality diagram on the Internet, select all the materials used and, in full accordance with the available documentation, make woodworking equipment that is universal in use. The cost of manufacturing a homemade sawmill will not be too high, and in terms of functionality and ease of use it will not be inferior to factory-made options.
Do-it-yourself sawmill from a chainsaw: video instructions and drawings
Having the drawings available and having studied the video instructions, it is quite simple to independently make a structure for processing logs, boards and slats. Before starting work, you must select a suitable location. You can install a sawmill using a chainsaw in an old barn, garage, hangar, or even just under a shed. If the room for the unit is closed, then you should take care of the hood.
Chainsaw sawmill - option No. 1
To make the structure, in addition to a chainsaw, you will need:
- two channels 8 meters long and 140-180 millimeters high;
- two rails;
- corners 50x100 mm and 40x40 mm;
- 25 cm sections of water pipe as ties;
- steel plate 4-6 cm thick and 60 cm long;
- movable hoses;
- pipes with a diameter of 35-40 mm.
Making your own sawmill should begin with assembling the base
from rails and corners 50x100 mm turned upside down. They must be installed strictly parallel to the floor, so you need to use a building level.
- Along the length of the base, according to the drawing, holes are drilled in increments of 1-1.5 meters and with a diameter of 14-16 mm.
- Then, according to the number of holes, ties are taken and connected with bolts.
- Stands are made from metal squares and the base is placed on them. The distance between the outer posts and the base should be about 100 cm.
- To make the structure more rigid, braces between the posts can be welded.
After the base is completed and installed, you need to make a movable cart with your own hands. To do this, a corner is welded to the bottom of the steel plate.
40x40 mm and the product is placed on rollers or bearings. Two corners are welded on top of the plate, to which a chainsaw is attached.
At the last stage of the work on making a homemade sawmill, it is necessary to make a structure for fixing the logs. To do this, movable hoses and pipes should be positioned at the required height and secured.
The first version of a homemade sawmill using a chainsaw is ready. There is another way to make a wood processing unit with your own hands. The tools and drawing for it will need the same, however, the design itself is more refined.
Do-it-yourself sawmill from a chainsaw - option No. 2
The structure consists of four main components:
- Driven saws.
- A mechanism for regulating the thickness of the board being produced.
- A mechanism for moving the saw part of the structure.
- Devices for fixing logs.
Since a chainsaw with a working engine and cutting teeth is already available, you will only need to make both mechanisms and a device for fixing logs with your own hands.
Mechanism for adjusting the thickness of the boards.
Logs are sawed by raising or lowering the base, which must be welded to the plate using four nuts with bent edges. Lock nuts must be installed at the top of this device
, which need to be tightened after the unit is adjusted to the desired thickness of the material being processed.
Mechanism for moving the saw.
The saw in the structure moves along the frame along guide angles, the distance between which should be 50 cm. Two rollers or bearings must be welded
by 20 mm. The lower roller should keep the sawmill from lifting, and the upper one should rest on the guide angle.
Device for fixing logs.
On such a unit, logs are secured using two ridges
– stationary and moving by means of a screw. After the material to be processed has been installed, the moving comb is secured with screws in a stationary state. Now you can safely begin to operate a homemade sawmill made from a chainsaw.
The sawmill is an impressively sized unit that is quite dangerous to operate.
, therefore, before you begin assembling it, you should carefully consider the place where it will be used. It should be well lit, ventilated and have free space. The nearby warehouse for finished boards will greatly facilitate the process of processing the material.
For a sawmill with an electric motor, you should very carefully install the necessary switches and automatic machines, as well as install the wiring.
Since the most dangerous elements of the unit are all its cutting and moving parts, when assembling the structure they should be given special attention. Before using the assembled equipment, it is necessary to check all fastenings and components, as well as the stability of the structure.
Before starting to operate the assembled equipment, it is necessary to check all fastenings and components, as well as the stability of the structure.
Design and operating principles
The main advantage of the sawmill is that it cuts logs lengthwise. Doing this manually is incredibly difficult.
To understand the principle of operation of the machine, you need to get acquainted with its structure. The design consists of several parts:
- saws;
- drive (usually electric, sometimes gasoline engine);
- saw carriages;
- guides;
- frames
The base of the U-shaped structure is metal beams or channels fastened together, along which rollers mounted on the frame move. On one side of the frame there is a stationary main wheel, on the other there is a movable one that moves along the frame.
At the base of the machine, above the rollers, there are guides, on which support posts are attached on top. The frame moves along the beams using a chain mechanism.
The cutting tool is a band saw approximately 6 cm wide. It is tensioned using hydraulics. The tape is held in place by special locks attached to the base of the main wheel.
The design is complemented by a ruler and a container with a special liquid that flows into the cutting area and protects the tape from the adhesion of sawdust.
There are several types of sawmills. The most common are belt, disk and chain. Almost any of them can be done independently, if you take as a basis a competent drawing of a homemade sawmill and carefully watch the video with step-by-step instructions. Mechanisms constructed using a chainsaw are also popular.
Note!
DIY induction heater ♨️ - reviews of the best manufacturing options. Varieties of homemade device designs + step-by-step master class (160 photos)
- Do-it-yourself Gauss cannon: TOP-130 photos of the best ways to create it yourself. Design features + master class for beginners
DIY clamps - a step-by-step master class for beginners. Schemes for manufacturing different designs + 170 photos
Homemade band sawmill
Self-assembly of a complex unit is not an easy process. It is necessary to correctly install and adjust all structural parts to ensure their smooth, uninterrupted operation. This will help you with instructions on how to make a homemade sawmill, following which you can acquire your own home woodworking complex.
To assemble the sawmill, a suitable site should be identified and prepared. Then the assembly of the frame of the future structure begins. First, a kind of rails are prepared along which the working saw will move with the help of rollers. The rails are fastened together with profile pipes that act as sleepers. Fasteners are welded to them to secure the logs.
At the next stage, a trolley is mounted on which special wheels for the tape are installed. Many craftsmen who assemble homemade band sawmills with their own hands have thought of adapting old car wheels for these purposes.
The assembly of the structure is completed by installing an electric motor connected to the moving mechanism using a drive belt.
Advantages of homemade equipment
Factory-made gas sawmills are distinguished by their reliability, ease of operation and versatility of use. Unfortunately, they come at a high cost, which is often unaffordable for most homeowners. At the same time, you can make a functional sawmill with your own hands, and the costs of implementing such equipment will be minimal.
It is possible to select the desired modification of woodworking equipment, which in its functionality will fully meet the requirements of the homeowner. These can be either simple options that only involve cutting logs, or multifunctional installations that can not only provide high-quality even cutting, but also subsequent processing of lumber.
Do-it-yourself motor cultivator, snow blower, ice auger and drill bit
A chainsaw motor is also perfect for creating a motorized cultivator designed for plowing virgin soil (for light soils). To work with dense and wet soils, the power and torque of the engine most likely will not be enough, but for loosening the surface layer and removing the roots of weeds remaining in the ground, a cultivator using a chainsaw will be enough. The main part of the device is a rotating cutter, due to which the equipment moves around the site.
Drawing of a snow blower made by hand using a chainsaw.
If you replace the shaft with plowshares in the cultivator with an auger, and also equip the structure with an intake device and a pipe for throwing away snow, the cultivator turns into a snowblower. A motor from any saw with a power of 3-5 horsepower will be more than enough to clear loose snow on the site
It is only important to make a convenient screw mechanism. For this purpose, blades made of thick rubber are most often used.
Parts made of galvanized steel are suitable as an intake device. Snow removal is easy to do by installing a large diameter plastic pipe.
Drilling through ice or frozen ground with hand tools is a rather long and physically demanding task. Making a motor drill with your own hands will greatly simplify this task. In this case, in addition to the motor, it is necessary to have a gearbox that regulates the number of revolutions per minute, because the device does not require such strong rotation as a chainsaw.
On a note! If you do not have enough knowledge regarding the operation of the gearbox, you can seek help from an engineer who will help you choose the right mechanism. The required type of device is selected depending on the characteristics of the motor.
To create a motorcycle or ice drill with your own hands, the first thing you need to do is make a reliable housing, which is a truncated pyramid consisting of two rectangles of different sizes. You will need a grinder, a welding machine and metal pipes. It is inside this frame that the gearbox will be installed; accordingly, the dimensions of the housing will directly depend on the size of the gearbox.
Chainsaw brownies will become indispensable assistants on the farm.
For reliability, experts recommend using a part from a good motor drill made of durable steel as an auger, because low-quality material will not withstand heavy loads. Another important issue is reliable fastening of the drill, which can be done using an ordinary pipe, fixed on both sides with dowels or studs. This method of fastening will allow you to change drills or use other devices for work.
Power station
For a mobile power plant with a power of up to 5 kW, there is a time-tested solution: a homemade generator based on a motor from a Druzhba or Ural saw. They are actively used on expeditions and at remote logging sites. The device includes a steel frame, welded from a corner, on which an engine, a generator and a waterproof electrical distribution box with sockets for connecting electrical equipment or an extension cord are mounted. Through the gearbox, torque is transmitted to the generator shaft.
For low-speed generators, there is an option for a homemade power station with a belt drive. This design is smaller in size.
How to make a winch and sawmill from a chainsaw with your own hands
Homemade products from the Urals often help in construction. So, when constructing buildings from solid wood, it is necessary to dismantle the logs into beams. The sawmill from the Ural chainsaw makes it possible to perform this action as quickly and accurately as possible, while maintaining the accuracy of the cut. The main advantage is that there is no need to perform any complex alterations. The device simply needs to be securely fastened in a homemade frame, which can be made of metal corners or profile pipes. The log for processing is then placed on prepared guides.
Scheme for making a sawmill from a chainsaw with your own hands.
You don’t have to create drawings for a sawmill using a chainsaw with your own hands, because a large number of ideas are available on the Internet that are suitable even for a person without experience.
The safety of using the structure is ensured by the fact that you do not need to move the log yourself. For this purpose, a carriage with a saw is used, which, depending on the thickness of the log, is fixed at the required height. Once switched on, the frame moves precisely and the cut remains neat and even. You can use the device not only for solid timber, but also for sawing boards for the purpose of harvesting firewood.
On a note! You need to be prepared for the fact that a large amount of sawdust will be formed during the work, since a chain of considerable thickness is used for sawing.
A homemade winch will also be a good helper during construction, because with its help you can easily lift loads to a height and move a cut tree. In addition, using a winch, you can pull out a stuck car or pull a boat out of the water onto the shore. The operating efficiency will depend on the gear ratio; in some models the figure can reach 1.5 tons.
A chainsaw sawmill will allow you to easily and quickly turn logs into timber.
To make the device convenient to use, you will need to make a durable frame using welding. The motor, gearbox and drum with braking system should be firmly secured to the frame. To fix the frame on the body, holes and lugs should be provided through which the device can be installed on any surface.
Owner reviews
Owners of sawmills made from chainsaws note the high efficiency, low cost and ease of installation of the structure. Most reviews about this device are positive.
They talk about the advantages of such an improvised sawmill. Thus, the famous video blogger Maxim Egorov assembled a sawmill from a chainsaw right in the forest. To do this, he used several boards and two roughly processed pine logs. Using the device, he managed to obtain boards in the required quantity, which were intended for the construction of a forest house. Maxim noted the simplicity and efficiency of the design, as well as the ability to quickly transform it back into a chainsaw.
Another video blogger, Mark Didenko, also assembled a similar design. True, he did not use boards for this, but a metal profile. In order for the cart to move smoothly along the base, he attached a gear drive to it, which is driven by rotating the handle. Didenko was also pleased with the assembled device. He noted the low cost of materials as its main advantage - according to the blogger, they cost only 10,000 rubles (not taking into account the cost of the chainsaw itself).
But the author of the blog “Lumberjack” is more critical of the device. He agrees that it can be assembled quickly and cheaply and even tells how he used a homemade one to build his parents' house.
But the blogger also points out two important aspects:
- The saw constantly operates at maximum load, which can lead to engine breakdowns or burnout of the electric motor.
- When using a homemade sawmill there is a very high risk of injury.
What needs to be provided?
Before making, you need to pay attention to the following things:
- The diameter of the logs being cut, if there are large diameters, then you need a more powerful saw, a longer bar with chain;
- Loading heavy logs for sawing, for this it is necessary to provide some kind of mechanism, or they can be rolled up either by additional jacks or, ideally, by a loader;
- The log must be fixed so that it does not play during sawing and the boards are even;
- The chainsaw guide and sled should not play, so they need to be strengthened;
- The more powerful the saw, the easier production will be. Therefore, when purchasing a saw, you need to take the most powerful one;
- Using electricity as an energy source allows you to save a lot;
- Do not forget that the chain must be for longitudinal sawing, this will significantly increase the speed of the process. Experts recommend using a 3*8 chain.
- It is advisable to buy a carbide chain. This is what he is doing today. Conventional circuits fail quite quickly;
- The length of the logs to be cut must take into account the maximum and minimum. So that the longest ones fit in, and the shortest ones don’t fall between the guides;
- Calculate in such a way that the saw does not vibrate or play on the guides during operation;
- The power of the saw, in some cases you want it to be both more powerful and more economical. In this case, folk craftsmen do the following. Instead of a chainsaw, an electric motor is installed, and the tire is left for sawing, see photo below;
- The height of the sawmill. It is necessary to provide in such a way that the back does not hurt to bend over and the logs do not need to be lifted high. If the wood is not heavy, it is better to make it higher. If the forest is heavy, you can go lower.
- Sawing of wood can be carried out either by the upper part of the tire or by the lower part. When sawing with the lower part, sawdust flies towards the chainsaw and clogs it. The upper part throws out sawdust from the chainsaw, this allows you to increase both the service life of the saw and the downtime during sawing;
- During the sawing process, the chain very often stretches on the saw and needs tensioning. Therefore, when installing the saw, it is necessary to provide access to the chain tension and secure the saw with access to the mechanism;
- When sawing, it is better to fix the position of the chainsaw handle, this simplifies the process;
- The cable, clothesline or lace should not drag, since the sawing process should be uniform over time.
Helicopter
This type of homemade product is considered complex and therefore has not been implemented to date. She is in the dreams of enthusiasts, in invented stories. One of them claims that back in the USSR, a prisoner who understood mechanics made a helicopter with a chainsaw engine and was able to escape from the colony.
Making a homemade helicopter requires, unlike a snowmobile, outboard motor, bicycle, grinder and even a snow blower, more complex engineering calculations. They also show that one, even powerful, engine is not capable of lifting such an aircraft into the air. At least 4 motors are required, moreover, forced and working in concert at the highest possible speed. But it is difficult to implement this with chainsaw engines in practice.
Types of sawmills
The most widespread today are the following three types of devices for sawing logs with a chainsaw with your own hands, which differ in their design:
- Tire.
- Tape.
- Disc sawmill.
https://youtube.com/watch?v=XR_TrDiAqQU
Disk installations
The relatively simple design of disc installations makes them easy for most homeowners. Due to their ease of assembly and versatility, these types of woodworking machines are most widespread and are found everywhere. The basis of this design will be a circular saw, which is mounted on the spindle of an electric motor. Additionally, a strong base is made, above or below which a shaft with a saw and an electric motor are fixed.
A durable and reliable frame for a disk unit can be made of metal or wooden parts that are welded or fastened together with nails and screws. The work table can be made of sheet metal; you just need to ensure the ideal geometry of the structure, which allows you to guarantee the highest possible quality of wood cutting.
The use of disc saws allows you to make slats of various sizes, produce timber, veneer, and cut boards to the required length and width. Thanks to the high rotation speed of the saw, it is possible to ensure that logs are cut with smooth, high-quality edges and cuts.
Band sawmill
Belt-type installations combine simplicity of design and excellent performance. Accordingly, they are popular not only in everyday life, but are also widely used in sawmills and enterprises that produce lumber. The advantages of this type of equipment include its high productivity, as well as the ability to cut large logs weighing more than 300 kilograms.
To make a band sawmill you will need the following:
- Pulleys.
- Channel.
- Metal corners.
- Pipes with different diameters and sizes.
- Metal structures for the production of sleepers.
The production of such a sawmill begins with the construction of a frame, which has the shape of the letter P and is made of a corner or channel with dimensions of 50 by 100 millimeters. The standard dimensions of the frame are a length of 8 meters and a height of at least 15 centimeters. To increase the strength of the base, the channels are additionally tightened with pipes and angles, which will allow the base to withstand the maximum possible load.
Next, they begin to build the mobile cart. For this, a steel plate is used, the thickness of which is 40 millimeters. An electric motor will be responsible for driving the trolley, the power of which should be 10-12 kW.
A saw is attached to the trolley with a chain drive, which is fixed to the electric motor shaft through a pulley. A handle-steering wheel is welded to the side of the movable cart, which will be responsible for moving the mobile structure along a fixed base.
https://youtube.com/watch?v=MVx1lq1COng
Tire sawmills
Tire sawmills or logosols differ in their design from other similar devices. Using this manual technique, you can longitudinally saw logs, producing high-quality slats and veneer. Thanks to its compact dimensions, logosol can be installed both outdoors and inside a small workshop or wooden shed. At such a sawmill it will be possible not only to cut logs, but also to produce small-sized workpieces with a non-standard shape.
Having a high-quality sawmill diagram in hand and choosing the correct length of the chainsaw blade, you can independently create a machine that will provide high-quality sawing of logs. It will be possible to decide how to make a sawmill with your own hands, saving on the purchase of components for equipment.
Self-assembly of a disk unit
The work begins with the acquisition of the necessary parts, assemblies and components. Then you can begin assembling the frame. Metal pipes and high-strength guides are used, which are attached by welding. The next step is to assemble the carriage.
A powerful engine is required to rotate the metal disk, so in most cases a gasoline version is used. The working elements of the unit are connected to the engine through special holes.
This usually happens using a chain drive, but in this case the sawmill will not be able to operate continuously for a long time - the drive will constantly overheat.
A rapidly rotating saw blade is a source of increased danger, therefore, during installation, all risks should be taken into account and all safety conditions must be observed.
Lightweight nozzle and debarker
The use of longitudinal sawing of logs has been sorted out, and you can move on to the lightweight method. It is really very easy to use, since the element is attached on one side. However, this method has lower productivity when compared to the first. In addition, the boards will turn out somewhat uneven, and therefore they are usually used for secondary buildings.
Another attachment is a drum debarker, or debarker. The technology for sawing logs into boards with a chainsaw involves the use of this attachment as one of the most suitable for dissolving the material. It works through a V-belt drive. The attachment is attached to both belts, and the kit includes special pulleys to secure it. As for the rotation speed, and therefore productivity, it directly depends on the size of these same pulleys. Thanks to this, changing the speed of work in the desired direction will not be difficult.
How to properly cut a log into boards with a chainsaw? In relation to working with this nozzle, the question is most relevant, since during its operation it is very important to monitor the progress of work, for which experienced craftsmen can even attract assistants
Making a homemade chainsaw machine
The main structural elements required for assembly are a chainsaw, a pair of channels, metal angles and rails.
First, a frame is assembled, in which holes are drilled for installing ties from metal pipes. During assembly work, it is imperative to ensure the accuracy of dimensions and observance of right angles. To strengthen the frame, it is recommended to weld several stiffeners.
At the next stage, the movable cart is assembled. Its basis is a steel plate, to which corners are welded from below and rollers are mounted. Fasteners for gas-powered tools are installed in the upper part.
At the last stage, a structure with fastenings for logs is installed on the frame.
What types of chainsaw sawmills are there?
A portable sawmill, converted from a chainsaw, looks like a wheelbarrow that needs to be moved by hand. The device moves on rails. There are two types of construction, which differ in the use of different types of saws.
The chain-based option is used for sawing tree trunks into bars. The disadvantage of using this option is a lot of sawdust after work, which indicates an uneconomical use of raw materials. Band saws are adapted for sawing large diameter logs
During operation of such a device, maximum precautions should be taken, since the radius of sawdust emission is quite large. To prevent injury, it is advisable to use a chip extractor with a flexible air duct.
Similar saws are used in industry, but for domestic use a small sawmill is sufficient. Small dimensions are an additional advantage, since the homemade product will be portable and will not take up much space in the room, and if necessary, it can easily be dragged to another place.
Tips and tricks for making a sawmill
A woodworking unit is an object with a high level of danger due to moving cutting elements. It is also quite large in size. Therefore, the location for assembling the structure should be chosen very carefully.
The site for installing the sawmill should be level and spacious, allowing access from any side. For these purposes, you can use a well-lit garage, barn or other utility rooms. You can install the machine outdoors, but in this case you should build a canopy.
If the unit is equipped with an electric motor, it is necessary to follow all electrical safety rules and monitor the condition of power and grounding cables.
The machine must be in a stable position, and the log must be firmly secured so that it does not fall off during cutting and injure the operator.
Before starting the assembled unit, you must make sure that all components and connections are reliable.
A sawmill is a woodworking system that has a not very complex design. It is easy to assemble it with your own hands. You just need to carefully follow all the recommendations, carefully read the drawings and rely on the provided videos and photos of the homemade sawmill.
How to choose an engine for a homemade sawmill?
The engine is the basis of the sawmill, so the choice of its characteristics must be taken with special responsibility. First of all, you need to figure out what type of motor is suitable for assembling a homemade product. The best solution has always been and remains a standard gas engine. Electric motors do not have sufficient power and thrust. In addition, not all electric chain saws are equipped with high-quality protection from dust and moisture, but they are the ones that constantly accompany the dissolution of logs into boards.
The second important factor is the power of the chainsaw engine. The ability of the motor to cut logs in the longitudinal direction depends on this parameter. Most often, powerful gasoline engines are used to make a homemade sawmill, the crankshafts of which rotate at a speed of at least 12,000 rpm. In this case, the engine power must be at least 5 liters. With.
The third factor is the anti-vibration system. During operation, any motor creates vibrations that affect the evenness of the cutting line. In order for a mini-sawmill to produce perfectly even boards, the chainsaw for its assembly must be equipped with an effective anti-vibration system.
Choosing a chainsaw
If you want to make a homemade snowmobile, you need to start looking for a reliable and convenient chainsaw, which will serve as the basis for a future vehicle
At the selection stage, it is important to make sure that the parameters of the unit correspond to the required ones. First of all, power and efficiency are taken into account
Also, the chainsaw should not have a lot of weight.
To implement the idea of producing a homemade snowmobile, a Ural chainsaw is often used. It is characterized by increased reliability, low weight and good performance. In addition, the tool is environmentally friendly and is not afraid of working in difficult conditions.
Using such a chainsaw, you can make a high-quality unit that is capable of moving through any snow drifts.
As for the technical characteristics, they look like this:
- Power - 3.68 kW.
- Weight - 11.7 kg.
- Dimensions - 46x88x46 cm.
The next popular model for the production of a homemade snowmobile is the Druzhba chainsaw. The unit has an affordable price and good technical characteristics. Based on it, you can create a good vehicle without unnecessary components and elements.
But the model has some disadvantages, including increased weight and low power (1 kW), as well as the lack of mounting points for fixing the safety casing. In some operating parameters, Druzhba is inferior to modern gasoline saws.
The Shtil chainsaw is also great for making homemade snowmobiles. Being an environmentally friendly model, it is completely harmless. At the same time, the device is characterized by low weight and almost silent operation when compared with domestically produced models. However, the cost of the powerful “Calm” can be prohibitively high.
