The possibility of making something useful out of unused or worn-out equipment attracts many home craftsmen. One such useful device is a laser cutter. Having such a device at your disposal (some even make it from an ordinary laser pointer), you can decorate products from various materials.
With a homemade laser cutter you can cut thin wooden parts or engrave glass
What is a CNC laser cutting machine?
A laser cutting machine has a lifting table designed to hold and move the workpiece relative to the beam. The movement can be linear about the vertical coordinate axis.
Reference : the machine has different lifting capacity, area and can be moved using mechanical or electric drives.
What do you need to assemble a CNC laser cutting machine yourself?
To assemble a laser machine yourself, you should make sure you have important tools, the tandem of which will allow you to get high-quality work from the product.
For cutting metal
The main element is the laser of a writeable disk drive for a PC, which has a high writing speed. You will also need:
- flashlight;
- laser pointer;
- soldering iron;
- locksmith supplies.
If a more powerful tool is needed, then additional parts are needed to produce the driver:
- resistors 2–5 Ohm;
- capacitors (100 pF and 100 mF);
- LED flashlight;
- multimeter
More power can be obtained by using a 60 W laser diode purchased in a store.
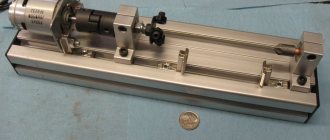
It is best to install a product for laser cutting of metal, made independently, on a frame; use a PC equipped with a program for control. Therefore, in addition to the laser, you need:
- frame;
- electric motors;
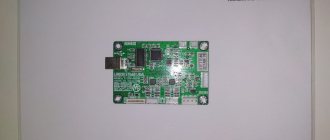
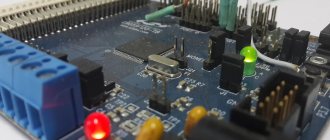
- transistors and boards;
- regulator;
- pulleys and timing belts;
- sheet steel for the production of brackets;
- nuts, couplers, ball bearings;
- controller and switches;
- metal rods and boards.
For cutting plywood
To make a plywood cutting machine, you will need the following elements:
- MDF, chipboard or plywood;
- guide parts - metal rods measuring 12 mm;
- holders;
- bearings and sliding bushings;
- stepper motors;
- running nuts and screws;
- controller;
- controller power supply;
- coupling;
- wires and cables;
- pulleys;
- switches;
- computer.
For cutting wood
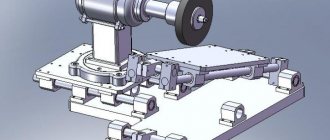
The basis for woodworking devices should be hard wood, steel, and aluminum. For high-quality operation of the complex, the development of calipers is necessary. No movement is allowed while they are moving, as this will cause inaccurate milling. Also, to assemble a wood cutting machine you will need the following components:
- guides made of steel, well polished;
- support mechanism made of textolite;
- stepper motors, it is better to use 24 V and 5 A samples;
- a working body fixation block, the configuration of which depends on the available tool.
Homemade laser: drawings, questions, solutions
- Go to page:
Homemade laser: drawings, questions, solutions
Message #1 Denis# » January 24, 2016, 01:46
Good health to everyone! The topic may seem a little crazy, but I am firmly convinced that if one part of humanity created something, then it is not a sin for another to repeat it
I came across drawings of a 50W CO2 laser circulating online. In appearance, everything is quite real, glass tubes, fittings, turning work. Apparently there should be mirrors, apparently mirrors with zinc selenide will have to be purchased, but that’s the next question. Urgent questions for people who understand this topic: 1 Please look at these drawings and please tell me the fine points in this installation. 2 quartz glass tubes, the ones I see on sale for 500 rubles/m.p. or is there some thread of a spherical horse in a vacuum that should be visible in the light in these tubes? 3, as I understand it, this is not a completely finished installation? As I understand it, how should the beam be focused on the workpiece? 4 is it clear that the beam must then be transmitted to the CNC using mirrors? subtleties, complexities? Do we focus the 5th beam once before the workpiece, or is it also pre-focused in front of the mirrors? 6 how to theoretically increase power? by increasing the length of the tube? As I understand it, for this you need to fix a certain number of tubes in parallel and refract the beam between them using mirrors? 7 What if, as a budget option, try sputtering finished mirrors with gold? Shouldn’t it be polished from a piece, or is gold not the best option here?
Sent after 4 minutes 4 seconds: I put the brochure here: viewtopic.php?t=585
I added when the topic reached page 11: To all newly arrived participants in the discussion, I would like to note that where China is located, the author of this topic is aware, just as he has no doubt that the idea is a priori complex. The author of the topic is also aware that all this cannot happen for free, everything will cost money and time. Most likely a lot of money and a lot of time. Therefore, all comments of this kind “why it’s difficult/impossible/you won’t succeed”, “yes, in China with this money you’ll buy 10 of them”, “the Germans are great, you’ll never catch up with them”, etc. I will silently close into scrolls. These messages can be read by clicking the mouse on the “Show” button. With the exception of. Namely: I think many will be happy to look at links to components on ebay. Not for finished machines, but for example for optics with zinc selenide, etc.
Homemade laser: drawings, questions, solutions
Post #2 nikirk2 » Jan 24, 2016, 02:18
Homemade laser: drawings, questions, solutions
Message #3 Denis# » January 24, 2016, 03:10
Waited!
Just now I thought that in addition to focusing, it is also necessary to organize gas purging.
Globally speaking, back in high school I began to understand that the basis of business is, after all, production. Because until someone produces something, the traders have nothing to do. Then it became clear that in this case, you need to either develop and produce equipment, or extract raw materials. Our state and more significant chatlans successfully handle raw materials, which means I don’t really have much choice. production of equipment.
If locally, then now there are tasks to cut duralumin and steel up to 2mm. This comes first. Next, let's see what else 1085 Nm cuts there and we'll think about how to live with it. I heard that 1085 Nm from duralumin likes to go into reflection, but they cut me. However, they cut 2 kW with Trumpf, so the question arises of what power is required for cutting thin sheet metal, for now let’s say up to 2 mm. As I understand it, the minimum is 400-500 W, preferably 1 kW. This is where we dance, if 3 kW is realistic, then we discuss them too, very interesting!
To assemble a kilowatt, as I understand it, you will have to dance with a tambourine, so I started looking at the simplest. Well, you need to understand how it scales and what it threatens. It seems to me that it is quite possible to lengthen the tube and adjust the beam with mirrors. Yes, it’s not easy, but it would be easy if there were no questions
Well, in general, we need an explanation “for dummies” of how it works. You don’t have to delve into the structure of beam generation and the difference in the generation of different wavelengths, at least for now, but explanations of what is for what are very desirable. Those. a tube is needed like this, not like that, this is used there, you can use another like this, but we will lose that. And so on for each component and its installation. I understand that there will be a lot of books, but if you, as well as other experienced forum users, join the topic, it could turn out to be an interesting textbook!
Shall we discuss? Will you tell me? Shall we try?
Homemade laser: drawings, questions, solutions
Post #4 neon » 24 Jan 2016, 03:44
Similarly, you can contact me with some questions, I am also developing gas lasers. Participated in the development of fairly powerful models, up to 4 kW. As was said, the described laser will not be able to work for a long time in the sealed mode for known reasons.
Briefly on the questions, if you decide to do just that, and not buy a ready-made one, which will cost you several times less and can last more than one thousand hours (very good sealed lasers from Reci). Decide on this right away, because there are a lot of nuances, and there will be very few assistants. The most difficult and urgent thing is to ensure long-term operation of the laser in sealed mode, when there is no need to pump the gas mixture, etc. Even not all Chinese have mastered this and one should not be deluded by the apparent simplicity.
1. I believe that this is the choice of a resonator with the selection of ready-made mirrors, adjustment units and gas equipment (vacuum pump, cylinder with a gas mixture, etc.) Considering the high cost of making mirrors to order, I think it is necessary to make a laser based on ready-made mirrors , and not vice versa. It will be cheaper this way. 2. No quartz tubes! They are like a sieve for water for helium. It is optimal to use borosilicate or ceramic vacuum-tight tubes. 3. Focusing optics is not a complex component; you don’t need to focus on this for now. 4. Flying optics are mainly used. The difficulty lies in the rigidity of the structure and adjustment. You can fix the laser and move the table, or place the laser on the portal if it is large. Then there is no need for flying optics. I came across the option of delivering radiation via optical fiber, but the power there was 40 W and the light guide cost as much as the entire machine along with the laser. In some cases, this is the only option (medicine, etc.) 4. Focus directly in front of the material being processed. If the thickness is the same and does not float, then there is no problem, but in practice this happens very rarely and automatic focusing is necessary. 6. Quite a broad question with many subtle points, especially with diffusion cooling. The Chinese simply increase the length and make a tandem, but even at 160-180 W this laser is a monster, 180-200 mm long, made of two independent gas-discharge tubes, but with a common resonator. They are practically not supplied to Russia, because they are very fragile and even if you get one, it can quickly fail from careless use or due to poor quality, which often happens. Chinese glass lasers are a game of roulette (with the exception of the company I indicated, I can’t vouch for others). In such lasers, a well-known paradox arises (few people even know about it) associated with the cooling feature. In theory, the power of laser radiation depends on the gas-discharge volume, and it would seem that by increasing the diameter of the tube, the maximum radiation power should increase, but this is not the case. The specific power for a given length can be increased by cooling the laser well, down to subzero temperatures, but there are some nuances and difficulties (blowing the optics, etc.) and they try to keep the temperature no lower than the dew point. We are not considering other parameters affecting power (pressure, etc.) for now, since there is a certain specific power and it is not so easy to exceed it. This is in general. We do not touch the laser excitation and assume that it will be a laser with a longitudinal glow discharge of direct current (high voltage), without gas pumping. 7. It’s cheaper to buy ready-made mirrors than to spray them. At this power, metal mirrors on a silicon substrate are used. Gold or copper plating with protective coating. There are other options, but they are less common. It is cheaper to use a translucent mirror made of zinc selenide. Germany will be several times more expensive.
How to make a CNC laser cutting machine with your own hands?
A self-assembled CNC device gives the craftsman a reason to be proud and allows him to understand in detail the filigree processing of materials.
For cutting metal
The first step to making a laser metal cutting machine is to disassemble the disk drive to remove the light bulb from it. It is located in the carriage and secured. The fasteners must be soldered with a soldering iron.
Help : during operation, you do not need to subject the light bulb to strong mechanical actions that could damage it.
Before assembling the machine, you need to decide what exactly it will be powered from, where the LED will be mounted and how to distribute the current.
Help : the diode requires a more powerful current than the parts of the pointer.
- You need to carefully disassemble the pointer and replace the diode with a light bulb that you pulled out of the disk drive. For fastening it is best to use glue.
- The power of the pointer may not be enough, so it is increased with batteries for a flashlight. To do this, the lower elements of the flashlight are combined with the part of the pointer in which the light bulb is located. The glass is removed from the flashlight and the light bulb is connected.
- When making the device yourself, an aluminum wire is wound around the light bulb. The resistor parts are connected to the batteries according to the circuit. This requires precision and respect for polarity.
- The body for such a machine is a metal flashlight. After installing the wooden frame, the rods are installed.
- To install electric motors, you need sheet steel brackets that are bent at right angles.
- Brackets should also be made to secure the drive, just bend the sheets into the letter P. The belts are connected to the base with self-tapping screws.
For cutting plywood
Self-assembly of the device for cutting plywood occurs in the following order:
- Cutting and production of base. It is best to use plywood twelve millimeters thick for it.
- Fastening fixed walls to this base and drilling holes for installing guide rods.
- Installation of guides along the Y axis. Sliding supports for the side elements of the frame are pre-strung on them.
- Making side movable walls. You need to drill holes in them for the guides along the X axis and install them on the walls.
- Fastening the walls to supports.
- Assembling the working head of the device.
- Electrical installation. It includes power supply, installation of switches, start buttons and emergency stop.
- Installation of electronics and connection of the controller.
- After checking all the parts, you can start working on your homemade machine.
For cutting wood
The sequence of actions for making a wood cutting machine is as follows:
- Installation of the axles of the support element and their fixation along the edges of the machine.
- Grinding in calipers. You need to move them along the guides until the movement becomes smooth.
- Tightening the screws to fix the support machine.
- Fastening elements to the base of the working mechanism.
- Installation of couplings and lead screws.
- Installation of motors. They are attached to the coupling bolts.
Electronic elements are located in a self-contained cabinet to ensure a minimum of disruptions during operation of the device. The plane for mounting the working machine must be without differences, since the design does not provide level adjustment screws. After completing all of the above, you can safely proceed to operating the machine.
Principle of operation
Before you start assembling such a unit at home, it is important to understand how it works. There are three main conditions that allow a laser to work properly. If at least one of them is not met, a beam of the required intensity simply will not arise. These are the conditions:
- Power supply.
- Working environment.
- Optical resonator.
The energy source fills the working environment with photons of a certain charge.
These photons are taken from the active medium by particles that are similar to them. When moving in a liquid, photons begin to accelerate due to collisions with atoms of the working medium, this leads to an increase in the potential of the installation.
At the other end of the tube, frosted glass is installed, through which the photon beam exits. The beam is formed in such a way that all its photons meet at one small point, superimposing their energy on each other, as a result the processed material is burned.
Video: DIY CNC laser machine.
DIY drawings of CNC laser plotters
A CNC plotter requires three axes to function when creating graphs: X, Y and Z. The first two axes are at 90 degrees to each other so that any point on the surface is determined by the value of X and Y. The Z axis is used to raise and lower the pen on paper.
For cutting metal
To correctly complete a drawing for laser cutting of metal, there are programs that work with vector graphic files. They store drawings for laser cutting. When converting a drawing, some distortions or accidentally added elements may sometimes appear. You must keep an eye on this so that you can correct them in time. Drawings must support the formats of the AutoCAD or Corel Draw software packages.
For laser cutting of metal, it is permissible to use a schematic drawing of the part in computer form. For this, CDR or DWG file formats are used. The part sketch must be a closed-loop schematic object. It may have slots and holes.
For cutting plywood
When creating a drawing for laser cutting plywood, electrical routing and connections must be taken into account. This will help reduce the number of errors when designing the machine.
You can make a drawing manually, but it is better to use programs such as Compass, AutoCAD or Visio. They allow you to correct a drawing, and Visio has ready-made templates for electrical equipment.