Despite the rapid decline in the popularity of landline telephones, there are not so many people who are ready to refuse them outright. Admit it, it happens that it is sometimes extremely difficult or even impossible to do without a traditional connection.
To connect the device to the switching network, you need a low-current node, the installation of which can be done by yourself. We will tell you in detail how to connect a telephone socket without calling a technician.
There is absolutely nothing complicated in the schemes and methods, and the useful information we offer, as well as photos and videos, will help you understand the issue.
Old and modern device standards
As equipment has improved, the way phones connect to the communications network has undergone a number of changes. In the first models of telephones, connection to the communication line was carried out without the use of sockets at all.
To create a closed current loop, the wires were simply twisted together or connected by any other available means.
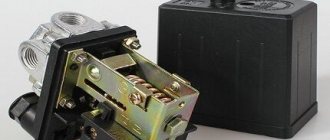
In the 80s of the last century, connections between telephone exchange lines were made using two-core copper wires. And to ensure a quick-disconnect connection to the telephone, sockets and plugs of the RTShK-4 standard were used. This abbreviation stands for "four pin telephone socket."
The housings of such devices are equipped with a protective key - a plastic connection that helps prevent incorrect installation of the plug into the socket.
The RTShK-4 design includes a key and two pairs of contacts. The first pair ensures the phone operates in normal mode, the second pair allows you to connect an additional line, provided that both devices are on the same phone number.
As a result of the widespread dissemination of microprocessor technologies, Registered Jack equipment marked “RJ” began to be actively used to replace obsolete models of the RTShK-4 standard. It complies with the international standard IEC 60884-1 and 60669-1.
Modern standardized equipment for low-current circuits allows you to connect up to four pairs of working contacts to the circuit
Connection of modern landline telephone models for use at the household level is carried out through sockets equipped with one pair of contacts. The housings of such devices are mounted in the cavity of a plastic module and are marked with RJ-11 symbols.
Between the two contacts, which are compact metal plugs, the cores of the supply wire are buried. Models of the RJ-11 standard are recommended for connecting devices to linear telephone lines.
In the central part of the plastic module, called the manipulator, there are brass contacts through which an electrical network is created between the telephone and the telephone exchange
To connect two devices to separate lines and create office mini-PBXs, RJ-12 and RJ-14 standard devices are used. Universal four-wire connectors are suitable for most models of telephone equipment.
To connect several devices at once, you just need to assemble the sockets sequentially into blocks, while observing the diagram: the first line is connected to contacts No. 2 and No. 3, and the second - to No. 1 and No. 4. Devices of this series are mostly used to create mini-PBXs when arranging office premises.
The model with a combined connector RTShK-4 and RG-11 is mainly used when it is necessary to connect a vintage exclusive old telephone with new telephone wiring
Installing an adapter allows you to connect plugs of both old and new standards with lines equipped with modern technologies.
The main difference between RJ-25 standard devices is three pairs of working contacts. For this reason, the connection of such equipment can only be carried out by a qualified specialist who is well versed in telephony and electrical issues.
The RJ-45 connector has four pairs of pins, but only the two pins located closer to the center are used to create an electrical circuit
When connecting computer systems, faxes, modems and other complex communication devices, the RJ-45 standard is also used. When connecting RJ-45 devices, the main attention is paid to the matching of the plastic keys.
Despite the design differences between the old and new standards, the device plugs have similar connectors and dimensions. The device is connected to the network only through two contacts. Only modern models use only middle contacts.
For those wishing to familiarize themselves with the connection features, the photo gallery will help:
Image gallery
Photo from
Appearance of overhead telephone socket
Telephone patch cord with RJ-12 connector
Internal structure of a telephone socket
Connection diagram for a socket with two connectors
Necessary materials
All assembly equipment for mounting and connecting the socket must contain the following products:
- Screwdriver with insulated handle. Insulation is very important to avoid electric shock.
- Cable;
- Socket box;
- Hammer drill (for installing a new socket);
- Sharp knife;
- Socket;
- Self-tapping screws;
- Wire cutters;
- Insulation tape;
- Special gloves for protection;
- Adhesive tape;
- Pencil;
- Universal tester.
Installation diagrams and connection methods
Connecting a telephone socket is much simpler than its electrical counterpart. But a process that involves working with, albeit low, but still voltage, requires accuracy and caution.
The connection diagram for a telephone socket is quite simple and involves connecting the two ends of the telephone wire to the corresponding contacts in the socket
When installing a telephone socket, you can use one of two installation methods:
- open - involves installation in an overhead manner;
- closed - in which the telephone line is hidden inside the wall.
When choosing a laying method, they are guided by the design of the walls, the service conditions of the communication line and the pretentiousness of the design of the room itself. Surface-mounted sockets do not look very aesthetically pleasing, but they are ideal for speed of maintenance: in a matter of minutes they can be removed from the support and the integrity of the contacts can be assessed.
The open method can be carried out without mounting it on the wall at all, by placing the device on the floor, and hiding the cable leading to it under the baseboard
To protect exposed wires from mechanical damage, decorative plastic cable channels are used. They are found on sale in the form of wall structures and floor skirting boards. It is convenient to monitor the condition of the wire in them through one- or two-sided snap panels.
For closed installation, KSPV cable is most often used. The single core of this cable is made of copper wire, and the outer sheath is made of polyethylene, painted white.
The telephone line is also laid using the TRP distribution cable. It has a dividing base. The core of this single-pair wire is also made of copper and insulated with polyethylene.
For ease of use and harmonious combination with the design, telephone sockets are not installed separately in the wall, but are included in the socket block
To decorate the connection points and make them less noticeable to prying eyes, the devices are placed behind TV screens and monitors, and are also built behind the façade of wall-mounted furniture.
A separate line should be highlighted for sockets built into the baseboard. The main thing is to choose models whose front panel fits tightly to the surface of the baseboard. Otherwise, over time, it will begin to move away from the base, exposing unsightly seams.
Useful tips
Following simple advice from experts will help you avoid mistakes in installation:
- It is better to use devices for hidden installation. They fit more harmoniously into the interior than others. But to install them, you will have to break the integrity of the walls and wall coverings.
- In the selection process, it is recommended to pay attention exclusively to proven companies with a good reputation. This is a guarantee of safety and reliability.
- Most outlets have numbered pins. If there are no markings, you should look at the colors. Green, orange or blue contacts in combination with white are positive, contacts of the same colors, but without white, are negative.
- When installing products of the old standard, it will not be superfluous to remember the color design of the contacts: orange, black and green are positive, red, yellow, blue are negative.
The types of sockets for connecting a telephone differ in design, installation method and other parameters. If you follow the instructions, installing these devices will be easy.
How to connect a telephone socket
When installing a telephone socket, it should be taken into account that the voltage for low-current communication devices does not exceed 60 Volts. But even reduced voltage can still create a current, causing discomfort to a person.
At the moment when a call occurs over the telephone line, the voltage completely rises to 110-120 Volts. And it can cause serious pain upon contact. It drops to a value of 12 Volts only after removing the handset.
In order to comply with safety regulations, all work on connecting an existing telephone circuit is recommended to be carried out wearing protective rubberized gloves.
The principle of placement and method of installing telephone sockets is practically no different from the technology for installing electrical sockets. Since today the most common devices are those that have the J-11 and J-12 standards, we will consider the intricacies of connecting a telephone jack using their example.
Stage #1: Preparatory work
The first thing you need to do is study internal communication patterns. They are included with the product instructions.
There should be no problems when connecting the J-11 and J-12 standards: you just need to connect the wires of the appropriate polarity. The main thing is that in the plug suitable for the device, the wires are routed in a mirror image of the contacts of the socket.
If you unknowingly purchased and plan to install the J-25 standard, the design of which involves 6 contacts, use only the 3rd and 4th contacts for connection.
According to the standard, a wire of a certain color is connected to each contact; this solution increases ease of maintenance and facilitates repairs
When planning to use an old standard device, you should worry about purchasing a universal socket in advance. It is equipped with a four-pin connector and connector. In addition to the socket itself, it is also necessary to prepare a two-core wire with a cross-section of 0.3-0.5 mm.
It is necessary to determine and mark the installation location and height in advance.
The following tools need to be prepared for the work:
- building level;
- cross knife;
- voltmeter;
- screwdriver;
- wire cutters;
- graphite pencil;
- protective gloves;
- Double-sided tape;
- hammer drill (if installing a new point).
When choosing a screwdriver, you are guided by the type of surface and dimensions of the screws used for fastening. To minimize the likelihood of electric shock, it is better to perform all manipulations with a screwdriver whose handle is insulated.
Having outlined the installation location of the connection point, use a building level to correct the horizontal and vertical position of its position
To connect a hidden type socket, you must first make a hole in the wall for its installation - a socket box. This can be done using a hammer drill equipped with a special crown with a diameter of 60-70 mm.
In the absence of one, the work can be done with an ordinary hammer and chisel. But manual labor will take much more time and effort. Then, to the hole made, it is necessary to drill a channel for laying the telephone cable.
There are certain nuances when installing a socket box into a plasterboard wall.
Stage #2: Stripping the ends of the cores
Before you start melting the wires, you need to strip the ends of the wires, removing the outer layer. Just expose the outermost 4 cm of the wire.
When stripping a telephone cable, remember that it is very vulnerable to damage. And broken wires will only lead to equipment malfunction. Therefore, it is important to use a specialized stripping tool.
Since it is not always possible to carry out the cutting accurately the first time, experienced craftsmen recommend that when laying the cable, make some allowance for its length. The excess wire can then be hidden under the cover of the device.
Removing the protective insulation from the ends of the cable should be done extremely carefully, using a cross-cutting knife, a sharp blade or side cutters.
The technician’s task is to strip the ends of the wires from the braid so that when exposed they are intact and free of any defects.
Step #3: Connecting the outlet wires
Stripped wires with separated cores are connected to the connectors of the box itself, focusing on the markings indicated on the front panel of the indoor unit. With a closed installation method, for ease of connection, the wires are made to protrude beyond the wall plane by 50-80 mm.
Experts recommend checking the polarity of the contacts when connecting wires using a tester.
To maintain polarity when connecting wires, follow the rule: red insulation on the line with the “-” sign, and green braiding on the “+”
If the rules regarding polarity are not followed, there is a high risk that the telephone will malfunction from time to time during operation.
At this stage of work you will need a voltmeter. With its help you need to check the readiness of the communication line. The line voltage should be between 40-60 Volts.
The supplied cable cores are applied to the clamp and tightened tightly with special screws, ensuring reliable fixation. The shape of the grooves to which the cores are attached facilitates the installation process. There is no need to wrap the joints with electrical tape.
When connecting devices whose design is equipped with four fork-shaped contacts, only the two central contacts are used
When performing open mounting, at the final stage all that remains is to close the housing cover using the latch and secure it with screws. The finished socket is attached to the wall or floor, “planting” it with double-sided tape.
With a closed installation method, making sure that the wires are not intertwined in the socket box, according to the markings applied, the indoor unit is mounted into the wall. Having given the block the desired position, the structure is fixed using expansion screws and self-tapping screws.
At the final stage, all that remains is to eliminate the gaps between the socket box and the wall, covering it with gypsum mortar, and also seal the channels with the laid telephone cable.
After the plaster has acquired the desired strength, the protective edging is installed in place and the front panel is attached. In modern devices, the protective edging is snapped onto the internal unit, and the front panel is secured by screwing in screws.
If you need to connect a multi-socket outlet that allows you to install several telephone sets, you must adhere to the same technology as when installing the classic version of the device. The only difference in the process is the increase in the number of conductors requiring connection.
Subscribe to the newsletter
Many people wonder how to properly connect a telephone socket on their own, and in this article we will tell you how to mount and connect a telephone socket.
Installation of different types of telephone sockets
Currently, several types of sockets are sold: external and built-in. The first option is easier to install, but built-in sockets have a more attractive appearance. Both types are connected in the same way; the differences are only in the installation method.
In addition, there are different types of connectors: RJ 11 with two contacts, telephone socket RJ 25(12) with 6 contacts, and RJ 14 with 4 contacts. Most often, an RJ 11 telephone socket is used to connect home analogue telephones.
In addition, to connect the main wire to several sockets, double telephone sockets are used, the installation of which is somewhat different from single ones.
Correct connection of an open-mounted RJ11 telephone socket
Installing a telephone jack requires a number of tools and components, including:
- RJ 11 telephone socket, which will be connected;
- two-core cable with a cross-section of 0.3-0.5 mm2, for example, KSPV 2x0.5 or TRP;
- insulation stripper;
- screwdriver;
- multimeter;
- protective gloves.
The answer to the question “how to install a surface-mounted telephone socket?” can be divided into several points:
- Wear protective gloves - the voltage of the telephone line at rest is about 60 Volts, and at the moment of calling 100-120 Volts.
- Strip the insulation from the cable, being careful not to leave any nicks on the wire.
- Open the socket housing. The RJ 11 telephone socket that we are installing involves the need to connect the telephone line to the middle contacts. The telephone socket circuit may include 4 contacts, in which case they are connected according to the circuit diagram.
- There are also German-made sockets in which you need to connect to pins 2 and 5, but they are rare. To connect such a device, you must use a black wire instead of a green one, and a yellow one instead of a red one.
- Determine the polarity. Red is a minus in the telephone line, and green is a plus. As a rule, connecting a telephone socket does not require determining the polarity, however, some devices may not work well if they are not connected according to the rules. You can determine the polarity using a tester.
- Bury the cable cores between the metal plugs inside the outlet using a cross-connector or a regular utility knife. The edges of the grooves are pointed and tapered. When the cores are buried, they cut through the insulation, which ensures good contact.
- Secure the outlet to the wall and snap the cover.
- Connect the phone to the outlet and check if there is a connection.
The method for connecting a phone to a socket is as follows: you need to purchase an RJ11 plug and, using a special tool, crimp it in accordance with the location of the wires in the socket. If you have a telephone socket whose connection diagram has 2 contacts, they will be located in the same way as shown in the diagram, and the outermost contacts will remain free.
Installation of a hidden telephone socket
If you are interested in how to connect a hidden RJ 11, the connection will be similar - the differences lie in the installation. First you need to make a hole in the wall, then install the socket box and secure it with self-tapping screws.
After that, use the above method “how to connect a surface-mounted telephone socket”, place the socket body in the box and secure it with spacer screws, install the outer frame of the socket and connect the crimped cable.
Kinds
RJ11
Telephone sockets have several varieties:
- RTShK-4 - this standard, despite its “antiquity,” is still used to this day. In modern room design it does not look aesthetically pleasing and, usually, during “European-quality renovation” it is changed to more modern options.
- RJ11 is the most common version of modern sockets for connecting a telephone. Uses a two-wire circuit, which greatly simplifies installation work.
- RJ12 is often a dual type, which allows you to connect two telephones at the same time.
- RJ14 - designed to connect 2 telephone lines, but practically this is impossible to do due to the presence in homes of only one telephone line, so this socket can be used as an RJ12 standard.
- RJ25 is practically not used for connecting individual telephone sets, due to the presence of a three-pin connector.
Preparing for work
Connecting a telephone socket yourself requires the following tools:
- Phillips and minus screwdriver;
- knife or pliers;
- voltmeter or tester;
- dielectric gloves.
When idle, the communication lines are energized at 40–60 Volts. During a call, the indicator rises to 120 Volts and drops to 12 when the handset is picked up. 120 V is not a lethal voltage, but the shock is painful, and if epilepsy is diagnosed, the electric shock will lead to an attack.. When working with exposed wires, wear rubber gloves.