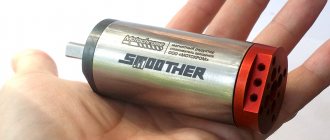
Currently, many owners of home workshops equip them with modern tools and equipment, which, being highly efficient and easy to use, significantly facilitates work and increases its productivity. However, at the same time, quite technically simple devices that can be made with your own hands in a home workshop are still in demand. One of them is a reduction gearbox.
What is a reduction gearbox?
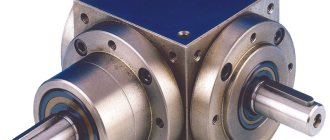
It is a special type of mechanism that serves as a transmission link between devices in which the active parts perform rotational motion. It is often used to transmit and convert torque from the unit that produces it to the device that uses the mechanical energy supplied to it. Unlike other types, a reduction gearbox provides a reduction in the number of revolutions and an increase in torque.
A reduction gearbox consists of a housing, gears, transmission chains, a worm mechanism, and shafts, with the help of which torque is transmitted and converted.
Toothed gears are located on the shafts in a rigid coupling, and worm gears are attached. They ensure the transfer of motion to each other, during which its transformation is carried out.
Transmission
The task of a homemade mini tractor transmission is to transmit torque from the engine to the drive wheels, change the speed of movement and provide reverse.
When driving in a lower gear, the engine is protected from overheating by an additional cooling system. Depending on the engine used and the wheel arrangement, the transmission layout may be different:
- Simple. Torque is transmitted through a belt clutch, which is installed on the gearbox.
- Complex. To transmit torque, you need to use cardan shafts.
A complex scheme is often used on homemade products with a breaking frame. This is a labor-intensive option for self-production. For this purpose, a 4x4 wheel arrangement is made with a Niva transfer case.
Preliminary preparation
Before you begin creating this device, you must have general knowledge of mechanics, be able to use repair tools and equipment, and know the operating principle and structure of this unit.
In addition, you need to initially determine:
- the type of future gearbox and its version;
- the gear ratio that will need to be converted and determined at the output;
- indicators of dynamic loads that will affect the working parts of the device;
- weight and dimensions of the future device;
- installation angle;
- temperature limits that will occur in the device during its operation;
- switching cycle – full or variable;
- intensity of operation.
conclusions
In a homemade mini tractor, controllability is very important, which is directly affected by the number of speeds and the ability of the mechanism to switch between them. The ability to sharply reduce speed to a minimum and increase power is the task of a reduction gearbox, and its installation is mandatory if the minitractor is intended for cultivating soil or removing loose and hard materials from the surface (for example, removing snow, leaves, grass, etc.).
When installing this part, it is important to calculate the load on it and the capabilities of the tractor after that, since an incorrectly selected or incorrectly installed gearbox will not allow the machine to develop its capabilities to the fullest.
More details about the components
The assembly process is not as complicated as the selection or production of spare parts necessary for such a gearbox.
- Device body. In industry it is produced by casting. The necessary holes are made using high-precision equipment, since it is necessary to achieve the mutually correct arrangement of the shafts and the alignment of the stars. When producing it, it is necessary to make the top cover removable. This will facilitate and simplify the process of servicing it during operation;
- Shafts and axles of the gearbox. They support gears and are used if they need to be equipped with this device. Installation is carried out by pressing onto splines or keys. For their manufacture, it is better to use durable steel measuring from 10 to 45 mm, which is easy to machine;
- Bearings. They are used as supports for shafts and resist loads and provide the possibility of rotational movement. Its reliability, durability and performance depend on the correct selection of these gearbox elements. If you are installing spur gears, then it will be sufficient to install conventional single or double row ball bearings. If a helical bearing or worm gear will be installed, then a roller or angular thrust ball bearing will be the best option. It is better to buy new ones than to use them from disassembly;
- Gears. They provide a change in the rotation speed of the shafts and, naturally, a reduction in the gear ratio. For their production, special metal-cutting equipment is used, which home workshops are not equipped with. The dimensions and characteristics of other parts included in this unit, as well as the distance between the axles and shafts, depend on the size of the gears. When installing, it is important to correctly set the gap between them. I-20 oil is perfect for lubricating gears. It is filled to the level of the bottom of the gears. Other parts of the device are lubricated by spraying lubricant onto them. You can take it from disassembly or buy new ones;
- Oil seals. They prevent oil from leaking out of the device body. They are installed at the exit points of the shafts on bearings under the covers. Are bought;
- Safety coupling. It is designed to prevent destruction of the device when excessive loads occur. Buyable;
- Bearing caps. They can be different - deaf and through. Designed to facilitate maintenance and installation of bearings. You can grind them yourself or find them at a disassembly site.
Mechanism elements
Regardless of whether a purchased or homemade reduction gearbox will be used in a walk-behind tractor, you need to understand how the elements of the mechanism are located, how to maintain and repair them. Reduction gearboxes for walk-behind tractors can be of several types, each of which has its own advantages and disadvantages.
Scheme for connecting the speed reducer to the gearbox
Gear reducer
As a rule, it consists of one or two stages; The main elements are gears. This type is one of the most reliable mechanisms used in creepers. Used in the most powerful walk-behind tractors. Its advantages may include:
- durability;
- reliability;
- small dimensions;
- possibility of reverse.
Such creepers are not without their drawbacks, the main ones being maintainability and price. In case of breakdown, as a rule, they are replaced entirely, which requires significant financial costs. In addition, it is necessary to monitor the presence of lubricant, the absence of which can lead to rapid wear.
Worm gear
The main element is the worm gear. Allows you to reduce the dimensions of the walk-behind tractor and improve weight distribution due to the perpendicular arrangement of the drive shafts and wheels. Most often they are installed on light and low-power walk-behind tractors.
Main advantages:
- large gear ratio;
- small dimensions;
- light weight.
The main disadvantage of a worm gearbox is the lack of reverse. In addition, in the event of a breakdown, the stroke reducer is completely replaced.
Chain reducer
One of the most popular types of gearboxes among users. Most often they are made dismountable, which simplifies maintenance and diagnostics. The most common failure is a broken or stretched chain, shearing of sprocket teeth or drive shaft keys. All these breakdowns, as a rule, are quite easy to fix yourself by replacing the failed part.
The advantages of stroke reducers of this type include:
- simplicity;
- reliability;
- possibility of reverse;
- maintainability.
A separate article about a homemade chain gearbox for a walk-behind tractor.
Combined gearbox
Gearboxes of this type are characterized by the presence of different types of gears in one mechanism: gear-chain or worm-chain. The need for such stroke reducers is dictated by the fact that in gear and worm gearboxes the center distance between the drive and driven shafts is regulated by the size of the gear and directly depends on the engagement module and the number of teeth. In a chain drive, the distance between the shafts can be adjusted by removing or adding links.
When assembling the design of a walk-behind tractor, it is not always possible to place all the units in an ideal position, and the need for an intermediate transmission link arises. This function is successfully performed by a chain drive, which compensates for the distance from the gear or worm gear to the wheel or drive shaft.
What does the speed reducer consist of?
Depending on the type of reduction gearbox, a homemade creeper consists of the following main parts: input (high-speed) shaft, output (low-speed) shaft, worm and worm wheel, drive and driven gears or sprockets.
In this case, the driving sprockets and gears always have a larger number of teeth than the driven ones. Auxiliary elements can be various couplings, bearings, and keys. In gear and worm gearboxes there is always a housing, which cannot be said about chain gearboxes. They may either completely lack a case or cover only part of the mechanism.
Maybe you will be interested in making a mower for a walk-behind tractor or an adapter for a walk-behind tractor.
Stages of work to create this device
- Installation of drive sprockets on the input shaft. In this case, installation can be done by spot welding, flange or key connection;
- Assembly of driven shaft axles;
- Installation of the driven sprocket;
- The case can be picked up from disassembly and adjusted or made by yourself. At the same time, it is necessary to make technological holes in it for oil seals and bearing connections;
- Installation of closed type ball bearings. An excellent option would be cylindrical ones. Their installation is carried out by tension;
- The drive shaft is mounted on eccentric bearing supports with the ability to adjust the chain tension by at least 15 degrees;
- At the final stage, a lid with a sealing gasket is installed.
Having decided to do this, it is better to first assess your strengths, knowledge and skills in handling the tool, so as not to get into trouble by spending a decent amount of money, a lot of time and effort, and at the same time, without creating the necessary device, but if you are an existing or former mechanic, you can safely get down to business.
If you have any questions, leave them in the comments below the article. We or our visitors will be happy to answer them
Classification
In the direction of the turn, transmissions are mostly right-handed. Sometimes the left direction of the thread is found.
Worm gears are classified according to the shape of the outer surface of the worm:
- cylindrical;
- Globoid.
The concave surface of the drive part increases the number of teeth that are in mesh at the same time. As a result, efficiency and transmission power increase. The disadvantage of globoid worms is that they are difficult to manufacture. The coils must be of the same height with a concave outer surface.
Worms are distinguished by the shape of the thread:
- Archimedean;
- convolute;
- nonlinear.
The Archimedes worm is distinguished by a straight involute in cross-section. The convolute has a convex configuration, close to the shape of a regular gear. Nonlinear profiles have a convex and concave surface.
The gear wheel has an inclined tooth of a reverse configuration, the shape of which coincides with the cavity between the threads.
The location of the worm relative to the wheel can be:
- top;
- lateral;
- lower.
The upper one is optimal for high-speed gears. The side one is the most compact. With the crankcase lubrication method, the oil is in the sump and the lower part, rotating, lubricates the rest; the lower location of the worm is more convenient.
Worm wheels are helical gears. The axes of the parts are usually located at an angle of 90°. In heavily loaded mechanisms, the angle can be 45°.
Gear wheels are divided according to the tooth profile:
- roller;
- concave;
- straight.
By type they can be:
- with continuous rotation – full;
- gear sector.
The sector can be of different sizes, from half a circle to a working length shorter than a worm.
Security measures
When working with sharp objects or flammable materials, follow safety rules. In addition, welding work carries a risk of electrical injury and thermal burns. When processing metal, use safety glasses and rough gloves - sharp edges can, like a razor, damage exposed areas of the body. In addition, lifting and moving heavy objects is carried out using special equipment to prevent accidental dropping of the load.
Regardless of which mechanism was the main one when assembling the mini tractor, it must be taken into account that it is dangerous. There are no instructions for homemade equipment, and therefore the first safety measure is a careful design layout. All rotating and hot parts are protected with protective covers so that the operator cannot accidentally or deliberately touch dangerous surfaces. The rules for handling flammable liquids must be observed: ignition of fuel is possible due to the use of an open flame near them.
Areas of application of a homemade mini tractor in the household
Homemade mini tractors have similar technical features as full-fledged Belarusian, Chinese and Russian-made units presented in stores. That is why their scope of application will be virtually the same.
Naturally, the main work for a homemade unit will be plowing, cultivating, and other cultivation of land. This task is paramount, because the farmer is fed by his harvest, i.e. something that he planted with his own hands, and without proper soil preparation this is almost impossible.
This largely explains the necessity and indispensability of such equipment for agriculture in general, as well as for specific farmers in particular.
In addition, with the help of a homemade mini tractor you can carry out a whole list of typical work:
- clearing snow in winter;
- transportation of small loads;
- cleaning of household waste, as well as various vegetation;
- hay making;
- planting and digging potatoes, beets, etc.
It is understood that the ability to perform such work is realized only in combination with certain equipment that plays the role of auxiliary. We are talking about trailers, rotary and segment mowers, snow plows, etc.
It is through the aggregation of these devices with a homemade mini tractor that it becomes possible to expand working capabilities, as well as increase multitasking, which everyone is talking about.
What drawings will be needed
In order to have a clear plan for working on a project to build a mini tractor, you will need a drawing or sketch of it. They are compiled based on the required parameters and those assembly units that need to be installed.
The tractor is assembled at home from components of motorcycles, walk-behind tractors and used cars. Therefore, the drawings are drawn up based on the units that are available.
First, a diagram is drawn on which the engine, gearbox, transfer case, and chassis are located. These assembly units are arranged according to their design features and dimensions. A kinematic diagram of torque transmission from the engine to the drive wheels is drawn up. The drawing then displays the design features:
- frame dimensions;
- material;
- attachment points for units, suspensions;
- elements reinforcing the structure.
The remaining drawings are not as important as the frame drawing because they are constantly being adjusted during production.
Advantages and disadvantages
What are the pros and cons of such a product? Firstly, you can operate a mini-tractor even in very limited space - it will fit perfectly into a small garage in the backyard. However, despite the fact that the size of a homemade tractor is relatively small, this will not in any way affect the functionality and volume of work performed.
In addition, it will help cope with plowing heavy rocky soil, since in this case digging with a shovel will give almost no results.
In addition, you can independently make your own unique drawing of a tractor that will meet all your needs.
You can also modify the designs to help reduce the weight and stress on the ground being plowed. This will greatly increase the productivity of the process.
Mechanical devices of different types
The use of wind generators in conditions of weak and moderate winds, typical for most regions of Russia, creates special requirements for the rotor design. At low flow rates, the windmill impeller rotates too slowly to generate sufficient electricity.
It is almost impossible to increase the rotation speed of a windmill.
The use of more sensitive types of impeller has little effect on the speed; only the possibility of starting from a weaker wind changes, which does not give a significant effect. To solve the problem, different types of mechanical devices are used - gearboxes .
Useful tips
To facilitate the lifting of attachments, hydraulic mechanisms are installed, but for the same purposes you can use a steering rack from a passenger car, which will significantly simplify the design.
The lack of suspension makes riding a homemade tractor uncomfortable. To change this situation, the seat must be installed on springs.
Don’t rush to register: most mini-tractors rarely go on public roads, and their small size allows them to be transported on a trailer.
Source
Types of homemade tractors
On plots of up to 10 hectares, the use of a mini tractor is justified: the “larger” counterparts have excess power for a private farmer, in addition, they are expensive, consume a lot of fuel, and it is simply inconvenient to work on them on small areas. In addition, making a “large” tractor with your own hands requires special materials and units, precise calculations, which require special skills. At home, the task turns out to be too difficult.
The situation is simpler when they create homemade mini tractors. These are small machines with enough power to comfortably process approximately 10 hectares of agricultural area. Such a tractor has all the necessary functionality, which is built into it at the design and assembly stage. Very often you can find homemade tractors in villages where residents need equipment, but cannot purchase it.
Multifunctionality implies not only purely agricultural use, but also the performance of other tasks:
- transportation of heavy loads;
- garbage removal;
- snow removal, etc.
When creating a homemade project, these nuances should be taken into account.
Today, there are two approaches to developing and assembling your own tractor.
- Re-equipment of finished equipment. The basis is most often taken on a walk-behind tractor, retrofitted with an additional wheel pair, frame and driver’s seat. This is the fastest and easiest way to get a tractor with a minimum of effort and cost.
- Creation from scratch. This approach is resorted to if the base of the future tractor is not available, or if some specific requirements are put forward for the equipment. Then the farmer creates a chassis design himself, and independently manufactures the car according to the project, selecting parts in accordance with the tasks, budget and design features.
Interesting: sometimes designers choose a steam engine as the power plant (for example, if it is not possible to buy an internal combustion engine or equip a tractor with a motor removed from another piece of equipment). A steam propulsion engine runs on almost any fuel, is relatively simple to manufacture, and the design has been proven over more than a century of history of steam engines. The downside of such a motor is low efficiency, bulkiness and a short power reserve, so at the beginning of the 21st century such units are made more often as entertainment than as machines for real agricultural use.
Modern variation of the steam tractor:
Today, many “homemade” projects have been created, some of them can be called typical: for example, “Bison”; instructions on how to make a homemade tractor of this type can be found on thematic sites and forums.
Attachments
The hitch on the mini tractor allows you to carry out any agricultural work:
- plowing;
- planting potatoes;
- hilling;
- cultivation;
- hay making;
- transportation of goods.
Equipment such as a plow, hiller, and cart are easy to manufacture. They can be made from scrap materials. However, their price in stores is also low.
DIY assembly
Experts say that making a small-sized worm gear with your own hands is quite troublesome, but it is possible. The device should increase the torque of the working shaft of the walk-behind tractor and reduce its number of revolutions. The maximum performance of the machine directly depends on the product.
The walk-behind tractor uses a reverse manual gearbox, which makes it possible to change speeds. The factory gear ratio is sometimes very small. The designers equipped the unit with a small sprocket on the operating shaft of the gearbox. Interacting with a large star from the wheel of the device, it ensures a decrease in engine speed. An additional sprocket must be put on the working shaft located in the bearing platform. It will transmit torque through the second chain to the wheels of the walk-behind tractor.
Manufacturing of the product body
Experts consider the body to be the most important part of the device.
The frame must be properly designed and assembled, because the position of the axes and working shafts, the alignment of the holes for the bearings, and the distance between the gears and belt mechanisms depend on it. In the factory, housings for reduction gearboxes are made by casting from cast iron or aluminum alloys. It is simply impossible to make such a blank on your own. For this reason, it is necessary to find or remodel the factory housing. It can also be welded from iron sheet.
Some home craftsmen were able to find a simple way out of the situation. In order not to engage in boring work, it is necessary to completely weld the frame. The support bearings will be installed in small sections of metal pipes. They need to be placed in the working position, and then secured well with fastening materials or welding.
Experts advise making a special removable cover on the body for easy maintenance of structural components. It is worth making a drain hole at the bottom, which is necessary to drain the old oil.
Video
The operation of a homemade reverse gearbox is shown in the video.
Owners of home workshops have many devices and devices that greatly facilitate manual labor and increase work efficiency. One such mechanism is a reduction gearbox. It is mainly used to change the rotation speed of the output shaft downward or increase the torque on it. By its design, this device can be combined, worm or gear, as well as single- and multi-stage. Many people make a reduction gearbox with their own hands.