Working with various materials requires the use of high-quality cutting tools. Most of the required types have standard parameters and are freely sold in stores, but some samples have specific sizes or shapes. They are not produced or are extremely rare. To a greater extent, the question concerns cutters that have many profile options, varieties or types of design.
Finding the right type can take too much time, so sometimes there are no other options other than making a cutter at home.
Will need
We only need two M8 bolts and a washer with an outer diameter of 35-45 mm. By the way, the size of the bolt depends on the problem being solved. In our case, we select the future tool for a Forstner cutter to match the holes for a small ball bearing. It must be secured flush with the plane of the base. We will also make a clamp for pressing the element into the wood.
So, let's arm ourselves with power tools:
- Grinder (angle grinder) with cutting and grinding abrasive discs.
- Drill.
- Electric welding machine.
- Vertical drilling machine.
The hand tools we will need are: a file, a marker, and a caliper. Well, a workbench with a vice can be found in every workshop.
This is interesting: Making a stand for a drill with your own hands: instructions, drawings, video
Safety precautions
Woodworking machines are the most dangerous type of equipment. A hand router is no exception. Working with it requires caution, accuracy and knowledge of safety regulations:
- Clothing should be sufficiently tight, without hanging ends, ties or other interfering elements;
- Wood dust is dangerous for the respiratory system and is a strong allergen. It is recommended to use a respirator, at least a regular “petal” one;
- Flying chips may get into your eyes. Most routers have a protective shield, but it would be a good idea to use glasses;
- It is necessary to hold the machine firmly in your hands. During operation, it vibrates and tends to turn in the direction opposite to the rotation of the shaft. You should not be distracted and let go of the running router;
- Recess the cutter shank into the collet by at least 20 mm and securely tighten the nut with a wrench;
- Before work, check the condition of the bearings on the edge cutters. They should not creak, wobble, or jam. If flaws are noticed, the roller must be replaced;
- First you need to start the milling cutter and wait until the working rotation speed is reached, and only after that insert the cutter into the material. If it is necessary to stop work, first remove the cutter from the material, then stop the machine;
- Always ensure that there are no nails or screws in the wood, and that there are no foreign objects or tools in the rotation zone of the cutter.
More detailed safety rules can be found in the user manual. Milling cutters from different manufacturers may have their own specific safety rules that you need to be aware of and follow during operation.
A hand router is an unpretentious device that does not require too complex or specialized maintenance. The main care for it consists of cleaning it from dust and chips, timely replacing the brushes on the motor and checking the bearings on the motor shaft and cutters. It is necessary to ensure the cleanliness of the guide rods and the ease of movement of the router along them.
Some experts advise covering the rods with a layer of lubricant, but this is a rather controversial advice, since dust and small wood particles will begin to stick to it. It is more correct to clean the rods with a brush moistened with turpentine, which dissolves tree resin and removes fine dust.
In conclusion, it is necessary to recall that a manual milling machine is a universal multifunctional machine that has a lot of capabilities and is capable of performing complex operations. With its help, complex parts, artistic panels and other crafts and products that require high qualifications and experience are made.
Gradually, skills and experience are developed, leading to the complication of work operations and obtaining more effective results. If at first the router is used to a minimum, this does not mean anything - one day it will perform complex professional tasks.
A router is an indispensable tool for all kinds of woodworking and is actively used by professionals. But if a home craftsman needs it for one-time work, then it makes sense to try to make it with your own hands from available tools. Of course, a homemade wood router, made, for example, from a drill or grinder, is not capable of completely replacing a standard tool. But some simple operations that do not require particularly clean processing can be performed with such a unit.
Useful tips
To get good results when working with wood, you should follow safety rules. You need to make sure:
- The cutter is fixed in a collet.
- The accessory corresponds to the power of the power tool.
- When using an edge router, you must ensure that the bearing or guide ring is installed.
- The correct insertion depth is set (when using a submersible device, this can be seen on a special limiter).
- The workpiece must have support.
- To reduce the amount of dust when working, use a vacuum cleaner.
The use of attachments specially designed for the material being processed can significantly improve the result.
And depending on the angle of their use, a different cut is obtained. Experienced craftsmen often make such attachments themselves. To do this, the cutting edge is sharpened at the required angle. But if you don’t want to waste time on homemade cutters, then you can easily buy them; the range in stores is quite wide. It is quite easy to make accessories for a wood router with your own hands, and their benefits are great. This option is suitable for those who do not want to spend a lot when buying a tool or when the necessary equipment is not on sale. And the use of a router with furniture templates significantly reduces assembly time, and also improves the quality of work and prevents mistakes.
Originally posted 2018-07-04 08:29:39.
Expanding the functionality of the router
Additions for a router should solve one problem - to hold the tool in the desired position when processing material. When purchasing an expensive machine, frequently used milling accessories are included in the kit. But for cheaper or highly specialized options, you have to buy them separately.
The design of such additions is quite simple and does not require a drawing for self-production.
Rip fence
This addition allows for straight cuts and is often used when working with wood. It allows you to work on any surface, not just your desktop. The grooves are cut with its help.
The design of the add-on consists of:
- Rods that are attached to the body of the instrument.
- A fine adjustment screw is used to adjust the gap between the cutter and the surface.
- A locking screw, with its help, the rods are secured in the desired position.
- Overlays, on which the tool is placed.
The design of the base is quite simple and you can make it yourself.
To prepare an addition to the work you need:
- Install the rods into the holes of the tool body and secure them with a screw.
- Set the required distance between the surface and the cutter.
Additionally, by placing a specially treated block (with one rounded edge), you can significantly increase functionality and make cuts along a curve. This part is installed between the tool and the surface. Due to its unstable position, it must be handled very carefully.
Guide rail
The addition is used to move the tool over the working surface at any angle, which is different from the rip fence. The design makes it easier to mill holes located at a distance from each other. Special clamps hold the device on the surface being treated.
If they were not included in the delivery set, then clamps are used. Some options are equipped with an adapter to adjust the direction of movement of the tool.
The design is best used together with a power tool whose support platform is adjustable. This will help eliminate the problem when the tire and the cutter are located in different planes, which happens when the tool and the workpiece are close.
The design is quite simple, but very effective. If you have minimal skills in working with the tool, it can be easily done at home. To do this, just take a block, which is attached to the surface to be treated using a clamp. If you fix the structure on two or more bars at the same time, you can make a groove in one go.
The main disadvantage is the difficulty of accurately fixing the structure in relation to the future cut. But the following additions lack this.
The first fixture consists of a sheet of plywood and a guide connected together. It is used to work with blades of the same size.
When you need to use cutters of different diameters, a different device is suitable. Its main advantage is that the tool is in contact with the entire lower part of the material. The guide has a board (folding) that holds the power tool in the desired position to the material.
Very often, when working with wood, the material is milled against the grain, resulting in chips.
To reduce this phenomenon, an addition is used that presses the wood at the entry point of the cutter, which prevents it from splitting off. The device consists of two guides connected at an angle of 90°. And another type is assembled from two parts in the shape of the letter L, which are attached to the material using clamps. It is often used for cutting grooves.
Preparing the template
Stage 1. Sketching.
Stage 2. Cut out the shape.
Stage 3. Making the mold.
Operating principle and classification
To manufacture the spindle, hard metal is used, which must meet certain requirements for rigidity and hardness. The operating principle of any milling cutter is as follows: the rotor is connected to a spindle onto which the cutter is fixed. When the tool is plugged in, the spindle begins to rotate. The material is cut with sharp knives.
The accuracy of the work performed depends on the rotation speed.
The stand for the router is also cut out from a piece of chipboard.
Since the number of revolutions depends on the density of the raw material, it is recommended to equip a homemade tool with a regulator.
Before building a router, it is recommended to decide on its type. According to the method of application, experts distinguish the following types of manual milling cutters:
- lamellar - makes grooves;
- upper - used to perform any woodwork;
- edging - makes edges and chamfers.
The top router is classified into the following types:
- fixed - rigid motor mount;
- submersible - the motor moves with the cutter.
Narrow-profile tools are subdivided taking into account the material and parts to which it is applied:
- tenon cutting machine;
- for drywall;
- to obtain a groove, etc.
The simplest clamp for pressing
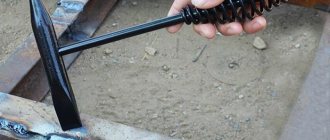
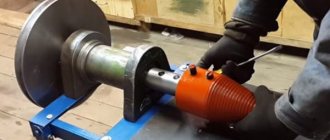
We will make this device from the same M8 bolt and a washer of suitable diameter. We place the bolt vertically on a metal surface, providing mass contact for electric welding. We place the washer on top in the center of the bolt head, holding it with pliers. We scald the center with an electrode, filling the area of the inner hole of the washer.
We clamp the resulting clamp in a vice and clean it with an angle grinder. The back part can be passed with a cleaning brush attachment for a drill.
We insert the finished clamp into the chuck of a vertical drilling machine, and try to press the bearing into the wood. This simple device will save you unnecessary effort and allow you to accurately handle such tasks.
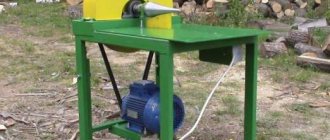
Milling cutter from a washing machine engine
Very often, craftsmen make various machines from a washing machine engine: wood lathes, drilling, sharpening, circular, as well as stationary milling machines. To make the latter, you will first need to make a table using the method described above. Next, you need to install a collet on the motor shaft to clamp the cutters.
Since it will not be possible to attach it to the motor shaft without an adapter, you will have to order one from a turner.
You will also need to make a lifting mechanism for convenient adjustment of the tool reach. It is made from two pipes that act as stands on which the engine is mounted, and a threaded rod.
One end of the pin enters the nut fixed to the bottom of the table, and the other rests against the lower part of the motor. A swivel wheel is rigidly fixed to the stud, with the help of which the height is adjusted.
To prevent dust from getting on the motor when the machine is operating, you can place a small piece of foam rubber on top of the motor.
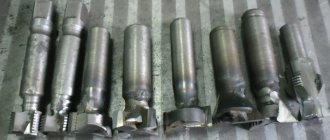
How to make a cutter
Milling cutter is a general name for a wide group of cutting tools. There are two main types:
- on wood;
- on metal.
There are many types of cutter designs used to perform different technological operations:
- Whole.
- Composite (prefabricated).
- End.
- End face.
- Shaped.
- With replaceable plates and others.
The production of cutting tools is a high-tech process that is demanding on the quality of the material. For example, the production of end mills consists of several stages:
- Turning of a workpiece (shaping).
- Milling teeth.
- Processing of cutting edges (sharpening and backfilling).
- Heat treatment of the material (hardening, tempering, other operations resulting in a high-quality metal structure).
To manufacture other varieties, similar or other operations are performed, determined by the type and design of the tool. Homemade cutters are only modifications of ready-made samples.
Attention! The manufacturing technology of cutting tools is complex and requires the use of precise equipment. At home, production “from scratch” is impossible; only processing of the finished tool, changing its shape or size is available.
The need to use one type or another, to obtain a certain profile or size of the cutting organ, forces you to decide the issue yourself. Let's look at how to make a cutter with your own hands at home.
Homemade wood cutters
Making a wood cutter with your own hands is possible if you have the appropriate workpiece and a machine where it will be installed. At home, an electric drill or a hand-held milling machine is usually used. The most affordable option is to change the shape of a regular metal drill, but other methods can also be used.
Let's look at how to make a wood cutter from a drill. Depending on the purpose of the tool, you will need a workpiece (metal drill) of a certain size. If you plan to manufacture a shaped cutter, then the diameter of the workpiece must be equal to the maximum diameter of the final product. Manufacturing consists of two stages:
- Giving a profile.
- Creating a shank.
Both operations require the use of industrial equipment. In any case, a lathe will be required to make the shank. The hand router collet is designed for a diameter of 8 mm (there are options for 6 and 7 mm). Therefore, for large drill diameters, the shank should be prepared before creating the profile. This will eliminate beating, which is dangerous when processing wood. The easiest way to create a profile is by grinding. First you need to make a template, according to which you need to constantly check the status of the profile. To work, you will need a grinding machine (emery), a grinder or a cutting wheel mounted in the chuck of an electric drill.
To create replacement plates for the milling head, either ready-made samples are used, which are given the desired shape, or blanks made of high-quality metal. The profile is created by grinding on a machine at hand.
The final operation is backing. This is the process of setting a specific cutting edge angle to ensure that the back of the edge does not contact the workpiece.
Important! Backing is a rather labor-intensive process, but necessary; it is the only thing that gives the cutter the ability to work normally.
DIY metal cutter
Making cutters for metal at home is limited to regrinding existing tools, changing the profile or diameter of the cutting part. More active intervention will require the use of industrial equipment, as it will be necessary to perform complex procedures:
- Tempering of metal (a procedure reverse to hardening).
- Machining, including shaping, sharpening, backing).
- Hardening the cutter.
It is almost impossible to carry out these actions efficiently at home. In addition, work of this kind requires considerable professional training and experience, which not everyone has. Therefore, they are limited to only available procedures that involve minor intervention in the original state of the workpiece.
Making cutting tools at home requires the necessary equipment and suitable workpieces. In addition, you must have skills and experience, otherwise you can end up with a very dangerous product that can ruin the surface being processed and harm the craftsman himself. It is not recommended for an untrained person to carry out such work; it is better to seek help from a specialist.
This is interesting: Metal burrs: types and application features
Homemade spherical cutter
So making a milling cutter (as the author did) is not so easy; you need a lathe, a drilling machine, etc. But you can come up with something of your own, look for other ways, because making all kinds of homemade products is a great way to train your brain, but you just have to do it like the author, look for other ways.
Let's get started, the necessary tools/materials.
1. Tokarka
2. Drilling machine, drill (it won't be easy)
3. Hacksaw, grinder
4. Material for making a cutter (the author uses a piece from a saw)
5. Tap, bolt, etc.
6. Round timber 30 mm (the cutter is made from it)
Step 1. Manufacturing
The round timber is processed on a lathe and given a spherical shape with a rod. If you don’t have a lathe, you can order this workpiece from a turner or take a file and earn yourself one. Next, the spherical shape of the workpiece is brought to an ideal state using a homemade pattern. The author made a pattern from cir. disk and block of wood. A circular mark is made on the sphere at 40 degrees; the author makes it using a saw blade. The author marks the center of the mark and drills a hole through. Then, using a hacksaw, using this mark, the sphere is divided into two parts, and on one part a recess is made for the bolt head. A piece is cut from a saw blade, it is given a round shape on a lathe and sharpened in one direction, this is a cutter.
Step 2.Testing
A cutter is tightened between the two parts of the ball with a bolt. At this point the cutter can be considered complete; now all that remains is to test it. Words cannot express how the homemade product manifests itself in operation, so watch the video. We can end here, thanks for watching. If the article is good, then don’t forget to like it.
Required Tools
Production does not require anything special. We will prepare the necessary materials and tools for the work:
- Small grinder with a circle of 125 mm;
- A piece of I-beam 180 mm long, 20-25 cm, or a sheet of iron 5 mm thick;
- Cutting disc;
- Cleaning disc;
- Cord brush for angle grinders with metal bristles;
- Chalk;
- Vise;
- Round bit with a diameter of 40 mm for drilling holes;
- emulsion coolant;
- 10 cm of square pipe 25*25 mm and 50 cm of profile 20*20 mm;
- 2 extended nuts and 2 regular nuts with a diameter of 8 mm, 2 bolts 8*40 mm;
- A piece of sheet iron 1-1.5 mm thick;
- Chuck for drill 1.5-13 mm with threaded connection;
- Tap M14;
- Clamping bolts with wings 8*20 mm - 2 pcs., 2 nuts 8 mm.
- Drills 8 and 10 mm;
- 2 bolts 8*10 mm.
Feather drill from a key
You can make such a drill from an old key. To work you will need:
- an unnecessary key from an old lock;
- emery for sharpening tools;
- grinding machine with a wheel for metal.
First, use a grinder to sharpen the upper half of the key, making it sharp. At this stage, special precision is not needed; we carry out the work “by eye”, since in the future we will still have to sharpen the workpiece.
Then, in a vertical position, excess millimeters are removed from the surface of the key. It is necessary to remove the same thickness. You will have to grind about 5-6 mm. Next, the same work is done with the sides of the future drill. This is how the master adjusts the size of the rod to the required hole size. The workpiece can be turned to any size. The main thing is not to forget to measure the correspondence of the drill to the diameter of the slot.
The next step is sharpening the joints of the upper part of the key. This is done at a slight angle, for more convenient work with wood and plastic in the future. Then remove the head of the workpiece with a grinding machine and remove any irregularities with sandpaper. The feather drill is ready. You can safely insert it into the drill chuck and make the desired hole. This manufacturing option is quite fast, it will take 20-25 minutes. Such a tool drills no worse than a factory one.
Making a feather drill yourself is not difficult. As they say, the master's work is feared. It is worth doing everything according to the step-by-step instructions and observing caution and safety precautions when working with an angle grinder. And the necessary material can always be found in every home.
In the first method, if desired, the stainless steel is replaced with any sheet metal and a blank is made depending on the diameter of the desired hole. In the second case, any key that is not useful on the farm will do. You can drill wood, plastic, ceramics and glass with this homemade tool.
Source: https://tehnopanorama.ru/diy/2-sposoba-sdelat-perevoe-sverlo-svoimi-rukami.html
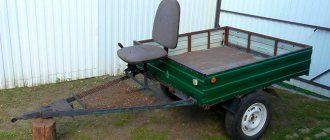
Do-it-yourself active cutter for a walk-behind tractor
Typically, an active cutter for a walk-behind tractor is sold complete with the walk-behind tractor. But sometimes you need to get the job done using specialized cutters that are not sold anywhere. In this case, you need to make cutters for the walk-behind tractor yourself.
In this case, you can go two ways: make the cutter yourself or order production from a master. The first option is quite labor-intensive. But a little time and money will be spent on manufacturing the cutter, as well as the cost of materials.
The second option has a number of advantages: the master has all the necessary tools and materials, and as a result the cutter will be more practical.
First you need to think about the functionality and design of the cutter. To do this, you should familiarize yourself with the analogues. To achieve maximum functionality and safety, all design details must be taken into account. If this is not taken into account, then the cutter will not do the necessary work, and all the work on its manufacture will be a waste of time.
You need to prepare the necessary materials after you have prepared the drawings. If the cutter design contains figured or pobedite elements, their production is ordered in the workshop. And other elements are bought in the store or those that are available are used.
After all the parts are made, it is necessary to assemble a normally working cutter, which not everyone can do. Assembly must proceed strictly according to the drawings, without any deviations in the design. Otherwise, the cutter will constantly move to the side, which will greatly complicate the work.
After the cutter is assembled, you need to test its operation. If the need arises, we alter the cutter so that it does the required job.
Types of cutters for metal
An electric drill with an inserted cutter can replace a manual metal milling cutter. Milling with a drill is not as convenient as with a special tool, but you can do many jobs. Types of metal cutters for a manual router:
- End This is the most commonly used type of metal tool. The axis of rotation of the end mill is located vertically. Flat surfaces are milled, from which a layer of metal is removed.
- Disk. This is a tool for forming various grooves and grooves. The teeth can be located both on the side and on the end surface of the tool.
- Cylindrical. The axis of rotation of such a tool is located horizontally. The teeth are on the side surface. They can be straight or screw. Helical teeth ensure more precise and smooth operation of the tool.
- End mills machine grooves, recesses, and ledges. They have teeth both on the side surface and at the end.
- Shaped and corner cutters are used for processing shaped and corner surfaces. These are the least commonly used types of tools.
When working with a drill on concrete, carbide bits with adapters are used. Simple types of cutters that work in conjunction with electric drills are a countersink and a cutter. They are used for boring holes in metal and roughing.
Manufacturing Features
A homemade part of this type has certain restrictions on the materials that can be worked with when using it. Creating cutters for a hand router usually involves working with steel, which belongs to the soft category. For this reason, such a device allows you to work perfectly with wood, but if the material is very hard, then the effectiveness of the device is significantly reduced.
To create a homemade cutter, scraps of reinforcement or steel rods are usually used. Sometimes it is made from a drill. If the reinforcement is the base, then its ribbed coating will need to be leveled using a lathe.
First we need to make the shape of our future cutter.
- Using a pencil and ruler we draw knives. If the diagram is not at hand, then you can find examples on the Internet or in the relevant literature, then simply redraw the required profile and follow the further algorithm.
- Now you need to directly cut out the shape. Depending on how many knives we need as a result, it is necessary to count out the required number of sheets and, having grabbed them, carefully cut out the shape of the future product, without catching the pair of load-bearing sides of the knife, as well as the tip.
- After this you can start making the form. Using an adhesive composition, you will need to glue the template to the workpiece and carefully saw it off using a grinder. It is important to remember that not only the tip should be preserved, but also the side parts. So when working with an angle grinder you will need to be as careful as possible and take into account the dimensions of the product.
Cutting grooves on narrow surfaces
The home handyman is often faced with the need to cut grooves for a door lock or hinges. As a rule, a chisel and a drill were used for this. But this procedure can be carried out much faster and easier if you use a milling cutter with special equipment. This design allows you to easily create grooves on narrow surfaces and is a flat base that is mounted on the tool.
And also two pins are additionally installed, which ensure the movement of the cutter in a straight line.
The main requirement for this design: the pins must be located in the center of the material being processed. If this condition has been met, then the groove will be located strictly in the middle. To shift the direction of processing, it is enough to put a sleeve of the required size on one of the pins. When using such an attachment, you must ensure that its edges are pressed tightly to the sides during processing.
If you need to cut a groove on a narrow surface, but there is no necessary equipment, then this problem is solved with the help of two boards. They are attached on both sides of the product in one plane. And the power tool itself is fixed with a parallel stop.
The use of such an attachment for a door hinge router allows you to:
- Make the most accurate notch without spending a lot of effort.
- Minimize the possibility of an error, the probability of which is very high without using a template.
Carbide cutter – component of machine tools
Carbide cutters: area of use, design features
We all need to do some work related to metal processing from time to time. This is especially true for owners of country houses and dachas. Drills and cutters made of hard alloys are used to make holes in metal parts and process metal surfaces.
Carbide cutters are used in most cases for processing various groove holes, as well as when working with metal products. Moreover, such products of the end variety are an integral part of the machines themselves. The wide range of all kinds of cutters, which differ in their design, size and scope of application, is amazing.
It should be noted that when choosing a product, you should know what the component will be used for in the future. For example, carbide end plates are subjected to perpendicular type surface treatment; angular - process inclined products, etc.
Wide variety of carbide cutters
All carbide cutters have a high degree of reliability and resistance to mechanical factors. Mostly for their production, materials with a predominance of tungsten are used, thanks to which it is possible to process hard and heat-resistant surfaces.
The main parameters by which cutters differ:
- form;
- diameter;
- dimensions;
- design.
Device, types and characteristics
Structurally, a milling drill consists of a shank, a milling part and a drilling part. Products with two working surfaces are usually classified according to the following criteria:
- material (high-alloy tool high-speed steel, hard alloys);
- tail section designs (cylindrical, hexagonal);
- length of the shank (short, extended, long);
- the material being processed (for metal, wood, universal);
- manufacturing method (solid, composite);
- diameter (from 3 to 12 mm);
- overall length;
- length of working parts;
- hardness (61÷68 HRC).
A drill-cutter working on metal is a universal cutting tool. They perform operations to make shaped holes in any thin-walled material. The advantages of the product, firstly, include the fact that with the help of one tool it is possible to perform two operations, which reduces the time for making a hole of the required configuration. This fact increases labor productivity, which is a decisive factor in production. Secondly, to rotate the milling drill, you can use any tool that has an appropriate clamping device
This is important for home craftsmen and small workshops. They can use a hammer drill, drill, or tabletop drilling or milling machines
Thirdly, the product can be resharpened, i.e. the sharpening angle of the drill can be restored if it becomes dull.
How to make a wood lathe with your own hands: drawings and technology
The easiest way to make a tool yourself at home is to construct a lathe or milling machine from a drill or electric motor removed from another tool. This process is not that complicated, so every master can handle it. To do this, you will need an electric motor, the power of which does not exceed 500 W, and available materials. A drill can also be used as a drive. Of course, making a lathe will require some skill.
The device of the tailstock of a homemade wood lathe
To build the machine, the following elements are required:
- metal frame;
- electric motor;
- handyman;
- tailstock.
It wouldn’t hurt to get a drawing that will help you navigate the dimensions and correctly manufacture all the structural elements for its subsequent assembly.
How to make a homemade drilling machine with your own hands with a motor
First you need to prepare the electric motor shaft. To do this, a faceplate is installed on it; a steel center with a thread is also suitable. Installation of the second center is carried out in the tailstock tube. To make the frame, you will need a pair of corners measuring 5x3 cm, their length is 15 cm. A motor is attached to the frame using a bolted connection.
An example of a homemade drilling machine
Note! The central part of the tailstock must coincide with the middle of the electric motor shaft.
At the next stage of making a homemade machine, you assemble the headstock yourself. This element is formed from a pair of horizontal and a pair of vertical corners. A pipe intended for the spindle is attached to it. You need to insert a bolt into it, the diameter of which is 1.2 cm. First, its head is sharpened at a right angle. Thus, the central part of the spindle is designated. After this, the headstock is installed on the bed. On the top post, which connects to the horizontal corners, it is necessary to secure the tube by welding.
To make a tool rest, you need to take a steel rod with a chamfer. This element must also have a hole that will be used to secure the support ruler. It is necessary to vertically weld the tube with the locking screw to the long angle. Then the tool rest rod is inserted into it.
The motor rotor on which the faceplate is attached will be used as the headstock spindle. You need to make several holes in it. A fork will be inserted in the central part. The holes along the edges are intended for fixing the part with screws.
Even with the help of simple tools you can create interesting wooden products; for this you need to study the technology of working with the tool and practice
How to make a wood lathe from a drill with your own hands
Having a workbench with a strong and flat working surface at hand, you can build a lathe without resorting to building a bed. The electric drill in this case will serve as a rotary drive and headstock. According to the simplest drawing of the machine, it is enough to fix this tool on the surface of the workbench through the neck. Clamps and a clamp are suitable for fixing.
Next you need to make a stop that will act as a tailstock.
This element is mounted opposite the drill. To create it, you can take two blocks of wood and an adjusting screw, sharpened at one end to a cone. If you intend to use the machine for processing massive wooden workpieces, then it is advisable to fix the stop on the table using clamps.
To make a tool with your own hands, inexpensive materials are enough. A drill-based lathe can be used to turn various parts:
- door handles;
- structural details of the staircase;
- decorative items, etc.
Using a workbench with a durable and flat working surface, you can make a lathe from a drill with your own hands
Note! The machine with a wooden clamp is suitable exclusively for processing wood blanks. It is not allowed to use such a tool for working with metal.
To expand the functionality of the tool, its design can be supplemented with attachments and other devices that can improve the quality of work.
Such improvements include:
- winding on transformers;
- applying a coloring composition over a rotating part to create patterns;
- applying spiral notches to the workpiece, etc.
Installing a special attachment in the form of a copier will allow you to use the machine to create a whole series of identical parts or products according to a template.
An example of a multifunctional homemade woodworking machine from a drill
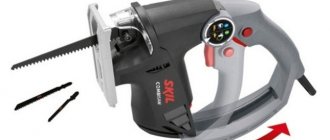
Cutting disc for drill
If it is necessary to use an angle grinder, but it is not available, it is permissible to use a cutting wheel for a screwdriver or drill. To be able to use this device, you need to purchase or manufacture a special attachment that ensures reliable fastening of the cutting disc.
PHOTO: img.staticbg.com The cutting disc must be attached using a special adapter
Using a drill attachment for a cutting wheel has several advantages, including:
- the ability to process metal in places where it is difficult to reach with a regular grinder;
- versatility since the user only needs to change the attachment without having to change the tool.
PHOTO: Lower drill speed reduces metal cutting efficiency
The disadvantages of this method is the need to fully comply with safety rules when operating a cutting tool. Also among the negative aspects are:
- decreased operating efficiency due to fewer revolutions;
- limited thickness of the processed metal to 5 mm.
It must be taken into account that the shaft of the power tool can rotate in both directions. When cutting, you must ensure that its rotation is carried out exclusively clockwise.
PHOTO: ae01.alicdn.com A variety of cutting discs allows you to turn your drill into a universal tool
Active use of drill attachments allows you to significantly expand the range of applications of this tool, including use as equipment for plucking poultry or mixing a solution. Therefore, when carrying out construction or repair work, you need to think about the need to purchase such a device. You can once again learn about the features of nozzles for cutting metal from the presented video.
Watch this video on YouTube
PHOTO: beton-house.com The corresponding attachment turns the drill into a concrete mixer PHOTO: One movement, and you can pluck a bird with the drill PHOTO: A set of brushes will turn the drill into a device for cleaning and grinding metal
Previous DIY HomiusSpa at Home with Helpful Bath Bombs Next STORIESReinventing an Old Chair: 5 Creative and Easy Ideas
Copy rings and templates
Devices for a hand router, such as copying rings, are a round plate with a protruding shoulder that can slide along the surface along the template, thereby ensuring the exact trajectory of the cutter. Often this element is attached to the base of the workbench. There are several ways to install it:
- Screwing the ring into a threaded hole.
- Installation of special antennae of the device into the holes on the sole.
If you have such a device for a manual router as a template, you can also achieve more accurate and efficient work. The said element is fixed directly to the workpiece itself with double-sided tape, after which both parts of the device are pressed to the machine using clamps. Upon completion of the work, experts recommend checking the condition of the ring - see whether it is securely pressed against the edge of the template or not.
Another feature of the tool in question is the ability to process not the entire edge, but only its corners. At the same time, some devices for a hand router allow you to make curves of four different radii at once. Thus, the process of cutting material using a template is an excellent way to cut grooves for a part.
Elliptical and round grooves
To cut grooves in the shape of an ellipse or circle with a hand router, circular devices are used. A simple compass for a router can be made from a rod, the end of which is connected to the base of the tool, and the second is equipped with a pin or screw. To obtain a circle, the rod is inserted into the hole, which serves as the center, and then a groove is formed along the contour.
To change the diameter of the circle, you need to move the tool closer to the other end. A more convenient version of this compass uses two rods instead of one.
Such equipment is quite common and often comes complete with a router. With its help it is convenient to cut shaped grooves with different radii. And when it is necessary to obtain holes of small diameter, other equipment is used. Its peculiarity is that the pin, which is installed in the center of the workpiece, is located under the tool.
- The design of such a compass includes:
- A base that is fixed to the material being processed using screws or vacuum suction cups.
- Two rods.
- Two shoes that fit onto the guides.
- Bracket connecting the router and fixture.
Using the holes in the bracket, the support plate of the equipment is easily aligned with the tool. If a circle is being milled, then only one shoe is used, but for an oval, both are used. Cuts made with this addition are of a higher quality than those made with a band saw or jigsaw.
This occurs due to the characteristics of the tool, which rotates at a very high speed.
Tools and materials
So, to create a wood cutter with your own hands, you will need to have a pair of M8 bolts, as well as a washer with an outer diameter of about 4 centimeters. Naturally, the sizes of the bolts will depend on the problems that need to be solved. If we are talking about a tool for a Forstner cutter made from a drill, then you should take into account that it must have holes for a small ball-type bearing. It should be attached flush with the base plane. In addition, you will need to make a clamp, which will allow you to press the element into the wood.
The tools you will need to have on hand are:
- drill;
- vertical drilling machine;
- electric welding machine;
- angle grinder with abrasive discs of grinding and cutting type.
If we talk about hand tools, you will need:
- calipers;
- marker;
- file;
- Desktop;
- vice.
What is a router and what is it for?
A hand router is a power tool, which is an electric motor with a collet for installing a cutting tool on a shaft.
Integrated with it is a platform or base, a kind of desktop, which is capable of moving along guides and being fixed in a given position.
Using the platform, the cutting depth is set. There are two handles on the sides, by which the machine is held in the desired position or applied to the workpiece.
The milling cutter is designed for cutting parts made of different materials:
- Solid wood;
- Chipboard, including laminated chipboard;
- MDF;
- Fiberboard;
- Aluminium, duralumin;
- Soft plastic.
Using a hand router, different types of material processing can be performed. These include the following operations:
- Milling of recesses of various shapes - grooves, sockets, grooves and other elements;
- Profiling edges - creating shaped (curly) surfaces, milling quarters;
- Milling of special structural elements - recesses for hinges, locks, handles, tenons and sockets for them;
- Trimming curved and complex edges of furniture parts or special elements.
To ensure the accuracy and cleanliness of the cut, the design of the router has a lot of adjustment and adjustment elements. With their help they produce the following
- Changing the shaft rotation speed;
- Setting the immersion depth of the cutting element;
- Pre-set depth for quick cutting mode changes.
Important! For mass production of large volumes of products, a manual milling machine is not suitable. It is most rational to use it only for domestic purposes or in small workshops engaged in small-scale production of custom-made products.
Step-by-step instruction
So, let's move on directly to considering the instructions for making the above-mentioned device.
- First, use a caliper to measure the residual distance on the bolt head relative to the bearing being installed. If we are talking about an M8 type bolt, then the size of the hat circle in this case will be 1.27-1.3 cm. The diameter of the handle is about 1.16 cm, which makes it possible to easily clamp it in the vast majority of modern drill chucks.
- The cap should be adjusted to the bearing diameter. It is this area of the bolt that will represent the working part of the cutter.
- For marking, it is better to use a thinner contrast marker; the main thing is that the marks that will be applied with it are easily distinguishable on the metal. Now we apply the markings of the cutter's burrs. This solution will allow her to get rid of shavings without much effort.
- After this, we clamp the bolt in a vice. Using a cutting wheel, we use a grinder to create slits on the cap.
- We measure the bearing diameter. To work the head of a bolt with a faceted surface to a circle, you should transform the drill into a lathe. To do this, you need to clamp it in a vice, and then firmly attach the bolt in the chuck precisely in the center.
- Now you should fix the drill key at a constant operating mode, after which you can begin processing the bolt head. This process must be controlled at all stages of its implementation in order to prevent the center of the bolt from moving, which can cause a violation of the uniformity of the operated teeth.
- After this, you should install an abrasive disc on the grinder for grinding and process the edges around the circumference. The end area of the cutter should also be removed a little, leaving only a slight sharpness in the center. This element is of great importance, because this type of cutter will first find the center when working, and only then will the material be triggered by the rims and edges of the cutting type. Here you can carefully refine everything using a file, so as not to accidentally cut off more than is necessary during the grinding process.
- The cutter itself will be almost ready. All that remains is to give the cutting edges the required shape, and then sharpen them a little.
For greater efficiency, it would be useful to make the simplest clamp for pressing. Therefore, the instructions for creating it also need to be considered.
- This device is also made from an M8 bolt and a washer of suitable diameter. The bolt should be placed vertically on a surface made of metal so that the required contact for electric welding is ensured. The washer must be installed in the center of the bolt head. To make this job easier, you can use pliers. After this, the central part will need to be treated with an electrode to fill the area of the inner hole of the washer.
- Now you need to clamp the clamp, which was obtained as a result of the above actions in a vice, and then clean it using a grinder. You can walk along its back using a special brush attachment for a drill.
- At the final stage, all that remains is to install the finished device into the chuck of a vertical drilling machine, after which you will need to press the bearing into the wood. Such a simple “gadget” will eliminate a number of inconveniences when using a homemade cutter.
By the way, an end mill for wood can be made not only from a drill, but also from a tube with thin walls.
In this case, the algorithm for creating it will be as follows:
- in this case, the workpiece will be a piece of pipe with a length of about 20 centimeters;
- on the side where the cutting edge will be located in the future (somewhere at a distance of 2 cm from its intended location), oval-shaped grooves should be made on both sides of the pipe;
- the future cutting part of the cutter itself will need to be shaped into a cone - it is ground at an angle of about 2-3 degrees;
- when clamping the workpiece in a vice, a cross-shaped cut should be made at its end area - this can be done using an angle grinder;
- From the side of the cutting part, you need to make grooves on the workpiece - right up to the oval holes made earlier.
Types of homemade cutters for wood processing
- Cone cutters, processed at medium and high speeds, are used to remove excess wood from the end elements of the workpiece. The best option for making this type of tool yourself is a milling cutter from a drill.
Such a cutter from a drill is made at home as follows: the tool is cut closer to its shank (from half to a quarter of its length), then each cutting edge of the cut drill is ground down to 1/2 - 1/3 of its diameter. If the cutting edges are ground down to a large amount, then not only will its body be exposed, but it will also lose its cutting properties. It is difficult to restore the cutting edges of homemade wood cutters, which have a spiral shape, with your own hands.
From a drill you can make cutters with different working heads
An end-type wood cutter can also be made from a thin-walled tube. How to make a cutter from such a blank? The following recommendations should be followed.
- A piece of pipe is taken as a workpiece, the length of which is 15–20 cm.
- From the side of the future cutting edge (at a distance of 2–3 cm from it), oval-shaped grooves are made on both sides of the pipe.
- The future cutting part of the wood cutter is given a conical shape, and it is ground at an angle of 2–3°.
- Having clamped the workpiece in a vice, a cross-shaped cut is made on its end part, for which an angle grinder is used.
- From the side of the cutting part, grooves are cut on the workpiece - up to oval holes.
- Using a homemade end mill made from a thin-walled tube, you can create blind or through holes in wood products. In this case, the inner surface of the blind holes must be refined using a chisel.
Many home craftsmen are interested in the question of how to make a large-diameter cone cutter with their own hands. It should be borne in mind that it is not easy to make such a tool for woodworking; for this you need to use special blanks and complex metal-cutting equipment.
Adviсe
Let's talk a little about tips that should be taken into account when creating homemade cutter models.
- To give the cutting area the correct configuration, you will need to use diamond-coated needle files or angle grinders with discs that are used specifically for working with metal.
- The edge for cutting should be sharpened at a 7-10 degree angle. If you make it sharper, then it will hold an edge poorly, which is why its cutting properties will significantly decrease.
- If a wood cutter made by yourself must have some kind of complex device, you can flatten it or bend it.
- When using an edge router, take into account that the guide ring or bearing is already installed.
- The cutter must be secured in the collet before starting work.
- The presence of additional accessories will help increase the power of the electric tool.
- The part to be processed must have some kind of support.
- When carrying out work, the correct insertion depth level should be set.
- To prevent too much dust from being generated when working, you can use a vacuum cleaner.
In general, it should be said that creating a wood cutter yourself is not difficult. True, it should be understood that in this way you can quickly solve some simple problem, because for hardware such as bolts, ordinary steel is used, not tool steel. This means that such a homemade cutter will quickly wear out. But its life can be significantly extended in a number of ways. Therefore, this solution has a place and should be used in cases where you really need to quickly acquire a pretty good wood cutter in order to get the desired result.
For more information on how to make a wood cutter with your own hands, see the following video.
Guide rail
When it comes to straight lines, a guide rail is a good alternative to the rip fence. It is fixed at an arbitrary distance from the edge and at any angle to it. Instead of a stop, a special shoe is installed on the rods - it slides along the tire and sets the position of the router. Due to the support on the guide, a height difference may occur as the machine is raised above the workpiece. To avoid holding it suspended, extend the support leg (if provided).
In a special configuration, such guides also serve for precise milling of holes, which is especially important when making furniture (the ruler has holes with a standard pitch, the machine has a stopper; all you have to do is select the desired positions and drill).
Important note: a set of parts for working along the guide is not purchased in all cases; it must be included in the manufacturer's list of accessories and be suitable for the specific router. The tire is fixed relative to the workpiece
The router is positioned along it using a “shoe” similar to a side stop, and can be placed at different distances from it. Since only part of the platform rests on the tire, an additional “leg” is extended
The tire is fixed relative to the workpiece. The router is positioned along it using a “shoe” similar to a side stop, and can be placed at different distances from it. Since only part of the platform rests on the tire, an additional “leg” is extended.
Cone cutters
Wood cutters, the working part of which has a conical configuration, are used for processing surfaces of complex terrain. In particular, with the help of such cutters, finishing of grooves in elements of furniture structures is performed. To manufacture such wood cutters in production conditions, complex-shaped workpieces are used, which are problematic to process at home. Such a cutter can be made with your own hands from a drill, the working part of which is given the required configuration.
Due to the fact that a homemade wood cutter is used to process fairly soft material in several passes, there is no need to further strengthen the structure of the material from which such a tool is made.
Manufacturing options for cone cutters
A little about cutters
Structurally, there are a huge number of cutters depending on the tasks performed, the milling tool used, the material being processed and the format of the parts being processed. The largest division of cutters is based on the type of installation on the milling tool. This type distinguishes between end and attachment cutters.
Mounted cutters are also called disk cutters, since they are really disks with holes in the center that are mounted on the axis of horizontal and universal milling machines.
An example of a disk cutter.
End mills use cutting surfaces located on the end of the cutter, which is clamped into the spindle of a milling machine, similar to the drill bits in a drill press chuck. Moreover, many of the cutters even resemble drills in appearance.
Example of an end mill.
However, there is a fundamental difference between drills and end mills, no matter how similar they may be. The fact is that drills are designed for workload only in the axial direction. Any displacement or deviation from the axial load is fraught with destruction of the drill. Milling cutters, in the most general sense, are used for spatial non-axial displacements and processing of material in various directions. The cutting edges of such cutters can be either along the axial part or at the end of the cutter.
The presence of several cutting surfaces and the ability to use this for spatial processing of material is also characteristic of disk cutters, which distinguishes them from cutting wheels.
It is this ability - the use of several cutting surfaces for spatial rather than axial or flat processing of material - that makes cutters a universal tool that can be used for almost any purpose and task. And the combination of a CNC milling machine allows you to create real works of art and even miracles.
Examples of work on a milling machine.
Attack end mills are represented by a large range of cutters that can be used both in home devices and hand-held milling machines, and for production purposes. Grooving cutters, edge cutters - molding, fillet, etc., as well as sets specially selected for performing the most common milling work. In addition to a wide range, Attack cutters are distinguished by precision and accuracy of surface processing and a long service life.
A drill-mill is a type of cutting tool that is used to make holes, including shaped ones, in materials of different purposes. Combines the functions of a drill and a cutter. The drilling part is used to make a hole, and its expansion to the required shape and size is carried out with a milling cutter, which is the side face of the tool. Manufacturers from different countries produce such drill-cutters of a universal type or for performing operations on a specific material - wooden blanks or metal. This is indicated in the passport data that the manufacturer puts on the product packaging. Due to the presence of two working surfaces, the tool is called a milling drill.
Using drill-cutters, holes are made not only in metal and wooden blanks, but also in plywood, plasterboard, fiberboard, chipboard, MDF, and plastic. To rotate the tool, use a hammer drill, drill or drilling and milling machines.
Device Add-ons
There are several devices that can be added to make this device more convenient to use, as well as slightly expand its functionality. For example, you can add a device such as a microlift, which will move the drill in the vertical direction. If everything has become clear on how to make a wood router from a drill, then few people know how to make a microlift, and therefore here are brief instructions:
- Guides are required. You can use two metal rods as them.
- To fix the electric drill, you need to use a platform that will be made of the same plywood or chipboard.
- An element such as a threaded axle and a nut will be responsible for moving the electrical device in the vertical direction.
- It is necessary to use suitable devices that can hold the drill in the selected position.
Using a drill
It's no secret that a drill can be used not only as a drill, but also as a multifunctional tool. There is a whole range of different devices that make the worker’s work easier.
Eg:
- a metal cutter for a drill allows you to avoid monotonous manual work with a file;
- the scissors attachment on the drill provides the ability to cut metal sheets and elements;
The drill attachment for cutting metal tiles, in turn, helps to accurately cut sheet metal roofing at any angle.
Working with this kit requires some skill, but over time you will understand the benefits of this method.
Let's take a closer look at each option.
For cutting tiles
Another name for this drill attachment is a cricket. The set is used both for smooth surfaces and for profiled iron sheets. The advantage of this cutter is the ability to create an even cut, without burrs or irregularities.
The cricket drill attachment is convenient to use for:
- cutting thin-sheet products;
- cutting parts from metal sheets.
Since its use does not depend on the spatial location, you can easily cut horizontal and even vertical sheets.
Scissor attachment
Of all the attachments presented, this one looks the least like a drill. It turns the drill into an electric one instead of a nibbler. They work on the principle of a straight cut, cutting metal with sharp edges using mechanical force. This is a rougher method for cutting metal and plastic. Such scissors perform only straight cuts; it is very difficult to change its direction during operation.
This set is more suitable for cordless tools.
Milling cutter
This attachment is otherwise called a cutter. It is intended for processing wooden and metal products:
- the cutter replaces the file;
- significantly speeds up the grinding process;
- eliminates defects.
One set can include cutters of different shapes, so you can choose the most suitable nozzle for each specific situation. Some of them are practically no different in appearance from a drill.
Milling machines and their varieties
Different types of milling machines differ significantly from each other both in design and purpose, some are intended only for wood processing, others for metal, there are also universal models. A number of designs have manual control, while others operate automatically; the simplest options can be made with your own hands, and there are complex factory-made designs.
Let's look at several types of machines below, and if you wish, you can also find drawings that relate to their independent manufacture and design.
The vertical type of milling machine is very common. The following cutters serve as working tools:
- cylindrical;
- end;
- shaped.
You can also perform drilling work. Using this machine you can process:
- grooves;
- gears;
- corners;
- vertical and horizontal metal surfaces;
- frame elements.
A feature of another type of machine, horizontal, is that the spindle is located horizontally. Thanks to this type of design, you will be able to process small parts. The versatility of using such a machine is due to the use of shaped, angular, end, end and cylindrical cutters. The standard factory equipment does not make it possible to process parts along a screw surface; in this case, you can modify the design with your own hands using drawings.
Drilling and milling machines help process horizontal, vertical and inclined surfaces, as well as grooves of dimensional parts. They are designed for manual metal work.
The machine has a milling and drilling head, which can perform drilling work at an angle and process surfaces that are located at an angle to the horizontal axis. The working head can also operate in reverse mode.