Despite the emergence of new attractive building materials, traditional wood is not losing its position. It is beautiful, durable and easy to process. No special skills are required to work with wood. True, it is a fire hazard and deteriorates from moisture, but this can be easily corrected with special impregnations. Let's figure out how to make a wooden gate with your own hands so that it turns out beautiful and functional.
Do-it-yourself gate made of corrugated sheets
To install a gate made of corrugated sheets with your own hands, you need to:
Determine the location of the future gate. Immediately when installing the fence, leave an opening between the two support posts, to which the frame will be welded. This way the problem of the gate’s size not matching the opening is easily solved.
Make a frame . It is recommended to use the same pipes that were used to construct the fence. The elements are welded to the support posts, and the upper part of the hinges is welded to the vertical post.
Weld the crossbar , which will give the structure strength. To do this, a piece of pipe is placed in the middle of the frame. To make sure it is level, use a level.
Cut off excess parts of the frame. The result should be a smooth frame, without any incoming pipe elements. After the connection, they are boiled and then cleaned using a grinding wheel.
Weld the top parts of the hinges . First, the attachment points are carefully cleaned using a grinder, the top hinge is attached, after which the frame is hung. All that remains is to weld the bottom loop. At this stage it is important to check whether the installation is carried out correctly. If, when opening, the frame touches other parts of the structure, it means that there is an error in the gate design.
Weld the hinges completely . The frame is removed again, and the hinges are well welded. The resulting seams need to be cleaned. If you do not want the material to be damaged during welding, cover the corrugated sheet from sparks and scale.
Make a hole for the lock using a grinder. The main thing is to take all the measurements correctly and mark the desired location on the frame pipe in advance.
Install strike plate from corrugated sheets with your own hands. It is attached to the fence post using a screwdriver. The frame is first installed in place. When everything is ready, check that the lock closes well.
Protect the structure from rust . To do this, it is coated with special compounds and painted.
Install corrugated . The material is first adjusted to the dimensions of the resulting frame, then installed using a drill and a gun for rivets or screws. Lastly, the linings and handles on the lock are installed.
Install limiter . This is a piece of metal placed inside the opening and designed to prevent the gate from opening too much.
In this way, a do-it-yourself gate made of corrugated sheets is installed directly on the fence posts, which allows you to obtain a reliable and durable structure without any extra effort.
Why do garden gates sag?
Often homeowners are faced with the problem of sagging gates.
Why does this happen and how to fix the situation? Garden gates sag because the square (or rectangular) frame is unstable.
The gate will spin if it is poorly secured or an error was made when hanging, as a result of which the free side sinks from its own weight.
To fix the problem, you need to level the frame and tighten the hinges. Also an important nuance is the use of high-quality materials that are resistant to deformation:
- Use materials that are resistant to corrosion;
- Use reliable fasteners;
- As for the choice of wood, it is best to choose rot-resistant species (cedar, mahogany, teak).
Cedar wins because teak is very expensive and has a high waste rate. Redwood should only be used if it is a finished lumber that is resistant to moisture and warping.
Valery
designer
Use outdoor-grade latches and hinges with unassuming mechanisms that are highly secure and durable. It is better not to use iron elements, as they quickly rust in outdoor conditions. It will be better if the fittings are made of stainless steel or brass.
— Valery designer
DIY wooden gate
A wooden gate also looks good. This design is no less durable and decorative. The stages are:
Prepare tools and materials for work. You will need boards and beams, metal corners and hinges, self-tapping screws, bolts, a drill, a level, a square, a tape measure, a socket and ratchet, and a construction pencil. Before starting work, it is advisable to soak wooden blanks with an antiseptic, which will protect against insects, mold and drying out.
Take the necessary measurements . It is necessary to decide how wide the passage will be, and then calculate the required number of boards. The frame will require beams. It is hung on supports that are installed in advance using metal wedges. To avoid cutting the boards later, carefully determine the distance between the supports before installation.
Prepare the material for the frame. The beams should be approximately 5-10 cm shorter than the boards for the gate.
Assemble the frame using metal corners and fasteners. At this stage, bolts will be useful, the size of which should be significantly smaller than the width of the workpiece, which will allow for high-quality assembly without damaging the beams. The result is a rectangle, in the center of which a crossbar is installed.
Hang the frame on ready-made supports. Try on whether all structural elements fit together well, then install the frame using supports.
Attach the hinges . Pre-align all the elements and do not tighten the bolts all the way. It is enough to adjust them and press them all the way.
Install the gate boards. They are screwed with self-tapping screws to the frame.
Paint the resulting gate.
Set the top bar. This framing looks very decorative and is easy to make: you need to place the plank slightly above the top of the boards, placing a piece of timber between it and the support. Nail it.
Install the latch. Do-it-yourself wooden gates work well with small metal locks that are placed on the outer board on the opening side.
This way you can easily make a wooden gate with your own hands in just a few hours.
Preparatory work and drawing development
It is clear that any work begins with preparatory activities. During construction, the first thing that needs to be done is to develop a detailed drawing. It will be possible to calculate the amount of material required. As a basis, you can take ready-made projects that are freely available on various Internet resources, or you can make your own based on your preferences. It is important to take measurements exactly in millimeters, this will avoid errors when creating the design.
The drawing will not only help you make a gate from a profile pipe faster and easier, but will also make it possible to save money. A correctly developed diagram clearly shows how much material will be needed to make a structure from a profile pipe, and there will be no need to buy extra. Also, the presence of a detailed diagram reduces the time for manufacturing a gate from a corrugated pipe.
Below you can see several options for diagrams for the manufacture of this building. They can become the basis for a future structure, to which you can add your own details. In this matter, it all depends on personal preferences, and the drawing can be supplemented with other elements.
When the schematic design of the gate from the profile pipe has been made, the rolled metal pipe should be prepared for work. If these are not new products, then they should be cleaned of corrosive formations with a grinding disc.
If these are new products without rust, then before welding they must be degreased with a simple solvent used to dilute paint.
Then the rolled pipe for the gate from the profile pipe is cut into pieces of the intended length. For a rectangular inlet hole, it is recommended to cut metal professional material in pairs. So the blanks for a structure made from a profile pipe will have the same length.
Dimensions and shape
For a solid gate, a profiled pipe with a cross section of 60*60*3 mm is used as pillars. In this case, it is better to choose thicker walls, as this will affect the durability of the structure. For the frame, a rectangular pipe 40*20*2.5 mm is usually used. The strength of this pipe is sufficient for medium wind loads. For light wind loads, you can take a 2 mm wall, but it will be more difficult to weld. Anything thinner than 2.5-3 mm must be welded in a special mode, and this is far from easy. If the winds are stronger, you can either increase the wall thickness, or use a larger cross-section: 40*30 or 40*40, even 40*60.
Wicket - device, dimensions
The height of a gate with an upper crossbar is usually about two meters, without a crossbar - from 1.2 m. Low ones are usually made in internal fences that delimit a site or in translucent low fences. For solid high fences made of corrugated sheets, wood, or flat slate, the height at the fence level is more typical. The width of the gate is minimum 90 cm, optimal is 100-110 cm. These dimensions are based on practical considerations, since in winter or autumn it will be inconvenient to walk through a narrow gate with a width of 70-75 cm in outerwear, and it will also be difficult to carry any items if necessary. those are big things.
It’s also worth talking about how deep to bury the pillars. The standard solution is 15-20 cm below the freezing depth . Based on this value and adding the height of the gate to it, supports are made.
Additional jibs increase rigidity
Using a shovel or a drill, make a hole in the ground, at the bottom of which a bucket of medium-fraction crushed stone is poured. Then the pole is installed, set vertically, covered with crushed stone (or broken bricks) and filled with concrete mortar. When the solution has gained at least 50% strength (after 7 days at a temperature of +20°C), you can attach the gate frame.
Wooden gate for a summer residence step by step instructions with photos
A wooden garden gate looks great - step-by-step instructions with photos will help you make it quickly and easily. The structure will require larch boards. This type of wood is preferable, as it is less susceptible to rotting and has a decorative cut. If desired, you can replace it with pine.
Thus, you need to prepare:
- larch blanks measuring 2000 x 140 x 20 (10 pcs.);
- pine boards 2000 x 150 x 50 (2 pcs.);
- loops (2 pcs.);
- metal toothed plates (6 pcs.);
- brass plates (4 pcs.);
- brass screws (40 pcs.);
- corner;
- latch;
- door handle;
- priming;
- protective agent;
- yacht varnish;
- chisel and hammer;
- hacksaw;
- drill;
- screwdriver;
- jigsaw;
- plane;
- bubble level;
- pencil and brush;
- skin;
- rope.
It is advisable to sketch out a diagram of the gate in advance in order to have an idea of the installation steps.
The gate is made as follows:
Make sidewalls . Loops are attached to them.
Align elements vertically using a level.
Support boards and attach to concrete pillars.
Treat the wood with several layers of antiseptic and protective composition, and cover with yacht varnish.
Install the support bar using self-tapping screws.
Assemble the frame , fastening the corners with brass strips and self-tapping screws.
Strengthen the structure with metal toothed plates , which are pressed into the wood and nailed.
This plate will make the gate reliable and durable.
Adjust the hinges for the gate.
Mount the hinges on the support bar.
Insert the frame into the opening to check the size fits.
Make a strut , which will give rigidity to the structure.
Attach the brace to the frame using plates.
The result is a strong frame for the gate.
Fix the frame to the hinges and cover it with boards. The first workpiece is installed on a support, which is leveled.
There are 2 screws for each sheathing board, 3 for corner boards.
Sew all the boards.
Drill the holes for the self-tapping screws in advance and countersink them so that the caps are slightly buried in the material.
Mount the handle. For ease of work, we advise you not to fasten the second board from the edge yet - through the opening it is easy to reach both sides of the gate.
Using a pencil and string forming a compass, draw circles at the top of the structure.
Using the resulting lines, make cuts with a jigsaw , process the cuts in the same way as the workpieces, only finish with not one, but two layers of varnish.
Install a brass angle that will prevent the hinges from aligning.
Secure the rubber fastener with a self-tapping screw.
These step-by-step instructions with photos will help you make a wooden gate for your dacha without much difficulty.
We erect support pillars
If you already have an opening, then all you have to do is take measurements and start designing the door. Otherwise, it is necessary to install strong support posts that can support the weight of the door.
Therefore, they are usually made from:
- metal profiled/round pipes with a cross-section of less than 10x10 cm;
- reinforced concrete or asbestos (factory production);
- laid out of brick or rubble, sizes from 35x35 cm or 1.5 bricks.
For stability, the supports are concreted to a depth of at least 1.5 meters; if the soil is subject to heaving, then below the freezing level. A concrete mixture of cement, crushed stone and sand is poured into drilled holes with pillars so that a “heel” is formed. Allow the solution to sit for a week and backfill.
Reinforced concrete support pillars
Protective caps must be installed on support posts. A practical option is retrofitted canopies. Wires can be protected by laying them inside the pole.
Caps with lanterns for poles
DIY gate schemes
Wicket diagrams will help you get the job done. You can see them in the pictures.
Wicket made of corrugated sheets photo
You can make a gate from corrugated sheets with your own hands in several versions. For example, designs are made in the same style as the fence or, conversely, contrast with it. The gate looks great in combination with brickwork or wide pillars made of light stone. You can decorate it using a canopy over the opening, forged edging and other elements, or even hang a mailbox. Using your imagination, it’s easy to create a gate that has a strict, solid or, on the contrary, a bright and fresh look
Selection of material
The appearance of the entrance group determines the choice of building materials for support pillars and lining of the panels. You can weld a gate from a round pipe, but it is inconvenient to attach hinges to it, and difficulties arise when connecting the corners of the frame. The square section avoids such difficulties.
The internal filling is made of mesh, artistic forging, this structure looks openwork and opens up an overview of the internal space of the yard. Corrugated sheeting is used more often due to the wide choice of colors and patterns to resemble stone and wood.
For the canvas, cellular or monolithic polycarbonate is used, and sandwich panels are installed. Sometimes forged elements are combined with wooden filling.
Characteristics of professional pipes
All profile pipe products have the following main characteristics:
- affordable cost;
- reliability and durability in use;
- light weight;
- a significant degree of resistance to mechanical stress and corrosive processes.
Every home craftsman, if desired, can make a gate from a profile pipe with his own hands without the help of a craftsman, which does not require professional knowledge and skills. You just need to confidently use a drill, welding machine, or grinder. You will also need to draw a simple drawing.
For the designed structure, you should purchase high-quality building materials. But before you go shopping, they develop a detailed drawing of a gate made from a profile pipe with all dimensions.
Cost and weight
The price of the pipe depends on the size and wall thickness. Products are produced in square and rectangular shapes. The dimensions of the profile shelves are 10–180 mm. Wall thickness 1–14 mm. For private construction, a profile pipe with a thickness of 1 to 4 mm is used; it is durable, lightweight, and the round counterpart is 20% heavier.
Types of professional pipes for creating a frame
The most popular profile for building a gate from a profile pipe at home:
- For the posts and frame of 3D gates, a pipe of 60x30 and 60x40 mm with a wall thickness of 2 mm is used. The approximate cost is 128–140 rubles per linear meter.
- To make a large open-type frame, a 50x25x2 mm pipe is used. The price, depending on the region, averages 110 rubles.
- The 40x20x2 mm profile is the most common for products of this type. It is used for products made of corrugated sheets, as well as metal sheets. The price of a pipe per meter is 78 rubles.
- To facilitate the design, a 40x20 mm profile with a wall thickness of 1.5 mm is used. The price of one meter is 75 rubles. Jumpers for rigidity are made from a 20x20x1.5 mm profile, the cost is 40 rubles. per linear meter.
The rectangular shape allows for greater convenience in attaching the facing material.
Thanks to its rectangular shape, the pipe has natural stiffening ribs, which makes it durable and can withstand heavy loads; this is the advantage of profiles over their round counterparts.
Wooden gate photo
To make a wooden gate with your own hands, boards or picket fences of various widths are used; there are no gaps between them or, conversely, large distances are left. The gate itself is painted the same color as the fence, or made contrasting. Black hinges and locks work well with pieces with a natural wood grain. As for the frame, it does not have to be wooden - a metal profile will do. An interesting option is a gate made of panels installed horizontally
Decoration
The design is chosen by the owner of the site depending on his own wishes. Popular options:
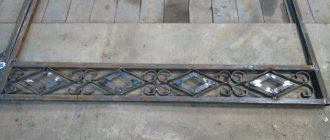
- Decoration of the canvas with forged elements. They can be welded to the main frame.
- Painting corrugated board or euro-fence. Before carrying out work, you need to clean metal surfaces from dirt, rust, and plaque. To increase adhesion, it is recommended to treat the metal with fine-grain sandpaper.
- An interesting option for a garden gate is to fill the inner space of the canvas with various tools.
- Decorating the top bar with decorative rods in the form of pointed peaks.
In order for the canvas to last longer, the seams must be coated with anti-corrosion compounds.
European picket fence (Photo: Instagram / cabinlife2019)


