A crosscut is a device for cutting a product crosswise to length, and not only wooden materials, but also any other materials that can be cut by circular saws (for example, plastic). There are a sufficient number of hand-held circular saws (so-called parquet saws) on the market, with which you can:
- adjust molded products to size;
- remove excess material by cutting out blanks;
- or even make a long longitudinal cut.
But all these actions are carried out literally in weight, that is, without rigidly fixing the tool or workpiece. In some situations, the achieved quality may be quite sufficient, but sometimes increased accuracy of the workpiece dimensions is required. In this case, specialized cross-cutting machines, which are sold in any supermarket of construction and finishing goods, come to the rescue.
But such machines are very expensive. And besides, as a rule, the need for them never lasts long, unless you engage in carpentry professionally. In this case, it makes sense to build a homemade miter machine using an existing hand-held circular saw. But how to properly make a homemade miter saw from a circular saw? We will talk about this on the pages of this article.
What will be needed for production?
The working body of a factory trimmer (motor, body, cutting disk) is similar to a conventional manual circular saw. Therefore, the hand saw can easily be adapted for miter cutting. The first thing you need is the handsaw itself. All that remains is to add a frame for attaching the electric saw and placing workpieces.
A variety of design options are possible, from the simplest platforms for straight sawing to complex devices: sawing at angles, with broaching for large-sized workpieces. Therefore, different materials and parts can be used.
For the frame, plywood with a thickness of 10-20 mm is best suited. Its advantages over other materials:
- Not brittle like chipboard, doesn't bend like fiberboard.
- Doesn't warp like wood.
- It is easy to process and attach in any home workshop, unlike metal.
- Under the roof, without moisture, it lasts quite a long time.
In addition to plywood, you will need:
- Fasteners for connecting frame parts (screws, studs, bolts, nuts).
- Wooden blocks or metal corners for joints and hinges.
- Hinge axis (pin, long bolt, washers, nuts).
The following tools are required and may be required:
- Sawing tool (hacksaw, jigsaw, circular saw).
- Drill or screwdriver (we also recommend reading how to make a circular saw from a drill).
- Drills of the required diameter.
The dimensions of the blanks for the bed will depend on what design the master chooses and on the dimensions of the circular saw itself, on the basis of which the trimming is done. For example, to trim a fence picket, you will need a bed length along the workpiece (1.2-2 m). For small parts, a more compact bed is suitable.
The photo shows an example of the so-called monkey - a cutting circular saw with an abrasive disc for metal, but it serves as an example of what a small frame can be used in such a design.
The cost of materials and parts cannot be calculated, since they will be different in each individual case. Someone may simply already have everything they need to make it, and the parts won't cost anything. If purchased, the cost will depend on what design the master chooses.
Types of miter saws
These simple devices allow you to make even cuts at right and arbitrary angles. Before you make a miter saw with your own hands from a hand-held circular saw or grinder, you need to familiarize yourself with the types of designs.
There are several types of saws.
Pendulum
A small machine with a cutting disc mounted on a pendulum. The blade moves back and forth, and the blade being processed can rise up and down and rotate. Thus, it is possible to adjust the cutting angle.
Pendulum saw
Combined
The design of the equipment includes an additional table for cutting material. It is possible to change the cutting angle during operation. Used simultaneously as a miter saw and a circular saw.
For reference! Combined devices at home are rare, mostly in carpentry workshops.
With broach
Designed for complex cutting with high precision angles. They are easy to use and the diagonal cutting is flawless. A special feature of the tool is a rotating module, which simplifies the work.
Which tool should you choose?
Manual circulars are used, which the owner already has. The peculiarity of homemade miter saws is that on most designs they can be easily removed and used for their intended purpose, like a hand saw. Therefore, the need to buy a second circular does not always arise. But in the following cases it is better to buy a new or second circular:
- The saw is old, its service life is expiring, there is no point in making a stand for it, because a new saw may not fit.
- The design is such that it takes a long time to remove and install the saw.
- The operations are constantly alternating, and you have to take turns working either with a miter saw or with a hand saw. Frequent installation/disassembly is inconvenient.
- Two people work, one on a cross-cut saw, the other with a hand saw.
The selection criteria are the same as for a manual circular saw. When cutting, the circular saw engine experiences almost the same, and even less, loads as when working with a hand saw. Therefore, increased power is not required for simple trimming. The power will not be superfluous when cutting with a broach, since it cuts dimensional workpieces.
Any circular saw is suitable for trimming. Optimally – average power and price, from a brand with a good reputation for quality.
For example, Makita HS7601, its technical characteristics:
- Power 1200 W
- Cutting depth 66 mm, at an angle of 46 mm.
- Disc speed 5,200 rpm.
- Disc diameter 190 mm, seat diameter 30 mm.
- Price about 10 thousand rubles. 2022
Or Interskol DP-190/1600M with technical characteristics:
- Power 1600 W.
- Cutting depth 63 mm at right angles.
- Disc speed 4800 rpm.
- Disc diameter 190 mm, seat diameter 20 mm.
- Price from 6,000 rubles, 2022.
We also recommend reading interesting articles about choosing a circular saw for the home and about the rating of the 10 best circular saws; it contains all the most necessary information that will definitely come in handy when choosing a tool.
Interskol DP 190 is an excellent option for homemade trimming
Sanding wood
If you decipher the abbreviation angle grinder, it is clear that finishing is the main purpose of the “grinder”.
Cord brushes
They are used primarily for primary (rough) sanding of wood, when it is necessary to smooth out the unevenness of the sample.
End discs
The name speaks for itself. These attachments are used to process the end parts of wooden blanks (cuts). They are especially effective if you have to deal with corner (oblique) cuts.
How to make a crosscut from a manual pendulum-type circular saw?
The simplest trim using a manual circular saw can be done in a few minutes. To do this, you will need a door hinge, preferably with one long side (strip). One side is attached to the circular platform, the other to the bed. The entire step-by-step manufacturing process is shown very clearly in this video:
It didn’t even require plywood and fasteners to make the frame. An ordinary wooden pallet was used as it. You can also use any suitable ready-made platform.
In some cases, if there are no slots in the wooden frame for the disc to pass through, they are cut through with the disc itself. Before this, the fastenings of the circular saw are loosened in order to make a cut with slight shifts to the left and right. This way the slot will be slightly wider than the disk, and during operation the disk will not rub against the sides of the slot.
The advantages of this solution:
- extreme ease of manufacture,
- a minimum of parts (a hinge and two bolts with nuts and washers).
- minimum tools for manufacturing (drill, drill bit, wrench).
- speed and ease of transfer from a hand saw to the miter mode and back.
Minuses:
- limited ability to cut at angles in length and height.
- there is play in the hinge axis; when sawing, you need to select one side and press the saw against it. In another case, due to backlash, the cut may be inaccurate (plus or minus 2-5 mm).
- changes to the safety device – the disk cover is always fully open.
An example of another homemade trim with a specially made frame instead of a pallet is here:
The method is a little more complicated, since you have to make a frame out of plywood. But the advantages of this design are compactness and mobility. It can be put away on a shelf, placed on a workbench, etc.
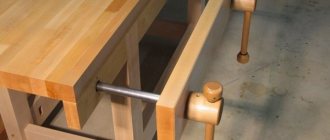
Add extension supports
1. For extension supports D, cut four blanks measuring 152 x 508 mm. To determine their final width, place a miter saw on top panel A. Place a long straight board rule on the saw table and support handle B so that its ends extend beyond the edges of the platform. Measure the distance from the rule to the underside of the bottom panel. Saw the support blanks D to this width and save the scraps.
2. To mark the centers of the holes on the supports of the extensions D into which the ends of the pipes are inserted ( Fig. 1), mark on one end of the bottom panel A the centers of the openings between the pipe guides C. Draw center lines for the outer opening at the front and for the inner opening at the back.
Align the ends of the support D with the bottom panel A and transfer the center marks of the openings for the pipes.
Rotate the support 90°. Mark on its end the position of the underside of the top panel A.
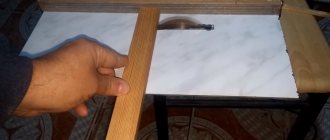
Now, pressing the edge of the extension support D against the bottom panel, extend the indicated center lines of the openings (photo C). Turn the support over to press it against both panels and the rule, and mark the position of the bottom of the top panel with a line on it (Photo D). This line defines the top edge of the pipe holes so that the top of the supports is flush with the surface of the miter saw table. Using a square, mark the crosshairs by drawing lines from the marks made on the support. Transfer these marks and draw lines on the remaining supports of the extensions.
How to do it with a broach?
If a conventional crosscut saw only has a pendulum stroke (in a semicircle), then on a crosscut with a broach the saw can also move horizontally. This type of trim can cut to size along the length of workpieces of greater width.
If for a simple trim the width of the workpiece is limited by the width of the disk at maximum immersion in the material, then for the version with broaching the width of the saw stroke along the guides is added.
Factory miter saws with a broach design have both a pendulum stroke in a semicircle and a horizontal stroke of the saw along the guides.
Most homemade crosscuts with broaching are simpler in the very principle of their design. They do not have a pendulum motion in a semicircle, but only horizontal movement along the horizontal.
An example of making a homemade crosscut with broaching in this video:
This design cannot be called a crosscut in its pure form; it is rather an analogue capable of performing certain operations. Its plus:
- availability of materials,
- comparative ease of manufacture,
- ability to cut to the width of the workpiece.
Minuses:
- limited functionality, you cannot cut at angles in different planes,
- it is inconvenient to insert long workpieces under the saw blade,
- for long workpieces that are placed perpendicular to the homemade bed and saw, you will have to additionally make a support workbench.
Assembling a complex machine
There is an option with a more complex and heavier design. She can definitely handle cutting pipes. In this case, a homemade installation will not require the use of a circular saw as a component of the machine. But for certain stages of work it is better to have a circular saw on hand.
Depending on the selected components, you can get a machine with increased power. To assemble the machine yourself
by hand you will need:
- Electric motor with a power of about 900 W. If you have to regularly cut pipes, you can choose a more powerful electric motor;
- Metal sheet;
- Metal corners;
- Channel;
- Hinge groups;
- Bulgarian;
- Welding device;
- File;
- Spring of impressive power.
When everything you need has been collected at the workplace, you can begin assembling the cross-cutting machine with your own
hands.
- A homemade bed can be made with your own hands by using adjustable supports, metal corners and bed posts.
- A sheet of durable metal acts as a working surface. You need to make holes in this sheet table and process them using a file.
- To weld a pendulum stand for a future machine, use channels and a welding machine. The structure is installed on a metal sheet. The approximate height of the stand is 80 centimeters.
- The stand for the electric motor is made of a metal sheet in the form of a fixed plate. Be sure to install the stand on its hinges.
- The stabilizer of the electric motor of a cross-cutting machine is a powerful spring. If you manage to find one, you can completely abandon the belts and pendulum.
- Using the eyebolt, you can tension and adjust the belts. The pendulum can be made of metal to make the structure reliable and durable.
- Use the actuating tool to select a disk of the required diameter. For household purposes, a saw blade with a diameter of 400-420 millimeters is usually sufficient.
- Be sure to provide protective covers, since assembling such a machine is accompanied by a certain degree of danger.
When choosing the option of assembling a machine with your own hands, rather than purchasing a factory-made cross-cutting machine, you need to understand that there will be quite a serious difference between them in the quality, accuracy and error of processing wood, pipes, metal and other products.
Safety during work
Safety precautions when using homemade and factory trimmers are no different. Basic Rules:
- The hand should not approach the cutting disc closer than 20-30 cm. When cutting small parts, clamps are used.
- Care must be taken to ensure that the electrical wire does not get caught in the cutting blade.
- Do not work outdoors during rain to avoid water entering the electric motor through the ventilation grille and socket.
- You cannot work tired, intoxicated, or with reduced reaction.
A circular saw is a very noisy type of instrument; long-term use of it has a negative impact on the hearing organs, so you must use headphones. Also with safety glasses, because... During the sawing process, a large amount of small sawdust is formed, which fly into the eyes.
Milling
Discs
Such nozzles are available in various designs. The main difference between the devices is the size of the abrasive grains.
What is the meaning and benefit of homemade products?
Homemade trims are one-piece, even unique products. Each master makes a tool to solve his specific problems. To cut long workpieces, you can attach the trimmer to a flat beam (up to 6 m). The beam itself will work as a support (workbench) for long workpieces.
Factory trims do not make it possible to cut long workpieces unless an additional extension of the bed is built.
Sometimes there is a manual circular saw, but there is no trimmer and no money, no time to purchase it, and so on. The material for making such devices is cheap or costs nothing and is already at hand. Therefore, the question of whether to do the trim yourself or buy a factory one is decided by each master, based on the conditions.
The prices for factory trims are also taken into account:
- Miter saw Makita LS1040FN 196176, power 1650 W – about 22 thousand rubles.
- Makita LS1219L with broach. Power 1600 W – about 67 thousand rubles.
- Budget options: Encore Corvette-8M 90080. Power 1200 W, - about 7 thousand rubles.
Advantages
When a tool (and even more so a machine) is produced independently, its design, as a rule, takes into account as much as possible the needs and tasks that are supposed to be solved with its help:
- so that the molded parts do not have burrs and creases when cutting, it is necessary that the circular saw has an adjustable speed of movement relative to the plane being cut (so that the burrs are removed by the cutting edges of the saw teeth);
- Suppose you need to make not the usual transverse trimming of molded products, but at a certain angle. In this case, it is necessary that the workpiece be fixed to avoid play during cutting;
It is extremely difficult to find a cross-cutting machine for sale that has the function of not only rotating the worktable, but also the option of pressing the workpiece. And if you manage to find such a tool, it will not be cheap.
- and, of course, the price. A cross-cutting machine can be assembled literally from scrap materials, moreover, from parts that cannot be used anywhere else. Cost-effectiveness – why not a decisive advantage?
Pros and cons of homemade products
The homemade product makes it possible to fully use a manual circular saw, for its intended purpose and for trimming. This saves space in the workshop and money on purchasing a factory trimmer.
Disadvantages of homemade products: limited functionality, rough cutting. They are good for rough carpentry work, and less so for fine carpentry. The factory trim has degrees of adjustment for sawing at different angles in two planes. As well as other options - laser pointers, clamps, backlight. Some models are broached. There are no such opportunities on homemade products.