The semi-automatic welding machine is a very convenient device for working at home and in small workshops. You can work with it in any conditions, no special preparation of the workplace is required, it is compact almost like a regular inverter.
Unlike manual arc welding, it does not require a highly qualified welder to work with it. Correct setting of a semi-automatic welding machine allows even a low-skilled welder to perform high-quality work.
Depending on the type of material being welded and its thickness, it is necessary to correctly set the wire feed speed and shielding gas. Next, the welder needs to move the torch evenly along the seam, and a high-quality weld will be obtained. The whole difficulty lies in the correct selection of welding parameters for a specific material.
Equipment capabilities
To properly configure a semi-automatic welding machine, an understanding of the welding characteristics is required; it is also necessary to understand the features of the semi-automatic machine.
Semi-automatic welding machines allow you to work with almost any metals and their alloys. They can weld non-ferrous and ferrous metals, low-carbon and alloy steel, aluminum and coated materials, are capable of welding thin metals up to 0.5 mm thick, and can even weld galvanized steel without damaging the coating.
This is achieved due to the fact that flux, flux-cored wire or shielding gas, as well as welding wire can be supplied to the welding area, and the supply occurs automatically, everything else is done as in manual arc welding.
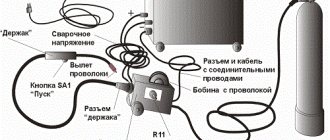
Semi-automatic welding machines are produced in different classes, but they all consist of:
- control unit;
- power supply;
- welding wire feed mechanism with reel;
- welding torch;
- power cables.
In addition, there must be a cylinder with a reducer and inert gas (carbon dioxide, argon or mixtures thereof), and a funnel for flux.
The wire feed mechanism consists of an electric motor, a gearbox and feed or pull rollers.
We choose, we buy
Table of characteristics for welding with an inverter.
It would be useful to google and read about domestic and foreign manufacturers whose products are offered on the Russian market. These are mainly European and Asian countries.
Equipment from Asia is usually inexpensive and of very decent quality, with the exception, of course, of handicraft fakes.
European inverters are distinguished by qualities with the obligatory adjective “high” in front: high price, high reliability, high quality. There are few Russian devices on the market.
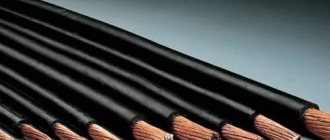
Understand the brand of welding cable and its cross-sectional area. The right choice will help you avoid difficulties with power surges if they occur during welding.
The second thing to do is figure out the availability of service centers around the country. If you live in a city with a population of one million, a service center for a specific product is unlikely to be a problem for you. But if you live in a remote region, this issue will become one of the most important for you.
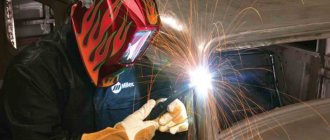
To be honest, you won’t be able to buy one device. Be sure to buy a welding helmet with a light filter. You need to protect yourself from splashes of molten metal and combustion products.
But the main thing is protection from ultraviolet radiation from a hot arc. The most primitive option is a mask made of plastic and a light filter, which is selected depending on the current strength, lighting and your vision.
A more expensive and much more comfortable option is a mask with a Chameleon-type light filter, which automatically changes its characteristics and can be adjusted to suit the ambient light and the condition of your eyes.
There are many tables on the Internet with data that will help you choose the right filters. It is better to choose them for a number larger or smaller. The best solution would be to check the lighting in the work area and your vision.
Okay, we agree, you don’t have to buy a whole suit made of special fabric. But a canvas apron with gloves is not a whim, but your protection. It is better to choose mittens from split leather. Pay attention to your shoes: be aware that drops of molten metal may fall on your feet.
Recommendations in the instructions
Before starting work, it is necessary to reliably ground the welding machine and only then begin setting up. The semi-automatic welding machine must be connected to a gas cylinder system with protective gas.
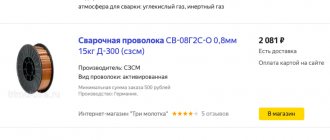
It is necessary to check the presence of welding wire in the spool, if you need to reload it and stretch it to the torch handle. The gas supply speed is of great importance in the welding process.
Therefore, it also needs to be installed. Gas equipment has gearboxes indicating gas consumption in liters. This is very convenient; you just need to set the required flow rate within 6-16 liters.
The operating instructions for the device provide recommendations on how to properly set up a semi-automatic welding machine, what current to use to weld a specific metal, and at what speed to feed the wire.
The instructions should contain special tables in which everything is described. If you set all the parameters in accordance with them, then everything should work out.
In practice there may be difficulties. The quality of semi-automatic welding is influenced by many parameters. If the supply network does not meet the standards, then the power source will produce voltage and current that is not what is needed, the parameters will be unstable.
The temperature of the medium, the thickness of the metal, its type, the condition of the surfaces being welded, the type of seam, the diameter of the wire, the volume of gas supply and many other factors affect the quality of semi-automatic welding.
Tables of recommended welding conditions are given for certain conditions, which cannot always be achieved. Therefore, when welding semi-automatically, many adjustments are made experimentally.
Of course, the recommended values are initially set, then the welding parameters are fine-tuned.
Safety precautions when working with semi-automatic machines
Before connecting the workpieces, it is necessary to ground the device, then begin the setup by connecting the gas cylinder, and check the coil of wire. The latter is sometimes recharged and the solder is pulled to the torch handle.
When using a semiautomatic device, you must comply with safety requirements.
Its main provisions:
- Do not allow direct sunlight to hit the gas cylinder, do not refill it yourself, protect the valves from damage, do not bring the tank from the cold into a warm room.
- All actions should be carried out in a fire-resistant suit, protective mask, special shoes and gloves.
- Keep explosive and flammable substances away.
- Use full lighting.
- Do not weld gas tanks, cans and barrels in which hazardous compounds were stored.
If the above rules are followed, the results will be good for all welders.
Setting current and wire feed speed
First of all, the strength of the welding current is set, which depends on the type of material being welded and the thickness of the workpieces. This can be found out from the instructions for the semi-automatic machine or found in the relevant literature.
Then the wire feed speed is set. It can be adjusted stepwise or smoothly. With stepwise adjustment, it is not always possible to select the optimal operating mode. If you have the opportunity to choose a device, buy a semi-automatic welding machine with continuously adjustable wire feed speed .
The control unit must have a forward/reverse wire feed mode switch. When all the settings have been made in accordance with the operating instructions for the semi-automatic machine, you need to try working on a draft sample with the same parameters. This must be done because the recommendations are average, and in each individual case the conditions are unique.
At a high wire feed speed, the electrode simply will not have time to melt, there will be large deposits or shifts on top, and at a low speed it will burn out without melting the metal being welded, the weld bead will sag, and depressions or breaks will appear.
Types of welding seams
Different types of welds have different settings. The type of weld differs according to the type of connection and the spatial position of the workpieces.
By spatial position:
- horizontal;
- vertical;
- ceiling;
- lower.
By connection type:
- into the joint;
- T-bar;
- overlapping;
- corner.
The simplest joints of workpieces are overlap welding and butt welding in the lower position.
Adjusting parameters
Adjustment of current or voltage depends on the thickness of the workpieces. The thicker the product being welded, the greater the welding current. In simple semi-automatic welding devices, the current adjustment is combined with the wire feed speed.
In professional semi-automatic machines, the adjustments are separate. The correct setting can only be determined experimentally by making an experimental seam on a test piece. The roller should be of normal shape, the arc should be stable, without splashes.
Some semi-automatic models have inductance adjustment (arc settings). With low inductance, the arc temperature drops, the depth of metal penetration decreases, and the seam becomes convex.
This is used when welding thin metals and alloys that are sensitive to overheating. With high inductance, the melting temperature rises, the weld pool becomes more liquid and deeper. The seam bead becomes flat. Welding in this mode is used for thick workpieces.
The welding wire feed speed switch in models capable of working with different diameters requires additional adjustment taking into account the specific thickness of the wire.
Even after fully studying the manufacturer’s recommendations, it is not always possible to obtain the desired operating mode of the semi-automatic machine.
Having set the optimal settings for welding a workpiece today, it may turn out that the next day they will become suboptimal because the quality of the network has changed or the position of the product on the workbench has changed.
That is, setting the modes is a constant and individual process because it also depends on the work style of the welder himself.
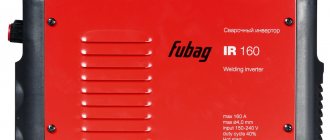
Inverter Welding Basics
First, let's look at the design of the welding inverter. We won’t look at the “stuffing”; we’ll look at what’s on top and what we’ll have to use.
What does an inverter welding machine consist of? (To enlarge the picture size, right-click on it)
This device is a small metal box, which, depending on the power, weighs from 3 kg to 6-7 kg. The case is usually metal; some manufacturers make ventilation holes in it for better cooling of the “filling” (mostly the transformer). There is a belt for carrying, and sometimes there is also a handle: the belt is put on the shoulder if the work requires movement.
One of the panels has a power button or toggle switch. The front part contains power and overheat indicators. There are also knobs for setting voltage and welding current. Also on the front panel there are two outputs - “+” and “-” to which working cables are connected. One cable ends with a clothespin clip, which is attached to the part, the second - with an electrode holder. The power cable connector is usually located at the back. That's all, actually.
When purchasing an inverter, make sure that the cables are long enough and flexible: this makes it easier to work with. It is the insufficiently long and rigid working cables that have the most complaints from users of the popular brand of inverter welding machines “Resanta”.
The general principles of working with an inverter welding machine are described in this video.
Welding with an inverter for beginners
As with any electric welding, the melting of the metal occurs due to the heat of the electric arc. It occurs between the welding electrode and the metal being welded. To create an arc, they are connected to opposite poles: “+” is applied to one, “-” to the second.
When connecting the electrode to the “minus” and the part to the “plus”, the connection is called “direct”. If “plus” is applied to the electrode, the connection is reversed. Both options are used when welding, but only for metals of different thicknesses: reverse - for welding thin metals; straight - for welding thick metals (more than 3 mm thick). But this is not an immutable rule; sometimes they do the opposite.
Direct and reverse polarity of connection on the welding inverter
What causes this division in practice? Physics of the process. When an arc occurs, the electrodes move from minus to plus. And at the same time they transfer their energy to the positively charged surface, increasing its temperature. Therefore, the element that is connected to the positive output heats up more. When welding metals of sufficient thickness, they need to be heated well so that they melt and the weld is of high quality. That’s why they are given a “+”. Thin metal, on the contrary, can burn out due to overheating and a “minus” is attached to it, warming up the electrode more, from which more molten metal flows into the seam.
You can weld metal correctly with an inverter only if you have good control over the electrode. To do this, you need to take the holder correctly. How to do this, watch the video.
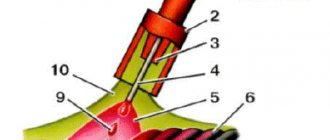
How a seam is formed during welding
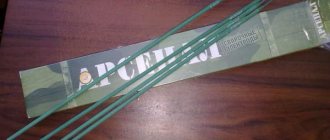
To make the basics of welding with an inverter clearer, let’s look at what happens when a seam is formed. To begin with, let us clarify that a welding electrode for welding metals consists of a metal core and a coating - a special coating that protects the welding area from contact with oxygen contained in the air. Read more about electrodes for inverters here.
Now about the welding process itself. An electric arc is formed when the electrode core and metal come into contact (read how to ignite an arc below). At the same time, the coating begins to burn. It partially melts, turning into a liquid state, and partially turns into gases. These gases surround the welding zone - the weld pool. They prevent oxygen from the air from “breaking through” to the molten metal. The part of the coating that has become liquid covers the molten metal, creating a second layer of protection. After cooling, it turns into slag, which crusts over the seam. And at this stage, the slag protects the still hot metal from oxygen.
How does inverter welding work?
But slag and protection are far from the only process that occurs and that needs to be controlled. When welding, it is necessary to ensure that the junction of two pieces of metal is heated evenly and sufficiently. Both parts should melt to the same distance from the edge. To ensure uniform heating, you need to maintain the same distance from the tip of the electrode to the part. This is not very easy to do: the electrode melts during welding, and particles of its molten metal are transferred into the seam by the arc. Therefore, you have to gradually move the electrode holder closer to the part. But this is not the end of the electrode welding technique. You also need to “write out” some shapes with its tip - zigzags, circles, Christmas trees, etc. They allow you to make the seam wider and fuse two parts together. The most common electrode movements are shown in the photo below.
Electrode movements when welding with an inverter: for beginner welders, you need to practice several movements until they become automatic
That is, you need to move the electrode from side to side the width of the seam along one of these trajectories, while monitoring the state of the weld pool, and lower the electrode as it burns out, maintaining the distance to the part constant. This is the difficult task facing those who want to learn how to weld metal. It’s easier with a welding inverter - the arc is constant and doesn’t jump, but at first you may not succeed.
This video shows, in very slow motion, the transfer of metal particles from the electrode into the weld pool and how it is formed.
Common mistakes
An error in the settings of the semi-automatic welding machine is indicated by a distinct crackling sound. Loud clicks indicate that the solder feed rate is low. It is necessary to increase the feed speed until the cracking noise disappears.
Heavy spattering of metal is often observed. This is due to an insufficient amount of insulating gas in the weld pool area. It is necessary to increase the gas supply and adjust the semi-automatic gearbox.
There are lacks of penetration or burns in the seam. This is due to the arc voltage being too low or too high and can be adjusted by setting the voltage or inductance.
The uneven width of the weld bead is associated with the speed of movement of the torch and its position relative to the seam, that is, it is associated with the welder’s working technique.
If you follow the manufacturer's recommendations and understand the processes occurring in the weld pool and how to adjust them, you can perform quite complex types of welding work at home.
Welding workpieces of considerable thickness
When joining workpieces with a thickness of more than 4 mm, preparation should be taken more carefully. In addition to cleaning the surface from dirt, paint and rust, the edges of the elements along which the welding seam will be carried out should be chamfered. How to properly remove a chamfer, at what angles, is regulated by GOSTs; information is also available on the Internet.
To ensure reliable connection of thick workpieces, it is necessary not only to conduct an arc along the edges being welded, but to make oscillatory movements with the torch. There are many types and methods of these movements, but most often the usual zigzag or reciprocating movements are used. The width of the molten weld metal approaching the surface of the part should be equal to the thickness of the workpiece.
Before starting work, you need to set the gap between the parts to be welded. Without a gap, the metal will not be welded to its full thickness, the seam will remain superficial and the necessary strength will not be provided. To strengthen T-joints made of thick metal, two more are placed on top of the finished seam - along the upper edge of the seam, extending onto the workpiece, and in the same way along the lower edge. This allows you to strengthen the seam, which can be important for parts with a thickness of 8 mm or more.
Despite the mistakes and some subtleties during training, semi-automatic welding is widely used; a video for beginners helps to visually distinguish the features, find out why certain errors appear and how to eliminate them. The importance of clarity is difficult to overestimate at the initial stages of using a welding machine, especially when independently mastering the equipment.
Carbide discs for metal. We work without sparks
Electric chain saws. Reliability rating