In just two decades, construction technologies have been updated, new building materials and tools have appeared. For example, the old faithful roofing felt has given way to new fused roofing materials, which are better in all respects. No one will argue with this anymore. And accordingly, the bucket with hot bitumen and a brush for coating has gone into oblivion, instead of which builders today use a gas burner for roofing work.
DIY gas burner. How to make a homemade gas burner?
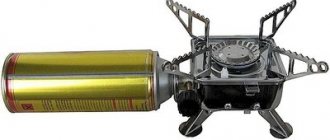
A homemade gas burner is a device that has a number of advantages compared to its other analogs that run on gasoline and other types of fuel. The main advantages of gas burners are as follows: they are easy to use, do not emit harmful or unpleasant odors during use and do not smoke, like gasoline burners. In addition, the gas burner is very compact, which means it can be used in almost any sector of the economy. What are its features and how to make it yourself?
Gas burner device
The design of this tool assumes the presence of the following main parts:
- Gearbox.
- Injectors.
- Fuel supply regulator (in this case gas).
- Heads.
- The node where the gas cylinder is attached.
What does it work on?
As for fuel, a gas burner often runs on propane (or a propane-butane mixture). It fills a separate container (cylinder), which, as we noted above, is attached to a special unit.
Is it difficult to make it yourself?
It is worth noting that this device does not have any complex elements or parts in its design. Therefore, making an infrared gas burner with your own hands very quickly (as practice shows, the work takes no more than 30-40 minutes), and even a novice master can understand its design. In the case of gasoline devices, things will not be so positive.
Scope of application and design elements
It is used mainly for heating and drying materials, cutting metal products, including pipes, and burning old paint. The design of the burner includes a metal body (it also includes a special glass that prevents the wind from blowing out the flame), a nozzle (for igniting fuel), a handle that is attached to the body (by the way, its length should be no more than 100 centimeters), a holder ( mounted on the handle and made of wood or heat-resistant plastic), as well as a gas hose. In addition, there is a gearbox and a supply pipe with a valve. The latter regulates the gas supply level and, accordingly, the flame length too.
How to make a mini gas burner with your own hands?
You can start with the simplest thing - with the handle. It can be made from wood, but it is best to take a ready-made one from a burnt-out soldering iron. The supply tube should be made of steel. Pay special attention to the sizes. The optimal diameter of the tube should be approximately 1 centimeter. Moreover, the thickness is no more than 2-2.5 millimeters. This tube must be inserted into the handle and secured. This can be done using regular glue.
Frame
We also make it from steel, namely from a brass rod 2 centimeters wide. A divider can also be made from it. Next you need to make several holes. This is necessary in order to ensure a normal supply of oxygen. Otherwise, at the slightest draft, the burner flame will go out or the gas from the nozzle simply will not ignite. How many holes should I make? There are 4 of them in total, each of which has a diameter of 1 millimeter. These holes must be made in the divider rod. In addition, drill 2 radical holes of 5 millimeters each directly in the body. All this will contribute to the normal combustion of fuel in the device, which will have a positive effect on the speed and quality of work performed.
How to make a homemade gas burner next? Next, you will need to press the divider into the body. In this case, the internal flange should be installed with a small gap (at least 0.6 millimeters). This gap will serve to slow down the flow of gas supplied to the igniter hole.
How to make a nozzle?
It will be machined from a metal rod. To make a hole in the nozzle, you will need to use a 2mm drill bit and make a blind hole with it. In this case, the distance to the exit should be at least one and a half millimeters. For the jumper we try on a drill with a diameter of 4 mm. The hole made is caulked with a hammer, then the end of the device is sharpened with sandpaper. It needs to be processed until the moment when the nozzle can be screwed onto the threaded tip of the tube.
Now a hose is put on the end of the tube (it comes from the gas cylinder reducer), made of a special rubber-fabric material. It is secured with a regular clamp using a Phillips or minus screwdriver. When the operating pressure is set, supply gas and place the nozzle into the flame of the gas burner. This should be done only after the substance has completely displaced the air from the hose. The upper part of the part should be sanded. It needs to be processed until the length of the burner torch is about 50 millimeters.
How to bring all these elements together?
The body together with the divider should be screwed onto the external thread of the nozzle. At the same time, a gas burner, made with your own hands, taking into account all the recommendations, should supply an even flame. It is important to ensure that the fuel does not emit soot during combustion.
What to do if the burner smokes and produces an uneven flame? In this case, you need to gradually turn the body on the nozzle thread. This must be done until the gas produces such characteristic smoke. If the threaded connection is very loose, seal it with FUM tape. That’s it, at this stage the gas burner has been successfully constructed with your own hands. Now you can safely use it on the farm.
A few words about how to use the tool
To ensure that a self-made gas burner is safe to use, before the first start-up, be sure to check its parts for leaks, namely solder joints, joints of connectors and sleeves. After this, open the valve half a turn and wait until the device produces a flame. Here the ignition process occurs automatically, so no further action should be taken. Now adjust the level and length of the supplied flame (this is done using a reducer or the same valve) and get to work.
So, we found out how to make a gas burner with our own hands, learned its design and the rules for using this device.
How to make a burner with your own hands
In principle, the design of a propane gas burner is simple. The main thing is to assemble the nozzle and glass. The remaining elements and parts are ready-made units and parts that are sold in any hardware store. Therefore, it will not be difficult to make it yourself.
So, what is required to assemble a burner with your own hands?
- The main detail in the design is the jet. It is this that creates the density of the gas flow and forms a torch of the required size. To do this, you can use jets from a car carburetor or from a home gas stove. It is important here that the hole diameter is not larger than 0.8 mm.
- The second most important thing is the glass. You can make it yourself from a thin-walled steel pipe with an internal diameter of 25-40 mm, pipe length - 100-1500 mm. Instead of a pipe, you can use a metal sheet 0.8-1.0 mm thick, which is rolled into a pipe and welded at the edges. Note that the option with a pipe is better and has fewer difficulties.
- As a main tube, you can use a brass or copper tube 70-100 cm long. It is very important to select a tube of thickness so that it can be threaded onto which the nozzle will have to be screwed. In fact, the tube and the nozzle are the nozzle.
- The most difficult part in the design of a gas burner for a roof is the control valve. Any shut-off valves will not work here. The best option is to install a gas tap or valve that opens and closes the gas supply to the burner in a gas household stove.
- The handle should just be comfortable, so you can make it yourself from wood and fit it to your hand.
- There is no need to invent a propane cylinder, a reducer for it and a hose; everything can be bought ready-made.
Do-it-yourself gas burner for roofing
To carry out repairs and other roofing work that involves melting mastics and laying roofing materials, you will need a special gas burner. The device is primarily used to perform the following tasks:
— heating and drying of roofing materials;
— metal cutting and soldering;
- firing a layer of old paint.
Gas burner device
The gas burner has a fairly simple design. It is a glass made of metal and equipped with a nozzle and a handle, which is attached to the body . Heat-resistant plastic or wood can be used to make the handle. Gas enters the housing passing through the gas pipeline. In most cases, propane under pressure is used to operate the burner.
The burner glass should have a shape that protects the flame from being blown out by the wind.
There is a valve on the burner body that allows you to adjust the flame length and intensity of the supplied gas . It’s good if the burner has a reducer, which allows you to use gas economically.
Roof burner components
During the assembly process of the device, mechanical processing is practically not used. The burner is assembled from ready-made spare parts. To make it we will need:
- A steel valve that can be taken from a cylinder intended for storing liquefied gas.
- A plug used for transporting gas cylinders.
- A nozzle from a blowtorch with a nozzle diameter of 0.8 mm.
- A piece of pipe one meter long with an internal diameter of 10 mm. and steel thickness 2 mm.
- Wooden handle.
You can use the handle from a burnt-out soldering iron as a handle.
Step-by-step burner manufacturing process
The process of manufacturing a gas burner begins with the fact that we insert the supply tube, for which we will use a steel pipe, into the handle and secure it with glue. The divider and body must be machined from a brass rod, the diameter of which should be 20 mm. In the finished body, two radial holes are drilled (each diameter is 5 mm) and four holes are drilled in the divider rod (each diameter is 1 mm).
When assembling, it is necessary to press the divider into the body with a slight tension. At the same time, the flange must be installed inside the housing with a gap, that is, the internal diameter of the manufactured housing must be 0.6 mm larger. diameter machined The resulting gap is responsible for braking the gas flow, which is supplied to the drilled holes in the igniter.
Such nozzles are found in purchased models
Next we grind out the nozzle. For this we need a steel rod.
To make a thin hole in our nozzle, you need to take a drill with a diameter of 2 mm. and use it to make a blind hole, which is 1.5 mm. doesn't reach the exit. Drill with a diameter of 0.4 mm. used for jumper. The resulting hole must be completely caulked with gentle hammer blows. Then you need to sharpen the end. To do this, take sanding paper and sharpen it until the desired cross-section of the outlet hole is found, that is, until the nozzle can be placed on the tip of the threaded burner tube.
A supply hose made of fabric-rubber material must be attached to the end of the gas supply tube. Secure the hose to the tube with a clamp. We set the working pressure, after which we supply gas. Wait until all the air is forced out of the hose, and only then insert the nozzle into the flame of the gas burner.
Attention! The nozzle is introduced into the flame without a housing or a divider.
Next you need to sand the end. The length of the burner flame should ultimately be 5 cm. We put the body together with the divider onto the external thread of the nozzle. Make sure that the burner produces an even flame with no signs of soot.
To achieve the desired effect, slowly rotate the body on the nozzle thread.
If you have a loose threaded connection, seal it with FUM tape.
Video. How does a roofing gas burner work?
What is a gas burner
This is a hand tool connected to a gas cylinder. It includes:
- An injector, inside of which a nozzle with a through hole of small diameter is installed. Through it, gas in the form of a flame is supplied to the place of surfacing or drying.
- Cup. This is a device within which flammable gas is mixed with air (oxygen). The glass has many holes through which air is sucked into the flame zone. In addition, this device protects the fire flame from the effects of wind.
- A valve that opens the gas supply and regulates its pressure, and accordingly the length of the torch.
- The main pipe that separates the torch from the handle that the welder holds.
- Handle made of plastic or wood.
Of course, to operate a gas burner, you need a hose connected to the cylinder and a reducer that reduces the gas pressure in the line. The gas pressure at the burner outlet is 0.1-0.15 MPa. A propane gas burner for roofing weighs a little, in the range of 1.0-1.5 kg. So it is convenient and easy to work with it.
DIY gas burner: manufacturing instructions
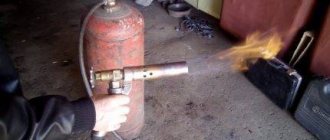
In this article we will look at how to make a gas torch for soldering with your own hands. This device is often in demand both in private households and for commercial purposes - for individual technical creativity and various types of construction tasks. In particular, gas burners are used for soldering, metalsmithing, forging, roofing, jewelry work, and for other purposes they produce flames whose temperature exceeds 1500°C.
In metalworking, using a gas torch, you can heat a metal workpiece so that in the end it turns out to be sufficiently hardened. When carrying out welding work with some metals, the areas of future seams must be heated.
Gas burner for roofing work
The past decade has been characterized by the emergence of revolutionary changes in the technology of arranging soft roof coverings. Classic roofing felt has given way to modern built-up materials. The composition of the tools needed to perform roofing work has also changed. The bucket of bitumen and brush were replaced by a roofing torch.
What kind of equipment is this?
A gas torch is an indispensable hand tool for performing work on installing soft roof coverings using modern weld-on materials. The flame generated by the operating burner allows you to create local heating of the surface to perform the following operations on the roof:
- drying wet areas of the underlying surface;
- heating and melting of the lower bitumen layer of the welded roll material.
Parameters for making a soldering torch
Firstly, the device must be made of refractory metals. With a properly adjusted burner, temperatures in excess of 1000°C can be achieved. Secondly, the burner must be equipped with a reliable operating valve, which will shut off the gas supply in the event of a dangerous situation. Thirdly, you need to use a reliable connection to a tank with a valve or a 5-liter propane tank with a reducer, which will eliminate the risk of accidents.
Below is a typical diagram and principle of operation of an injection gas burner:
Making a gas burner from scrap materials: step by step
List of materials and tools:
• drill; • Bulgarian; • hammer; • sandpaper; • brass blanks for the divider nozzle; • thin brass tube with a diameter of 15 mm; • wooden blocks; • vice; • silicone seal or FUM tape; • hoses for connection; • valve for adjustment.
How to make a nozzle and handle
First of all, we take a brass tube and attach a handle to it - for example, from an old burner, or from a wooden block, having processed it beforehand. We drill a hole in the block for a brass tube with the appropriate diameter. Having inserted the tube into the timber, we secure it with silicone or epoxy resin.
Next, we proceed to a more labor-intensive and time-consuming stage of work - manufacturing the nozzle. The hole size should preferably be 0.1 mm.
You can use a drill to make a slightly larger hole, and then adjust the edges to 0.1 mm. The hole must have the correct shape so that the flame is even.
After this, we fix the workpiece in a vice, take a hammer and carefully, in a vertical plane with a “pull” towards the middle of the workpiece, strike the future nozzle. We rotate the product evenly to form an ideal hole.
Then we take fine-grit sandpaper and sand the nozzle head. To connect to the tube, a thread is applied to the back of the product; the elements can also be simply soldered - but in the future, repairing the parts will be more difficult.
Now we connect the device to the gas cylinder and set it on fire - the do-it-yourself burner is ready for use. However, here you can see that to regulate the gas flow, you can only open and close the valve of the gas cylinder, and thus it is very difficult to obtain the desired flame. What we can do?
How to improve flame control
For the normal operation of our homemade unit, we will install a divider and a tap on it. It is better to mount the tap near the handle, at a distance of about 2–4 cm, but it can also be attached to the supply pipe. As an option, take a burner tap from an old autogen or another similar tap that is attached with a thread. To seal the connection, take FUM tape.
The divider is installed on a pipe with a nozzle; it is made of brass, diameter 15 mm. The best option is a cylindrical part with a hole for a tube with a nozzle. If there is none, we do this:
1. Take a brass pipe with a diameter of 35 mm and cut a piece of 100–150 mm. 2. Take a marker, step back from the end and mark 3-5 points, with an equal distance between them. 3. Drill 8–10 mm holes in the pipe, take a grinder and make straight cuts to them. 4. We bend everything to the center and weld it to the burner pipe.
Gas burner assembly
First of all, you need to cut an internal thread at one end of the copper tube using a tap of the appropriate diameter. Copper is not a very hard metal, so it will not be difficult to carry out this operation with your own hands. It will also be easy to screw in the jet.
With a glass everything is more complicated. To do this, you will have to cut one side of the pipe into several longitudinal petals (6-8 pieces), and then bend them towards the center. You will get a cone, but there is no need to bring the petals to the end; you need to leave room for the main tube, onto which the glass is placed. After which the petals are pressed against the tube, where they are sealed. There are slots between the petals that will serve as air supply inside the nozzle. The length of the petals is approximately one third of the entire length of the glass.
Important! The jet should be located at a distance equal to the length of the petals. That is, a flame of propane and oxygen should form at the level of the slots.
The gas burner for roofing work, or rather, its front part in the form of a nozzle is ready. All that remains is to assemble the back part. To do this, you will need two M25 bends made from a pipe with a diameter of 25 mm with threaded threads. In a one-way bend, in a place where the thread is not cut, a cone is formed into which the rear part of the main tube is inserted. This can be done by heating the squeegee with an oxygen torch and tapping it on all sides.
A gas control valve is screwed into it. The second connection, it is double-sided, is screwed into the valve on the other side. Be sure to wrap it on a sealing material. For example, on fum tape. An adapter from a threaded connection to a hose connection is screwed onto the rear end of the second bend. There is no point in making it yourself, because it is sold in any hardware store and is very cheap.
Now all that remains is to make the handle and install it on the prepared device. There are a huge number of options for handles. The main thing here is to hold the entire homemade device comfortably. For example, it can be cut from a wooden board 5 mm thick, you can buy an ax handle and adjust it to the size and shape. It is better to attach the handle to the brackets, because this is the strongest section in the entire structure. Optimally, this is a rear drive, because the control valve should be located slightly in front for ease of use.
There are different ways to attach a piece of wood to a metal tube.
- Make a recess along the entire width to fit the diameter of the pipe of the squeegee, place the squeegee in it and secure it with two clamps made of metal tape.
- Install the squeegee on the side of the handle and also secure with clamps.
So, you have made a gas burner for roofing work yourself, you can connect it to a gas cylinder and carry out testing. To do this, the hose is connected to the cylinder through a reducer, where it is secured with a clamp. Its second end is threaded into the adapter, where it is also secured with a clamp.
The cylinder opens, the supply of propane through the gas reducer opens. And the last thing to open is the control valve on the injector. Gas should flow through the nozzle with a characteristic sound. You must wait until the air inside the device is completely released. After which the gas flow is ignited. The valve near the handle regulates the length and power of the torch.
Attention! A homemade gas burner for roofing work is a high-risk device. Therefore, all operations performed must be approached with special care. This is especially true for the connections of all elements with each other. Complete tightness must be maintained.
How to make a gas forge with your own hands
Most metal shops require a forge. You cannot do without such equipment when working not only with cold, but also with hot forging. The necessary equipment can be purchased, but its cost is very high: the minimum price is several tens of thousands of rubles. For this reason, many workshop owners decide to make a gas forge with their own hands.
Stone or charcoal, oil products or gas can be used as fuel for the forge. A gas forge is the optimal equipment option for a workshop due to the low cost of fuel and its availability. The efficiency of such a forge is high, and it can be connected not only to the main gas pipeline, but also to fuel cylinders.
Purpose of the forge
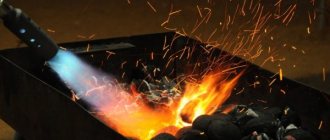
Processing metal products requires heating them until they change color and acquire a light orange hue. Such changes in steel correspond to a temperature of 1000-1200 o C. The metal brought to this state is easily subject to deformation under the influence of impact tools.
The workpiece loses its plasticity as it cools, and accordingly, forging and giving it the desired shape becomes more difficult. Applying more force leads to deformation of the metal and increases its fragility. Maintaining the forging temperature avoids material destruction.
A conventional oven is not capable of producing a temperature of more than 1000 o C. For such purposes, ovens with forced air flow are used.
A forge is used to heat metal blanks and maintain the required temperature. Such equipment is used not only for forging, but also for melting and then pouring metal into a mold, hardening tools, and soldering using copper and brass.
Advantages of a gas forge
- The design of such equipment is simpler due to the absence of grates in it, in contrast to the same coal options;
- More convenient adjustment of fuel supply and temperature;
- Light weight allows the gas forge to be moved;
- The cost of self-production is small and will not affect the master’s budget;
- Gas is one of the most accessible and cheapest types of fuel.
Types of gas forges
The design features of the forges play virtually no role and are chosen by the master depending on his preferences and final wishes for the efficiency of the equipment. Often even the basic rule is neglected - creating a foundation from a fire-resistant hearth. However, there are several main types of forges.
Open
Metal structure installed on a fireproof foundation. Its role can be a concrete platform or fire-resistant bricks. For this design, a special tray is created in which parts are placed for subsequent heating. On the sides there are vertical posts on which the burner for the gas furnace is mounted.
With this design, the smoke is drawn out naturally during operation, and therefore there is no need to create an exhaust hood. But at the same time, the gas forge is placed either in a well-ventilated room or in the open air.
The advantage of this forge design is the possibility of heating different parts on a pallet, and their dimensions are limited only by the side racks.
Burner
It is not a separate type of forge, since it is an integral part of it. Its body is most often made of stainless steel; one end of the pipe is closed with a removable lid or welded. On the other hand, a metal mesh with a suitable diameter is installed - it depends on the desired torch.
A pipe through which the fuel mixture will be supplied is welded to the side of the closed end of the pipe. It is attached to a pipe of smaller diameter through which gas flows from the compressor.
The impeller is installed to enrich the fuel mixture with air.
Closed
The main difference between a gas forge of this type and others is the type of draft. In this design it is forced and carried out by means of a fan. This option is optimal because it allows you to ventilate the entire room.
The oven is made in a cubic shape from refractory bricks. A homemade gas forge for domestic needs is usually small - its sides rarely exceed one meter in length. An umbrella is placed on top - a metal cover made of a 4 mm thick sheet of metal. The internal volume must be completely sealed, otherwise the efficiency of the forge will be low.
How to make a gas forge with your own hands
The main requirement for the design is lightness and practicality. Thanks to these qualities, the equipment can be easily moved from place to place.
To achieve the required result, the gas furnace is made of refractory blocks - either refractory bricks or so-called fireclay bricks play their role.
The process of how to make a gas forge consists of several stages:
- Fireproof blocks or bricks are prepared.
- The body of the forge is created - the number of parts used may vary depending on the complexity and size of the chosen design.
- The body can be processed with a hacksaw or any other tool.
- There should be no gaps between individual blocks or bricks - all elements should fit as tightly as possible to each other.
- A small threshold is created from half a brick or block at the front of the structure, allowing the forge to maintain a high temperature.
- A small rectangular hole is cut in the back, which will serve for ventilation. In addition, such a cutout will allow you to work with long metal workpieces.
- A hole is cut in the side wall to the diameter of the gas burner.
The gas forge can be considered complete after completing the described manipulations. To operate it, you only need a gas burner and testing the entire device in practice.
Gas burner for forge
The main part of the forge is the gas burner - it is this that creates the temperature necessary for processing metals. Craftsmen most often make burners from stainless steel, using a pipe welded at one end and covered with a metal mesh at the other.
The diameter of the hole is selected individually, depending on how strong the flame should be. An additional pipe is connected to the burner, through which the fuel mixture is supplied. You can use the finished forge only after the burner operation has been adjusted.
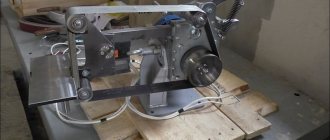
Blacksmith's forge from a bucket
You can create a forge at home from available materials - for example, an ordinary bucket.
Creating such a furnace is quite simple: holes are made in the walls, the inner surface of the metal is lined with ceramic wool, capable of withstanding temperatures of more than 1200 degrees. Since the bucket has a cone shape, it must be positioned correctly, for which legs are installed.
A hole for the burner is created in the middle part of the forge, and a ventilation hole is cut in the bottom. Fireclay brick, which has increased fire resistance, is placed on the bottom. Finished equipment is often coated with a layer of heat-resistant paint.
Useful tips
- Cutting a small hole in the back of the forge will improve ventilation. In addition, this cutout allows you to heat long metal workpieces.
- The forge is placed on a special metal stand or table, which makes working with it more convenient. The height is selected individually by the master.
- If a forge shop works with workpieces of different sizes and shapes, then it is advisable to install several forges of different dimensions at once. They are placed close to each other, and gas and air are supplied using flexible hoses. This design solution allows you to quickly reconnect the burners.
- Each gas pipeline must have a shut-off valve. For this purpose, conventional valves are most often used - they provide smoother adjustment, unlike ball analogues.
The main thing in creating a forge with your own hands is to understand the principle of operation, select the right materials and follow safety precautions. Such equipment is created by craftsmen based on personal preferences, wishes and requirements, which provides wide scope for activity.
DIY gas burner for roofing work
In just two decades, construction technologies have been updated, new building materials and tools have appeared. For example, the old faithful roofing felt has given way to new fused roofing materials, which are better in all respects. No one will argue with this anymore. And accordingly, the bucket with hot bitumen and a brush for coating has gone into oblivion, instead of which builders today use a gas burner for roofing work.
What is a gas burner
This is a hand tool connected to a gas cylinder. It includes:
- An injector, inside of which a nozzle with a through hole of small diameter is installed. Through it, gas in the form of a flame is supplied to the place of surfacing or drying.
- Cup. This is a device within which flammable gas is mixed with air (oxygen). The glass has many holes through which air is sucked into the flame zone. In addition, this device protects the fire flame from the effects of wind.
- A valve that opens the gas supply and regulates its pressure, and accordingly the length of the torch.
- The main pipe that separates the torch from the handle that the welder holds.
- Handle made of plastic or wood.
Of course, to operate a gas burner, you need a hose connected to the cylinder and a reducer that reduces the gas pressure in the line. The gas pressure at the burner outlet is 0.1-0.15 MPa. A propane gas burner for roofing weighs a little, in the range of 1.0-1.5 kg. So it is convenient and easy to work with it.
How to make a burner with your own hands
In principle, the design of a propane gas burner is simple. The main thing is to assemble the nozzle and glass. The remaining elements and parts are ready-made units and parts that are sold in any hardware store. Therefore, it will not be difficult to make it yourself.
So, what is required to assemble a burner with your own hands?
- The main detail in the design is the jet. It is this that creates the density of the gas flow and forms a torch of the required size. To do this, you can use jets from a car carburetor or from a home gas stove. It is important here that the hole diameter is not larger than 0.8 mm.
- The second most important thing is the glass. You can make it yourself from a thin-walled steel pipe with an internal diameter of 25-40 mm, pipe length - 100-1500 mm. Instead of a pipe, you can use a metal sheet 0.8-1.0 mm thick, which is rolled into a pipe and welded at the edges. Note that the option with a pipe is better and has fewer difficulties.
- As a main tube, you can use a brass or copper tube 70-100 cm long. It is very important to select a tube of thickness so that it can be threaded onto which the nozzle will have to be screwed. In fact, the tube and the nozzle are the nozzle.
- The most difficult part in the design of a gas burner for a roof is the control valve. Any shut-off valves will not work here. The best option is to install a gas tap or valve that opens and closes the gas supply to the burner in a gas household stove.
- The handle should just be comfortable, so you can make it yourself from wood and fit it to your hand.
- There is no need to invent a propane cylinder, a reducer for it and a hose; everything can be bought ready-made.
Gas burner assembly
First of all, you need to cut an internal thread at one end of the copper tube using a tap of the appropriate diameter. Copper is not a very hard metal, so it will not be difficult to carry out this operation with your own hands. It will also be easy to screw in the jet.
With a glass everything is more complicated. To do this, you will have to cut one side of the pipe into several longitudinal petals (6-8 pieces), and then bend them towards the center. You will get a cone, but there is no need to bring the petals to the end; you need to leave room for the main tube, onto which the glass is placed. After which the petals are pressed against the tube, where they are sealed. There are slots between the petals that will serve as air supply inside the nozzle. The length of the petals is approximately one third of the entire length of the glass.
How to make a gas forge with your own hands
Most metal shops require a forge. You cannot do without such equipment when working not only with cold, but also with hot forging. The necessary equipment can be purchased, but its cost is very high: the minimum price is several tens of thousands of rubles. For this reason, many workshop owners decide to make a gas forge with their own hands.
Stone or charcoal, oil products or gas can be used as fuel for the forge. A gas forge is the optimal equipment option for a workshop due to the low cost of fuel and its availability. The efficiency of such a forge is high, and it can be connected not only to the main gas pipeline, but also to fuel cylinders.
Purpose of the forge
Processing metal products requires heating them until they change color and acquire a light orange hue. Such changes in steel correspond to a temperature of 1000-1200 o C. The metal brought to this state is easily subject to deformation under the influence of impact tools.
The workpiece loses its plasticity as it cools, and accordingly, forging and giving it the desired shape becomes more difficult. Applying more force leads to deformation of the metal and increases its fragility. Maintaining the forging temperature avoids material destruction.
A conventional oven is not capable of producing a temperature of more than 1000 o C. For such purposes, ovens with forced air flow are used.
A forge is used to heat metal blanks and maintain the required temperature. Such equipment is used not only for forging, but also for melting and then pouring metal into a mold, hardening tools, and soldering using copper and brass.
Advantages of a gas forge
- The design of such equipment is simpler due to the absence of grates in it, in contrast to the same coal options;
- More convenient adjustment of fuel supply and temperature;
- Light weight allows the gas forge to be moved;
- The cost of self-production is small and will not affect the master’s budget;
- Gas is one of the most accessible and cheapest types of fuel.
Types of gas forges
The design features of the forges play virtually no role and are chosen by the master depending on his preferences and final wishes for the efficiency of the equipment. Often even the basic rule is neglected - creating a foundation from a fire-resistant hearth. However, there are several main types of forges.
Open
Metal structure installed on a fireproof foundation. Its role can be a concrete platform or fire-resistant bricks. For this design, a special tray is created in which parts are placed for subsequent heating. On the sides there are vertical posts on which the burner for the gas furnace is mounted.
With this design, the smoke is drawn out naturally during operation, and therefore there is no need to create an exhaust hood. But at the same time, the gas forge is placed either in a well-ventilated room or in the open air.
The advantage of this forge design is the possibility of heating different parts on a pallet, and their dimensions are limited only by the side racks.
Burner
It is not a separate type of forge, since it is an integral part of it. Its body is most often made of stainless steel; one end of the pipe is closed with a removable lid or welded. On the other hand, a metal mesh with a suitable diameter is installed - it depends on the desired torch.
A pipe through which the fuel mixture will be supplied is welded to the side of the closed end of the pipe. It is attached to a pipe of smaller diameter through which gas flows from the compressor.
The impeller is installed to enrich the fuel mixture with air.
Closed
The main difference between a gas forge of this type and others is the type of draft. In this design it is forced and carried out by means of a fan. This option is optimal because it allows you to ventilate the entire room.
The oven is made in a cubic shape from refractory bricks. A homemade gas forge for domestic needs is usually small - its sides rarely exceed one meter in length. An umbrella is placed on top - a metal cover made of a 4 mm thick sheet of metal. The internal volume must be completely sealed, otherwise the efficiency of the forge will be low.
How to make a gas forge with your own hands
The main requirement for the design is lightness and practicality. Thanks to these qualities, the equipment can be easily moved from place to place.
To achieve the required result, the gas furnace is made of refractory blocks - either refractory bricks or so-called fireclay bricks play their role.
The process of how to make a gas forge consists of several stages:
- Fireproof blocks or bricks are prepared.
- The body of the forge is created - the number of parts used may vary depending on the complexity and size of the chosen design.
- The body can be processed with a hacksaw or any other tool.
- There should be no gaps between individual blocks or bricks - all elements should fit as tightly as possible to each other.
- A small threshold is created from half a brick or block at the front of the structure, allowing the forge to maintain a high temperature.
- A small rectangular hole is cut in the back, which will serve for ventilation. In addition, such a cutout will allow you to work with long metal workpieces.
- A hole is cut in the side wall to the diameter of the gas burner.
The gas forge can be considered complete after completing the described manipulations. To operate it, you only need a gas burner and testing the entire device in practice.
Gas burner for forge
The main part of the forge is the gas burner - it is this that creates the temperature necessary for processing metals. Craftsmen most often make burners from stainless steel, using a pipe welded at one end and covered with a metal mesh at the other.
The diameter of the hole is selected individually, depending on how strong the flame should be. An additional pipe is connected to the burner, through which the fuel mixture is supplied. You can use the finished forge only after the burner operation has been adjusted.
Blacksmith's forge from a bucket
You can create a forge at home from available materials - for example, an ordinary bucket.
Creating such a furnace is quite simple: holes are made in the walls, the inner surface of the metal is lined with ceramic wool, capable of withstanding temperatures of more than 1200 degrees. Since the bucket has a cone shape, it must be positioned correctly, for which legs are installed.
A hole for the burner is created in the middle part of the forge, and a ventilation hole is cut in the bottom. Fireclay brick, which has increased fire resistance, is placed on the bottom. Finished equipment is often coated with a layer of heat-resistant paint.
Useful tips
- Cutting a small hole in the back of the forge will improve ventilation. In addition, this cutout allows you to heat long metal workpieces.
- The forge is placed on a special metal stand or table, which makes working with it more convenient. The height is selected individually by the master.
- If a forge shop works with workpieces of different sizes and shapes, then it is advisable to install several forges of different dimensions at once. They are placed close to each other, and gas and air are supplied using flexible hoses. This design solution allows you to quickly reconnect the burners.
- Each gas pipeline must have a shut-off valve. For this purpose, conventional valves are most often used - they provide smoother adjustment, unlike ball analogues.
The main thing in creating a forge with your own hands is to understand the principle of operation, select the right materials and follow safety precautions. Such equipment is created by craftsmen based on personal preferences, wishes and requirements, which provides wide scope for activity.