The gas burner has long become a familiar tool for the home craftsman. However, there are areas and situations in which gas is not available. But there is always gasoline at hand. In this case, a compact and easy-to-use device comes to the rescue—a gasoline soldering torch. The simplicity of the design allows you to make such a device yourself.
Design and advantages
The soldering device is very simple. its main components are:
- container for gasoline;
- air pump;
- supply hoses;
- body with nozzles.
The housing contains:
- nozzle;
- limiter;
- valve;
- air regulator;
- rings for sealing.
A gasoline soldering device has the following advantages:
- small size and weight;
- mobility;
- combustion stability;
- high soldering temperature.
Gasoline burner device
Due to the simplicity of the design and the absence of expensive and complex parts, a gas-air soldering torch is quite affordable for self-production.
Gasoline torch for soldering - self-made
A DIY gasoline torch for soldering does not require expensive materials or purchased components. In most cases, a gas-air burner successfully replaces a gas burner. It is especially convenient for long trips into nature by car or motor boat. It will allow you not only to cook food or singe game, but also to quickly repair minor breakdowns right on the spot. And upon returning home, a self-made gasoline burner will again take its place in the workshop, allowing you to engage in technical or artistic creativity. In order to make such a device, you need to have metalworking and welding skills.
Homemade gasoline burner
Buy or make a burner yourself
Buying a gasoline burner in a store is the easiest option. Understanding which model is best for you is quite a difficult task, because everything depends on the design features.
Sometimes burners are heavy, so you won’t be able to take them with you, especially if you don’t have a vehicle.
Factory-made burners are extremely expensive, and for their stable operation you need to buy only high-quality fuel.
- Creating a BG yourself has certain advantages.
- Firstly, you can refuel such burners with the most affordable fuel, and secondly, you can create a drawing of a gasoline burner and make exactly the device you wanted.
- And thirdly, you can install accessible consumables that you can quickly change while using the burners.
We are confident that this article will help you create a homemade gasoline burner. We wish you good luck!
Step-by-step manufacturing process
The following is the sequence of operations for manufacturing a gas-air burner:
- The body is made on a lathe or milling machine; on one side it must be open, on the other it must be closed with a plug.
- A hole is drilled in the plug. Its diameter should exceed the outer diameter of the nozzle by fractions of a millimeter. It should fit tightly.
- A ring of fine wire mesh is placed inside the housing.
- A limiter and a bushing with a hook are cut out of a sheet of metal.
- The handle is made from dense wood.
- The tube is passed through a hole in the housing so that its end becomes the burner nozzle.
- The end of the tube is sealed with refractory solder.
- a 0.2 mm hole is drilled in the solder. You can solder a ready-made jet of suitable diameter into the end of the tube.
Do-it-yourself gasoline burner assembly
You can make refractory solder yourself from finely chopped pieces of copper and zinc. Zinc is taken from the battery glass, crushed and poured with weak hydrochloric acid. Then copper and borax are added. The resulting mixture is calcined in a crucible.
Gasoline Burner made from grass material for 62 rubles
Good afternoon everyone. There was a need for a burner for garage work, I looked at the forums and was inspired to do something similar to Roman’s
The task was set as follows: minimum financial costs (made from the material that is in the garage); minimum labor costs and minimum tools for manufacturing.
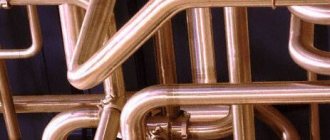
What materials are needed: copper tube for the burner base D-10 mm internal d - 7 mm (about 7.5 cm), copper tube D-5 mm internal d - 2.8 mm (about 21 cm), used a can from a CO2 siphon, any suitable brass faucet (I have one from a car from an engine block to drain the coolant), any tube D - 10 mm for the handle (about 10 cm) and a piece of tube D - 8 mm for the hose fitting. A piece of sheet brass 1-2 mm thick. You can use 10 kopecks from 2003 (if newer, they are already made of copper-plated steel, a distinctive feature from old coins is the absence of a notch on the edge and is magnetic).
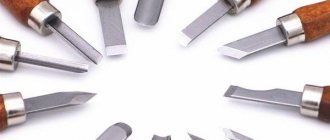
What tools were needed: for soldering you need everything in the photo
a carbide rod was given by a friend of the refrigerator, a drill bit from the store was 12 rubles. Hacksaw, pliers, file, sandpaper, drills - 1 mm, 1.5 mm, 5 mm, 6 mm, 10 mm, hammer, core, calipers, drill, yews.
Initially, I made a jet, I simply tapped the edge of the 5 mm tube on an anvil with a hammer until it completely touched the walls, then with a 1.5 mm drill. I drilled a hole in the center and filed the irregularities. Then I prepared the nozzle itself by sawing off the bottom of the can at the very bend and drilling a 5 mm hole. in the neck and 10 mm. near the shoulder. I used a bottle from a siphon, because its diameter and especially the upper part, with minimal modifications, turns into a nozzle. The internal diameter of my bottle turned out to be 17 mm, and the diameter of a 10-kopeck coin was 17.5 mm, but I found a brass washer that was completely suitable even I didn't finish the hole. I marked the washer like this: I inserted an M5 screw into the hole and tightened the nut, it turned out to be a kind of mandrel. I clamped the screw into the drill and touched it with a scriber in three places, getting stripes. Then we core as evenly as possible and drill 3 rows of 1 mm holes. from the edge. I managed to break 2 pieces (25 rubles each, the brass was a piece of cake) and unfortunately I couldn’t get the pieces, so I drilled nearby. Photo
Then I prepared the faucet and tube for a 10 mm wide flame. I wanted to strengthen the connection of the tube to the faucet and I made a brass insert (as it turned out in vain). Photo
We had to make a 15 mm coupling for the taper thread of the M10x1 tap, although it was possible to solder the handle tube directly to the thread at the end. Well, the tube section D is 8 mm. for the hose into the handle tube (optional, depending on who has which hose). Photo
Assembly view in the photo.
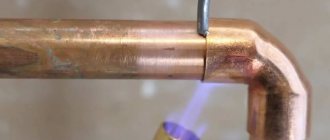
Well, now the most difficult thing for me, since this is my first time soldering with hard solder. I soldered a length of D-8 mm to the handle tube without any problems. inserted into the end by 4-5 mm. and a threaded coupling. I soldered with a gas torch without external heating with borax, although here it was possible to solder with tin. But no matter how hard I tried to solder the copper tube to the faucet, it didn’t work, the solder didn’t flow. I remembered about the blowtorch and soldered it in no time. Then I soldered the nozzle itself to the tube. Photo
Now we assemble the nozzle. Since my mesh is fitted with tension, I did not attach it additionally. I pressed it evenly from the edge by 6 mm, check with a caliper. Photo
Now I twisted everything into a pile and, having previously measured it, bent the 5 mm central tube through a spark plug wrench (or any suitable mandrel). Photo
I drilled a 5 mm hole in the handle tube in place. I put the central tube in place, the end of the nozzle 4 mm from the grill and soldered it with a soldering iron (tin with rosin), heating the tube with a gas burner if necessary. I haven't soldered the central tube to the nozzle yet for ease of setup. Photo
I assembled the faucet and it turned out to be a burner, although without a wooden handle. Photo
Now the most exciting thing is to pour gasoline into the burbulator like the respected Yuri (bim) https://www.chipmaker...72/page__st__40 and move on to full-scale tests.
There can be many modes, each for its own purposes. Needle Photo
"blowtorch"
and average
Of course, the quality is not the same as Roman’s, although my burner is somehow closer to me. The costs were: drill - 12 rubles, 2 drills 1 mm 50 rubles and then 62 rubles. but happiness does not lie in this, but in the pleasure received from the hobby. I would be glad if I helped someone with my opus.
Prevention of clogging
During operation, the gasoline soldering device inevitably becomes clogged. This occurs, first of all, from the use of low-quality gasoline. Soot forms on the nozzle, and contaminants in the form of plaque can be deposited on the walls of the tube. If the tube and air flow control elements are clogged, air from the compressor flows downwards without mixing with gasoline in the required proportion.
Experienced professionals recommend the following ways to prevent clogging:
- Use high-quality fuel.
- After each use, wait until the nozzle cools down and wipe off carbon deposits with a rag soaked in gasoline.
- Once a month, you should wash the burner parts with carburetor cleaner. It will remove deposits from the walls of the tube.
Soldering with a homemade gasoline torch
Regular maintenance of the gasoline soldering device will allow it to serve for a long time and without annoying failures.
If you find an error, please select a piece of text and press Ctrl+Enter.
Source: stankiexpert.ru
Preventing clogging
During use, the channels or nozzles for supplying the combustible mixture may become clogged.
To prevent this from happening, it is important to follow these recommendations:
- Use gasoline with the lowest octane number.
- Each use of the burner must be completed by thoroughly cleaning the device.
- Once a month, add high-quality injector additives to gasoline.
- Systematically clean the system with carburetor cleaner. Such products fight very well against various deposits in fuel channels and jets.
Gasoline torch for soldering: how to make it yourself
A gasoline torch for soldering and welding has a single purpose - to perform high-quality connections of various metal parts using liquid metal. The gasoline soldering device operates thanks to the gasoline-air combustible mixture formed in the burner and making it possible to carry out smelting work.
Using a rotary tap located on the handle, the direction and power of the flame can be adjusted, which makes the work process even more convenient.
The melting process is carried out by two types of solders: low-melting and refractory . If almost any type of soldering iron can be used to work with low-melting metals, then to solder refractory metals it is necessary to create a very high temperature, which only a torch can do. There are several varieties of this universal device, operating on different types of fuel, but they all allow you to get a high temperature.
The most common and convenient are soldering and welding torches operating on a fuel-air mixture and gas. Such devices can either be purchased at a specialized store or made with your own hands.
Advantages and disadvantages of a gasoline burner
Among the main advantages of BG are the following:
- Proper functioning of the burner at an altitude of 3-4 thousand above sea level.
- The burner can operate normally even at minus 40 degrees Celsius.
- Fuel such as gasoline costs much less, especially when compared with gas.
- Light weight burner and ease of use.
- You can take the burner anywhere, for example, fishing, hunting or just on a hike.
- This device is convenient to use during installation work.
- The high temperature at the outlet allows you to work with various types of metals and alloys.
- You can use other fuel: kerosene, alcohol or diesel fuel.
But a gasoline burner also has disadvantages:
- High fire hazard, especially during fuel filling.
- Most often, the fuel torch is uneven.
- Soot may appear during operation.
- It is important to use pure high-octane gasoline, otherwise the throttle hole will quickly become clogged.
Device design and advantages
A gasoline torch for soldering and welding has the following components:
- burner;
- nozzle;
- current-carrying tip with electrode wire;
- welding arc;
- weld pool;
- Weld;
- base metal;
- drops of electrode metal;
- gas protection.
In a simplified version, the device consists of a gasoline tank or fuel tank, an air compressor, gasoline hoses and, in fact, the burner itself. The latter, in turn, also consists of several elements.
A gasoline torch for metal soldering includes the following parts (structural parts):
- frame;
- a bushing with a hook made of metal;
- a tube;
- heap;
- emphasis;
- filler;
- air flow regulating ball;
- rubber o-ring.
When purchasing a gasoline torch for soldering and welding, you should not forget that most often the device does not include gas-resistant hoses and torches, so most likely you will need to purchase them separately.
Gasoline and gas burners are designed quite simply , so they can also be made with your own hands at home without much difficulty.
Despite the simplicity of assembly and design of the device, a gasoline torch for soldering and welding has undeniable advantages. Firstly, the low weight and size of the device make it lightweight, portable and convenient to use at work. Secondly, thanks to the creation of a fuel-air mixture, the device ensures the appearance and retention of high temperatures, which, in turn, guarantees the highest quality result upon completion of the soldering process.
Do-it-yourself gasoline burner for melting
Parameters and materials required for work
Purchasing a new gas or gasoline burner is not always possible due to the relative high cost of the device, while used devices may not bring the expected result due to the presence of hidden defects or breakdowns. For this reason, many men prefer to make a high-quality and inexpensive device with their own hands. As mentioned earlier, even an unprofessional welder can build a gasoline burner for melting with his own hands at home, saving a lot of money and not spending much time on it.
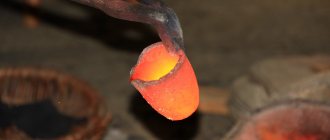
If you bring a pre-lit match to a homemade gasoline burner, the fire should flare up instantly and ensure a steady burning of gasoline for 3-7 minutes. The flame temperature should be more than a thousand degrees. With such a device, without any difficulties, it will be possible to melt various solders (including hard ones) and metals, soften glass, and also perform various types of heat treatment on all kinds of small-sized tools.
How to set up a gasoline burner
Well, now how to use it. We adjust the supply of the fuel-air mixture using a faucet on the generator.
Incorrect (rich mixture)
Using a tap on the burner, we regulate the flow of the mixture from the central nozzle, making the torch narrower or, conversely, wider.
The length of the entire torch turned out to be about 8 cm, and the central one was about 3 cm.
The attempt to melt the copper was successful, which means the temperature in the burner is clearly above 1000 degrees.
During operation, I adjusted the supply of the fuel-air mixture several times as the torch lost its shape. I think this is due to the poor quality of gasoline and the many additives in it. After half an hour, the gasoline acquired a cloudy color, and the fuel-air mixture became very lean and I had to completely close the tap so that all the air could pass through the gasoline. By the way, with fresh gasoline, the mixture was very rich and the valve was practically closed and most of the air passed past the generator.
Overall, it turned out to be a very useful thing that will definitely come in handy in every workshop. It is made quite simply and does not require any specific knowledge or materials to make it. Anyone can replicate this device.
DIY gasoline burner
Among the most useful and functional devices for the home workshop, a gasoline soldering torch occupies one of the leading places . Such a device is capable of qualitatively connecting all kinds of metal structures using liquid metal technology. The device operates on the basis of a gasoline-air combustible mixture, which is formed in the burner, and allows further smelting work to be carried out.
The rotary tap located on the handle acts as a regulator of the direction and power of the flame , which significantly simplifies the combustion process.
Today, metal smelting is carried out using two types of solders:
If when working with low-melting metals almost all existing types of soldering irons are used, then in the case of refractory metals it is necessary to create maximum temperature indicators . In this case, you simply cannot do without using a burner. Currently, there are several varieties of such a universal device that can operate on the basis of different fuel mixtures, but at the same time heat the structure to the required temperature.
Among the most common and convenient torches are models for soldering and welding, which operate on gas or a gas-air mixture. You can purchase them at the appropriate store or try to create them yourself .
Gasoline burners and liquid fuel burners: types, manufacturers, prices
Among the liquid fuel burners on sale today, you can find both models that are well known to tourists and climbers with Soviet experience, as well as new types of burners.
At the same time, the first group is both a “rehash” of the Soviet “Bumblebees” and “Tourist”, the creation of ) and Zaporozhye (“Motor Sich Pt-2” and “Motor Sich Pt-3”), and the models that have finally reached us, which have become prototypes for domestic primus tourist "Ogonyok" and "Tourist", which we have already described in detail in one of our materials.
Classification of liquid fuel burners
By fuel type:
- petrol: petrol 80, petrol "Galosha", special. petrol;
- liquid fuels: gasoline, kerosene, aviation fuel.
According to the method of increasing pressure in the fuel tank:
- pumpless (pressure rises by heating);
- pumping (pressure is pumped up by a pump).
By design:
- hose (the container with fuel is connected to the burner with a special hose);
- hoseless (the container is part of the burner itself).
As an example, we can cite some of the most interesting, in our opinion, models.
Pumpless hoseless. The iconic Optimus Svea burner belongs to this family.
The Optimus Svea 123R burner is recognizable as a “tourist’s dream” - the Ogonyok Primus. Quite miniature – 550 g, this tourist petrol burner is an esthete’s dream. It is made of brass and looks like an antique. Some tourists note that the burner is very demanding on the quality of fuel; it runs only on low-octane white gasoline (“Galosh”), fuel with a higher octane number leads to overheating of the burner and its explosion. It costs a little more than 4,000 rubles.
Hoseless pumps. Here we can see the mega-popular “Tourist” prototype from the Optimus company, models from the CIS countries, camping gasoline burners from the Coleman company (the so-called American bumblebees).
Tourist liquid fuel burner Optimus Hiker+, many will recognize it as the “Tourist” Primus, complete with a pump. The burner is of excellent quality and solid weight - more than 1.5 kg, a power of more than 2.8 W and impressive omnivorousness (it even feeds on alcohol). Due to its massiveness, today it is unlikely that anyone will take it to the mountains. Its attractiveness is also reduced by its price - more than 8,000 rubles.
Liquid fuel burner Motor Sich PT3 - Ukrainian comrades either improved the Soviet “Tourist” by adding a pump to it, or Optimus Hiker+, increasing its weight to 2.2 kg. The only good thing about Motor Sich PT3 is the price of 1,700 rubles. For the same amount, they worked on the “Bumblebee” - the result was a Motor Sich PT2 gasoline burner, although some argue that its design was borrowed from Coleman. We don’t know what was borrowed there, but it weighs 1.4 kg, i.e. 2 times heavier than the Coleman indicated above. Maybe despite the fact that she’s terrible on the outside, she’s really okay on the inside?
Gasoline burners “Dastan” and “Dastan in a pot” aka “Bumblebee 2” are a gift from Kyrgyz manufacturers to budget tourists. For 2000 - 2500 rubles. you can buy the good old classic weighing 1.7 kg.
The manufacturer positions the camping gasoline burners Coleman Sportster and Coleman Feather as liquid fuel burners, but according to reviews from tourists, they do not tolerate low-quality fuel, incl. high octane gasoline with additives. Because of them, the generator becomes coked, which then has to be replaced (fortunately, they are on sale). It is also necessary to use a “native” funnel with foam rubber, which acts as a filter, to fill fuel. The weight of these burners is 600 g, the price is from 4700 rubles.
Pump hose. This type of burner is produced by almost all well-known manufacturers: MSR, Primus, Kovea, Optimus. Their cost starts from 4300 rubles, weight from 330 g.
Chinese gasoline burner Fire-Maple TURBO FMS-F5 is the lightest gasoline burner in the world. Its weight is 180 g, and the holders can be adjusted to heat large dishes. Price: from 4300 rub.
Homemade burner: description and characteristics of the device
If we talk about the burner design, it includes the following components and elements:
- The burner itself.
- Nozzle.
- Conductive tip with electrode wire.
- Welding arc.
- Welding pool.
- Weld.
- Base metal.
- Drops of electrode metal.
- Gas protection.
A simplified version includes a gasoline tank or fuel tank, an air compressor, gasoline hoses and the burner itself, which, in turn, consists of individual parts.
Models that are used for soldering metals have the following structural elements:
- Body.
- Metal sleeve with hook.
- With a pipe.
- In a bunch.
- With emphasis.
- Filler.
- A control ball (designed to change the air flow).
- Rubber sealing ring.
If you are going to purchase a torch for soldering and welding, do not forget to pay attention to the presence of gas-resistant hoses . In most cases, they are not included in the basic kit, so there is a need for additional purchase of such parts.
The design of gasoline and gas burners is very simple , so you can make the design at home using improvised materials. However, despite the ease of assembly and the absence of complications in the configuration of the device, the gasoline burner remains a very valuable tool, which is characterized by many undeniable advantages.
- Firstly, such a solution is lightweight and compact in size, which makes it very convenient for further use.
- Secondly, the creation of a gasoline-air mixture allows you to create and maintain a high temperature regime, which is necessary to achieve maximum quality of the final result.
Making a gasoline burner with your own hands
Not everyone can purchase a new burner that runs on gas or a fuel-air mixture, which is due to the relative high cost of the device . And the purchased model does not always cope with the assigned tasks, especially if it has already been used. This may be due to the presence of hidden defects or breakdowns.
To avoid becoming a victim of such an unwise purchase, many men prefer homemade solutions, which are particularly affordable and easy to assemble. As mentioned earlier, even the most inexperienced welder can easily install such a device using improvised means, saving himself from high costs.
If a homemade gasoline burner is made taking into account the basic rules and recommendations, it should produce fire immediately after a lit match is brought to it. In this case, stable and steady combustion of the fuel-air mixture will be noticeable for another 3-7 minutes. During the combustion process, it is possible to reach temperatures up to 1000 degrees Celsius. Using such a device, you can successfully melt all kinds of solder, including hard solder, as well as metals and glass. In addition, the burner easily solves the problem of heat treatment of small-sized products.
To make a device with your own hands, it is enough to use a number of materials. Among them:
- Frame.
- Pen.
- Sleeve.
- Hook.
- Emphasis.
- A tube.
- Balloon.
- Ring.
- Rubber bulb.
- Filler.
Gasoline-air torch for do-it-yourself soldering
If there is a need to reproduce the soldering (welding) process at home, then a gasoline torch will help you with small metal parts.
This type of metalworking equipment is sometimes sold in specialized stores.
Due to the simplicity of the design, interchangeability and accessibility of individual components of the unit, modifications of burners made by hand are successfully used in everyday life.
The material in this article will tell you about torches for soldering and welding metals and the possibility of their production at home.
Gasoline blow torch
A gasoline burner is designed for the process of high-quality fastening (soldering) together of metal components of a single structure using molten metal. The solder used for soldering has a solid physical state and can be either low-melting or refractory.
Work with a refractory alloy is carried out exclusively with burners.
Design and principle of operation
When purchasing a gas torch for metalworking by soldering and welding, you should not assume that the kit contains all the elements necessary to organize the work.
Since each gas-air burner apparatus has individual drawings, and there are no clearly defined design standards, we will consider the basic (simplified) set of working elements:
- tank for storing gasoline (fuel);
- air compressor;
- gasoline blow torch;
- gas-resistant hoses providing fuel supply,
- stand.
A gasoline burner is a heating device in which the combustion process of gasoline converts it into a gaseous state. Combustion occurs in the evaporator , where oxygen is supplied from the air by a nozzle.
As a result, a gasoline-air flammable cocktail is formed, a mixture of the combustion product of gasoline and air, which is involved in the soldering process.
The rotary tap located on the handle functions as a regulator of the direction and power of the flame.
Bring an open flame source to the nozzle of the working element and you will see an instant flash of a flammable mixture.
Stable combustion of fuel will last for 5 minutes (+/-2 minutes).
The temperature at the end of the flame reaches 1000° C or more.
Benefits and safety of work
Heating devices for soldering, the initial fuel of which is gasoline, have become widespread in various fields due to their ease of use and thermal performance.
A positive characteristic of the heating device is the ability to operate without preheating.
Advantages of gas burners:
- relatively small weight and dimensions of the device;
- portability and ease of use (compared to its gas counterpart);
- high-quality soldering and welding of metals.
The disadvantage of using the device is the presence of the smell of gasoline in insufficiently ventilated areas. When working with a gas burner, it is prohibited:
- operate the device as intended if a gasoline leak is detected;
- use substances not specified in the instructions as fuel;
- allow the fuel tank to heat up to 500C;
- refuel while soldering or open the container when the evaporator is not cooled down;
- Use in closed or unventilated areas.
Application area
Hard-melting solders and various metals and alloys (brass, bronze, etc.) can easily be soldered with a gas torch.
The unit carries out heat treatment (hardening) of small tools, is used in the artistic processing of wood, and even softens glass.
Petrol burner for jewelry - used for melting gold, silver and semi-precious metals. The set of dental equipment also includes a heating device for soldering metal and alloys.
A separate group is represented by tourist burners (primus), they come in gasoline, gas and multi-fuel types.
Do-it-yourself gas-air burner
The new acquisition of such equipment involves the purchase of individual working parts and their further independent assembly into a single unit. However, the design of the burner is quite simple, and if desired, it is possible to build it yourself, saving a certain amount of money.
Gasoline burner production
When making a gasoline burner with your own hands, the drawing contains further assembly elements: body, handle, bushing, hook, stop, tube, rubber ring, heating pad and filler.
The composite body of the gas burner is made from any type of steel using a lathe.
One side of the part is open, and the other is covered with a special plug with a hole.
The diameter of which is 0.1 mm larger than the outer diameter of the tube, this allows you to move the device body along the tube, while maintaining the tightness of the structure. A ring made of iron mesh and slag wool is placed inside, and a bushing with a hook and stop is made from sheet steel.
Nozzle with a hole of 0.2 mm. located at the end of the tube passed inside the body. To produce it, the tube is sealed with PMTs-54 hard solder and a hole with the required diameter is made.
The handle of the device is cut from hardwood.
During manufacturing, it is necessary to strictly adhere to the parallelism of the holes for mounting the inlet fittings.
The wooden handle is sanded and treated with several layers of wood varnish.
The gasoline torch for DIY soldering is ready for use.
Copper-zinc solder
Making homemade copper-zinc solder for soldering does not incur large physical and financial costs. Copper is obtained from cut calcined copper wire.
A zinc cap from an ordinary galvanic battery is calcined over a fire and placed in cold water and a weakly concentrated solution of hydrochloric acid.
At the end of the heat treatment, the finished zinc is finely cut with scissors.
Keeping the proportions, pieces of zinc and copper are covered with borax and placed in a crucible.
The joining of metals into solder is carried out in the torch.
The resulting workpiece is cooled and leveled in a vice with a file, the chips are picked up and mixed with borax again.
Gasoline torches for soldering and everything connected with them
The gasoline soldering (smelting) apparatus is designed to form a gasoline-air combustible mixture.
A gasoline torch for soldering and melting metal runs on a gasoline mixture.
These burners offer convenient flame adjustment using a rotary tap located on the handle.
Advantages of the device
Advantages:
- The device is portable;
- Low weight of the device;
- Ease of use;
- High-quality result upon completion of soldering (melting).
Gas burner device
Components:
- Gasoline tank;
- Air compressor;
- Gasoline hoses;
- Burner.
Please note that torches and hoses, as a rule, are not included in the kit for gasoline soldering. In this regard, the purchase of these elements is made separately.
Do-it-yourself gasoline torch for soldering
Purchasing a ready-made gas burner is not always possible (for various reasons).
In this case, it will be useful to know that you can make a gasoline torch for soldering yourself.
Note that homemade gasoline devices are no worse than purchased ones. A DIY device is just as effective.
If you bring a lit match to the spout of a gasoline burner, you will be able to see a fire instantly flare up.
Steady combustion of gasoline will continue for five minutes (+/-2 minutes).
The flame temperature at its tip will reach more than 1000° C.
Note that with such a burner you can easily melt hard solders, heat treat small tools, melt various metals, solders, and even soften glass.
There is no need to make many parts of a homemade gas burner, since they can be borrowed from other things. For example, homemade parts such as a rubber bulb can be made from a spray bottle.
The homemade burner device contains:
- Frame;
- Sleeve with hook;
- A tube;
- Emphasis;
- Pen;
- Rubber ring;
- Balloon;
- Pen;
- Rubber bulb;
- Filler.
Manufacturing:
- The burner body can be turned on a lathe. Any grade of steel can be used as a material for the manufacture of this important part. It is worth paying attention to the fact that the body of the part is composite (one end is open, and the other is closed with a plug). There is a hole in the plug, the diameter of which is 0.1 millimeters larger than the outer diameter of the tube. With this quality, the body can move along the tube quite tightly, while maintaining a tight seal.
- A ring made of metal mesh and slag wool must be installed inside the housing.
- Next, you need to make a sleeve with a hook and a stop. You can use a steel sheet for this.
- The burner handle, which is essential for a gasoline device, is carved from beech or oak.
- The holes for the tubes (2 pcs.) are drilled very carefully. Thus, the axes of the holes should be strictly parallel. The finished handle is sanded and then coated with several layers of colorless varnish.
- Next, it is necessary that the end of the tube, which is passed inside the body, forms a nozzle. If you have PMTs-54 hard solder (adheres well to steel), try to solder the end of the tube with it, and then drill a 0.2 millimeter (diameter) hole along the axis of the tube. You can make your own solder. It must be said that solder consists of copper and zinc. In order to get zinc, you can use cups from an old electric battery. You need to empty the glass of its contents and then heat it over the fire. Next, you need to lower it into cold water, and then into a weak solution of hydrochloric acid. A clean glass is cut into pieces with scissors. Thus, we obtain zinc. Now it's up to copper. To do this, do the following: take copper wire; anneal it on fire; Finely cut the wire using scissors. Now you can pour pieces of copper and zinc into the crucible, maintaining equal proportions, after which you need to sprinkle with borax. Metals can be fused using a burner. After this, you will need to cool the resulting block and secure it in a vice. Then use a hog file to file it on all sides. The resulting sawdust must be mixed with borax.
My homemade gasoline burner
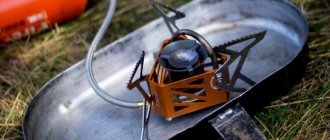
Hello, friends. So I got the idea to review my homemade gasoline burner for melting precious metals and copper alloys. I would like to note that this project did not incur any special financial expenses, all you need is desire, inspiration and three free evenings after work. Let me start with the fact that its device is not very complicated, it runs on a gasoline-air mixture and is connected to a 220 V network.
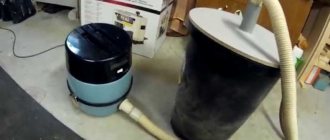
Consists of an old but working refrigerator compressor
A regular switch and start relay (from the same refrigerator). When disassembling the refrigerator, I sketched out the connection diagram, where which wire goes, etc., which made the installation much easier for me, since I am not an electrician.
How to make a gas-air mixture generator for a gasoline burner
While all this is drying, you can start making a gasoline-air mixture generator. We will make it from an ordinary glass jar with a screw-on lid.
We drill two holes in the lid for the tubes.
We make one tube to the very bottom of the can, and the second is short, through which the gas will escape. We glue them with the same glue that we used to glue the handle.
We will also need two three-pieces, a faucet and metal sponges for dishes. We tear apart the sponges, giving them more volume and stuff them into a jar. They will perform two functions at once. Firstly, do not allow the resulting foam to rise high and get into the tube for supplying the gasoline-air mixture, and secondly, serve as a kind of radiator that significantly increases the generation of gasoline vapors. Fill the jar about 1/3 with gasoline.
We connect the tees and taps with silicone tubes and connect them to the generator.
We connect the output from the long tube to the compressor, and from the short one to the burner. A compressor for a gasoline burner can be used from an old refrigerator.
During testing, I trimmed the nozzle a little more because the torch was not stable. The depth of the nozzle to the divider was 11 mm.