Types of burners used for gas combustion
The choice of the optimal design of the forge burner is related to the issues of the amount of metal waste during heating for forging, the intensity of surface scaling, as well as the total gas consumption.
Closed-type furnaces require short-flame burners that provide rapid and intense mixing of the combustible mixture. It is then that the efficiency will be maximum, and the removal of combustion products from the working chamber of the forge will be uniform and efficient. Thus, the gas burner must provide:
- The greatest angle of inclination of the finished gas-air mixture at the entrance to the working space of the forge.
- High jet exit speed with a low height and large width.
- Gas ignition safety.
- Stability of the combustion process.
- Insensitive to high humidity inside the forge.
- Safety during the so-called “reverse strike”, when a sudden change in the direction of thrust can extinguish the torch, which almost immediately leads to an explosion of the flammable mixture in the furnace.
Gas burner drawings
Thus, for burning propane (from a cylinder or gas pipeline) the following are used:
- Injector burners providing self-suction of gas. Despite their simplicity, they are characterized by low efficiency, since they allow adjustment of the ratio of components for a relatively small range of values. Regarding a home-made forge, this most often leads to the need to work with a lack of air;
- Burners are tangential type (point jet), when the gas flows along the axis and the air flow tangentially to the mixer body. Mixing here occurs quite intensively, but pressure losses due to turbulence are also large. This affects the unevenness of the amount of air supplied to the forge, and it is greatest where the heated metal comes into contact with the hearth bottom. Accordingly, waste and scale formation increase. The positive quality of tangential burners is their simplicity and reliability;
- Vortex burners, where spiral guide plates are used to mix the flows. In such options, complete mixing occurs only at the mouth, so control by operation in this case is the best, and there is practically no pressure loss. Some of the disadvantages are the design complexity, which is why, even with drawings, making a vortex burner for a forge in a home workshop is very labor-intensive;
- Combined burners that combine tangential and direct-flow supply. The adjustability of the combustible mixture is the best, since by changing the amount of air supplied between the internal and external channels, you can adjust the length of the torch in the forge and, therefore, control the heating time of the workpieces for forging. The disadvantage of such designs is their large dimensions, which may be unacceptable for small forges. Also, the technical complexity of manufacturing a dual-flow burner can be considered a minus.
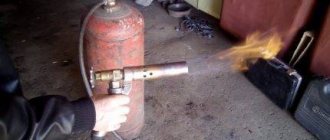
Homemade injection burner
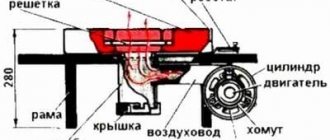
A homemade burner of a standard design is supplied with gas from a cylinder through a special hose, usually propane. There is no need for a reduction gear, since the flow of gas is regulated by the operating valve located on the cylinder.
Opening and shutting off the gas supply is carried out using a shut-off valve, other burner adjustments are made using the operating valve. The gas hose through which gas flows is connected to a special nozzle with a nipple.
This allows you to set the size and speed of the flame. The nipple and tube are placed in a metal cup. This is where propane is saturated with oxygen from the incoming air.
Standard gas burner circuit. Based on it, you can develop your own design. For ease of repair and operation, it is better to make it easily dismountable
From a metal cup, the combustible mixture enters the combustion zone through a nozzle under pressure. To ensure the process is continuous, there are special holes in the nozzle that act as additional ventilation.
To make your own, you will need a drawing of a gas burner for the forge, as well as a set of tools and materials:
- pieces of pipes, hardware;
- Bulgarian;
- semicircular or round file;
- drilling machine, if not, can be replaced with a drill;
- semi-automatic welding;
- tap, blade, drill, metal brush, hammer, pliers;
- circles - cleaning, cutting;
- sheet iron with a thickness of 1.2, 3 mm;
- protective equipment for welding.
All work on the manufacture of a fuel-burning device consists of five stages.
When creating a gas burner, the mandatory requirements for them must be taken into account: safety of gas ignition, stable combustion, safety in the event of a change in draft (backlash) and the likelihood of a flammable mixture flaring, insensitivity to moisture inside the hearth
At the first stage, a diffuser is made. As a starting material for it, you can take a piece of pipe of a suitable diameter. For example, a stainless steel muffler or a water pipe.
Using a grinder, cuts are made along the pipe to the required length. A bearing cage with a suitable diameter is stuffed onto the tube. The same is repeated on the other side.
The cuts are welded, then a flap circle is taken and the surface is processed until completely smooth. Brew and clean all existing pores and uncooked areas. Using a round or semicircular file, burrs are removed from the inside of the part.
To perform work in an economical mode at relatively low temperatures, pipe 3 has thin walls, which increases the speed of gases, promotes better mixing, and prevents the mixture from igniting in the pipe
The next step is making the mixer and confuser. The first one looks like a tube. A water pipe with a diameter of about 2 cm and a length of 9 cm is suitable. The tube is welded to the diffuser, and a confuser is welded to it - a cone for air intake.
The blank for it can be cut from a sheet 1.2 mm thick. Next, it is bent, the seam is welded and the finished part is welded to the mixer. A plane is made at the end for the abutment of the adjusting washer. By decreasing/increasing the gap between the confuser and the washer, the incoming air flow is adjusted.
Next, they begin to manufacture the mechanism for supplying the components of the gas-air mixture. At this stage you will need a bolt with a long M10 thread. The cap is cut off, then a through hole of 5 mm in diameter is drilled from the end, and an M6 thread is cut.
To create a nozzle, you can use a tip for supplying welding wire from a semi-automatic machine. Since it is quite long, it needs to be trimmed. In this case, approximately 3-4 mm should remain after the thread. The remaining part is enough to make another jet.
For further work, you will need a washer with an outer diameter of 43 mm. You can purchase it or make it yourself from a sheet of metal. A hole with a diameter of 1.2 cm is drilled in the center of the washer. An M10 nut is welded to the finished washer.
In the assembly of the unit, screw the nut onto the bolt, install the adjusting washer, and screw in the gas injector. The jet is inserted flush with the washer by rotating the latter. The first screwed nut is placed in the center of the thread
Before proceeding with installation, you need to make a fastening of the unit to the body in the form of a bracket. It can be cut from sheet metal. Without changing the position of the assembly, apply it to the confuser, attach the bracket and weld it to the nut and body. The welding location does not matter much, but it is necessary that the structure is rigid.
By screwing in and unscrewing the bolt, the degree of ejection is adjusted. As practice shows, the optimal result is achieved when the nozzle enters the confuser to a depth of about two mm. The amount of incoming air is adjusted with a washer.
The final stage is testing. To do this, put a hose on the bolt. The pressure indicator on the reducer is set to 0.2 kg/cm². You can experiment with this value, but you need to remember that with a large gas flow, the cylinder, especially with a capacity of 5 liters, can quickly freeze. In this case, a 0.6 mm nozzle is more suitable.
The washer must be completely closed before ignition or a small gap must be left. After igniting the gas, the air supply is gradually increased. The flame will acquire an increasingly rich blue color and gradually move away from the burner nose. A feature of the operation of a burner in an open hearth is that with further intensification of the air stream, the flame is separated from the burner and it extinguishes.
To avoid this phenomenon, a barrier (distributor) is placed along the flame path or the burner is used in a closed space. In this case, the fire escaping from the nozzle will ignite the gas and combustion will be maintained.
The injection burner is inserted into the forge through an equipped hole in the wall of a heat-insulated container. An important condition for safe operation is the presence of forced exhaust
If the burner is powered by main gas, then under ideal conditions its flame should be bright blue. When the gas source is a cylinder filled with a propane-butane mixture, the flammable mixture looks like yellow tongues.
This injection type burner works great in confined spaces. If you tune it well, you can get temperatures up to 1200⁰. These conditions are suitable for forging blanks from files, annealing blades, and melting non-ferrous metals.
Gas is supplied to the burner from the network or a cylinder, and the process is controlled by a regulator. To check the adjustment and pressure, carry out a test run of the gas or gas mixture, while monitoring the smell.
Purpose of the forge parts
Now let's go back to the list at the beginning and see what's in the forge for what. And then we’ll get down to making the forge using the samples discussed below or independently, based on the available materials and capabilities.
In industry, tables are mostly lined with quartz refractory brick; it lasts for decades under intense workload. A homemade furnace is usually lined with fireclay bricks, which are cheaper and more accessible. With irregular use, it will also last for years.
A firebox with a grate, an air chamber with drainage and a supply pipe with a valve form the heart of the forge - the tuyere. In industrial designs, replaceable lances are used for different heating methods and heated workpieces. For an amateur or individual craftsman, most often it is enough to have one grate tightly mounted into the table with a solid grate perforated with round holes.
Air drainage is necessary to accurately and quickly regulate the blast without taking your eyes off the workpiece. It will not be possible to forge an underheated part and it will not accept hardening; overheated and overdried, it will tear under a hammer, and in a quenching bath it will at least fail, or even crack. And in any case it will turn out to be unacceptably fragile. How to determine its readiness for forging or hardening by the appearance of a red-hot workpiece is a separate matter. But experienced blacksmiths know that they need to be able to release excess air into the atmosphere in seconds.
The purpose of the chamber, or tent, of the forge, together with its umbrella and chimney, is to remove flue gases from the working area. There are plenty of them released during the preparation of the coal mass (see below), and none of them are good for health. The draft in the chimney needs to be good, because... The front (working) window of the tent and openings for lengthy items (pipes, metal profiles) are constantly open.
As for the quenching bath and gas-air chamber, they may or may not be there, it’s at your discretion. A hardening bath is definitely needed if you are going to forge the so-called. Damascus, damask steel products. They need thermal shock hardening, i.e. from the forge - instantly into the bath.
The gas-air chamber is used in industry:
- For additional drying and heating of air.
- To clean blast air from impurities and condensate.
- For introducing gaseous alloying additives into the air.
At home, super-super special spas are not obtained; The problem of condensation in production occurs when blowing from a common compressed air network. In a low-power furnace, the air heats up sufficiently when passing through the holes of the lance grate, and household gas can be purified from sulfur by passing it through a layer of naphthalene, as mentioned above. In general, make a gas vent, don’t do it, it’s up to you.
Finally, the crucible. This is a heat-resistant cap that expands the extremely high temperature zone. It is installed if non-ferrous or precious metals and alloys are melted in a crucible in a furnace (melting point of gold is 1060 degrees, silver is 960, copper is 1080, brass and bronze is 900), parts are cemented in a muffle, etc. There is no point in looking for an expensive ready-made crucible; in a home forge, it can be completely replaced by a dozen fireclay bricks laid out on a dry surface, piece by piece. In this configuration, a homemade forge will replace an expensive muffle furnace.
Metal cutting. Equipment and tools for oxygen cutting
The following types of welding are used for metal: oxygen, oxygen-flux, plasma-arc, arc with an electrode, etc. The most widespread are oxygen and plasma cutting, which is divided into separation, the purpose of which is to separate one part of the metal from another, and surface ( fire), the purpose of which is to cut off a layer of metal.
The process of gas plasma oxygen cutting is based on the combustion of metal in an oxygen environment, in which the flame brings the metal to the combustion temperature, and a powerful stream of oxygen burns it and removes the resulting slag. The amount of heat generated when burning metal is quite large. This allows the hot flowing slag to heat the underlying layers of metal (more than 1 mm).
The metal to be cut with oxygen must satisfy the following conditions:
The ignition temperature of a metal in oxygen must be lower than its melting point. This condition is satisfied by steels containing up to 0.7% carbon. Conventional cutting of metals with a high carbon content is not possible. The same thing happens when cutting alloy steels; with increasing impurity content, cutting conditions worsen even with low carbon content;
The melting temperature of metal oxides must be lower than the melting temperature of the base metal. Cast iron and non-ferrous metals do not satisfy this condition, and, therefore, cannot be cut in the usual way;
the cut metal must have minimal thermal conductivity.
For cutting, the same equipment is used as for welding, with the exception of a torch, instead of which a cutter is used (Fig. 4.5).
Figure 4.5. Oxygen cutter
The cutter structurally combines the heating part and the cutting part. The heating part is similar to a welding torch. The cutting part consists of an additional tube 4 for supplying cutting oxygen. The mouthpiece contains two concentrically located holes for the exit of the heating flame 1 and the cutting jet 2. The mouthpiece of the cutter 3 forms a right angle with the barrel. When replacing acetylene with other flammable gases in the cutter, the cross-sections of the injector channels and the mixing chamber are increased. Manual cutting, due to the uneven movement of the cutter and the vibration of the cutting jet, does not provide a high quality cut surface, so the cut cavity is machined.
According to their purpose, cutters are divided into universal ones, which allow cutting of various shapes in any direction, and special ones, intended for certain operations (for cutting holes, etc.), as well as for surface cutting.
On a different fuel
This is how the ancient coal forge works. Initially it was heated with charcoal, then with coke. Both are almost pure carbon. In principle, the forge can also be heated with wood, allowing it to first burn down to coals, i.e. to charcoal; Let's see how further.
The design of the forge is greatly simplified if you use purified monogas, propane or butane as fuel. They consist of carbon and hydrogen, which is also an excellent reducing agent and, when combined with oxygen, produces even more heat. Moreover, the gas can be mixed with oxygen in advance, while still in the burner. We will also look further into how gas burners for a forge are constructed, but for now let us state a fact: a brick gas forge can be assembled in a hurry, as long as there is a burner, see fig. (You can also watch the video at the end of the section on how to make a gas forge yourself).
Simple brick gas forges
However, this applies only to pure monogases for industrial use. Household natural gas, firstly, consists of a mixture of saturated and unsaturated hydrocarbons, which have different oxygen requirements and different heat release for complete combustion. That is, it is fundamentally impossible to set up the optimal air supply for heating the metal for high-quality hardening or cementation.
Secondly, natural gas contains sulfur, silicon, and phosphorus in negligible quantities. At least in the form of an “odorant” – mercaptan – artificially introduced into household gas for immediate leak detection. If phosphorus and silicon, with precise dosage, can still be useful (the first - for surface phosphating; the second - for improving magnetic properties), then sulfur is the worst enemy of steel, completely killing its operational value, and irreversibly; restoration requires complete remelting.
Therefore, household gas can be used as fuel for the furnace, firstly, only after purification from sulfur-containing compounds. The simplest, but by no means free, method is to pass gas from a cylinder through a container with mothballs before feeding it into the burner. It desires sulfur no less than carbon desires oxygen. Secondly, heat in a gas furnace only parts that are not critical and will not be loaded in the future; say, decorative elements of artistic metalwork.
With or without an injector: how does it work?
There are two types of gas burners. Let's look at each of them in detail.
Burners without injector
Design of injection and non-injector burners.
These gas burners operate at high pressure, have a relatively simple design and are extremely efficient to use. Here is the algorithm in which they operate:
- The necessary oxygen is supplied from the air through special rubber slots and a valve, after which it enters the mixer.
- The function of the mixer is to divide the total flow into small jets that enter the nozzle. In the same way, the flow enters a special valve.
- Mixing of gas with oxygen occurs through circulation to ensure that the output is as homogeneous as possible.
- The mouthpiece at the tip is usually made of durable metal, such as copper. The mixture, heated to a very high temperature, comes out through it. The outlet temperature will be even higher than the melting point of metals.
The technical requirements for these devices are simple and specific: the gas flow must be uniform and have a specific speed that can be controlled and very accurately.
An additional requirement applies to the mixture: it must burn completely. The speed of the gas flow must be sufficient to prevent the flame from spreading to the top of the device, which is very, very dangerous due to the high risk of explosion.
On the other hand, the speed of the hot gas flow should not be too high due to the risk of the flame detaching from the mouthpiece with its subsequent attenuation.
How to calculate the optimal gas flow exit speed?
There are several factors to consider:
- composition of the combustible mixture;
- diameter of the inner wall of the nozzle;
- technical device of the mouthpiece.
The average speed is in the range of 70 – 150 m/sec.
Burners with injector
Methane, oxygen or acetylene are used as combustible gases, which are pumped into the mixer using an injector. This is the technological feature of the injection family of welding torches.
Here's how the injector design works:
- Combustible gas is pumped into the mixing chamber by an injector.
- Oxygen comes from the cylinder there too.
- After entering the mixer, the gas is mixed with oxygen in the air.
- The resulting mixture flows through the pipe into the mouthpiece.
- The gas pressure from the mouthpiece must be at least 3.5 atmospheres.
Injection models have a significant technological drawback that must be constantly remembered: the mixture of combustible gas and oxygen is not constant, it changes its composition all the time. As a result, the flame of such a gas burner, by definition, cannot be even and stable.
Such gas burners are used very widely, despite the low pressure and rather complex design. They have a built-in cooling system, since due to the low pressure the nozzle and mouthpiece become very hot. Therefore, the most important point is to control the overheating of the chamber so that it does not explode.
How to make a gas forge with your own hands
The main requirement for the design is lightness and practicality. Thanks to these qualities, the equipment can be easily moved from place to place.
To achieve the required result, the gas furnace is made of refractory blocks - either refractory bricks or so-called fireclay bricks play their role.
The process of how to make a gas forge consists of several stages:
- Fireproof blocks or bricks are prepared.
- The body of the forge is created - the number of parts used may vary depending on the complexity and size of the chosen design.
- The body can be processed with a hacksaw or any other tool.
- There should be no gaps between individual blocks or bricks - all elements should fit as tightly as possible to each other.
- A small threshold is created from half a brick or block at the front of the structure, allowing the forge to maintain a high temperature.
- A small rectangular hole is cut in the back, which will serve for ventilation. In addition, such a cutout will allow you to work with long metal workpieces.
- A hole is cut in the side wall to the diameter of the gas burner.
The gas forge can be considered complete after completing the described manipulations. To operate it, you only need a gas burner and testing the entire device in practice.
A few words about the air supply itself
Of course, something must force delicious oxygen into this pipe, which will heat the coals in the chamber to hellish temperatures. You can use blacksmith bellows. The kind our ancestors used in their forges. But this is not the best option, you need at least a couple of bellows to get the required temperature, and it would be nice to have an assistant who will tirelessly press the bellows. It is much more productive to use electric leaf blowers. For example, a turbine for inflating mattresses. I used an old Soviet vacuum cleaner. You can even twist the hose from blowing in to blowing out, but it broke. I had to tape the bag on the side where the air is blown out.
Open forges
An open forge gas forge consists of vertical stands on both sides of a metal container, which is installed on a fire-resistant base. The role of the base can be performed by:
- concrete floor (platform);
- several refractory bricks laid in a row, etc.
A gas burner is installed on the racks, with the nozzle pointing down. In most cases, forges are installed on a metal stand, which has a tray at the bottom for placing the workpieces to be processed.
Tips for use
Before starting work, it is necessary to check the presence of draft; its absence can lead to carbon monoxide poisoning. It is prohibited to determine the presence of draft using an open flame, as this may cause an explosion. The safest way to check is with a thin piece of paper or fabric. After checking, open the general valve on the gas pipeline, shutting off the primary air supply.
Then they light the burner and check the quality of the flame - the flame should be calm, even, not come off the burner, do not fall inward and not have a purple tint. At the end of the work, first turn off the primary air supply, then close the burner valve and shut off the general gas supply.
For more information about the forge burner, see the video below.
Portable
The next design is a portable forge made from... goose horn. The design is clear from Fig. The lining is fireclay marl mixed with fireclay sand (ground fireclay bricks, commercially available). Firing the lining after drying - as work progresses.
Portable goose horn
Pressurization is not necessarily a fan from a manual siren, as in Fig. You can use any suitable one, see below, by attaching it with a metal clamp. This, by the way, will make working with long items more convenient. In this case, at the blind end of the air duct, air drainage is required, similar to that for a mobile forge, which will be discussed later.
The capabilities of a goose forge are wider than those of a 6-brick one, because The workspace is larger and open at the top. But there are also significant disadvantages:
- Non-separable design: when cleaning the tuyere (see below about the stationary furnace), carbon deposits fall down and clog the perforation of the air duct, even if its holes are oriented sideways or downwards. To clean you have to break the lining.
- Works only on coke or charcoal, because... There is no table with space for burning.
- Expensive to operate: carbon consumption is comparable to that of coal in real furnaces.
- Low operating temperature, up to 900 degrees, because A lining that is not properly fired will crack.
About cavalry and sewing machines
Cavalry bugle
Once upon a time, every cavalry squadron of all the armies of the world had on its farm a portable forge with a foot drive from a crank mechanism for forging horseshoes and horseshoe nails. It was called cavalry, see fig. If we talk about non-volatile horns, then this is much more convenient than a fan from a siren: both hands are free. Moreover, savvy horsemen taught horses to press the pedal with their hoofs.
Nowadays the cavalry bugle can only be seen in the Red Army Museum. But – let us also be smart – old foot-powered sewing machines are still in use and sold. And this is the same crank with a drive pulley of a suitable diameter and a strong frame for the table. Plus wheels on which you can roll the forge.
Construction of blacksmith bellows
What kind of fan is needed?
Below we will move on to designs that are already quite functional, which require full blowing. And electricity for the fan can be found everywhere. But what kind of fan is needed for a forge? Once upon a time, forges were blown with bellows; For those who are curious about how blacksmith's bellows work, see Fig. on right.
As for productivity, 200-250 l/min is quite enough for a stationary coke furnace. That is, the fan motor power is sufficient from 80-100 W.
Much more important is that we need to push air through a fairly dense mass of sintered fuel
Therefore, when choosing a fan, first of all you need to pay attention to the pressure it creates at zero performance, the so-called
maximum pressure. The meaning of this parameter is simple: the fan will create the maximum pressure by forcing air into a closed cavity.
For the forge you need a maximum pressure of 220-230 mm. Hg Art., which corresponds to approximately 0.3 ati. Axial fans (impellers) of this type are created only by industrial ones, such as VN-2 or its analogues. Household exhaust and industrial cooling systems are not standardized in terms of maximum pressure at all and, as a rule, do not create what is needed.
In addition, they bring the air up to maximum pressure slowly, in minutes, and during delicate forging work, the blast needs to be changed in seconds. It is useless to install a receiver: when the valve is opened, the air in it will expand adiabatically, which at 0.3 ati will only produce zilch.
The final conclusion is that to pressurize the forge you need a centrifugal fan-volute. You don’t need to look at the specification; any centrifugal fan will provide the required maximum pressure based on the very principle of its operation. It is best to take snails from radiation protection systems of military equipment; they also have high productivity. True, the power supply is 12, 24 or 27 V DC, so you will need a transformer and a rectifier of appropriate power.
Any old household vacuum cleaner will work perfectly, but you need to take into account that its power will almost always be excessive. You should not reduce it with an LATR or a thyristor regulator: the motor will work in a difficult mode of excessive rotor slip and the service life of an already worn-out old man will be short. It is best to make a wide air drainage in the tuyere, as in the stationary forge described below.
Self-production
Mini horn
The smallest forge you can think of is a mini forge. For a novice blacksmith, this is the best option, intended for use only outdoors. The principles of construction are as follows:
Mini-forge drawing
- 6–8 bricks can be used as the main building material. Having built a stand from them, you can move on.
- The construction of a grate can be done using scraps of metal pipes and a fragment of a steel strip, the thickness of which should be at least 4–6 mm.
- Such a forge can be heated with either coal or coke. For ignition and blowing I use a regular blowtorch. It provides both heat supply and process continuity.
The use of a mini-forge indoors is prohibited due to the lack of a chimney in the structure.
Portable forge
The construction of a mobile forge can be carried out using kitchen utensils such as a goose pan. As a boost system, you can use a fan from a hand siren or any other suitable device.
A portable forge has certain disadvantages:
- its design is non-separable, so it is difficult to get rid of carbon deposits;
- does not allow creating very high temperatures, the maximum possible value is 900 °C;
- operation is quite expensive: only coke or charcoal can be used as fuel.
Despite this, this type of coal forge has many more possibilities than the homemade brick construction described above. This is due to the fact that the work space of a portable structure is open at the top and is much larger.
Stationary forge
This design is the most complex from a construction point of view. Experienced craftsmen manufacture the forge independently, taking into account their own anthropometric data. Its ergonomics must be honed to the smallest detail: the work performed here is often very dangerous.
So, when building a stationary forge, it is necessary to proceed from your own physical data. To do this you need to measure:
- Table height. Stand up straight with your feet shoulder-width apart. The right arm must first be lowered and then bent at the elbow. This will be the height of the table, to which you need to add 5–7 cm.
- Half the diagonal of the table. You need to take large pliers in the same hand and measure the distance from their lips to the stomach. By adding 10–12 cm to the result obtained, you can get the desired result.
- The length of the side of a square table. To do this, the result obtained in step 2 should be multiplied by 1.4.
A forge is an open or closed furnace used in blacksmithing to heat metal
. To make a stationary forge with your own hands, you will need the following materials:
- heat-resistant steel with a sheet thickness of at least 4 mm;
- fireclay brick;
- rolled metal, from which the forge frame should subsequently be assembled;
- steel chimney for carrying out the process of removing gases generated during the combustion process;
- fireproof putty, which must be used to seal cracks;
- steel for lining on the outside.
Materials for making a forge
Rules for the manufacture of a stationary structure
Since the forge is a stationary unit, its location must be clearly defined. Access to one of the walls is necessary because the forge should not be independent. The presence of a wall will allow you to more securely arrange chimneys and install a fan. This design can use a homemade lance.
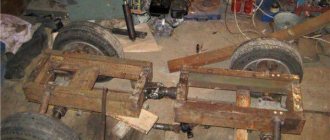
Support frame for forge
The construction of the forge should begin with the manufacture of a support frame. It is brewed from a metal pipe. The upper part is constructed using refractory bricks. This will make the structure durable and allow you to use the stove more intensively.
The channels provided for ventilation and chimney should be lined with steel corners around the perimeter. The metal is also used in the construction of the lining and damper of the furnace. Sheets used in finishing must have a stiffener.
The forge table must have a forge nest, the optimal depth of which is 10 cm. Below it is an ash chamber into which air is supplied. The size of the table is not regulated, but it is better if it is designed taking into account the master’s data.
A square-shaped pipe should be rolled out of 2 mm thick steel. This will be the ash receptacle. A hole should be made in one of the walls into which a pipe for air supply will later be inserted. This can be done using a vacuum cleaner.
Useful tips
A few secrets to improve the performance of the forge:
- The back wall with a cutout will improve ventilation and make it possible to work with long workpieces.
- A metal stand for the forge will make work more convenient.
- To work with workpieces of different sizes, it is more convenient to use several forges of different sizes standing next to each other. Air is supplied using flexible hoses for quick switching between burners.
- Each “main” must have shut-off valves. For smooth adjustment, ball valves should be abandoned.
After completing the installation process, it is necessary to test run gas into the furnace. The slightest smell is a signal of incorrect installation. For further safe operation of the structure, it is necessary to find out and eliminate the cause of the leak. The check should be carried out with sufficient ventilation of the room.
Types of gas burners
There are several design types of propane burner:
Vortex
Air flows are mixed by guide spiral plates. Mixing takes place entirely in the wellhead area, providing excellent control with minimal pressure loss. But manufacturing such a burner is labor-intensive due to the complexity of the design.
Injection gas burner
Its features: independent gas tightening, simplicity of design and low efficiency (the ratio of components is adjusted in a small range of values). Made with your own hands, it will require work when there is a lack of air.
Tangential type
The gas flow occurs along the axis, the air flow occurs tangentially relative to the mixer body. Characterized by intense mixing and high pressure loss due to turbulence. The air in the furnace is supplied unevenly; there is more air in the area of contact of the heated workpiece with the furnace bottom. This leads to increased waste and scale formation. These burners are good for their simplicity and reliability.
The combination of tangential and direct supply provides the best controllability of the combustible mixture: the length of the torch varies depending on the amount of air supplied between the internal and external channels. This makes it possible to control the heating time of parts for forging. It is characterized by its large size, which is not suitable for use in small forges, and the technical complexity of its manufacture.
Conclusions and useful video on the topic
The injection burner developed by Alexander Kuznetsov is especially popular. In this video, he explains what the structure consists of and how to assemble it:
Example of an injection burner operation:
Properly designed and made with your own hands exactly according to the requirements, the injection burner will become a reliable assistant for a long time. This device will replace expensive factory-made tools. With its help, you can solve many everyday problems without resorting to the help of professionals.
Would you like to tell us about how you assembled an injection torch for blacksmithing with your own hands? Do you have useful information on the topic of the article? Please leave comments in the block form below, ask questions, post photographs.
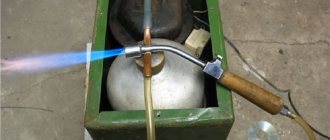
Do-it-yourself gasoline torch for soldering
Purchasing a ready-made gas burner is not always possible (for various reasons). In this case, it will be useful to know that you can make a gasoline torch for soldering yourself. Note that homemade gasoline devices are no worse than purchased ones. A DIY device is just as effective.
If you bring a lit match to the spout of a gasoline burner, you will be able to see a fire instantly flare up. Steady combustion of gasoline will continue for five minutes (+/-2 minutes). The flame temperature at its tip will reach more than 1000° C.
Note that with such a burner you can easily melt hard solders, heat treat small tools, melt various metals, solders, and even soften glass.
There is no need to make many parts of a homemade gas burner, since they can be borrowed from other things. For example, homemade parts such as a rubber bulb can be made from a spray bottle.
- Frame;
- Sleeve with hook;
- A tube;
- Emphasis;
- Pen;
- Rubber ring;
- Balloon;
- Pen;
- Rubber bulb;
- Filler.
The burner body can be turned on a lathe
Steel of any grade can be used as a material for the manufacture of this important part. It is worth paying attention to the fact that the body of the part is composite (one end is open and the other is closed with a plug). There is a hole in the plug, the diameter of which is 0.1 millimeters larger than the outer diameter of the tube. Using this quality, the body can move along the tube quite tightly, while maintaining tightness. A ring made of metal mesh and slag wool must be installed inside the housing. Next you need to make a sleeve with a hook and a stop
You can use a steel sheet for this. The burner handle, which is essential for a gasoline device, is carved from beech or oak. The holes for the tubes (2 pcs.) are drilled very carefully. Thus, the axes of the holes should be strictly parallel. The finished handle is sanded and then coated with several layers of colorless varnish. Next, it is necessary that the end of the tube, which is passed inside the body, forms a nozzle. If you have PMTs-54 hard solder (adheres well to steel), try to solder the end of the tube with it, and then drill a 0.2 millimeter (diameter) hole along the axis of the tube. You can make your own solder. It must be said that solder consists of copper and zinc. In order to get zinc, you can use cups from an old electric battery. You need to empty the glass of its contents and then heat it over the fire. Next, you need to lower it into cold water, and then into a weak solution of hydrochloric acid. A clean glass is cut into pieces with scissors. Thus, we obtain zinc. Now it's up to copper. To do this, do the following: take copper wire; anneal it on fire; Finely cut the wire using scissors. Now you can pour pieces of copper and zinc into the crucible, maintaining equal proportions, after which you need to sprinkle with borax. Metals can be fused using a burner. After this, you will need to cool the resulting block and secure it in a vice. Then use a hog file to file it on all sides. The resulting sawdust must be mixed with borax.
https://youtube.com/watch?v=uCl-xY5eBwk
Homemade gasoline burners like these will work great if done correctly.
Please note: if you do not have enough experience working with flammable materials, it is advisable to use commercial gasoline burners
Flameless panel burner
1 - tunnel; 2 - nipple; 3 - distribution chamber; 4 — injector; 5 - nozzle; 6 — air regulator; 7 - gas pipeline; 8 - ceramic prisms
Flameless combustion of gas has the following advantages: complete combustion of gas; possibility of gas combustion with small excess air; the ability to achieve high combustion temperatures; combustion of gas with high thermal stress of combustion volume; transfer of a significant amount of heat by infrared rays.
Based on the design of their fire part, existing designs of flameless burners with refractory nozzles are divided into burners with nozzles having channels of irregular geometric shape; burners with nozzles having channels of regular geometric shape; burners in which the flame is stabilized on the fireproof surfaces of the firebox.
The most common are burners with nozzles of regular geometric shape. The refractory nozzles of such burners consist of ceramic tiles measuring 65x45x12 mm. Flameless burners are also called infrared burners.
All bodies are sources of thermal radiation arising due to the vibrational motion of atoms. Each temperature corresponds to a certain range of wavelengths emitted by the body. In this case, heat transfer by radiation occurs in the infrared region of the spectrum, and burners operating on this principle are called infrared radiation burners (figure below).
Recommendations
The principle of operation of the device is what you should understand before making the device. You can consider it using the example of a burner for roofing work. How does the burner work?
- The device is connected to the reducers of oxygen and propane cylinders by a system of supply hoses.
- Reducers are placed on the cylinders to create working welding pressure.
- A diagram for gas and oxygen is assembled, the tightness of the connections is checked, the nodes are secured, after which the gas can be opened with valves.
- The gas pressure is set to the operating value and the valve opens.
- The fuel is supplied through hoses to the propane appliance.
- The injector carries out the mixing process to form a gas-air environment.
- A working flame with a temperature reading above 2000 degrees comes out of the device.
When performing any welding work, you must wear personal protective equipment: gloves and goggles, special shoes. You can work with propane cylinders only in a well-ventilated area, and at sub-zero temperatures, any actions with the burner are excluded.
What you should absolutely not do:
- work near open fire;
- keep the cylinder tilted;
- place vessels under the sun;
- carry out work without a gearbox;
- Warm up the gearbox over an open fire.
If you can clearly smell the gas, work with the burner should be stopped by closing the valve on the cylinder. Homemade burners, depending on the purpose of use, can be different: burners with a VK-74 valve, devices converted from an acetylene gas cutter and mini gas burners. It is realistic, profitable, and useful to build every homemade device. Only initially you need to decide on the type of structure and its parameters. The gas burner is also used in private households and for commercial purposes. In plumbing, a metal workpiece is heated with a torch, which ultimately comes out quite hardened.
How to make a gas burner, see below.
Gas safety
Let's start with precautions. Start working with gas from the smallest 5 liter cylinder
Buy a new one and fill it with propane at the nearest gas station. Ask the gas station attendant to tell you how to properly store, transport, refill and use the gas cylinder. He will do this with pleasure, because he is simply bored filling cylinders all day.
Buy a good adjustable gearbox right away. It costs 700-1500 rubles, but this is a small thing when it comes to safety. The pressure gauge should have divisions from 0.1 to 0.6 MPa (mega-pascals)
Attention! The reducer tap does not work like a water tap, but vice versa: to increase the pressure, we need to turn clockwise, i.e. tighten the tap; to reduce the pressure, you need to turn it counterclockwise, i.e.
unscrew the tap
This is important to remember, because in a critical situation we will try to tighten the tap, and this, on the contrary, will only increase the gas pressure - remember this! The burner of a melting furnace, like a burner for a gas forge, usually operates in the pressure range from 0.15 to 0.25 MPa
It’s easier for me to calculate pressure in atmospheres, so it’s 1.5 - 2.5 atmospheres. Don’t turn the gearbox to higher pressure - we simply don’t need it! My gas burner for the melting furnace now operates at a pressure of 1.5 atmospheres, which is enough for liquid aluminum to float in the crucible within 15 minutes
The burner of a melting furnace, like a burner for a gas forge, usually operates in the pressure range from 0.15 to 0.25 MPa. It’s easier for me to calculate pressure in atmospheres, so it’s 1.5 - 2.5 atmospheres. Don’t turn the gearbox to higher pressure - we simply don’t need it! My gas burner for the melting furnace now operates at a pressure of 1.5 atmospheres, which is enough for liquid aluminum to float in the crucible within 15 minutes.
It is strongly recommended to work with gas outdoors. Especially while the gas burner has not yet been configured. In a confined space, 10-15% concentration of propane in the air is enough for an explosion to occur. It is almost impossible to explode in air when working with gas. To explode a 5-liter gas cylinder, you need to throw it into a large fire for 3-4 minutes. Only then will it explode.
It is also highly recommended to use a long gas hose of at least 3-5 meters. The hose must be attached to the gearbox using a clamp with a screw tightening. In addition to the gearbox itself, you also need to acquire some kind of control valve, which would be located directly near the burner. This is necessary so as not to run to the gas cylinder every time to open/close the gas. Fortunately, the cylinder should then be placed around the corner in a special metal cabinet with a padlock. Instead of a faucet, I used another gas torch from an acetylene torch, only instead of a nozzle I connected the hose of my torch.
Gas-powered devices
A distinctive feature of this type of forge is that it is much easier to prepare them for work than forges that run on solid fuel.
If we talk about the design of gas-type forges, it consists of the following elements:
- Camera. For its manufacture, a material with fire-resistant properties is used. The outside of the chamber is lined with steel with heat-resistant properties.
- Front flap. Its opening is ensured by using a counterweight or hinges. In order to be able to observe what is happening inside the chamber, a small viewing window is mounted in one of its walls.
- Under. For its manufacture, fireclay bricks are used, which have heat-resistant properties.
- Burner. Several types of burners can be used. When determining the type of burner, the main factor is the type of gas that is used. For example, if a propane-butane mixture is used as fuel, a diffuse type burner is used. Burners of this type guarantee uniform heating of the workpiece, as well as the formation of a minimum amount of waste.
- Mixing reducer. Air enters the gas mixture, which is located in the cylinder.
- Nozzle. Its shape is directly dependent on the shape of the workpieces that will be used in the work process.
- Grate grate. Its purpose is to increase the traction rate, as well as to ensure the collection of scale.
- Fan. With its help, air is forced into the burner.
The use of gas forges is possible subject to the following safety rules:
- The blacksmith's room must be periodically ventilated to prevent gas accumulation;
- It is not allowed to place devices containing oxygen or mixtures containing it near the forge;
- By using a gas analyzer, it is necessary to check the final combustion of gas before starting the furnace again.
Blacksmith's forge from a bucket
You can create a forge at home from available materials - for example, an ordinary bucket.
Creating such a furnace is quite simple: holes are made in the walls, the inner surface of the metal is lined with ceramic wool, capable of withstanding temperatures of more than 1200 degrees. Since the bucket has a cone shape, it must be positioned correctly, for which legs are installed.
A hole for the burner is created in the middle part of the forge, and a ventilation hole is cut in the bottom. Fireclay brick, which has increased fire resistance, is placed on the bottom. Finished equipment is often coated with a layer of heat-resistant paint.
Horn device
A classic production forge is designed as follows, see figure on the right:
Construction of a forge
- forge table made of refractory material;
- firebox (hearth) with grate;
- air chamber;
- air drainage;
- supply air duct;
- air valve;
- chamber (tent) forge;
- window for feeding long workpieces;
- bugle umbrella;
- chimney (gas outlet);
- removable furnace;
- hardening bath (tub, tub);
- gas-air chamber.
How the forge works
In order to make a forge yourself and use it successfully, we’ll figure out how the forge works, what’s what, and what can be made cheaper and easier for home use without compromising the quality of metal processing. The operation of the forge is based on the chemical reaction of carbon combustion 2C + O2 = 2CO2 + 188.1 kcal. Based on its energy output (94.05 kcal/mol, i.e. 12 g of C, completely burned, will give 94.05 kcal of heat) it is clear that carbon is a very strong reducing agent, i.e. greedily combines with oxygen.
This property of carbon has been used since time immemorial in metallurgy for the smelting of iron and other metals: their ores are often the corresponding oxides or their derivative compounds. Carbon unceremoniously robs itself of oxygen, and the deprived metal has no choice but to be released in a free form.
In a forge, the reducing power of carbon is also used partly to prevent oxidation of the workpiece. Simply to prevent the metal from burning. But the high calorific value of carbon is no less important here: by blowing enough air into the fuel mass so that the carbon has enough of it, you can burn it quite quickly, and the large amount of heat released will develop a high temperature.
The blowing into the forge is adjusted so that the fuel is slightly lacking oxygen; this will completely prevent oxidation of the metal. However, if the workpiece is overexposed in the forge, then carburization will occur: the metal, especially steel, will become, as they say, overdried - excessively, disproportionate to the increase in hardness, brittle. An example of completely overdried iron is cast iron. In metallurgy, in order to obtain structural steel from it, molten cast iron is subjected to reprocessing: oxygen is introduced into it in a converter or in some other way, removing excess carbon.
IGK burner: how to buy
Buy IGK burners
various modifications presented in the product catalog of PKF Spetskomplektpribor are possible in several ways.
You can order the required number of Kazantsev injection burners by filling out the intuitive order form at the top of the page. Another purchasing option is to directly contact our managers by phone, email or online dialogue form. If you do not know which specific model of IGK burners you need, our professional consultations will help you avoid making mistakes when selecting this or that equipment.
Return to the general price list for burners
Video on the topic
In this article we will look at how to make a gas torch for soldering with your own hands. This device is often in demand both in private households and for commercial purposes - for individual technical creativity and various types of construction tasks. In particular, gas burners are used for soldering, metalsmithing, forging, roofing, jewelry work, and for other purposes they produce flames whose temperature exceeds 1500°C.
In metalworking, using a gas torch, you can heat a metal workpiece so that in the end it turns out to be sufficiently hardened. When carrying out welding work with some metals, the areas of future seams must be heated.
Criterias of choice
The correct choice of device is carried out with full knowledge of the technical properties of the metal and the gas used, the first being of paramount importance, especially the refractoriness of the materials being welded.
To solder copper or cable, you will need a specialized torch, which can be purchased at a retail chain in large cities, for example, in Moscow.
Technical features:
- The flame power varies depending on the type of work: desoldering electronic parts is the minimum value, and for heating metal for forging is the maximum value.
- The shape of the torch is also related to the types of operations: heat shrinking or heat treatment of large surfaces requires a wide torch, and for soldering a high-precision needle-shaped contour flame is used.
- The plastic case is budget-friendly and is used for work with low operating temperatures and short processing periods, otherwise the plastic may melt.
- Flame stability is determined by the ability to work at an angle of up to 45.
- The presence of replaceable attachments is a welcome feature for users to be able to perform different tasks.
- Special requirements: design shape, stability, presence of protective functions, for example, wind protection.
- Connection options for cans, threaded connections, the most reliable and common with maximum tightness.
- Containers are selected based on the volume of welding work: from 5 to 50 liters.
- The hose must be long enough to reach the work site.
- A propane reducer is used with a pressure gauge to monitor the presence of gas.
Gas burners for roofing work
Principle of operation
The principle of operation of the forge is based on the chemical reaction of combustion of carbon, which, when reacting with oxygen, forms carbon dioxide with the release of heat. In addition, metal recovery occurs, which is a very important aspect for the formation of homogeneous, high-strength parts.
To maintain an optimal level of combustion and temperature, air ducts and air chambers are installed inside the fuel chamber, which forcefully pump pure oxygen. Due to this, it is possible to obtain temperatures above +1000°C, which are unattainable with conventional combustion of solid fuel (coal or wood).
What does a DIY gas forge look like?
At the same time, using the inflation technology, the volume of air is selected so that there is always a slight lack of oxygen for the oxidation reaction to occur. In other words, it is necessary to select an operating mode to prevent metal combustion.
The time the smelted part remains in the furnace should also be limited, since in an atmosphere of carbon dioxide the metal will begin to react with it and form a high-strength alloy with increased fragility. These negative consequences can be avoided by introducing additional oxygen into the chamber in such an amount that carbon dioxide has time to completely react.
Flameless panel burner
1 - tunnel; 2 - nipple; 3 - distribution chamber; 4 — injector; 5 - nozzle; 6 — air regulator; 7 - gas pipeline; 8 - ceramic prisms
Flameless combustion of gas has the following advantages: complete combustion of gas; possibility of gas combustion with small excess air; the ability to achieve high combustion temperatures; combustion of gas with high thermal stress of combustion volume; transfer of a significant amount of heat by infrared rays.
Based on the design of their fire part, existing designs of flameless burners with refractory nozzles are divided into burners with nozzles having channels of irregular geometric shape; burners with nozzles having channels of regular geometric shape; burners in which the flame is stabilized on the fireproof surfaces of the firebox.
The most common are burners with nozzles of regular geometric shape. The refractory nozzles of such burners consist of ceramic tiles measuring 65x45x12 mm. Flameless burners are also called infrared burners.
All bodies are sources of thermal radiation arising due to the vibrational motion of atoms. Each temperature corresponds to a certain range of wavelengths emitted by the body. In this case, heat transfer by radiation occurs in the infrared region of the spectrum, and burners operating on this principle are called infrared radiation burners (figure below).