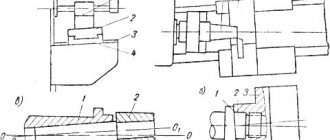
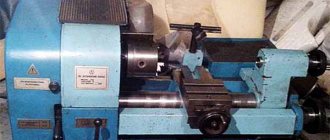
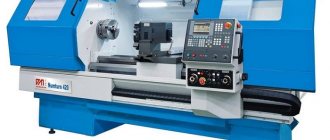
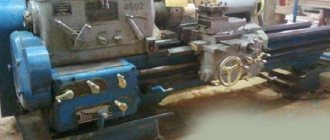
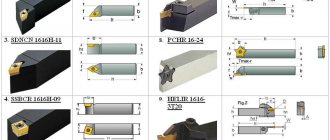
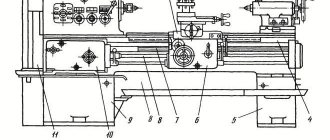
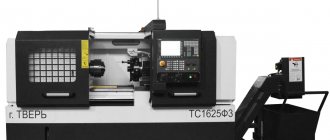
Metalworking accuracy is the basic criterion for assessing the quality of metal products. The priority task is to minimize deviations in the dimensions of manufactured products from the specified parameters. To solve this problem, periodic monitoring of machines is carried out for technological accuracy. It should be understood that such a check is more than just inspecting and measuring the relevant parts of the equipment. In the course of this work, a whole range of activities is carried out.
Purpose of technological accuracy checks
The main purpose of the control is to check the coincidence of the current parameters of the machine with the characteristics specified in the equipment passport. The need for this procedure is dictated by the wear and tear of the equipment during operation. And we are not talking about replaceable tools here - cutters, cutters, drills and sharpening stones are checked in the current mode. When checking technological accuracy, permanent components of the machine structure are examined, including the following.
- Spindles.
- Calipers.
- Consoles.
- Drives.
In equipment equipped with a CNC system, measuring devices (sensors) that are used for automatic control of metalworking are also tested.
The result of control activities is the conclusion about the possibility of further use of the machine at this production site. A reduction in technological accuracy to unacceptable limits becomes the basis for a radical modernization or replacement of the machine.
Contents of the check
The types of activities related to maintenance procedures and their frequency are determined by the procedure set out in the current standards and regulations. Moreover, different types of equipment have their own standards, but there are also general maintenance rules.
Electric welding machines, being essentially electrical installations, must be operated and also undergo maintenance in accordance with the current standards, which for them are the Rules for the Technical Operation of Consumer Electrical Installations, which contain the corresponding section. According to these rules, inspection of welding equipment should be carried out to the following extent:
Technical means for carrying out measurements
It is obvious that the quality of technological accuracy checks is directly determined by the characteristics of the measuring instruments. When carrying out control, the following technical means are used:
- calipers;
- micrometers;
- goniometers;
- calibers;
- movement indicators.
In most cases, measurements are performed with standard mechanical instruments, but there are also more accurate meters - laser ones. These devices are being used more and more often today.
Repair and preventive maintenance
Repair and maintenance of devices intended for welding work must be carried out by specialists with sufficient qualifications who are part of specialized units.
If the enterprise does not have repair personnel of the appropriate level, the work must be performed on a contractual basis by repairmen from specialized organizations.
Welding equipment, along with thermal equipment, belongs to objects that are a source of increased danger. For this reason, specialized regulatory documents have been developed regulating the procedure for monitoring its condition. These provisions are formulated in the guidance document RD 34.10.127 - 34.
Control regulations
Planned control of the technological accuracy of metalworking equipment is carried out according to a schedule, which is drawn up in accordance with a special document - a list of machine equipment. It contains information about the frequency of technological operations that affect the accuracy of product manufacturing. This document also contains information about the operating modes of the machines.
The check can be not only scheduled, but also performed in case of emergency equipment failures. In this case, control measures are carried out in accordance with regulations developed to eliminate force majeure circumstances.
Any inspections - both scheduled and emergency - are carried out subject to the temporary removal of machines from operation. For this reason, developing a schedule of control activities is very important for planning both production activities and equipment modernization. It remains to add that, as a rule, the chief technologist of the plant is responsible for this area of the enterprise’s work.
FAQ: GOST standards for accuracy and measurement
GOST 8-82 Metal-cutting machines. General requirements for accuracy tests
GOST R ISO 230-1-2010 Testing of machine tools. Part 1. Methods for measuring geometric parameters
GOST 22267-76 Metal-cutting machines. Schemes and methods for measuring geometric parameters
GOST 7599-82 Metalworking machines. General technical conditions
GOST 27843-2006 Testing of machine tools. Determination of the accuracy and repeatability of positioning of axes with numerical control (GOST 27843-88)
GOST 30544-97 Metal-cutting machines. Methods for checking the accuracy and consistency of working out a circular trajectory
Product samples
GOST 25889.1-83 Metal-cutting machines. Methods for checking the roundness of a sample product
GOST 25889.2-83 Metal-cutting machines. Methods for checking the parallelism of two flat surfaces of a sample product
GOST 25889.3-83 Metal-cutting machines. Methods for checking the perpendicularity of two flat surfaces of a sample product
GOST 25889.4-86 Metal-cutting machines. Method for checking the constancy of the diameters of a sample product
GOST 26189-84 Metal-cutting machines. Method for comprehensive verification of parallelism and straightness of two flat surfaces of a sample product
GOST 26190-84 Metal-cutting machines. Methods for checking the size constancy of cylindrical product samples within one batch
GOST 26542-85 Metal-cutting machines. Methods for checking the end runout of the surfaces of a sample product
GOST 25443-82 Metal-cutting machines. Sample products to check processing accuracy. General technical requirements
GOST 30527-97 Metal-cutting machines. Methods for checking the processing accuracy of a sample product
Lathes
GOST 18097-93 Screw-cutting and turning machines. Basic dimensions. Accuracy standards
GOST 3179-72 Turret lathes. Main Dimensions
GOST 17-70 Turret lathes. Accuracy standards
GOST 44-93 Vertical turning machines. Basic parameters and dimensions. Accuracy and rigidity standards
GOST 8427-75 Longitudinal turning machines. Automatic machines. Main Dimensions
GOST 8831-79 Longitudinal turning machines. Automatic machines. Accuracy standards
GOST 21608-76 Lathes with numerical control. Main parameters and dimensions
GOST 6820-75 Multi-spindle vertical cartridge lathes, semi-automatic. Accuracy and rigidity standards
GOST 19660-74 Backing lathes. Main Dimensions
GOST 9886-73 Horizontal double-sided semi-automatic machines for end processing and centering. Main Dimensions
Drilling machines
GOST 1222-80 Radial drilling machines. Main Dimensions
GOST 98-83 Radial drilling machines. Accuracy and rigidity standards
GOST 21611-82 Vertical drilling machines with numerical control. Main parameters and connecting dimensions
GOST 370-93 Vertical drilling machines. Basic dimensions. Accuracy and rigidity standards
Boring machines
GOST 7058-84 Horizontal boring machines. Main Dimensions
GOST 2110-93 Horizontal boring machines with a cross table. Accuracy standards
GOST 18098-94 Jig boring and jig grinding machines. Accuracy standards
GOST 30175-94 Jig boring and jig grinding machines. Main Dimensions
GOST 21613-82 Vertical coordinate boring machines with numerical program control. Main parameters and connecting dimensions
GOST 9520-73 Vertical finishing and boring machines. Main Dimensions
GOST 594-82 Vertical finishing and boring machines. Accuracy standards
GOST 9547-80 Horizontal finishing and boring machines with a movable table. Main Dimensions
GOST 11576-83 Horizontal finishing and boring machines with a movable table. Accuracy standards
Surface grinding machines
GOST 13135-90 Surface grinding machines with a rectangular table. Basic dimensions. Accuracy standards
GOST 14-88 Surface grinding machines with a round table and a horizontal spindle. Basic dimensions. Accuracy standards
GOST 27-88 Surface grinding machines with a round extendable table and a vertical spindle. Basic dimensions. Accuracy and rigidity standards
GOST 273-90 Surface grinding machines with a cross table and a horizontal spindle. Basic dimensions. Accuracy and rigidity standards
Cylindrical grinding machines
GOST 11654-90 Cylindrical grinding machines. Basic parameters and dimensions. Accuracy standards
GOST 13510-93 Centerless cylindrical grinding machines. Basic parameters and dimensions. Accuracy and rigidity standards
GOST 30677-2000 Cylindrical grinding machines. Covers. Types and main sizes
GOST 30676-2000 Cylindrical grinding machines. Flanges for mounting grinding wheels. Design and dimensions
Various grinding
GOST 25-90 Internal grinding machines. Basic parameters and dimensions. Accuracy standards
GOST 9735-87 Profile grinding machines. Accuracy standards
GOST 30512-97 Roll grinding machines. Accuracy standards
Sharpening machines
GOST 599-93 Grinding machines for twist drills. Basic dimensions. Accuracy standards
GOST 8308-72 Universal grinding machines. Main Dimensions
GOST 1584-87 Universal grinding machines. Accuracy standards
GOST 16929-90 Machines for sharpening flat knives with a straight cutting edge. Accuracy standards
GOST 28651-90 Machines for sharpening band saws. Main parameters. Accuracy standards
GOST 20404-88 Machines for sharpening circular saws. Accuracy and rigidity standards
GOST R 50340-92 Machines for sharpening wood-cutting tools. Severity standards
GOST 627-93 Grinding machines for cutters. Basic dimensions. Accuracy standards
GOST 28650-90 Machines for sharpening frame saws. Main parameters. Accuracy standards
GOST 9990-71 Machines for sharpening flat knives with a straight cutting edge. Main settings
Milling machines
GOST 6955-79 Longitudinal milling machines. Main Dimensions
GOST 18101-85 Longitudinal milling machines. Accuracy and rigidity standards
GOST 17734-88 Console milling machines. Accuracy and rigidity standards
GOST 26016-83 Wide-universal tool milling machines. Accuracy standards
GOST 9726-89 Vertical milling machines with a cross table. Terminology. Basic dimensions. Accuracy and rigidity standards
GOST 10460-72 Horizontal copying and milling machines. Main Dimensions
Slotting machines
GOST 1141-74 Slotting machines. Main Dimensions
GOST 26-75 Slotting machines. Accuracy and rigidity standards
Planing machines
GOST 439-73 Longitudinal planing machines. Main Dimensions
GOST 35-85 Longitudinal planing machines. Accuracy and rigidity standards
GOST 1105-74 Cross-planing machines. Main Dimensions
Electroerosive machines
GOST 20551-93 Electroerosive cutting machines. Basic dimensions. Accuracy standards
GOST 24772-81 Electrochemical copying and piercing machines. Main parameters and dimensions
GOST 30098-93 Electroerosive copying and piercing machines. Basic dimensions. Accuracy standards
Aggregate machines
GOST 24380-91 Beds of aggregate machines. Basic dimensions. Accuracy standards
GOST 19468-81 Modular machines. Main Dimensions
Gear, spline, and thread processing machines
Measuring tool
GOST 10905-86 Testing and marking plates. Specifications
GOST 8026-92 Calibration rulers. Specifications
GOST 3749-77 Test squares 90 degrees. Specifications
GOST 9392-89 Frame and block levels. Specifications
GOST 15982-70 Levels with micrometric ampoule supply. Methods and means of verification
GOST 11196-74 Levels with micrometric ampoule supply. Specifications
GOST 2386-73 Level ampoules.
Specifications https://vsegost.com/C…/17/17360.shtml Modified on January 11, 2015 by tmpr
Main components of the interferometer
Laser interferometer on a tripod, ready for measurements
Fixed base
Block for compensation of changes in environmental parameters
Main components of the machine condition inspection system
Checking Ballbar QC20W Lathe
Test kit - for vertical machining centers and boring machines
Lathe Test Kit
Welding machines of private owners
In order for welding equipment in a private owner’s workshop to work reliably, it must be properly maintained. The burden of repairs and maintenance in this case lies with the owner himself.
The most common type of privately owned welding equipment is an inverter for performing manual arc welding. How to check its functionality is written in detail in the instructions supplied with it.
For long and successful operation of such a device, you should follow a few simple rules. The load mode of the device should not exceed that recommended in the operating instructions.
The device body and additional accessories (wires, clamps, electrode holder) must be kept clean. The condition of elements subject to wear must be constantly monitored and promptly replaced. This applies to the electrode holder and workpiece clamps.
Periodically, depending on the intensity of use of the product, it is necessary to carry out a maintenance procedure for welding equipment.
In particular, if this is a welding inverter, you sometimes need to remove the housing cover to remove dust and carbon deposits deposited on the surface of the cooling radiators and electronic components of the circuit.
To do this, you can use a soft brush or blow it with a vacuum cleaner. Dust accumulating inside the housing prevents the normal removal of heat from heating power elements, which can cause their premature failure.
The inverter circuit elements are forcibly cooled by a fan. Cooler maintenance involves cleaning its blades from dust and lubricating the bearings with liquid lubricant.
A sign that it's time for maintenance is when the fan becomes louder . This is caused by the imbalance of the device due to dirt accumulated on the rotating blades.
During each maintenance that involves opening the case, in addition to cleaning it from dust, you should check the tightness of the screw fastenings of the parts, preventing them from becoming loose.
Inspection frequency
In accordance with this document, all repair and preventative measures related to the maintenance of welding and thermal equipment must be carried out in direct accordance with the schedule approved by the chief technical specialist of the enterprise.
The importance of timely verification of technical measuring instruments that are equipped with welding machines is especially emphasized. For this purpose, it has been established that the specialist responsible for metrology at the enterprise should take part in the preparation of maintenance schedules for welding equipment.
Thus, a planned shutdown of equipment for repairs or maintenance should be timed to coincide with the delivery of measuring instruments for verification.
According to the standards established by this guidance document, as part of maintenance, it is necessary to regularly carry out activities to monitor the technical condition of equipment:
- AC and DC welding machines (transformers and rectifiers) are inspected twice a month;
- welding inverter converters are subject to inspection once a week;
- machines for automatic and semi-automatic welding are inspected daily.
The fact of the inspection (inspection), as well as the result obtained, is recorded in a journal of the established form.
Special checks
A special form of inspection is established when monitoring newly received equipment, equipment that has been repaired, and equipment that has been idle for more than three months.
In these situations, the availability and completeness of the technical operational documentation of the device (passport, operating instructions, diagrams) is checked.
A visual inspection of the technical condition of the equipment is carried out, if the equipment is new, excess lubricant is removed, transport fasteners are removed, and if any, loose bolted connections are pulled.
The presence of a valid (that is, not expired) mark (sticker) of the verification organization on the housings of measuring instruments is checked. If necessary, a note about the verification period is made in the corresponding column of the equipment passport.
The level of electrical insulation resistance is measured. It is also necessary to turn on the equipment to determine its operating status.
Insulation resistance measurements are carried out between windings (for transformers and rectifiers), as well as between each winding and the equipment frame.
In this case, you should follow the recommendations set out in the technical documentation of the device. If the operating instructions do not contain a description of the testing methodology, they should be carried out in accordance with GOSTs. Thus, automatic welding machines are tested in accordance with GOST 8213 standards.
Semi-automatic welding devices - in accordance with GOST 18130. Tests of devices based on a welding inverter are carried out in accordance with GOST 7237. Alternating current devices (transformers) - in accordance with GOST 7012.
As part of the service, electric generators are subject to testing in accordance with GOST 304. Devices using rectified welding current - in accordance with GOST 13821.
