by Alexey | Tools | Wednesday, December 15, 2021
| Follow Make-Self.net on Facebook and be the first to read our articles. |
A router is a very useful tool in woodworking. It can be used for shaping wood, drilling various holes, cutting grooves, finishing edges and much more. It's hard to imagine any complex project without it.
A router table may be the most important tool a carpenter can use.
Most people use routers as portable tools. While this is a viable option, a table-mounted router is safer to use and can perform its functions on a whole different level. If you're looking to build your own router table yourself, you've come to the right place. We've rounded up 13 of the best DIY table designs.
Folding milling table
This briefcase-sized design transforms into a fully functional router in minutes and folds up for storage just as quickly.
A full-size router table can be a great solution—if you have the space. But if you only use the router occasionally or need a mobile solution, this might be a good solution. This benchtop tool provides all the precision and stability you'd expect from a full-size router table.
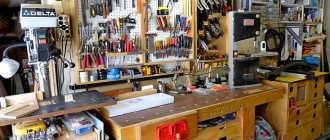
Option for making a compact table with drawers
Quite an interesting design that is easy to replicate for your own workshop.
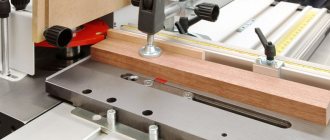
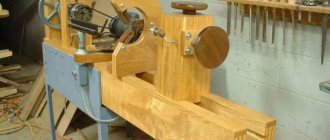
Real view of the machine for milling blanks
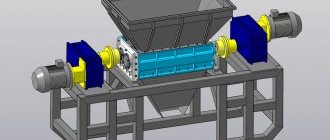
Constructive development in three-dimensional display using engineering programs
| Frame made of individual parts. They are made from coniferous wood. | |
| Organization of cuts when joining frame parts in the upper part. Main dimensions shown. | |
| Organization of cuts when joining frame parts in the lower part. | |
| To install guides for drawers, you will need to glue these parts from two blanks. | |
| Assembling the table frame and installing facing side panels. | |
| The tabletop consists of two plates. They are framed by side ribs. It is required to do a miter connection. | |
| The stop is made of several parts. | |
| Large drawer design. | |
| Small drawer design. | |
| The order of installation of the elements of the front part of the box. |
| Side walls, central wall and bottom of the machine. |
To manufacture such a machine, you will need to prepare parts. Table 2 shows the configuration, workpiece dimensions and material.
Table 2: Accessories for making a table for a router
| Position on drawings | Name | Finished dimensions, final | Quantity | Material | ||
| Thickness, mm | Width, mm | Length, mm | ||||
| Frame | ||||||
| 1 | Front and rear horizontal frames | 50 | 40 | 780 | 4 | Solid pine |
| 2 | Racks | 50 | 50 | 860 | 4 | Solid pine |
| 3 | Horizontal side frames | 50 | 40 | 550 | 4 | Solid pine |
| 4 | Front and rear horizontal | 50 | 20 | 750 | 2 | Solid pine |
| 5 | Side window frame, vertical | 50 | 50 | 380 | 4 | Solid pine |
| 6 | Side window frame, horizontal | 50 | 20 | 360 | 2 | Solid pine |
| Panels | ||||||
| 7 | Side panels | 6 | 740 | 518 | 2 | Birch plywood |
| 8 | Sidebar Windows | 6 | 600 | 393 | 2 | Birch plywood |
| 9 | Lower window | 6 | 600 | 400 | 1 | Birch plywood |
| Large drawers | ||||||
| 10 | Side of the drawer | 16 | 140 | 550 | 8 | Solid pine |
| 11 | Front and back side of the drawer | 29 | 140 | 348 | 8 | Solid pine |
| 12 | Drawer front | 7 | 168 | 348 | 4 | Solid ash |
| 13 | Bottom | 6 | 138 | 570 | 4 | Birch plywood |
| Small drawers | ||||||
| 14 | Side of the drawer | 16 | 100 | 550 | 8 | Solid pine |
| 15 | Front and back side of the drawer | 29 | 100 | 138 | 8 | Solid pine |
| 16 | Drawer front | 7 | 108 | 138 | 4 | Solid ash |
| 17 | Bottom | 6 | 570 | 348 | 4 | Birch plywood |
| Tabletop | ||||||
| 18 | Upper layer | 18 | 700 | 920 | 1 | Birch plywood |
| 19 | Front and rear trim strips | 10 | 38 | 940 | 2 | Solid ash |
| 20 | Side trim strips | 10 | 38 | 720 | 2 | Solid ash |
| Emphasis | ||||||
| 21 | Stop wall | 18 | 150 | 750 | 1 | Birch plywood |
| 22 | Stop base | 18 | 150 | 640 | 1 | Birch plywood |
| 23 | Front stop bar | 10 | 90 | 380 | 2 | Solid ash |
| 24 | Top edge stop | 10 | 420 | 550 | 1 | Solid ash |
Spacious milling table on wheels
If you're a fan of Ana White, then you know that she has everything you could ever want to build.
It's no surprise that she has a great plan for helping you build a great router table. It has ample storage and work space. I hope you enjoy it as much as we do.
Professional milling table at half the price
This table includes all the best features found in store bought router tables at half the price! We have had the opportunity to study and use most of the router tables available on the market. Based on this experience, we developed our own fully functional and easy to assemble desk. The detailed project can be viewed here.
How to make a milling machine with your own hands: instructions
You can assemble a milling machine of both vertical and horizontal type with your own hands. The choice of option depends on the purpose of the machine, the availability of space in the workshop, planned costs and other specific circumstances.
Vertical milling machine
The vertical type milling machine is most popular in home workshops. Before starting production, it is necessary to decide on the design, taking into account the tasks assigned to the equipment, select the necessary materials, prepare the tools, and calculate the technical parameters of the future machine.
Selecting materials for the router
When choosing materials for the manufacture of a machine, these recommendations should be taken into account.
Bed. It must withstand significant dynamic loads, which requires the use of metal. A square or rectangular steel pipe is most suitable. You can use a corner measuring 100 millimeters or more. Assembly can be done using a welding machine or bolted connections. The second option is preferable because it provides mobility.
Tabletop, work desk. The tabletop can be made from the following materials: multilayer plywood, board, chipboard or MDF. The surface must be smooth. It should be protected as much as possible from damage. Often a covering made of plastic, sanded boards or metal is used. The design of the table should allow you to store all the necessary tools and consumables. The photo shows examples of execution.
Electric motor. Both asynchronous and commutator motors are suitable. Asynchronous is easy to operate, does not limit the size of the cutters, but is quite noisy. The commutator motor is accessible, but its brushes wear out much faster.
Important! The material should be selected taking into account the expected loads (working on wood or metal) and the size of the machine.
Making a fixture for a stationary router
You can make cutters for the machine yourself. To do this, you need to prepare a cylindrical blank. Half the diameter is cut off on it in the area where the cutting zone is formed. The transition that appears is smoothed out. Next, another quarter of the diameter is removed, and the border is smoothed. The processed area of the workpiece is given a rectangular appearance by cutting off the lower part. As a result, the thickness of the metal in the working area should be 3–5 mm. Operations are carried out using a grinder or drill with an attachment, and sharpening of the edge is carried out on a sharpening machine.
It is recommended to sharpen the cutter at an angle of 7–9 degrees. Using diamond-coated files, you can give the edge any desired shape. When making a milling cutter of complex shape, the workpiece is flattened and bent.
Equipment for a homemade milling machine
We can highlight some critical elements of the machine design that require special attention.
Drive plate and suspension. In order to hang the drive from the machine plate, it is necessary to make an opening (window) in it. Based on technical considerations, a round shape is better, but a square shape is easier to manufacture. The suspended electric motor must not touch the surface of the plate. The photo shows an example of a suspension.
When making the slab itself, it is necessary to ensure optimal cutting. A durable coating is needed on the motor board, and the rest can be made from cheaper material. A gap of about 0.6–1 mm is left between the motor board and the machine board.
Emphasis. A drawing of a fairly simple stop is shown in the photo. Multilayer plywood can be used as a material. 4-5 holes are drilled for the comb and the lifting stop at a distance of 5 cm from the edge of the cutout. Drilling pitch – 26–30 mm. The side supports are secured with a clamp.
Dust collector. To organize such an important procedure as collecting emitted dust, a vacuum cleaner is usually used. It is advisable to provide a dust container with a volume of 15–20 liters. The photo shows an example of a machine dust collector. An inlet pipe with a diameter of about 20 mm is installed, and an exhaust pipe with a diameter of 30 mm is installed.
Comb. It is made from hardwood (oak, beech). Installed on both sides. The first tooth of the comb is shortened by 3–4 mm. It is attached to the side support with bolts. The drawing is shown in the photo.
For a vertical milling machine, it is important to ensure maximum vibration resistance of the equipment.
Do-it-yourself milling machine manufacturing technology
Assembling a homemade vertical milling machine with a bottom drive is carried out in the following order:
- Development of drawings. Carrying out marking of the movement of moving parts.
- Selecting an electric motor. Any motor with a power of 1–2 kW for a voltage of 220 V with a rotation speed of 700–3000 rpm will do. Often a motor from a washing machine or vacuum cleaner is installed. You can install an electric drill with high rotational force. It is important to consider that a motor with a power of up to 2 kW allows for a processing depth of up to 100 mm. To increase this parameter, you will have to install a 380 V motor.
- Assembly of the frame. It may have a bolted connection or a welded structure.
- Cutting and installation of the machine plate, including the formation of a hole for the working element.
- Fastening the guides.
- Suspension and fastening of the electric motor.
- Installing a spindle with a chuck on a lifting bar (vertical lift). Securing the drive.
- Installation of stops and limit strips.
- Installation of the dust collector.
- Completing the installation of the desktop.
After installing the electrical panel, electricity is supplied and testing of the machine begins.
To carry out the assembly you will need the following tools: a welding transformer, an angle grinder, an electric drill, a screwdriver, a jigsaw, a hacksaw, a hacksaw for metal, files and needle files, pliers, screwdrivers, wrenches and socket wrenches, calipers, a ruler, a square.
Horizontal milling machine
The second common version of the milling cutter is a horizontal machine. It has a simpler design compared to the vertical type, but can perform fewer functions.
Selecting materials for the router
The difference between the vertical and horizontal arrangement of the spindle only leads to a change in the principle of movement of the part and the working body. The cutting tool has the ability to move horizontally to adjust the depth of processing, and the spindle with slide moves vertically. The workpiece moves along the plate mainly longitudinally. The requirements for materials for a horizontal machine are similar to the requirements for the elements of a vertical unit. This is primarily a high-strength metal frame. The worktop is large, which requires increasing the strength of the countertop.
Making a fixture for a stationary router
For horizontal milling, the same cutters are used as for vertical processing. You can make them yourself using the technology described above. Most often, horizontal machines provide the following operations: grooves on the ends and edges, drilling horizontal holes, grooving planks, forming skirting boards and various long products with relief.
Equipment for a homemade milling machine
The main components of a horizontal router have certain features:
Spindle. It is positioned horizontally, for which a special support system is made. The photo shows drawings of a device that can be used in a horizontal router.
Stove and countertop. There is no hole made in the plate of a horizontal machine for the working element. The tool is fed from the side. When cutting, a simple rectangular slab is formed. The most common size is 75 × 50 cm. The layout of the table for the milling machine is shown in the diagram.
Important! For a horizontal milling machine, an asynchronous motor of increased power is usually installed to ensure the ability to process large products.
Do-it-yourself milling machine manufacturing technology
The horizontal router is assembled in this order:
- Development of drawings with elaboration of trajectories of movement of moving parts.
- Selecting an electric motor.
- Assembling the frame (frame) using bolts or using a welding machine.
- Installation of the electric motor in a horizontal position on special brackets, with the shaft extending sideways beyond the tabletop.
- Cutting and installation of the slab (countertop).
- Installation of a “vertical lift” of the spindle.
- Securing the spindle and belt drive.
- Installation of the device for feeding the workpiece, stops and limit bars.
To supply electricity, a panel with a circuit breaker and a switch is installed.
Copy milling machine
Nowadays, copy milling machines based on 2D and even 3D technologies are moving into the category of standard equipment. In the first case, milling cutters with a tabletop or mounted pantograph are manufactured. The desktop version is simpler, but the copying accuracy is only 1 mm. A mounted pantograph makes it possible to ensure high precision processing and even engrave.
Selecting materials for the router
The following materials are recommended for the manufacture of a copy router:
- knee cemented polished shaft with a diameter of 16 mm;
- linear bearings – 2 pcs.;
- guide rails 90 cm long – 2 pcs.;
- rectangular pipe 30 × 60 mm and 40 × 40 mm with a wall thickness of no more than 3 mm;
- metal plate 90 × 10 cm;
- end posts – 2 pcs.;
- rocker arm for attaching the copier and cutter – 2 pcs.;
- movable coupling – 2 pcs.;
- crown type coupling for turning the part and the template.
The dimensions of all elements are specified when developing a detailed drawing.
Making a fixture for a stationary router
The operating principle of a copy router is based on repeating the movements of the copier according to a template. The cutter must exactly repeat the shape of the template. This requires high-quality high-speed steel tools. Processing is carried out on flat and curved surfaces. Engraving cutters are widely used. The types of cutters are shown in the photo.
Equipment for a homemade milling machine
An important element of the machine is the pantograph, which is used to set the task for the milling cutter. The photo shows the principle of operation of a drawing and drawing pantograph with scaling. Such a simple device allows you to copy parts at different scales by moving the cutting tool relative to the zero point.
For the production of a 3D machine, the copier has 4 degrees of freedom, which allows you to recreate three-dimensional models. Such a device is shown in the photo.
Do-it-yourself milling machine manufacturing technology
The milling and copying machine is manufactured in the following order:
- The base of the machine and small vertical posts are formed from a 40 × 40 mm profile pipe.
- Supports for rail guides are made from 30 × 60 pipe.
- The frame and main structure are assembled by welding. The seams are cleaned.
- The guides are fixed strictly parallel.
- Installation of base with rail guides.
- Holes for bearings and struts are drilled on the metal plate.
- The movable element is manufactured by attaching rocker arms 300 mm long.
- The moving element is mounted on the shaft through bearings.
- The structure is placed on a plate 100 mm wide.
- The suspended structure is mounted on guides through split bearings. The limit switches are fixed.
- Movable couplings, a probe and a cutter are fixed at the ends of the rocker arm.
After connecting all the elements with couplings, the structure acquires the required mobility.
Wall cabinet for router
This compact storage cabinet does double duty as a top-notch router table while also holding all your accessories.
With plenty of storage and a built-in desk, this cabinet allows you to knock two important items off your list. And here's what's interesting: it takes up very little space. The secret to its compactness is that it folds out when you need it and retracts when you're done.
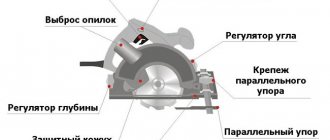
Features of a manual circular saw
The tool is based on an electric motor with a saw blade mounted on a shaft. Models from different manufacturers have approximately the same design.
The products are equipped with many additional accessories:
- Start button with rotation speed controller;
- Protective casing;
- Retractable parallel stop;
- Regulators for cutting depth and tilt angle;
- Sawdust ejection pipe.
The saw blade rotates towards the base plate, towards itself. The main rule when working with a manual circular saw: first start the engine so that the disk begins to rotate, then carefully bring it closer to the surface to be treated.
The tool is convenient when performing the following work:
- Sawing boards, plywood, particle boards;
- Cutting timber, cutting slats;
- Recesses for groove tenons;
- Edge processing, chamfering;
- Cutting waste lumber for fuel.
The power of the device is selected based on needs. For short-term work in domestic conditions, processing workpieces up to 4.5 cm thick, a power of up to 1.2 kW is sufficient. Semi-professional tools have a power of 1.8 kW and cut workpieces up to 6.5 cm thick.
Professional equipment with a power of 2.2 kW can withstand long-term loads and leaves a cut of up to 8.5 cm. Woodworking enterprises use saws with a power of up to 5.5 kW; their weight reaches 100 kg.
Milling small parts
Several router table accessories make it easy to achieve safe and accurate results.
The problem with small workpieces is that there are large holes in the tabletop, and the stops can cause small parts to get stuck. This can ruin the project and be unsafe. This router table attachment holds small parts and allows the workpiece to be pushed past the router bit for precise and safe cutting.
Follow us on Pinterest for more interesting articles.
Useful short videos from Make-Self.net
Option for manufacturing a table for a router
Quite an interesting design of the table. Here they suggested using a car jack to raise and lower the tool.
| If you take the tabletop out of the cabinet box, you can see a similar design. | |
| A car jack allows you to develop a force of several tons. It rests on a special box where the router itself is located. | |
| This is what the tabletop looks like from above. There is an emphasis. A groove is made on the surface with an aluminum guide channel glued into it. | |
| A carriage can be installed in the groove. With its help, the part can be fed for processing at any angle. | |
| The parallel fence is fixed in the desired position using wing nuts. There are grooves in the horizontal plane along which the thrust device moves along the working surface of the table. | |
| Box for connecting a vacuum cleaner. You can use not only an industrial, but also a household vacuum cleaner. | |
| The router itself is attached to the tabletop using a steel support plate. | |
| Features of fastening the tool to the plate can be seen in the presented photograph. | |
| By rotating the jack handle, the master moves the router in the vertical direction. |
Detailed video about a homemade table.
