Homemade machines and devices for the home workshop
Before selecting a set of homemade machines and accessories for the garage, it is necessary to create optimal working conditions. In this case, the size of the room must be at least 6 square meters. m. You can attach an additional room to the garage or to the house. It is important to decide what types of work you will carry out, as well as make a list of equipment and necessary tools.
A compact workshop can be set up in a garage
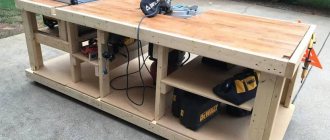
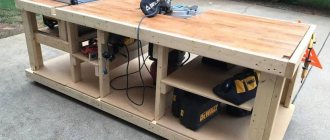
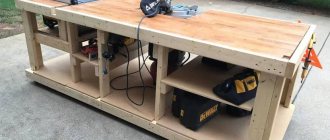
It is most convenient to organize storage of some types of tools on the wall. This will save space. It is also convenient to use racks and shelves. To save useful space, it is worth making universal devices that combine several functions. The table should be equipped with drawers, and also used as a carpentry workbench.
Ergonomic design of the desktop allows you to place the maximum number of items
When choosing homemade machines and devices for your home workshop, you can select different types of mini equipment. For working with metals, the following options are used:
- grinding equipment is used for processing metal surfaces: grinding, polishing and sharpening. Its manufacture requires a minimum number of components and parts. The equipment includes sharpening stones and an electric motor. For the stability of the device, mounting elements are used;
Grinding equipment option
- A milling machine is used to drill holes. In the manufacture of such a lifting mechanism design, a steering rack is used. In addition, you can install an angle milling machine.
Professional version of this design
For wood processing, various homemade tools and do-it-yourself devices are used. The most commonly used types are cutting, turning and grinding. With their help, you can perform all types of work at home. The following equipment is used for wood processing:
- cutting machines . The simplest device is an electric or chainsaw. Such units can be disk, belt, or chainsaw sawmills. When making homemade equipment, it is worth considering the diameter of the disk, as well as the width of the cutting part;
Simple cutting equipment
- grinding device. The simplest option is made from a stable table, a vertical grinding shaft and an electric motor. An abrasive belt is used to process the ends of wood blanks.
Grinding device
Related article:
Woodworking machines for the home workshop. Specialized equipment with an electric drive greatly simplifies the processing of wood blanks. But acquiring it involves significant investments. To successfully solve this problem, you should carefully study the materials in this article.
DIY tool shelves: popular designs and manufacturing
It is worth noting the following options for storing tools:
- racks;
- hanging shelves;
- wall structures;
- shelves in the form of shields on which small tools can be mounted.
Unusual shelves for storing tools
You can make a panel shelf for a tool with your own hands like this:
- cut out a shield from plywood and mark the places where the shelves will be installed;
- make shelves with side walls, the length of which should correspond to the length of the shield;
- the shelves are fixed to the panel using self-tapping screws;
- hooks are mounted, which are equipped with a special thread;
- The brackets are being installed on the back side of the shield.
This way you can make a simple panel structure, which will allow you to put your workshop in perfect order.
For your information! Panel shelves are functional. You can attach hooks or special holders to them. An additional lamp can be hung above such a structure. In this case, you can use a small light bulb.
To help the hostess
It is not always possible to financially buy, for example, some new furniture in a furniture showroom or place an order for its manufacture. But you can always get out of this situation by making the right thing with your own hands, and at the same time making it attractive and unique, using improvised means for this.
Kitchen apron made of corks
The kitchen apron is the surface of the wall located between the countertop and wall cabinets. Usually this part of the wall is tiled. But it is possible to use many other materials to cover it, for example, gluing wine corks to the wall.
This exclusive decor looks quite magnificent.
Before sticking, each cork is cut lengthwise into two halves with a sharp stationery knife. It is advisable to paint the wall black, which will highlight the seams between the plugs.
Corks are glued to the wall using liquid nails in a checkerboard pattern or with a certain pattern, since it is unlikely that they will be laid out perfectly evenly, and curved rows will visually look disgusting.
The plugs themselves are not afraid of moisture, but they quickly get dirty and are difficult to wash, so it is best to cover them with a glass screen made of tempered glass. True, you will have to spend a little money on it and order glass from a special workshop, where they will cut it to a given size and make holes for sockets and fasteners.
The glass is secured to the wall with anchor dowels , which can be purchased at almost any hardware store.
Although an apron decorated with wine corks may be an expensive pleasure, the result achieved will be worth it.
The surface of the tabletop, as well as the wall, can be decorated with corks and covered with tempered glass.
Hanging folding table
A folding table mounted on the wall allows you to save some space in the apartment. When folded down, it can protrude from the wall at a distance of no more than 10 cm and does not bother anyone at all, but when unfolded it can replace a full-fledged table.
There are many options where you can use a wall-mounted folding table. Here are just a few of the most basic:
- Balcony. Naturally, on the balcony the table should be small in size and attached to the screen fence. It can be used for drinking tea in the fresh air, working with a laptop or doing some handicrafts. In other words, you can provide yourself a place to do creative work without disturbing other members of your family.
- Kitchen. If the kitchen is small, a wall table will be just a godsend for the hostess. It can replace a dining table that cannot be placed due to lack of free space. In addition, it can be freely used for cooking, since its size is much larger than a balcony table.
- An ironing board is usually large and heavy, and when unfolded it can take up a lot of space. In this case, the housewife often has to pull it out of the place allocated for it, lay it out, and after ironing, repeat all the steps, only in the opposite direction. A folding table will save the hostess from these problems.
Shower for the cottage
There is probably nothing better than cooling off under running water on a hot summer day, especially if it was spent working in the garden. Naturally, only a shower will solve this problem and relieve the fatigue that has accumulated during the day.
You can install the shower yourself without involving outside help; the main thing is to choose a place for it and decide on the type of shower stall.
Among the summer showers, there are three types of cabins , which you can freely build on your own:
- Base. Consists of one shower stall, water tank and other accessories needed for a shower.
- A shower cabin, additionally equipped with a dressing room, where you can leave clothes, things and a towel, and after taking a shower, you can calmly change clothes.
- Shower cabin with dressing room and toilet. This is a good solution for a summer residence if there is no sewerage system. This saves money on the additional installation of a separate sanitary system.
Installing a simple shower is done as follows:
- A shower cabin frame is made, which can be assembled from metal, wooden beams or other available materials.
- A metal or plastic water container, which can have a volume of 50 to 200 liters, is installed on the roof of the assembled frame.
- It is advisable to paint the metal container black for better heating of the water. Additionally, several heating electric heating elements can be installed in the container, then you can take a shower even in cloudy weather.
The booth can be sheathed with boards, plywood, slate, or simply covered with tarpaulin or cellophane film with folding curtains.
Designing a carpentry workbench with your own hands: drawings, video
Let's start learning about useful DIY household gadgets from the workbench. This useful unit comes in the following varieties: stationary, mobile and folding.
The diagram shows the main elements of such a workbench
Remember that a do-it-yourself folding workbench drawing should contain the following details:
- a working surface, to create which you will need a board at least 6 cm thick. In this case, hornbeam, beech or oak are used. You can use boards painted with drying oil;
Special drawings will be required to carry out the work.
- a vice structure is mounted on the top cover;
- The supporting legs of the workbench are made of pine and linden. Longitudinal connecting beams are placed between them to ensure stability of the entire structure;
- Shelves for tools are mounted under the workbench.
The diagram shows how to correctly assemble such equipment
You can watch how to make a simple workbench in this video:
Technology and drawings of a do-it-yourself carpentry workbench: simple design
To make such a device, you will need drawings with the dimensions of the carpentry workbench.
In this photo you can see how the folding structure is made
Let's look at how to build such a device:
- To make the lid you will need thick boards. The dimensions of the shield should be 0.7 * 2 meters. Long nails are used for fastening;
- the roof is finished using timber;
- depending on the dimensions of the carpentry workbench, vertical supports are used;
- The height of the working surface of do-it-yourself carpentry workshop tools is determined. Markings for the beams are applied on the ground where these elements are buried;
- The workbench cover is being installed. The support bars are attached in pairs. In this case, long self-tapping screws are used.
Homemade design option
Features of creating and designing a wooden workbench with your own hands
You can buy a wooden workbench or make one yourself. Additionally, the structure can be equipped with drawers. So, let's look at the manufacturing technology:
- vertical supports are fixed using horizontal jumpers. They make grooves for connecting fittings. In this case, a chisel and a hammer can be used;
- When the jumpers are installed at the required level, holes are made in the bars on the support. Then the bolt is mounted, after which the elements are tightened;
- horizontal jumpers are installed two pieces on each side. Parts under the countertop will be required for installation above the work surface;
- bolts are used to secure the work surface. Holes for fastening elements are drilled on the tabletop. The bolts are mounted so that the bolts are recessed.
Wood construction drawings
You can easily make a belt sander at home. In this case, you will need an emery cloth and a sanding belt. Its sticker is applied end-to-end. To strengthen the seam, it is necessary to place dense material under the bottom. In this case, you should not use low-quality glue.
Ready frame for the table
The diameter of the tape shaft should be several mm wider in the center than at the edge. To prevent the tape from slipping, it is necessary to wind it with thin rubber. For the manufacture of grinding devices, you can select designs such as planetary, cylindrical grinding and surface grinding.
Technology for making a carpenter's vice for a workbench with your own hands
For workbenches, you often make a vice with your own hands at home. The video allows you to see this process:
To make such a design you will need special studs. To work, you will need a screw pin with a thread. You also need to prepare a couple of boards. One element will be fixed, and the second will move. When manufacturing, it is necessary to use drawings of a vice with your own hands. In each of the boards it is necessary to make holes for pins, which are connected with nails. Then screws and nuts with washers are inserted into them. When constructing a homemade vice with your own hands, you should use instructions and ready-made diagrams.
Carpenter's vice design
Helpful information! If you make the pins movable, you can make workpieces of various sizes.
Home crafts
To make something interesting and useful with your own hands, you don’t have to spend a lot of time and effort on it. The main thing in this matter is desire. Even if you don’t know how to do something, you can always learn it!
Hand-made “little things” and useful ideas help to arrange the surrounding space in the house specifically to your taste: a room, a living room, a corridor, a kitchen, a bathroom and even a balcony - all of this can be made special and individual.
Interior details and furniture
On our website you will find ideas and advice from experts on how to make any house or apartment original. Moreover, in most cases, this does not require experience in construction and repair.
For example, we recommend paying attention to cool ideas and solutions for decorating wall surfaces. By making such decor, you can achieve amazing results. But here you need to experiment.
If you want to try your hand at making home furniture yourself, then on our website you will find a lot of interesting things for yourself: from how to glue tabletops and assemble shelves or cabinets, to more “delicate” works - for example, how to make your own use your hands to stick the plastic edge onto the furniture, or make a trash can out of a balloon.
And this is only a small part of what we can offer you! For those who constantly lose their keys in the house, we can offer to make an organizer with a magnetic key holder. And if you want to make a pleasant surprise for your wife, then you will probably be interested in a dressing table with lighting and a mirror.
Various useful things for the kitchen
Homemade products for the kitchen are designed not only to help in the cooking process, but can also decorate the interior of the room! We offer only the most daring solutions and ideas that will definitely interest you.
All devices and accessories differ in their level of complexity. While not everyone can make a hatchet for chopping bones from an old circular saw (this requires both experience and appropriate equipment), then to make, for example, a cutting table with a metal tray, a lot of experience is not required.
In the homemade kitchen section, we are pleased to present to your attention a powerful vegetable cutter made from an old gearbox, a rack for seedlings made from sections of PP pipe, or, for example, a magnetic holder for kitchen knives. In general, everyone will find something for themselves here.
Making a metal bench with your own hands: drawings
If you often work with metals, the best solution would be to create a metal workbench with your own hands. Wood material is not suitable for such purposes, since it will often be damaged when processing metal products.
Universal metal option
It is worth noting the following elements of such a device:
- horizontal jumpers are used to ensure longitudinal rigidity;
- Small rack beams are made from profiled pipes. They are used to assemble the frame part of pipes. In the corner zone there are welded spacers, which are made of steel strips;
- for rack beams, profile pipes with a wall thickness of 3-4 mm are used;
- corner No. 50 is necessary for the racks on which the tools are mounted.
To create high-quality seams, it is necessary to use a carbon dioxide semi-automatic machine, as well as a pulse-type welding machine.
Assembly of a universal device begins with the frame. To do this, long and short beams are welded. To prevent them from twisting together, follow these steps:
- place the elements on a flat surface;
- in areas where connecting points are located, it is required that the beams are joined using spot welding;
- in this case, welds are made on one side of the frame and then on the other.
The diagram shows the frame of the metalworking machine, as well as its full view
After this, the rear beam and vertical posts are mounted. It is important to check how evenly they are located in relation to each other. If there are any deviations, they can be bent using a hammer. When the frame is ready, special corners are attached to it to strengthen the structure. The tabletop is made of wooden boards, which are impregnated with a fire-resistant liquid. A steel sheet is placed on top. A plywood shield is attached to the vertical rack parts. The same material is used for lining the cabinet.
Table 1. Making a metal bench with your own hands
| Image | Installation stages |
| A carbon dioxide semi-automatic machine is used for welding the structure. | |
| Creating a structure frame. For welding, all parts must be laid out on a flat surface. At first, the joining joints are simply tacked together, and then all the seams are welded. The rear pillars and beam are welded to the frame. | |
| After welding all the stiffening elements, the following frame is obtained. | |
| Then a reinforcing angle is attached to the frame to secure the tabletop. Before installation, the boards must be treated with a special fire-resistant compound. A sheet of metal is attached to the top. | |
| The side walls are finished with plywood panels, and wooden boxes are placed in the right cabinet. To protect the base, the surfaces are coated with various paints and varnishes. First, the primer is distributed, and then a special enamel is used. |
Wood sanding machine
The design of such a machine has a cylinder on which sandpaper is placed. This unit rotates while processing the part. The assembly of a homemade machine is often performed for grinding cylindrical workpieces. A device is also made to create a flat surface of the workpiece.
When fixing the sanding paper, follow these rules:
- the width of the abrasive cloth should be approximately 250 mm;
- the sanding belt is connected without a gap exclusively end-to-end;
- The sandpaper is attached using a high-quality adhesive;
- at the edges of the shaft for the abrasive cloth there must be a side, the protrusion of which is from 2.5 to 4 mm;
- a rubber backing should be placed under the tape.
The shaft of the device is rotated by an electric motor. These two parts of the machine are connected by a belt drive. The design of the frame itself can have different designs. The option is chosen depending on the size of the workpieces being processed.
Device for polishing wooden parts Source notperfect.ru
Do-it-yourself knife sharpening device: drawings and nuances
To make a sharpener from a washing machine engine with your own hands, you can take parts from old Soviet appliances. To build a sharpening machine you will need the following parts:
- tube for turning flanges;
- grindstone;
- special nuts;
- steel elements for the construction of protective casings;
- cable cord;
- launching device;
- a block of wood or a metal corner.
Homemade unit for sharpening knives
The flange section must match the dimensions of the bushing. A sharpening stone will also be placed on this element. This part will also have a special thread. In this case, the flange is pressed onto the motor shaft. Fastening is carried out by welding or bolting.
The working winding is fixed to the cable. Moreover, it has a resistance of 12 ohms, which can be calculated using a multimeter. A frame is also made, for which a metal corner is taken.
How to sharpen a drill for metal: do-it-yourself device
You can make a simple metal drill sharpening machine from ordinary tools. An abrasive block is suitable for this.
At home you can use the following equipment:
- You can use an electric sharpener to sharpen the drill. In this case, sharpening is performed from the edge. When using a sharpener, you need to pay attention to the sharpening angle and the fixation of the drill on the axis of rotation. Excess metal should be removed gradually. Finally, the edges are shaped into a cone;
- A grinder is used as a do-it-yourself sharpening machine. For sharpening, the cutting tool is secured in a vice. To do this, the mounting angle is selected, and the disk is mounted.
Types of drill sharpening devices
It is worth considering that the grinder is mounted on a flat surface. In this case, the disk should be located downwards. If the grinding device is not secured securely, it can damage the drill. Sharpening with a grinder can only be done for products with a small diameter. It is not possible to finish using a grinding device. The edge of the shield is used to support the cutting tool.
You can also use a drill attachment, which should be equipped with a grinding disc with sandpaper. To grind elements with a drill, you need to find two flat surfaces.
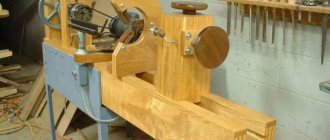
Wood lathe for lathe
There are various homemade machines and machines for the workshop. They all make the job easier. These include a lathe. Its structural elements are:
- Durable frame made of metal angle or pipe. Sometimes it is created from wooden blocks. The bed is fixed to the floor, and its lower part is weighted.
- A support, which is a supporting element for the cutters. This part of the machine must provide reliable fixation and allow the workpiece to move to the side. For this purpose, the design provides a screw rod.
- The clamping spindle, also called the headstock. The head of a powerful electric drill is often used as it.
The head of an electric drill is often used as a headstock. Source woodtoolsimg.ru
- Tailstock used for longitudinal movement of the workpiece. It is recommended to use the factory spindle, which has four cams.
- Electric drive providing rotation of 1500 rpm. Its power should be from 250 to 400 W. Often a washing machine motor is used as an electric motor. The design also includes a belt drive. This is a transmission, for the operation of which it is necessary to install pulleys on the shafts.
The electric motor of washing machines is often used as a drive for a lathe. Source dobro-teh.ru
Cutters for the machine
It is recommended to equip homemade devices with factory cutters. After all, they are sharpened with high quality using special equipment. As a last resort, for production use:
- old files without significant defects;
- steel square reinforcement is the optimal material for making cutters;
- square or rectangular spring from the car.
Subsequently, the existing workpieces are sharpened. Creates a semi-circular cutting edge for roughing wood parts. Finish turning work is carried out with a cutter that has a straight blade.
After sharpening, the cutting elements are hardened. During this process, the cutters are first heated and then placed in machine oil.
Wood boring tools for a lathe Source 24aul.ru
Drilling machine for home workshop
You can make a drilling machine attachment from a drill with your own hands. The drawings will help you understand the design. For such a design you will need the following elements:
- base or frame;
- rotation device;
- mechanism for ensuring supply;
- stand for fastening the door.
Installation of the machine in the workshop
Here are the main steps in making a homemade drilling machine with your own hands:
- Chipboard is used for racks. In this case, you need to choose a thickness of at least 20 mm;
- To maintain the accuracy of the drill machine, it is necessary to use guides. In this case, you can use steel strips;
- For the pads, steel clamps are used.
To make a drilling machine you will need a rotary tool feed mechanism. The design uses springs and a lever. There are various tools for sharpening drills.
Assembling a drilling machine with your own hands: drawings with dimensions
The design will also require the manufacture of a homemade vice for a drilling machine. The simplest device can be assembled from a drill, without a steering rack. To minimize vibration processes, it is necessary to build a more massive table. The stand and table are connected at right angles. In this case, the drill can be attached using clamps. A vice is mounted on the table surface.
Complex drawing of a drilling machine
Thicknesser
Crafts for the workshop are often created to perform woodworking. The material always has to be planed. It is to solve this problem that a surface planer is made. The machine consists of the following parts:
- The frame consists of two frame structures, which are welded from 40*40 mm corners. The frames are fastened with studs.
- Tabletop made of metal or lumber, pre-impregnated with drying oil. The working surface is bolted to the frame.
Bed with a steel tabletop for thickness planer Source prostanki.com
- A broach consisting of rubber rollers. They are taken from a broken washing machine. The rollers are provided with smooth rotation by sliding them onto bearings.
- A casing that protects rotating parts. It is made of sheet metal about 5 mm thick and fixed to a frame made of corners measuring 20*20 mm.
- Electric motor with a power of 6 kW, which can rotate at a speed of at least 3000 rpm.
Clamps are used to secure the thickness planer. The device is fixed on the working surface. Do not forget about the required gap, when setting it, take into account the thickness of the workpiece.
Designing a press for a garage with your own hands
The design of a homemade garage press is intended for straightening, pressing, bending sheet materials and for compression. Devices for plumbing work are characterized by a compact and simple design. The forces from such a press can vary between 5-100 tons. For garage work, 10-20 tons is quite enough. To make a similar design, a manual drive is used. The hydraulic device contains two chambers with pistons.
Homemade design
Do-it-yourself press from a jack drawings
You can see how to make a simple device on a special video of a press made from a jack with your own hands:
A simple option is a hydraulic one, which can be constructed from a bottle jack. An important element is the frame, inside of which the jack is placed. The platform is used as a reliable base. The upper surface is used to support the elements being processed. The table should move freely up and down on the frame. In this case, rigid springs are attached to the base on one side, and to the working surface on the other.
Using a jack
Here is a simple assembly diagram:
- the necessary elements are cut out according to the drawings;
- The base is mounted by welding. In this case, the steel structure should resemble the letter P;
- a mobile table is made from a pipe and channel;
- Finally, the springs are fixed.
Stationary circulation saw
The stationary circular saw is placed on a sturdy table. Its working surface is usually made of metal sheet. It is reinforced with stiffening ribs. For their manufacture, a steel angle is used.
On the working surface there are usually:
- stops;
- guides;
- elements for adjustment;
- cutting disc.
On a note! The circular saw is powered by an electric motor. Its power should be approximately 800 W, and its rotation should be 1700 rpm. The electric motor of the angle grinder corresponds to these characteristics.
Angle grinder for a stationary circular saw Source tdrim.ru
Before making a device for sawing wooden parts, prepare a working angle grinder with the necessary characteristics. Further actions are performed in the following order:
- Assembling the frame.
- Prepare a worktop in which a slot is made for the cutting disc.
- Two wooden blocks are fastened in parallel. They will be used as stops.
- Set the scale necessary to control the cutting of wooden parts.
- Clamps are installed so that workpieces and guides can be fixed.
- The grinder is secured by first installing the disk into the previously created slot in the table top. The power tool is fixed from below the working surface.
